
Overview
You can perform the following installation types with Managed Engine Endpoint Central.
- Base version install - use this installation type when you are deploying idemeum client for the first time to a set of Windows workstations. You will need to use the .exe file for this installation.
- Upgrade version install - use this installation type when you already have idemeum desktop client installed, and you need to upgrade the client to a newer version or update the client settings. You will need to use the .msi file for this installation.
Prerequisites
Before you initiate deployment make sure you have Managed Engine agents installed on your workstations.
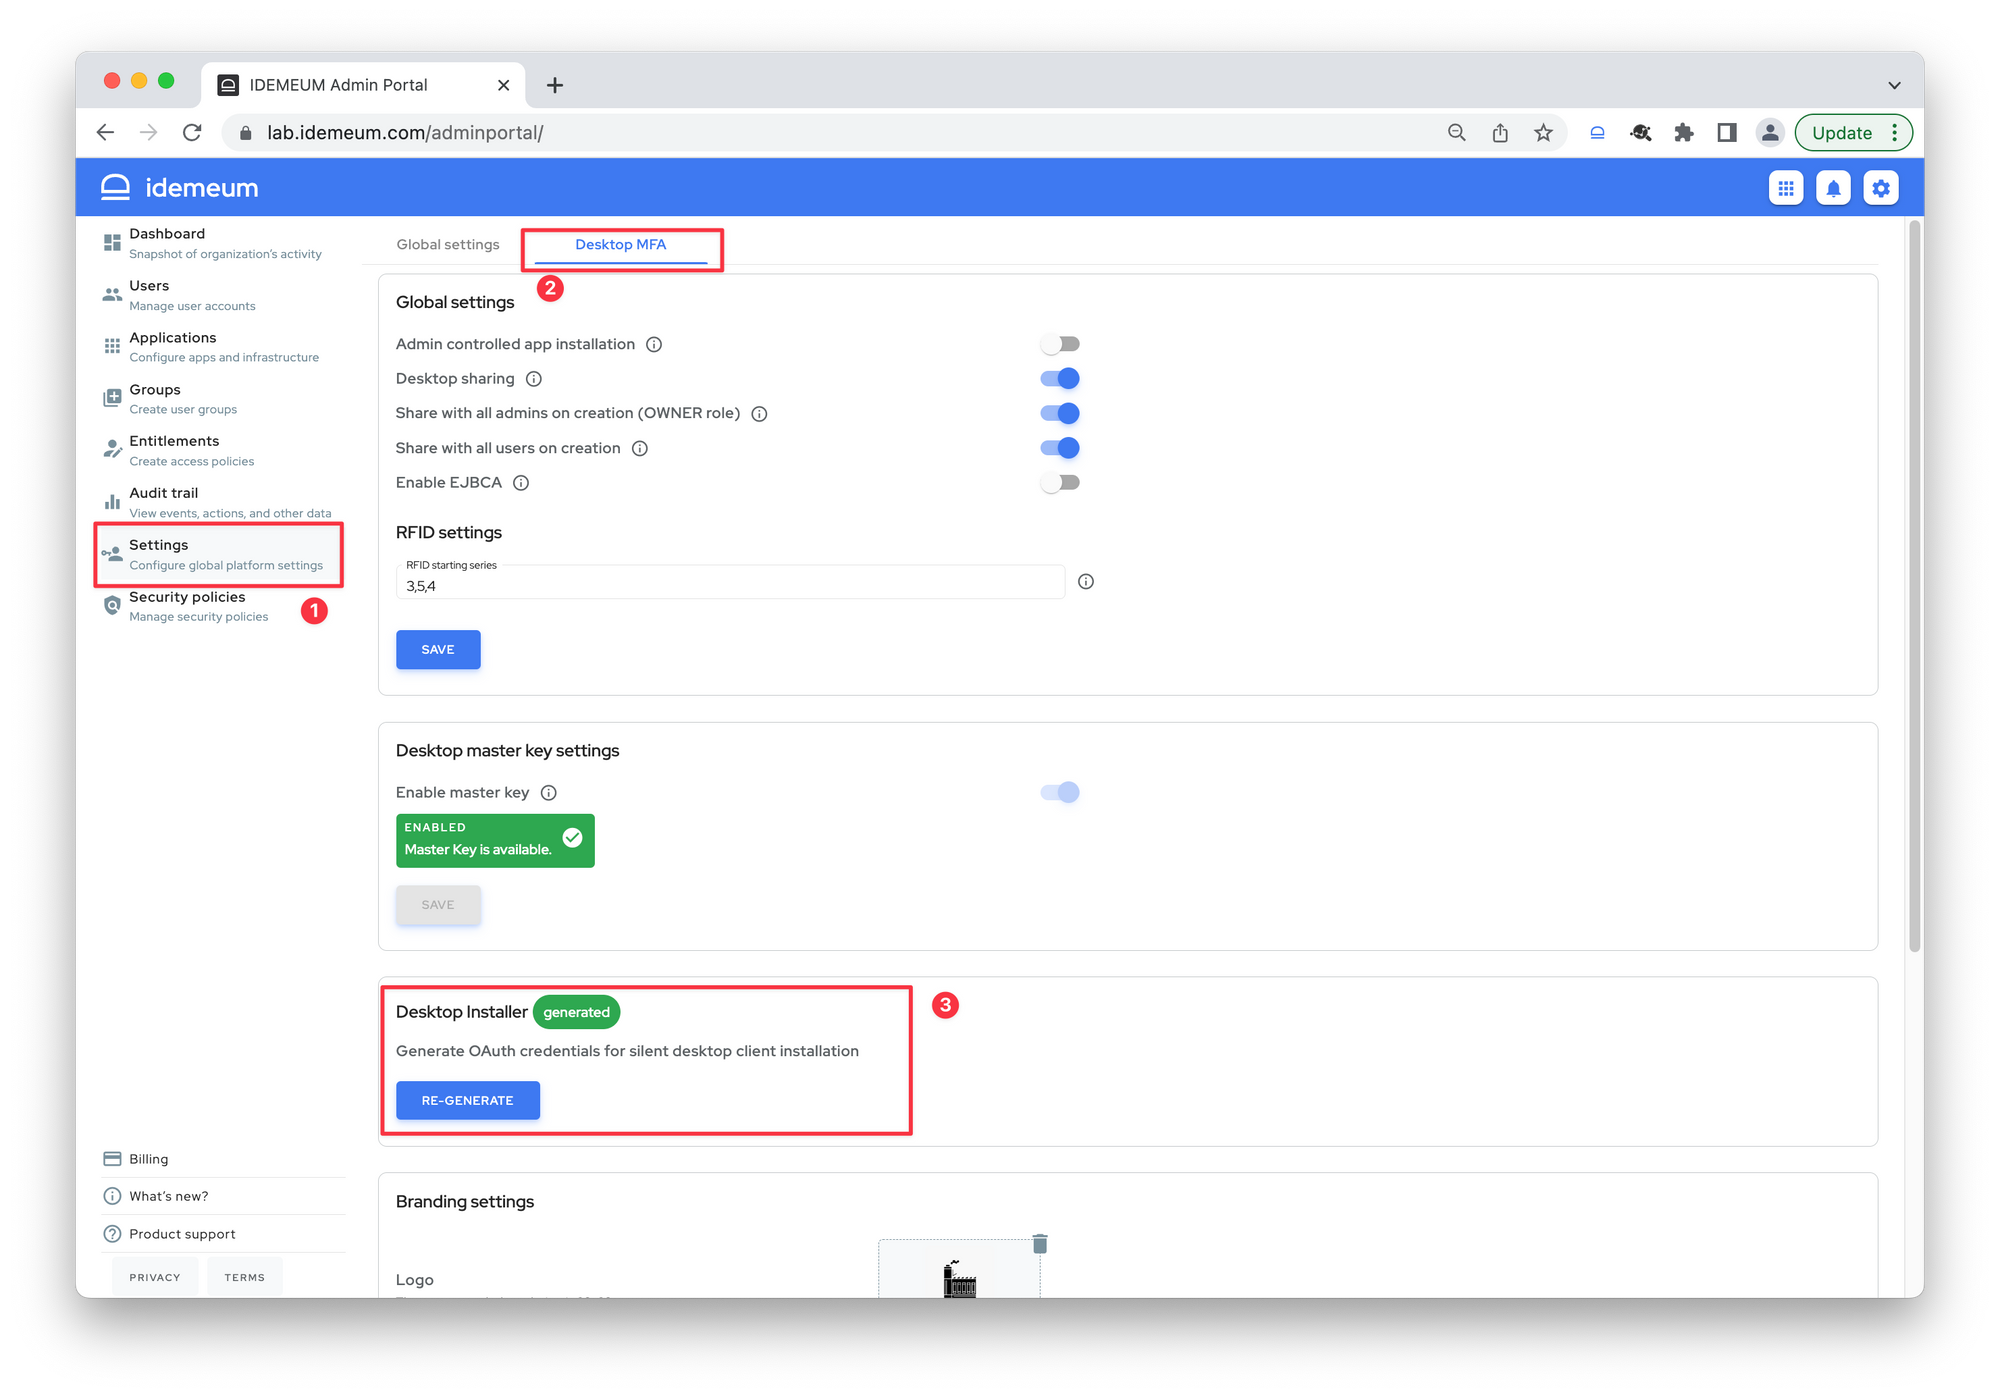
Now you will create idemeum client id and client secret required for silent installation.
- Navigate to your idemeum admin portal. Then click
Settings->Desktop MFA. - In the
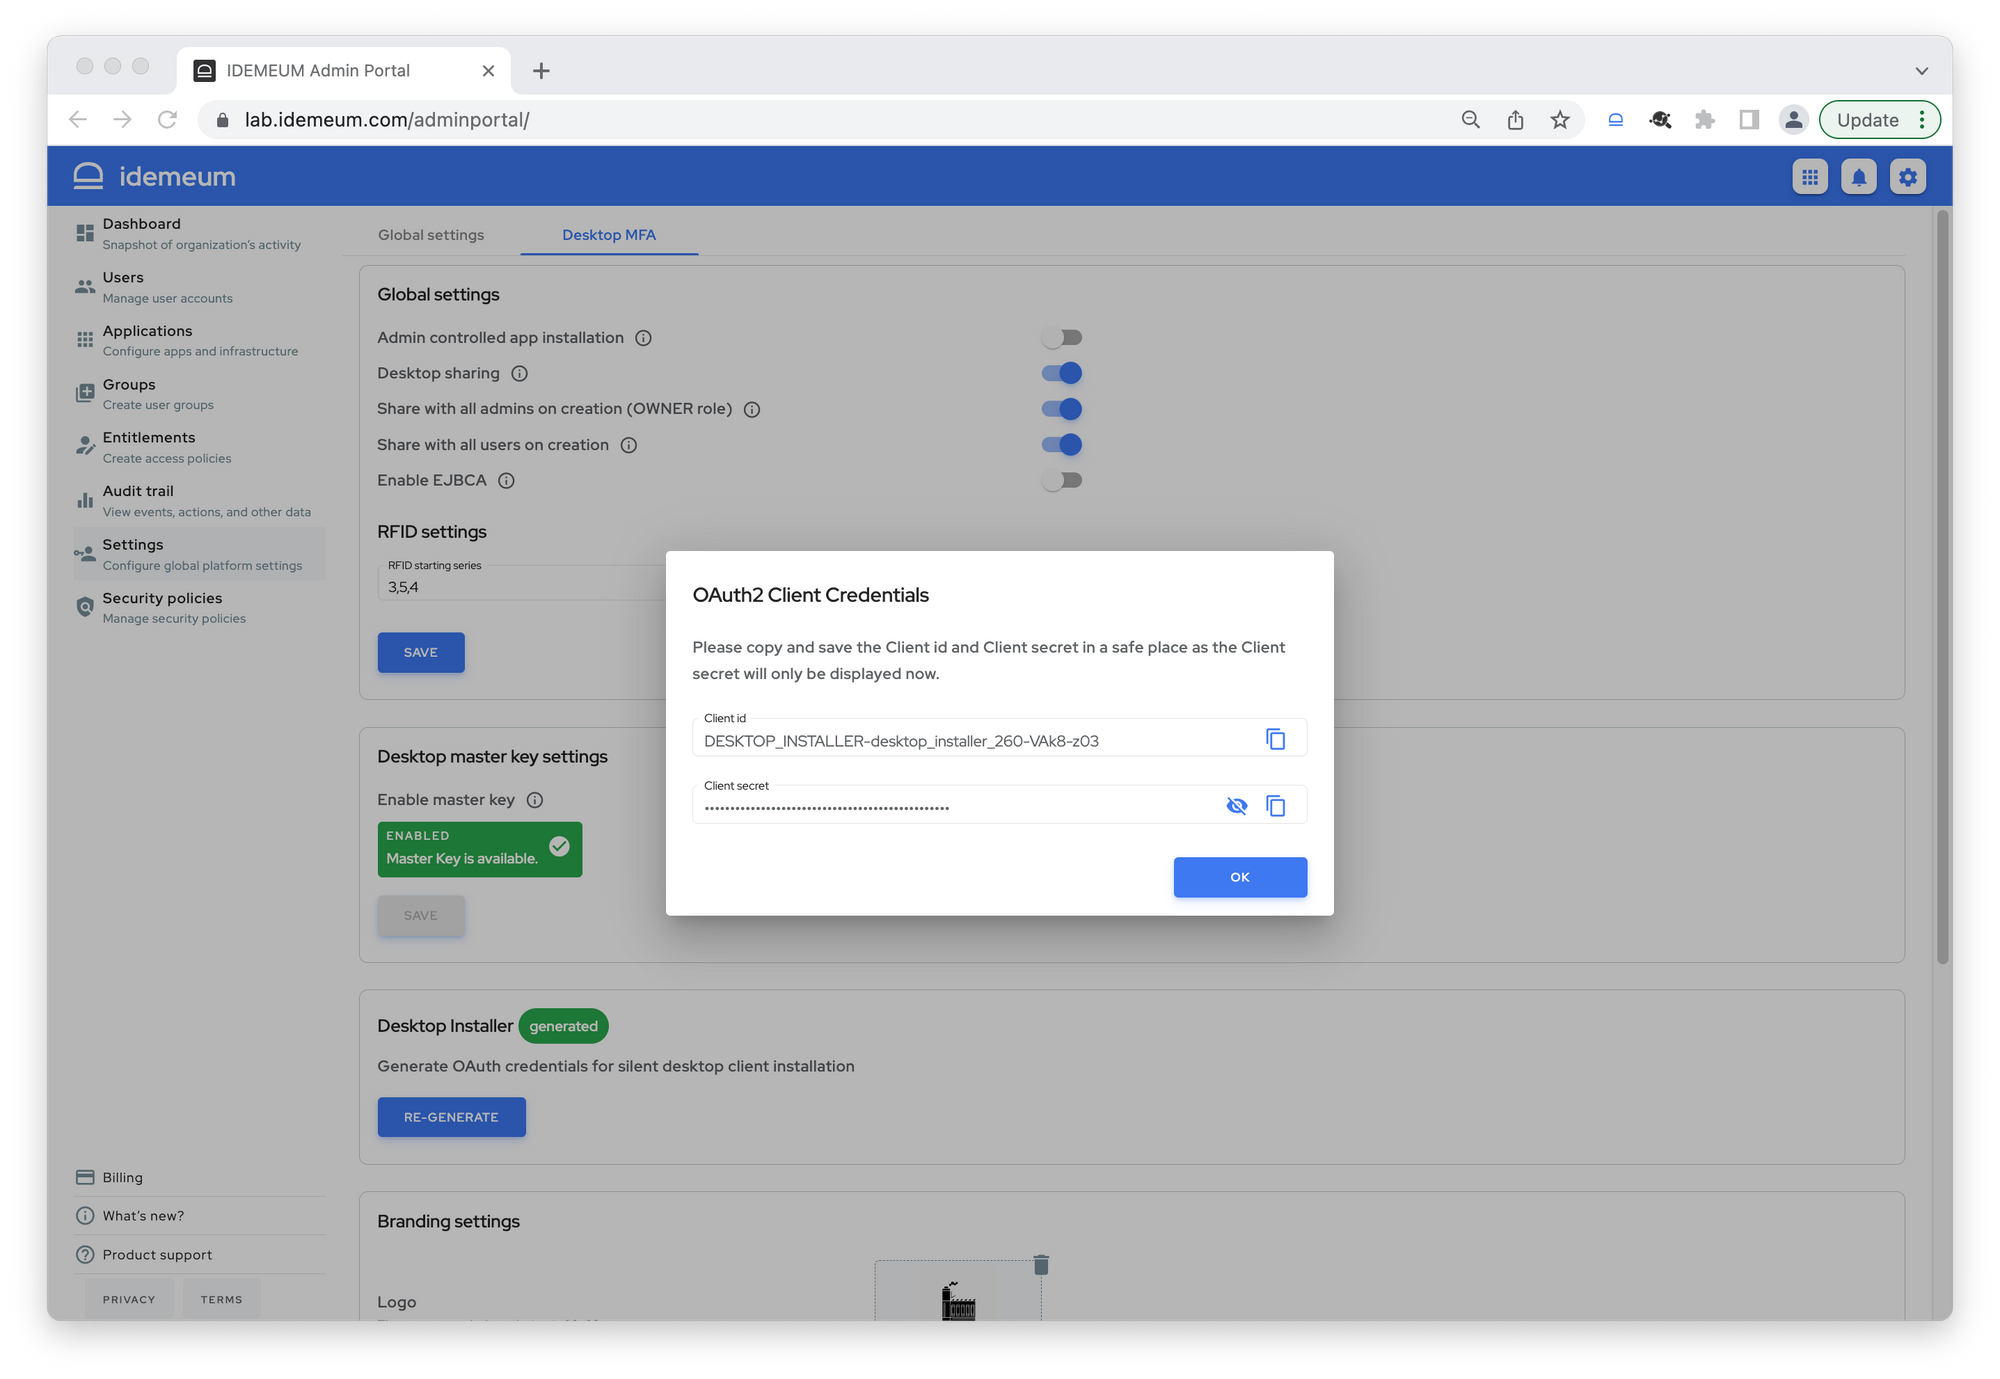
Desktop Installersection clickGENERATEto generate client id and client secret for silent installation - Note down the client id and secret required for silent installation
Base version install
Please follow the following steps to install idemeum desktop client to a fleet of Windows workstations.
- Navigate to idemeum documentation portal and download the latest idemeum desktop client
- Access Managed Engine admin dashboard and create a new deployment package
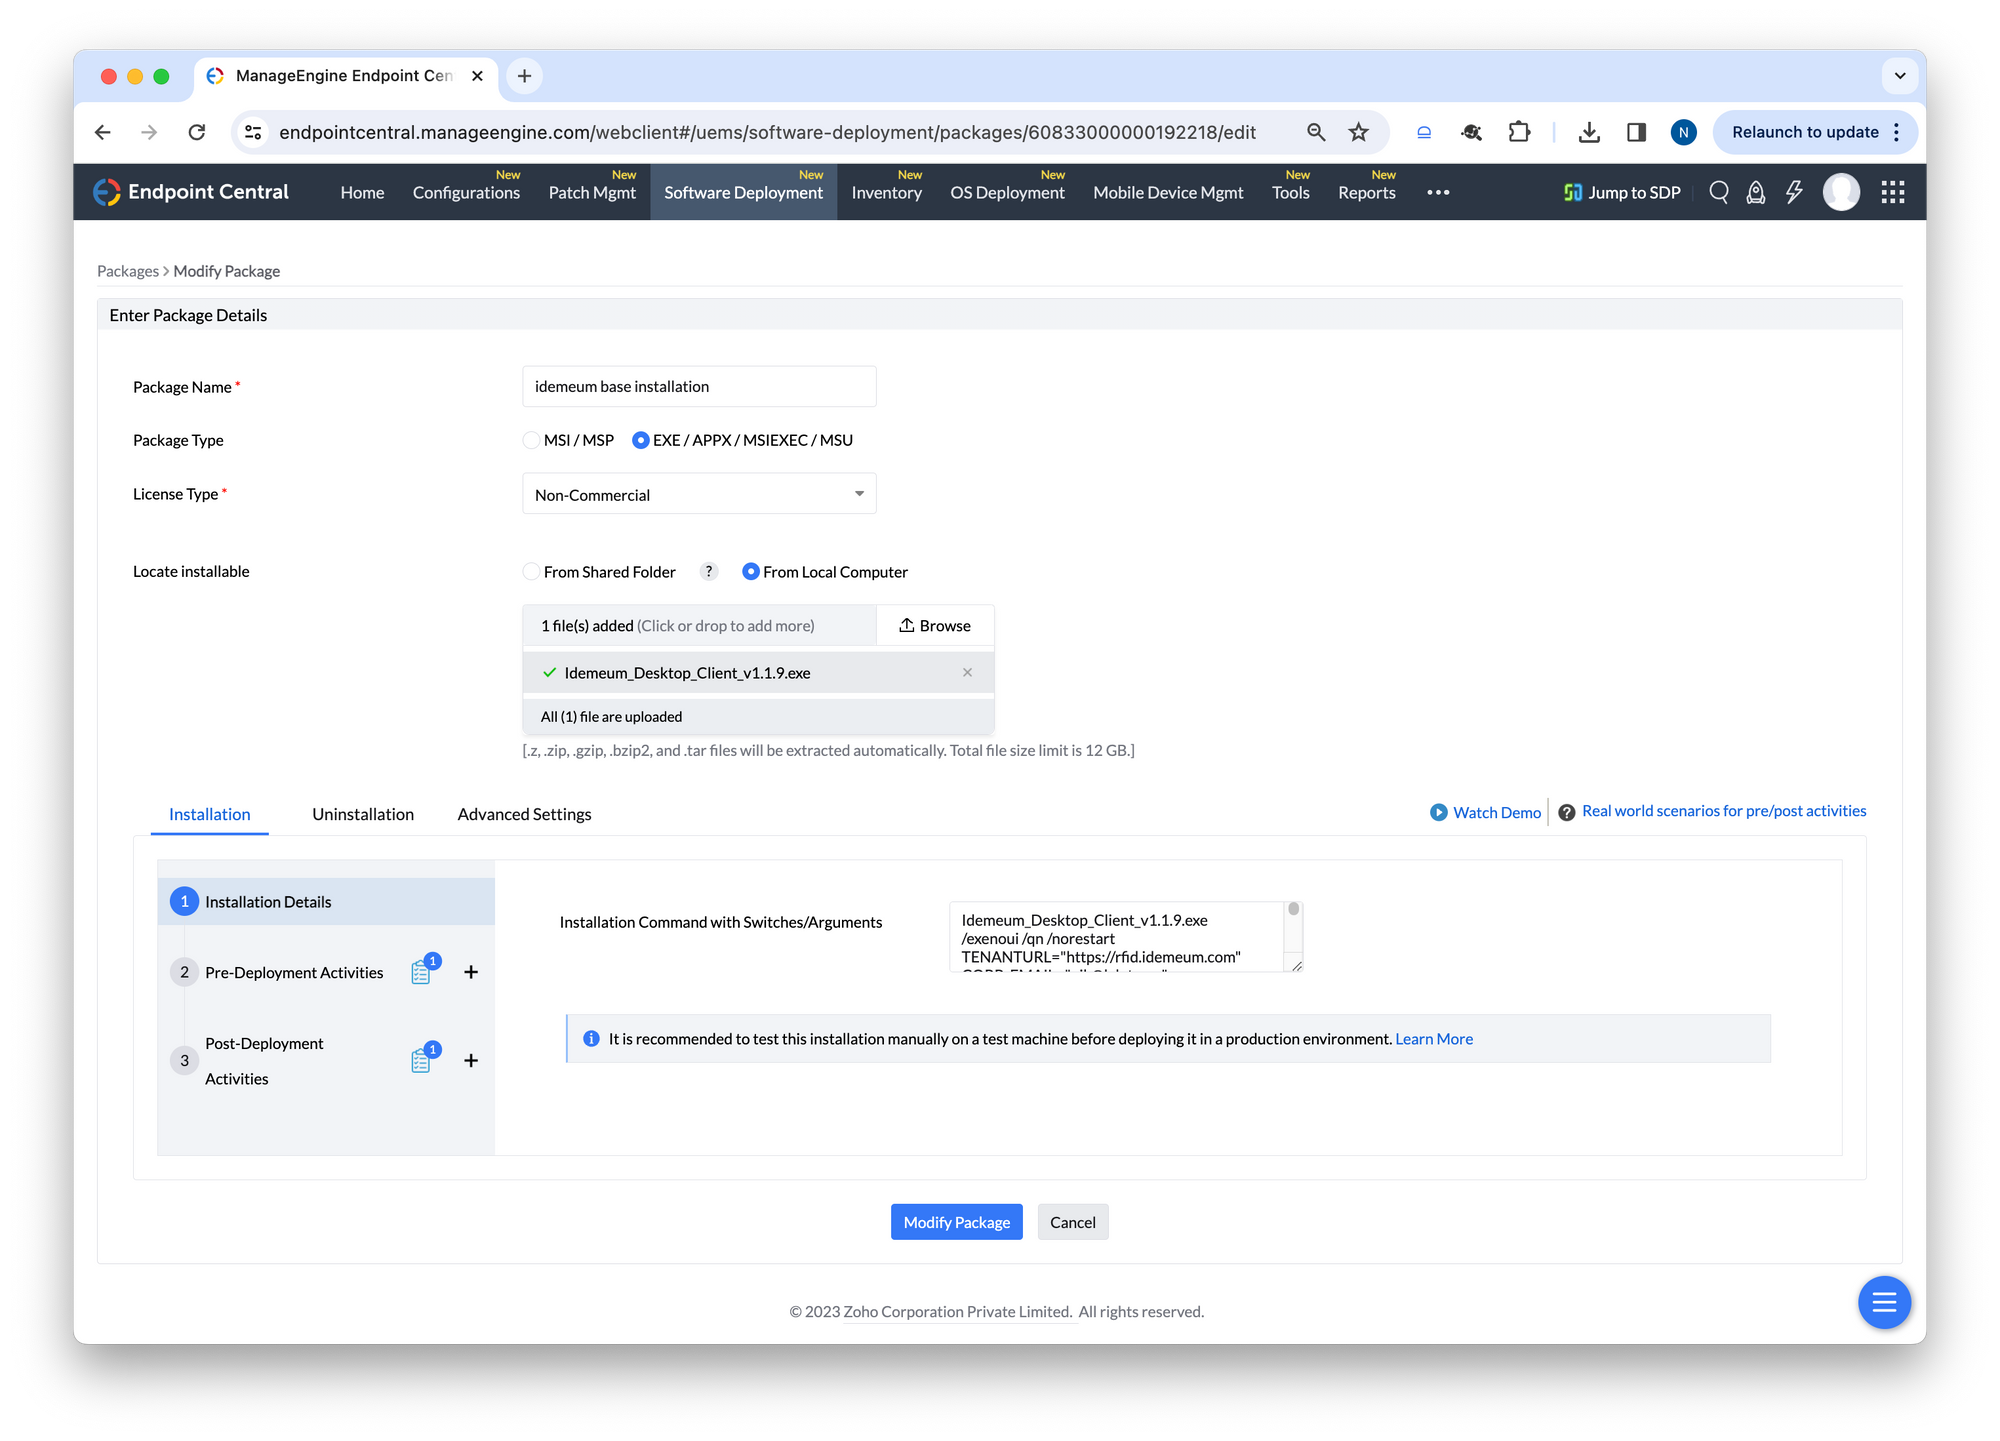
- Give package a name
- Choose
exetype - Choose file source from
local computerand provide path to idemeum .exe file - For installation details you will need to provide the command in the form
<idemeum exe filename> /exenoui /qn /norestart TENANTURL="<your tenant URL>" CORP_EMAIL="<admin corporate email" CLIENT_ID="<your client id" CLIENT_SECRET="your client secret" AUTH_TYPE="<authentication type>" TENANT_DISPLAY_NAME="<display name you want to use>" MASTER_KEY="<your tenant master key>"For example here is the command that we used:
Idemeum_Desktop_Client_v1.1.9.exe /exenoui /qn /norestart TENANTURL="https://rfid.idemeum.com" CORP_EMAIL="nik@lab.town" CLIENT_ID="DESKTOP_INSTALLER-desktop_installer_299-UC-q47eY" CLIENT_SECRET="N_~WV9cVwo10QFCh^1XBCG1TRhXb_ja^u$62o@16CLX@YW0v" AUTH_TYPE="RFID" TENANT_DISPLAY_NAME="ACME Company" MASTER_KEY="9bb20d5e-6197-4e7b-b75a-2abacc1fb14e::/Pr+yyQL/V7Lw4mm2vstB+05uxsV/jN1NUOouZY9HXM="- Click on
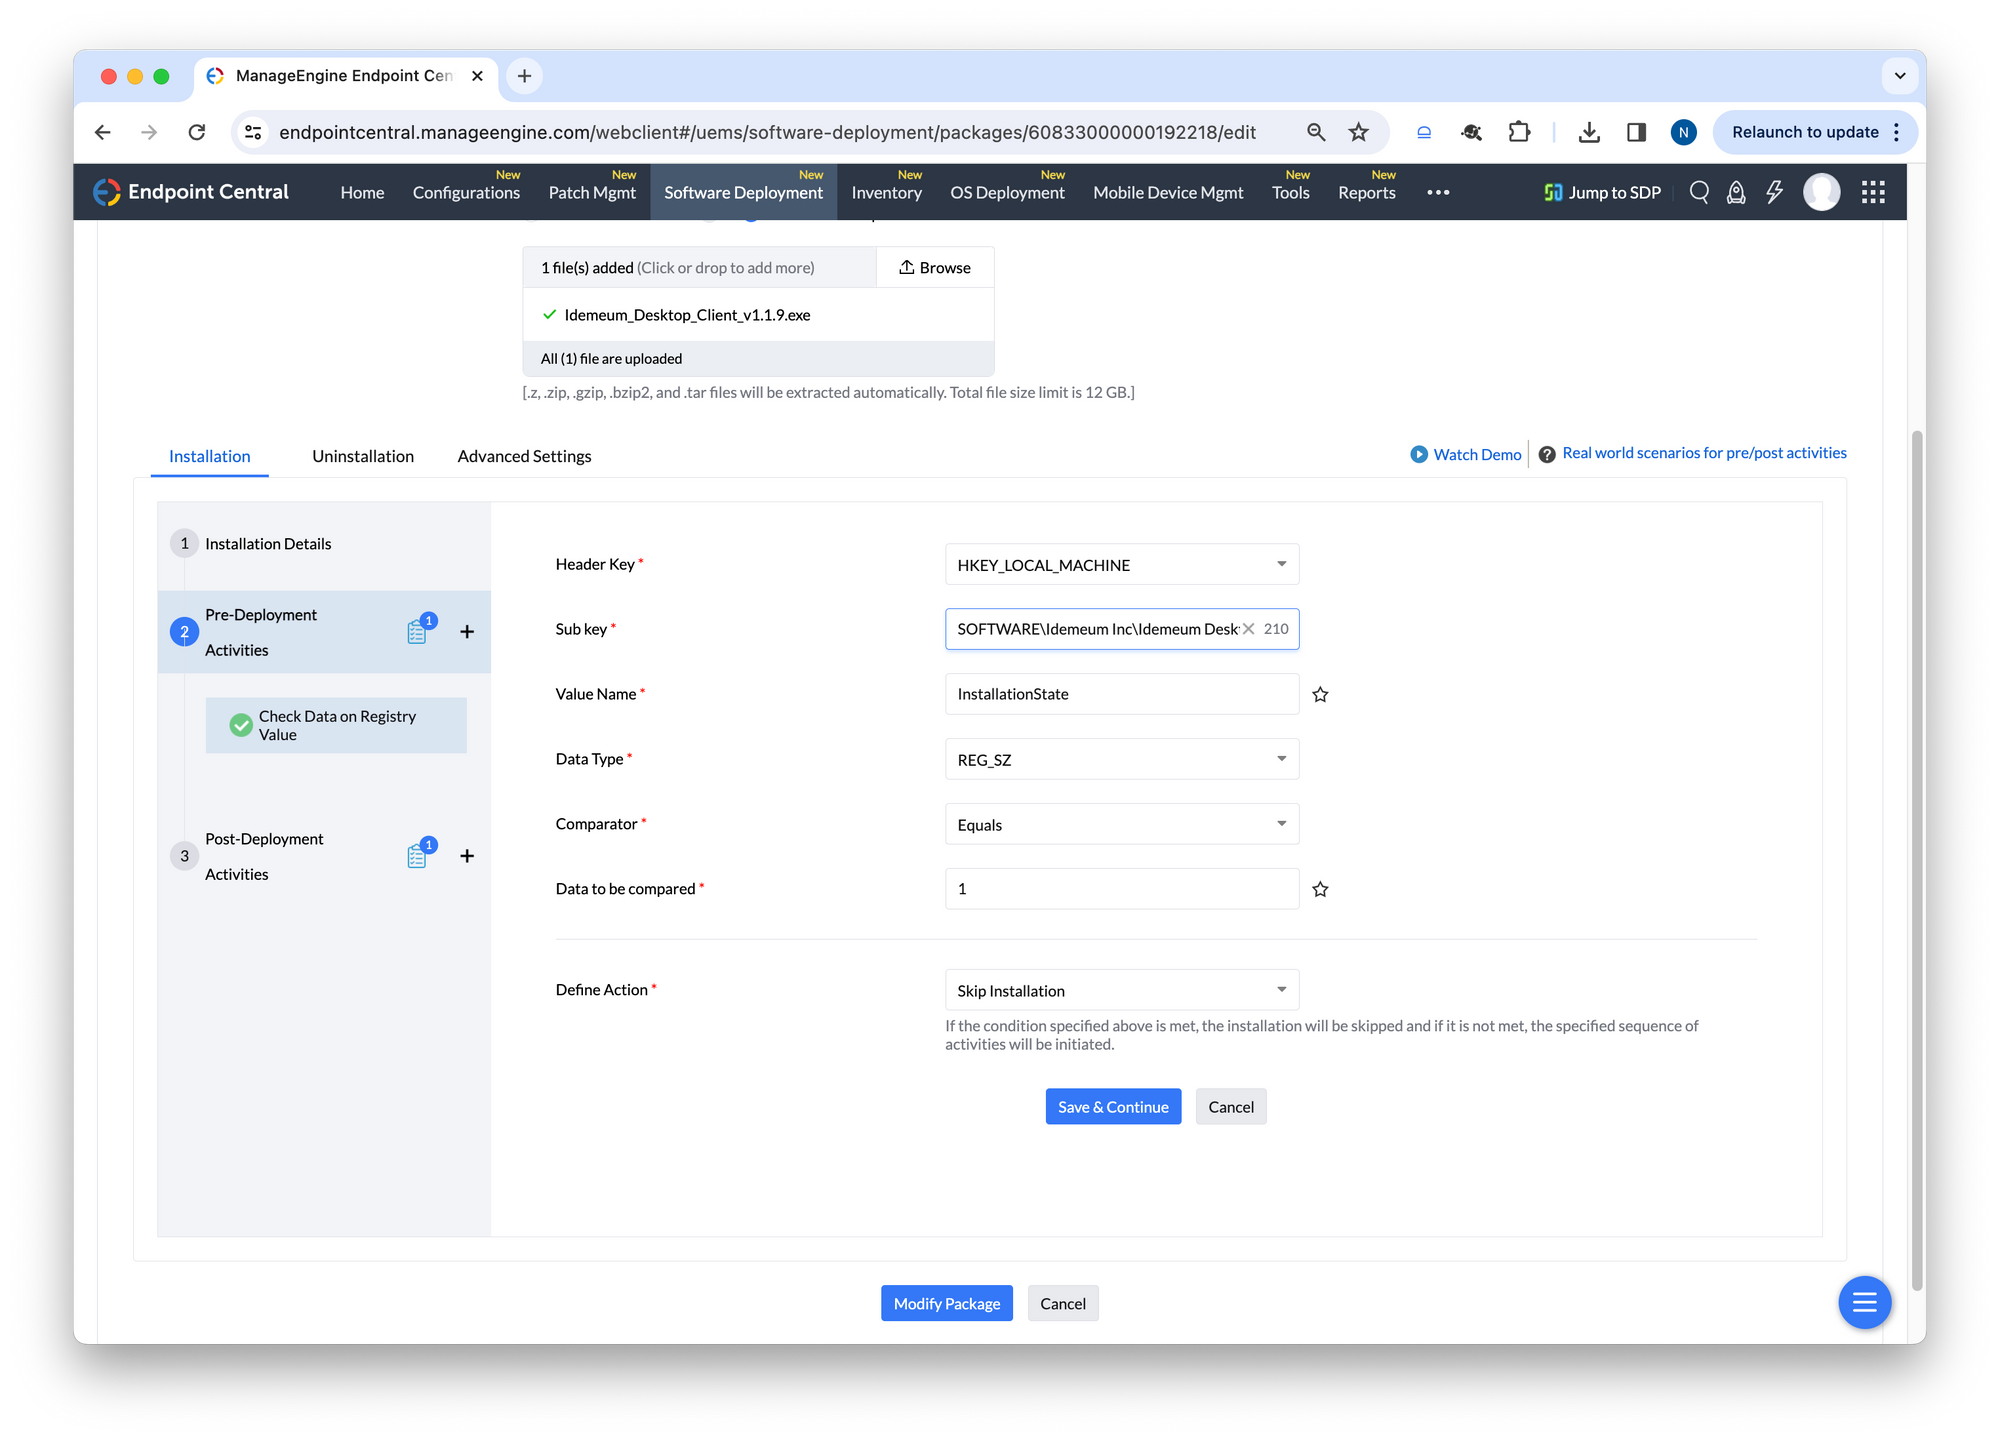
Pre-Deployment Activitiesand addCheck Data on Registry Value - For registry key use
HKEY_LOCAL_MACHINE - Value name -
InstallationState - Data type -
REG_SZ - Comparator -
Equals - Data to be compared -
1 - Define action -
Skip Installation
- Now click on
Post-Deployment Activitiesand choose to addCustom Script
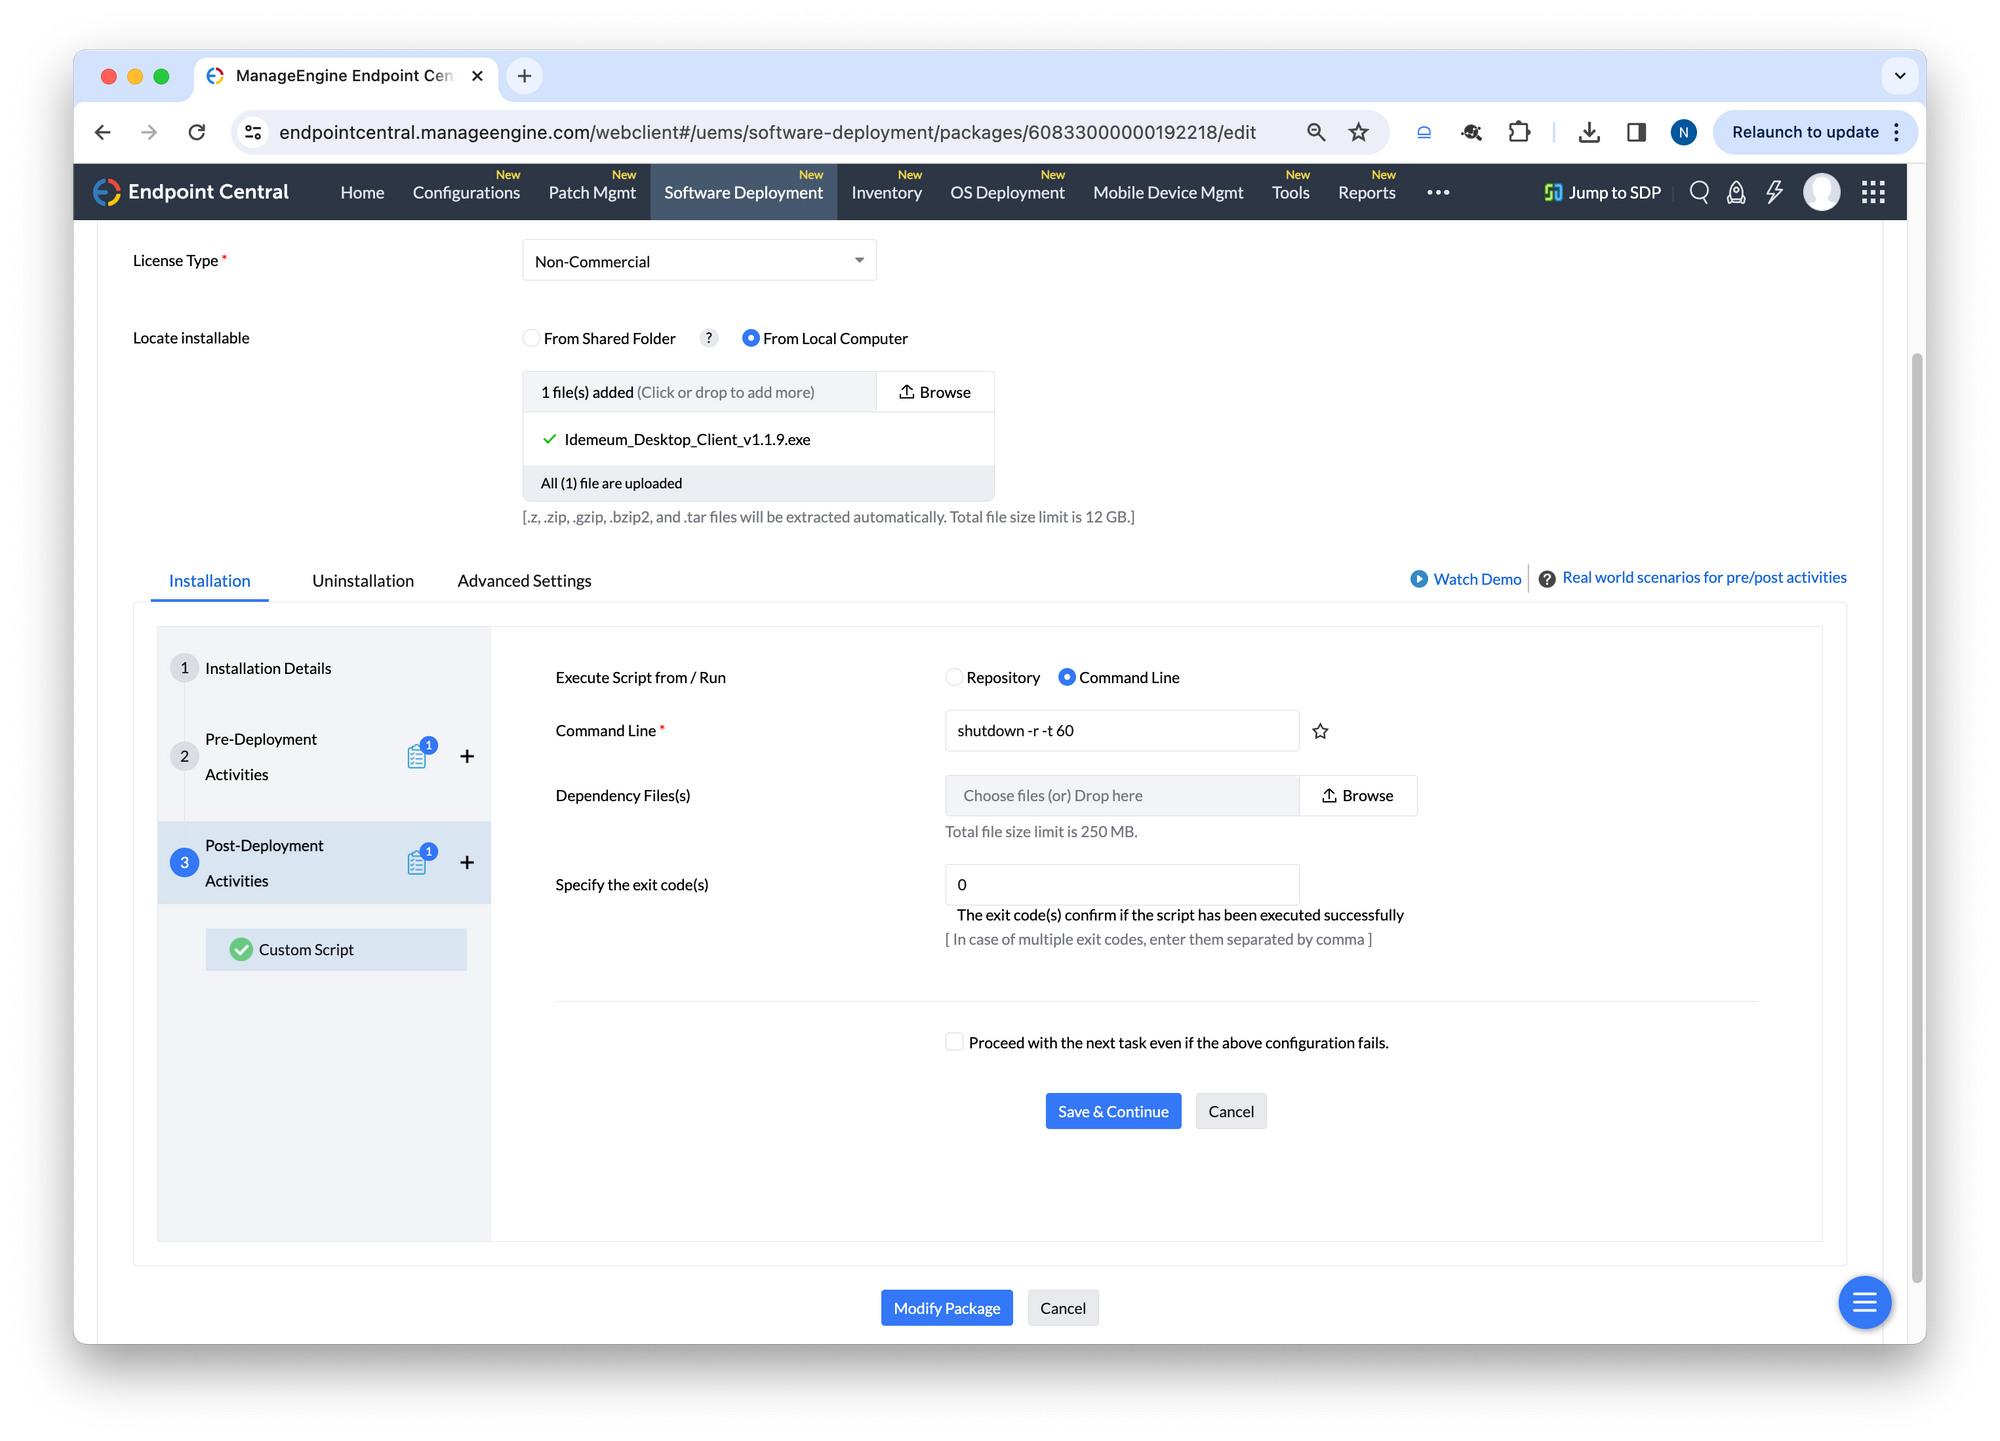
- Choose
Command line - Enter the following command line -
shutdown -r -t 60 - Now you can
Save the configuration
Now you can deploy the package to a list of target machines and idemeum client will be silently installed, and the workstations will restart.
Upgrade version install
This installation type is used for desktop client upgrades. Once the base version is installed, you can use the steps below for all subsequent upgrades.
- Navigate to idemeum documentation portal and download the latest idemeum desktop client
- Access Managed Engine admin dashboard and create a new deployment package

- Give package a name
- Choose
exeversion - Choose file source from
local computerand provide path to idemeum .msi file - For installation command you will need to enter the following
msiexec.exe /i "Idemeum_Desktop_Client_v1.1.9.msi" ALLUSERS=1 /qn /norestart- Click on
Pre-Deployment Activitiesand addCustom Script - Choose
Command line - For
Command lineenter the following
msiexec /x {93B9CC98-6004-411E-A8BF-88F7C3BC5541} /qn- Make sure you check the box
Proceed with the installation even if the above configuration fails. - Click
Save and continue

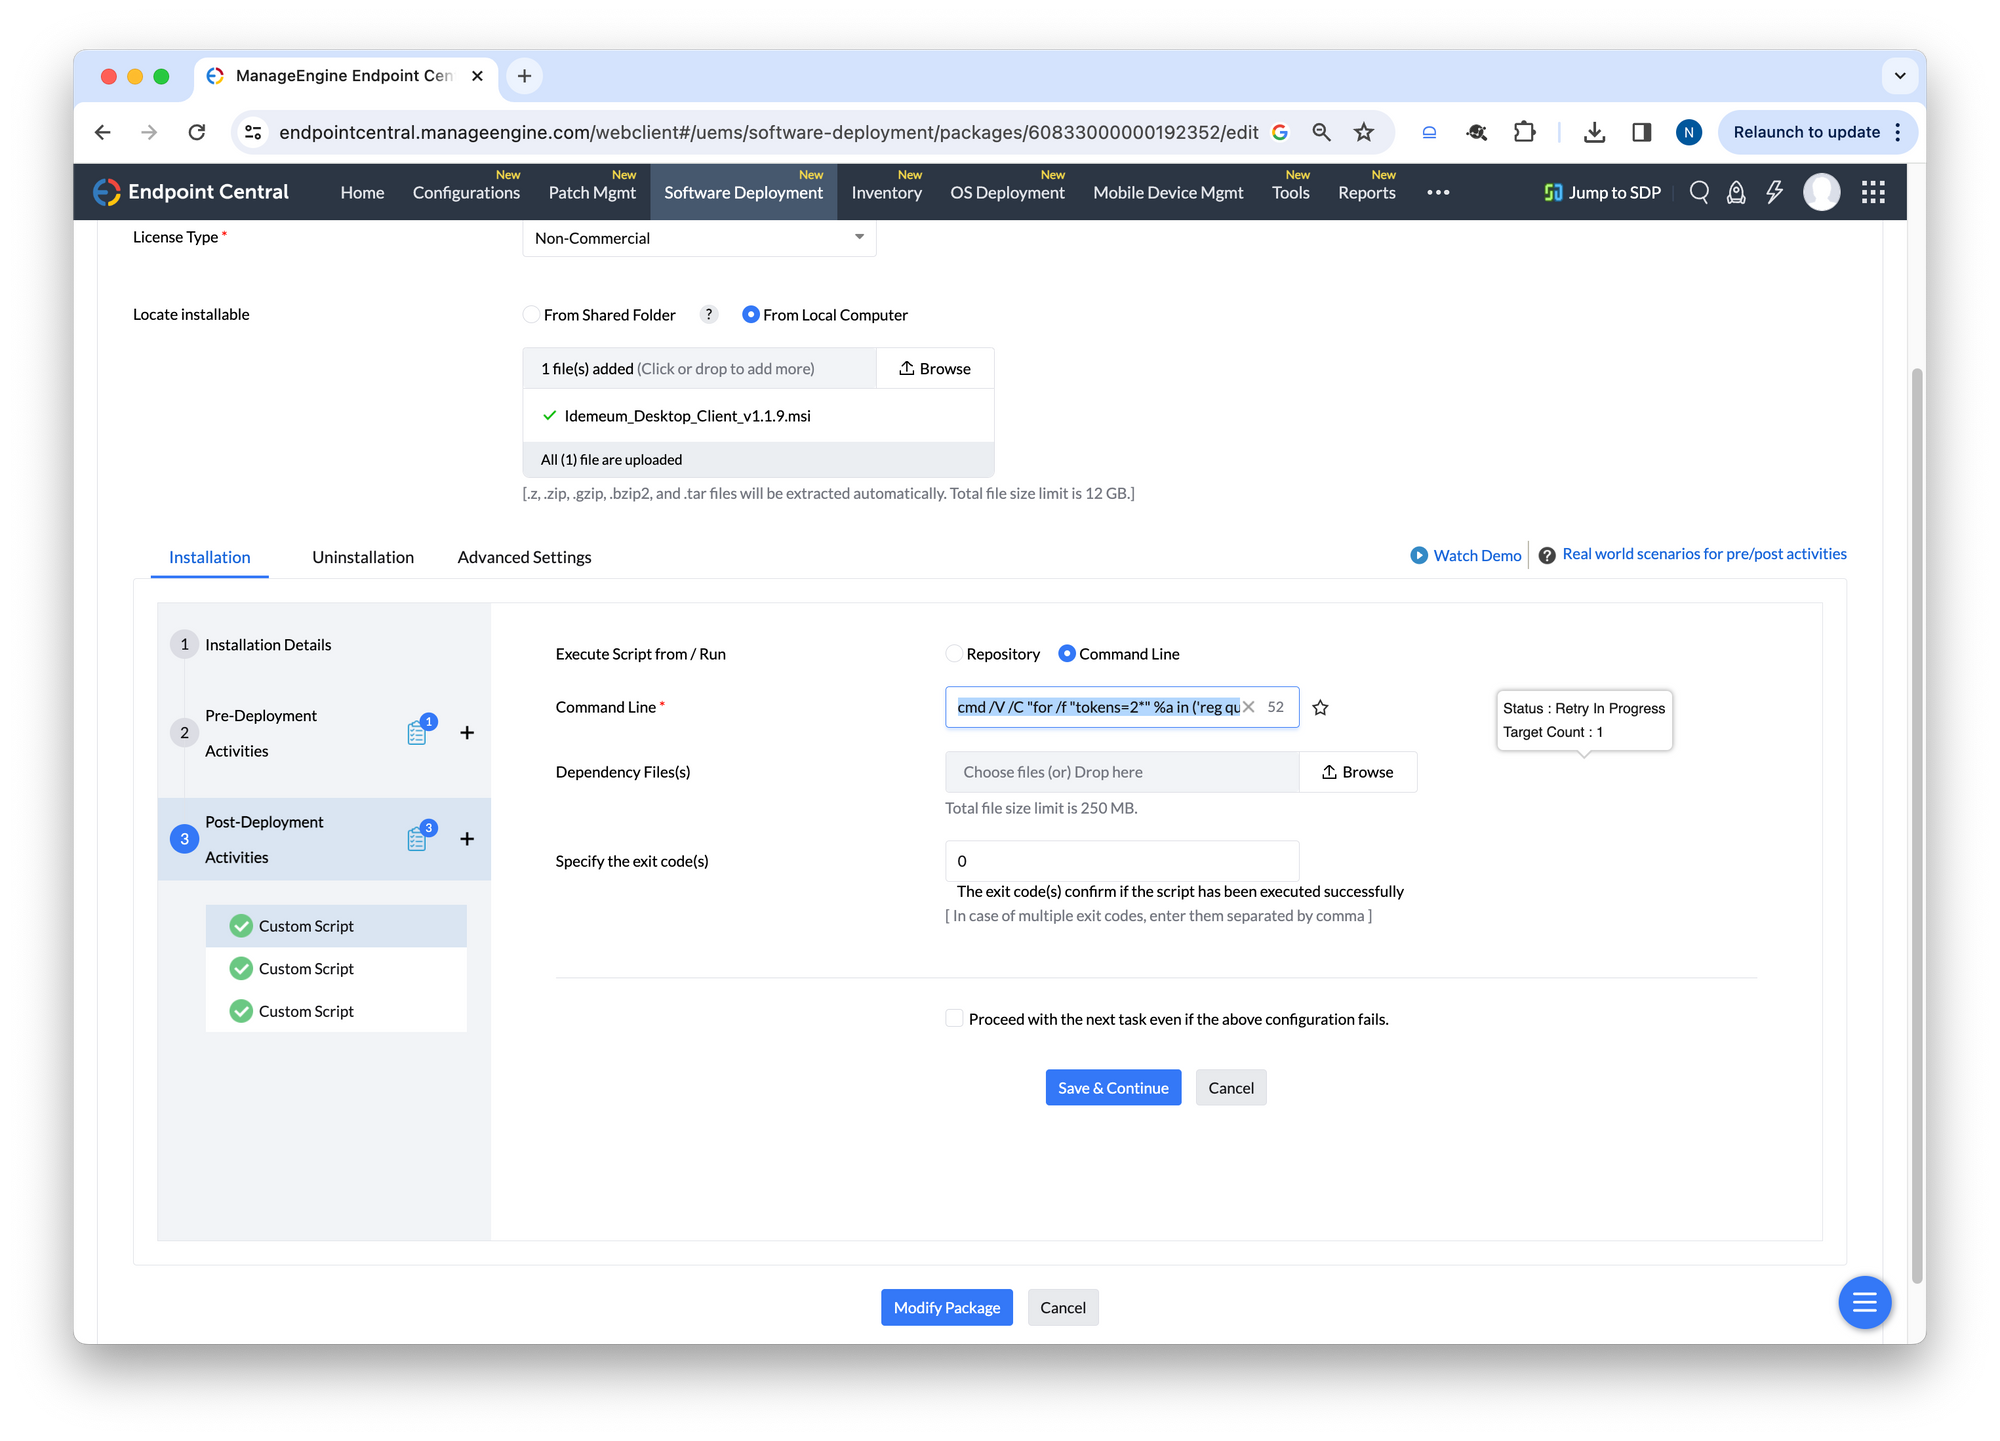
- Click on
Post-Deployment Activities - Add
Custom script - Choose
Command line - Enter the following command
cmd /V /C "for /f "tokens=2*" %a in ('reg query "HKEY_LOCAL_MACHINE\SOFTWARE\Idemeum Inc\Idemeum Desktop Client" /v Path') do set "FilePath=%b" && "!FilePath!\idemeum.exe" UPDATE_SETTING"- Save the script configuration
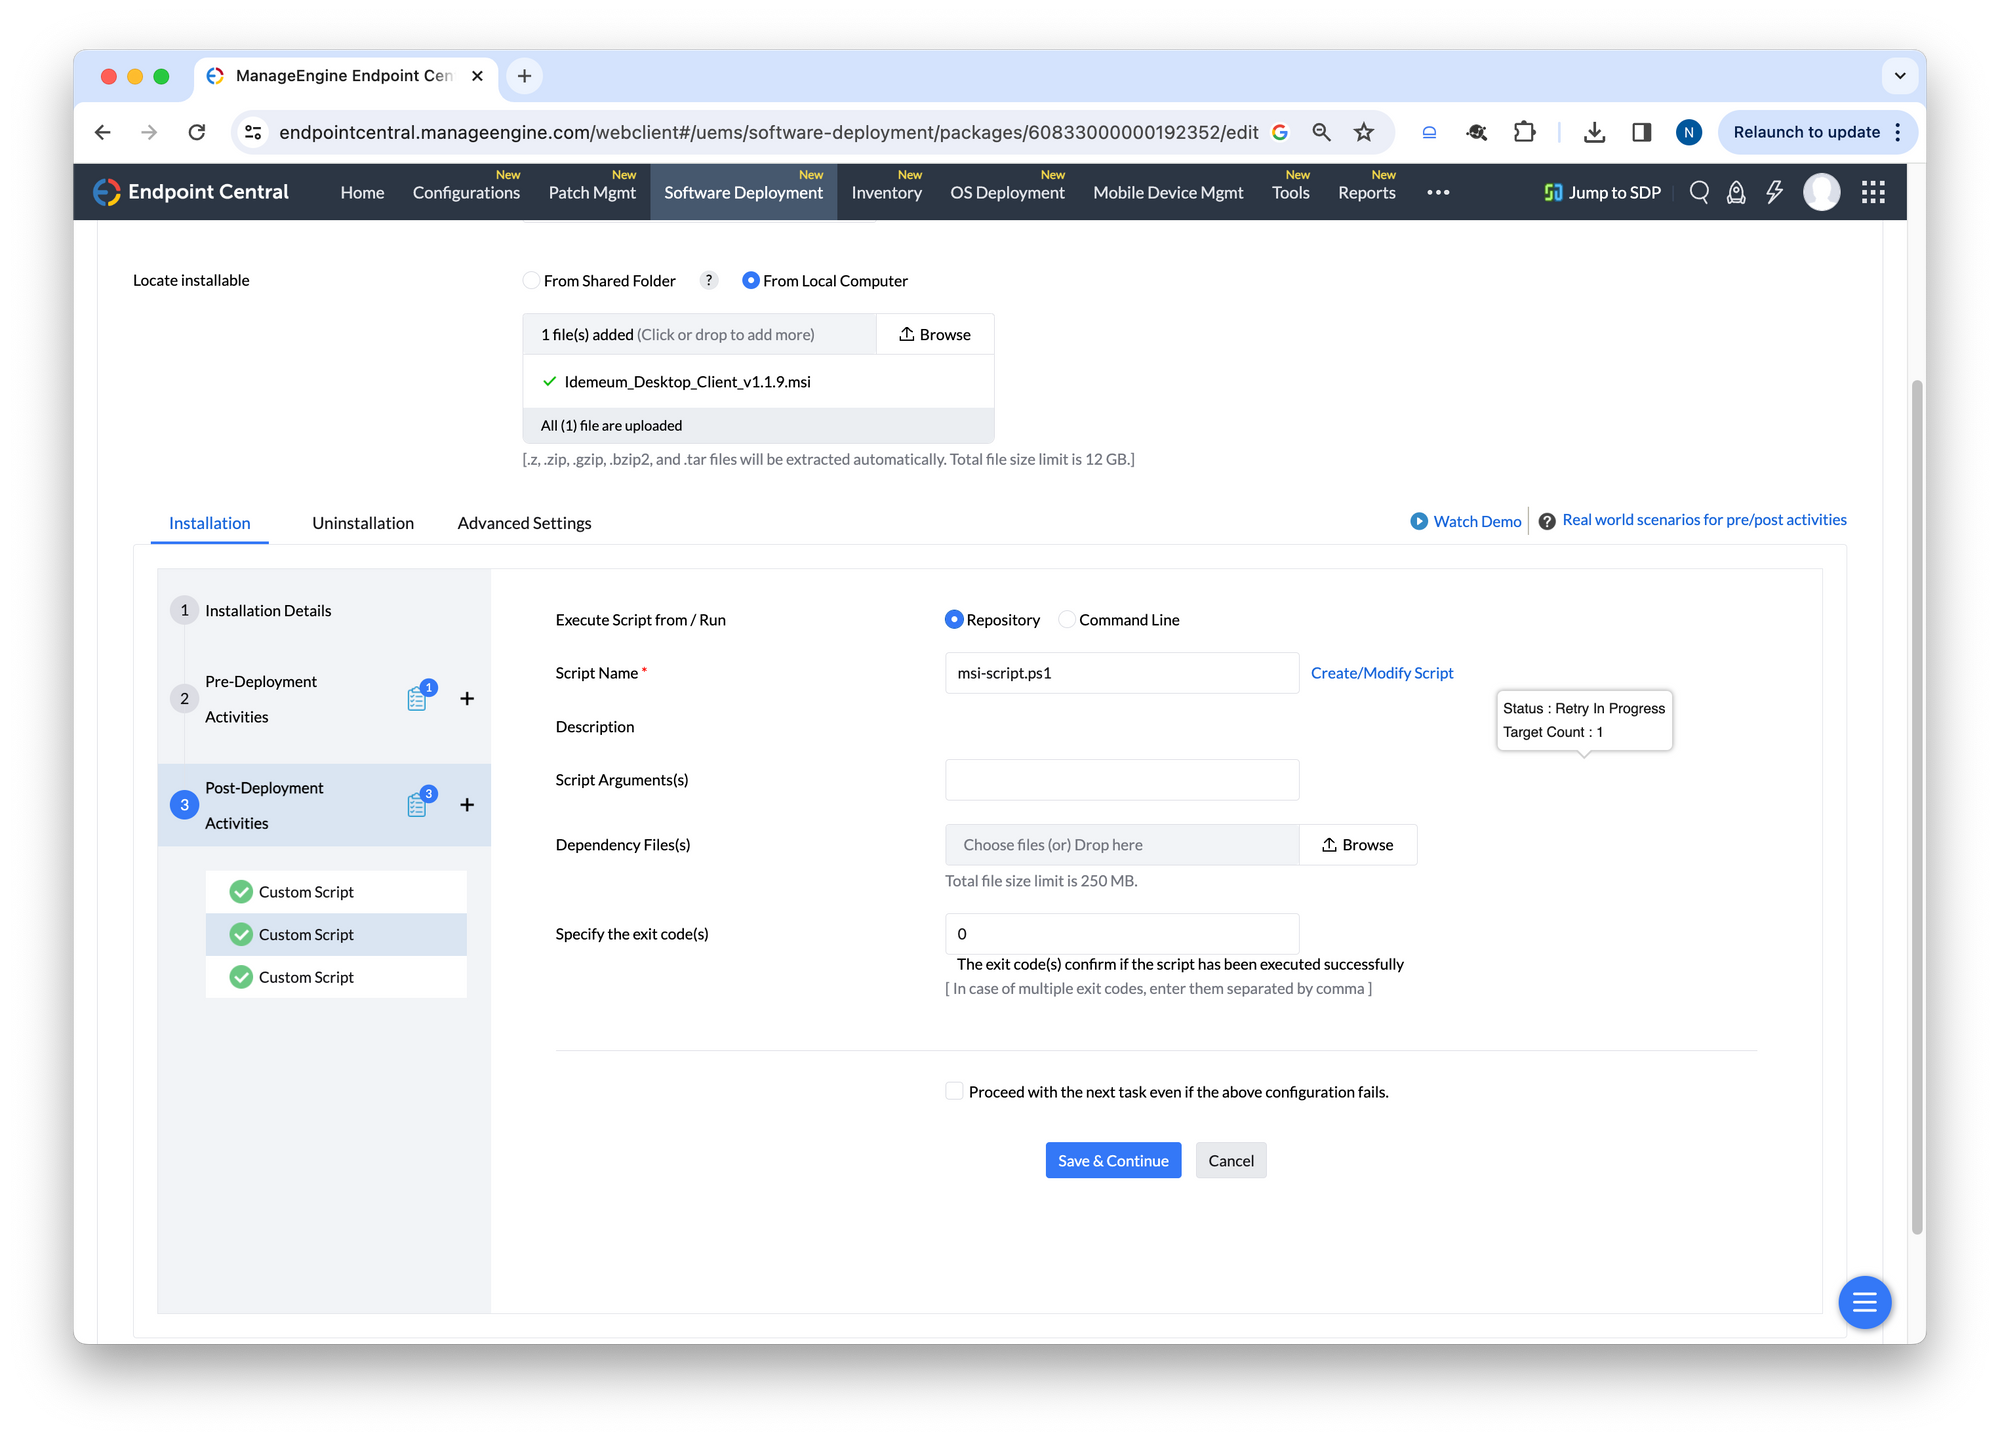
- Click on
Post-Deployment Activities - Add
Custom script - Choose
Repository - Upload the following PS1 script to execute
- Save the configuration
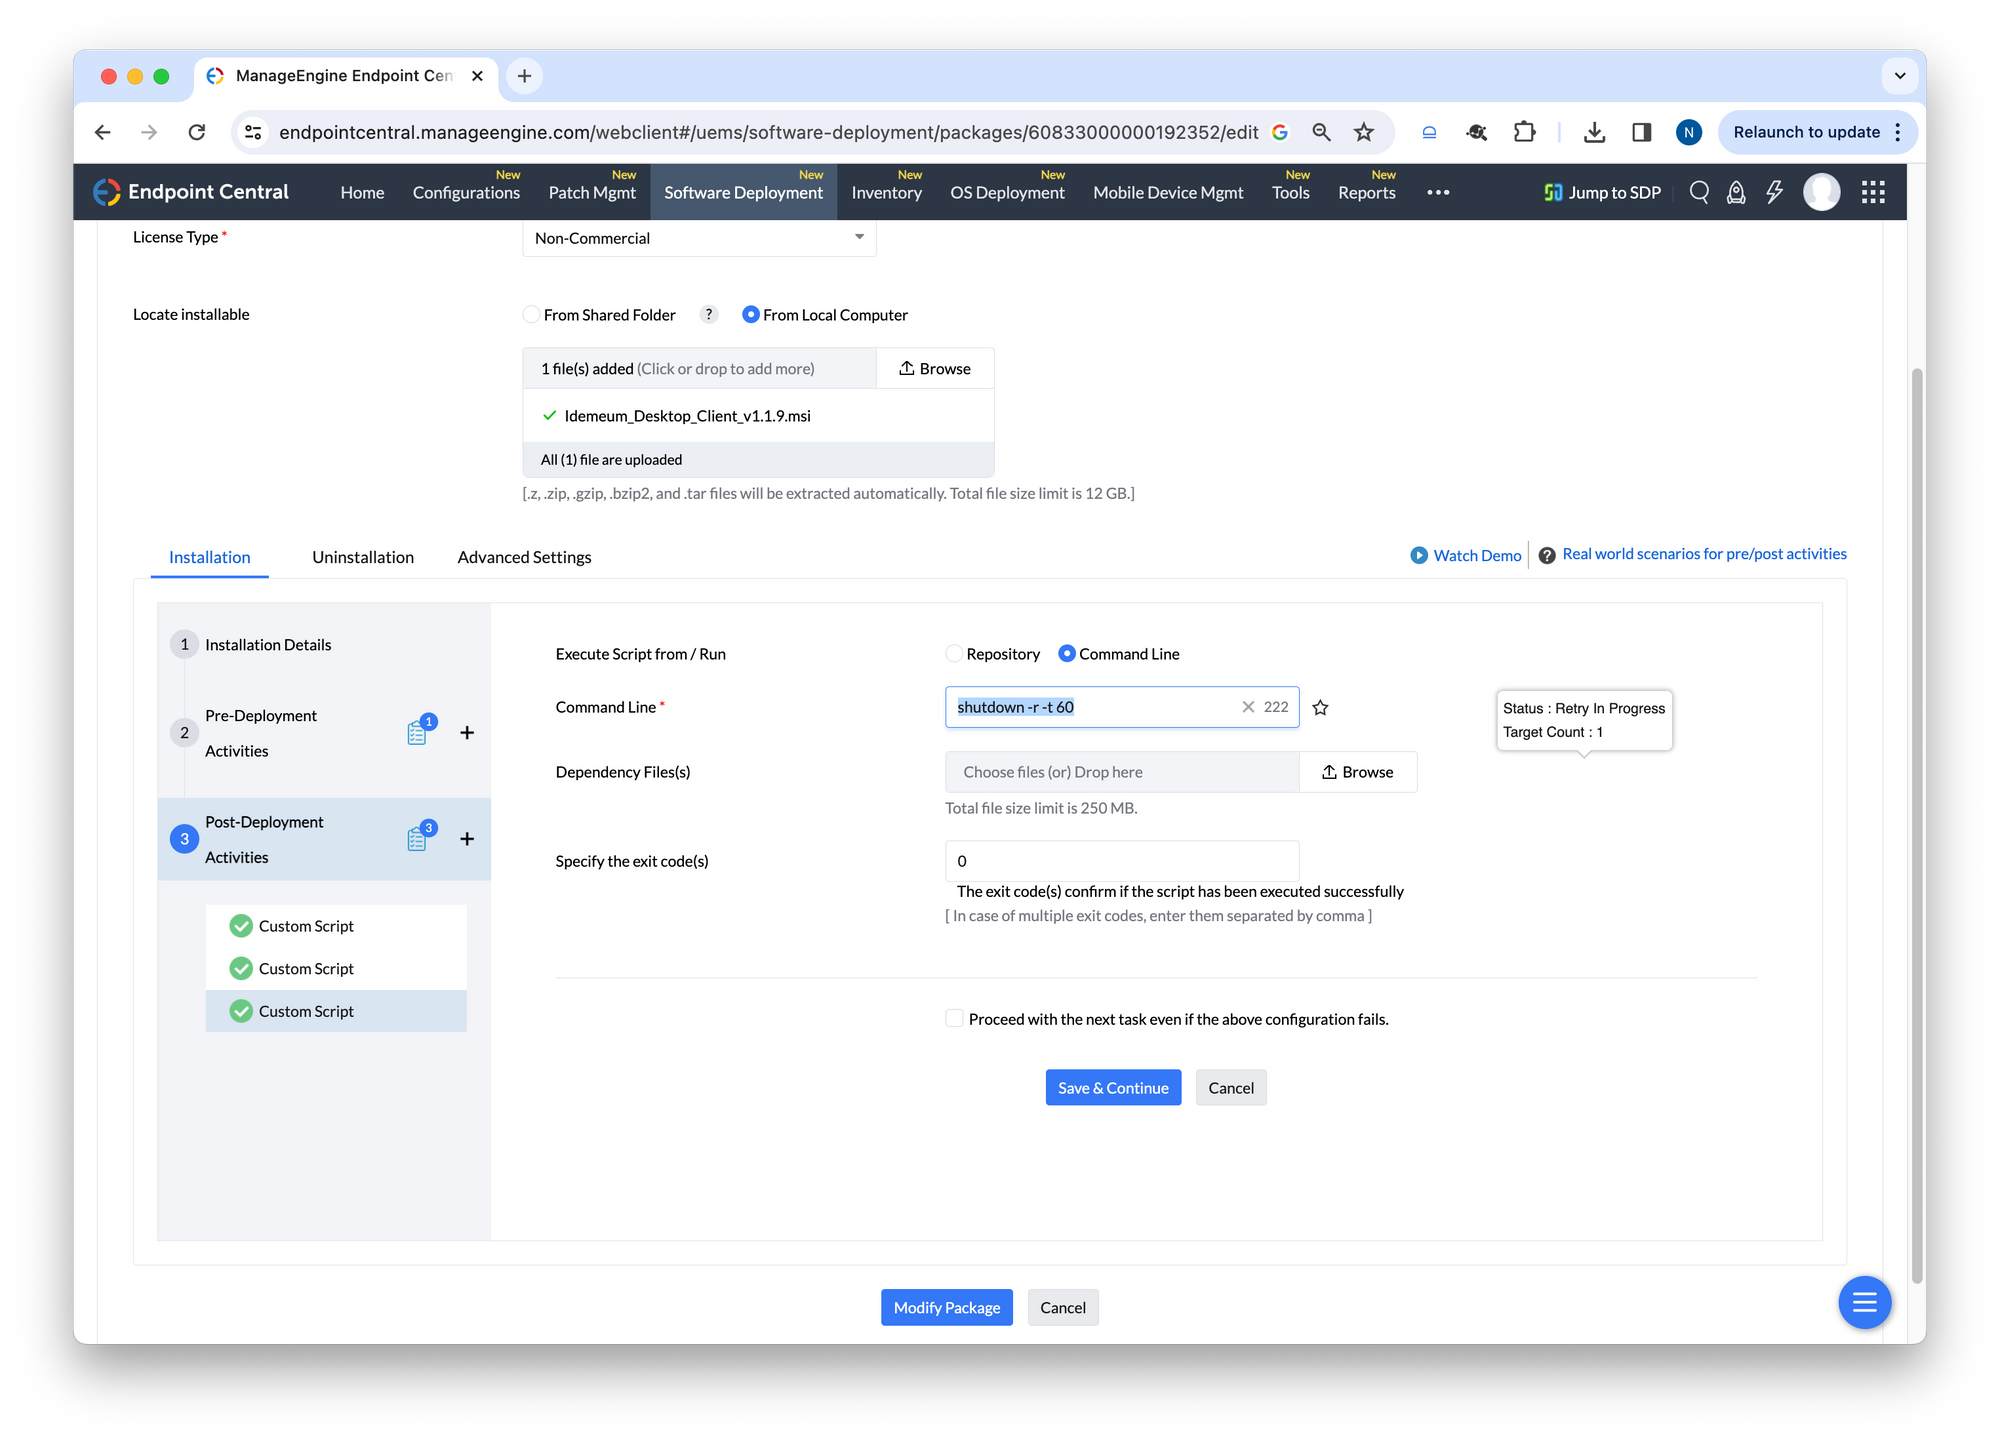
- Click on
Post-Deployment Activities - Add
Custom script - Choose
Command line - Add the following command line
shutdown -r -t 60- Save the script configuration
Now you can deploy the package to a list of target machine and idemeum client will be silently updated, and the workstation will restart.
