
This guide will show how to set up and configure Windows and EJBCA for Windows SmartCard Logon.
Pre-requisites
Desktop MFA is supported on Windows machines where TPM is enabled. Please click here to enable TPM on your PC. By default, Windows 11 will have TPM enabled, whereas not all Windows 10 PC will have TPM enabled by default, and if the PC has TPM present and disabled, it can be enabled via BIOS setup. Refer to the same link as before to learn more about how to verify whether TPM is present in the system.
Step 1: Creating the CA
- Login to EJBCA Administration GUI
- Navigate
CA Functions->Certification Authorities - Add the CA name and Click
Create...
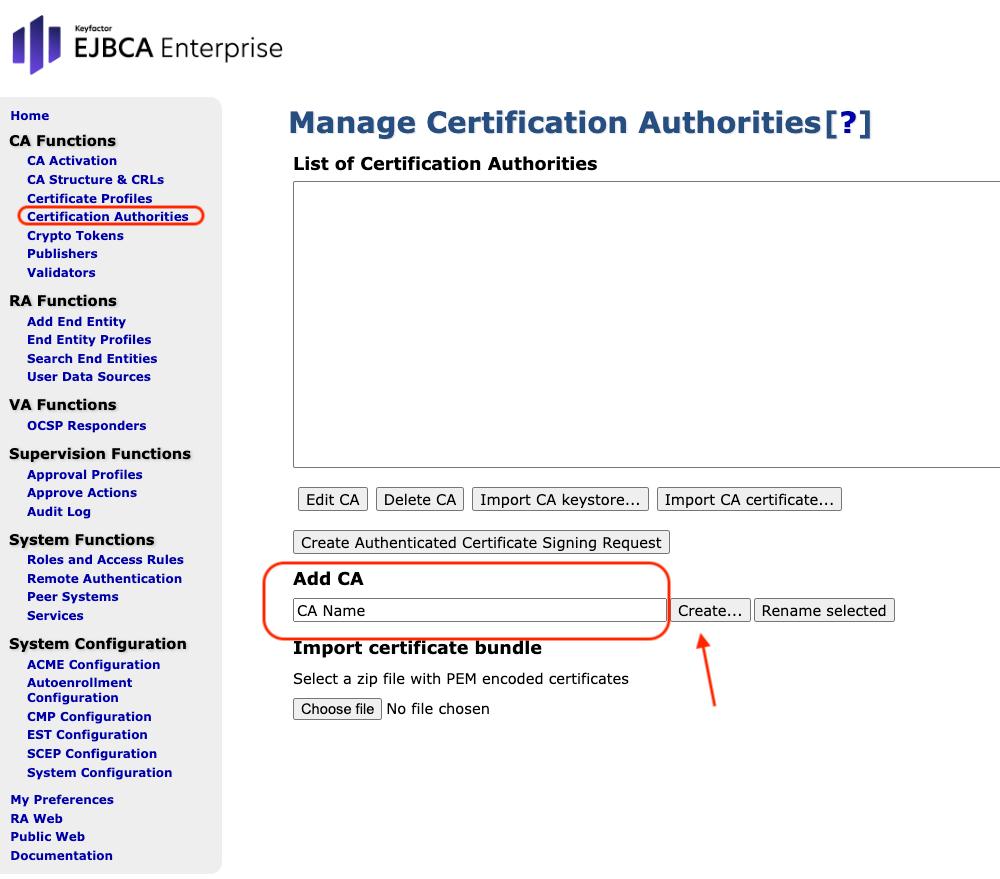
- When setting up the CA, be sure to select appropriate values for settings such as Subject DN, Validity, and CRL Distribution Point. Additionally, ensure that the CRL Distribution Point is publicly accessible to enable certificate revocation checking.
Step 2: Create Certificate Profile for DomainController
- Login to EJBCA Administration GUI
- Navigate
CA Functions->Certificate Profiles - Download the zip file above
- Click
Choose fileand select the downloaded zip file - Click
Import Profiles - Verify Certificate Profile with the name
DomainControllerimported successfully and listed in theList of Certificate Profiles
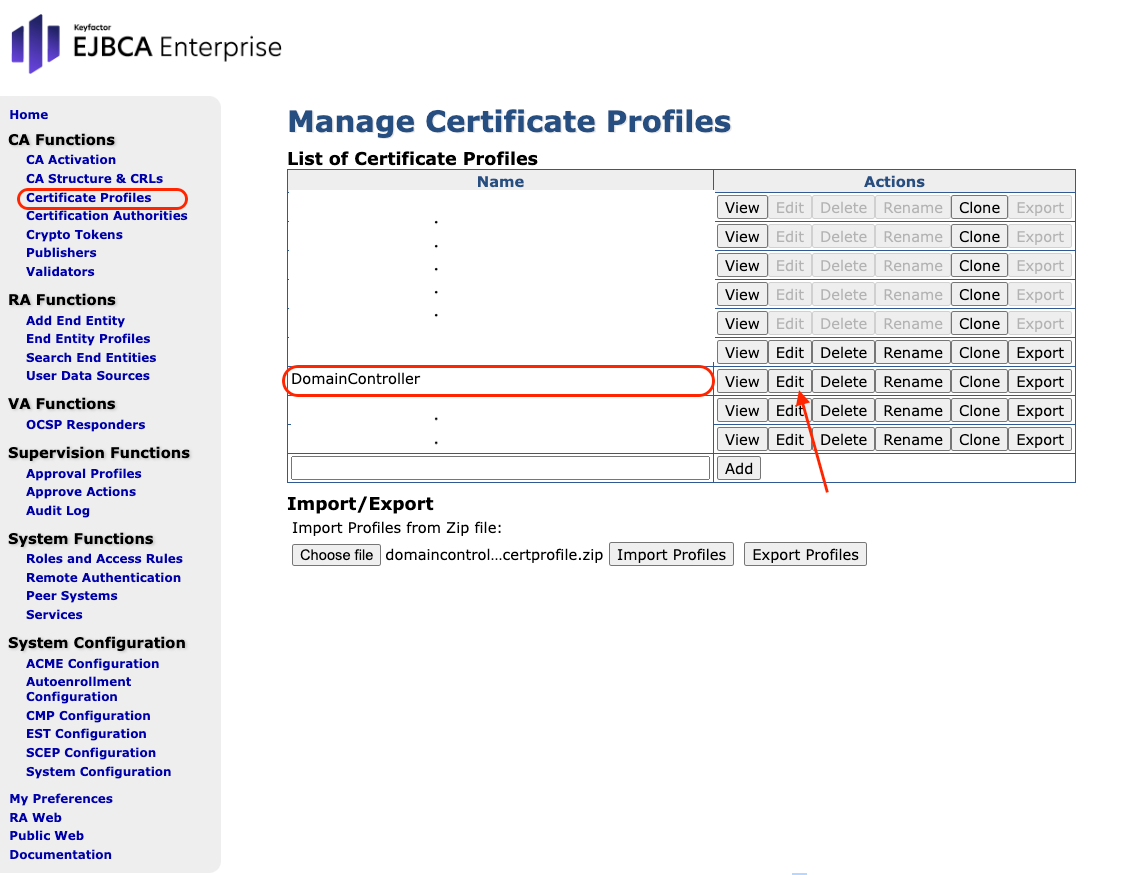
- Click
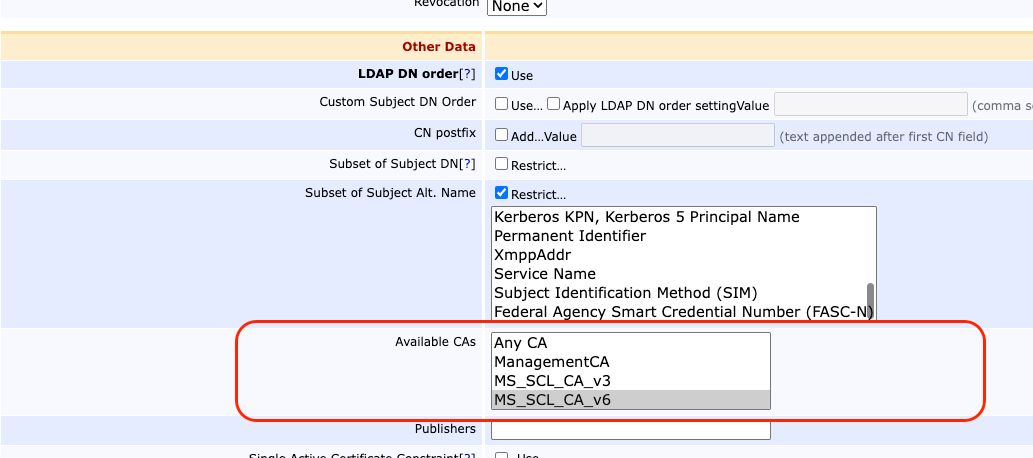
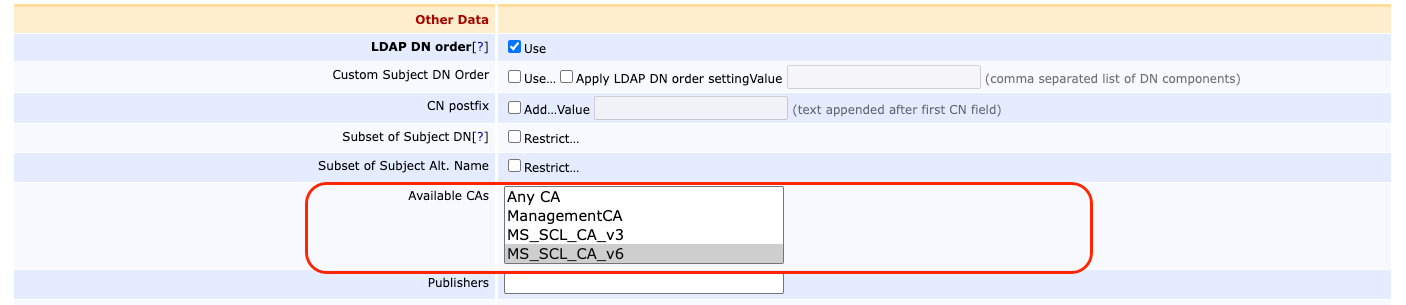
Edit - Change
Validity or end date of the certificateas per Org policy - Choose the relevant CA in
Available CAssection - Click
Save
Step 3: Create Certificate Profile for end users
- Login to EJBCA Administration GUI
- Navigate
CA Functions->Certificate Profiles - Download the zip file above
- Click
Choose fileand select the downloaded zip file - Click
Import Profiles - Verify Certificate Profile with name
MSSmartCardLogonimported successfully and listed in theList of Certificate Profiles

- Click
Edit - Change
Validity or end date of the certificateas per Org policy - Choose the relevant CA in
Available CAssection - Click
Save
Step 4: Create an End Entity Profile for DomainController
- Login to EJBCA Administration GUI
- Navigate
RA Functions->End Entity Profiles - Download the zip file above
- Click
Choose fileand select the downloaded zip file - Click
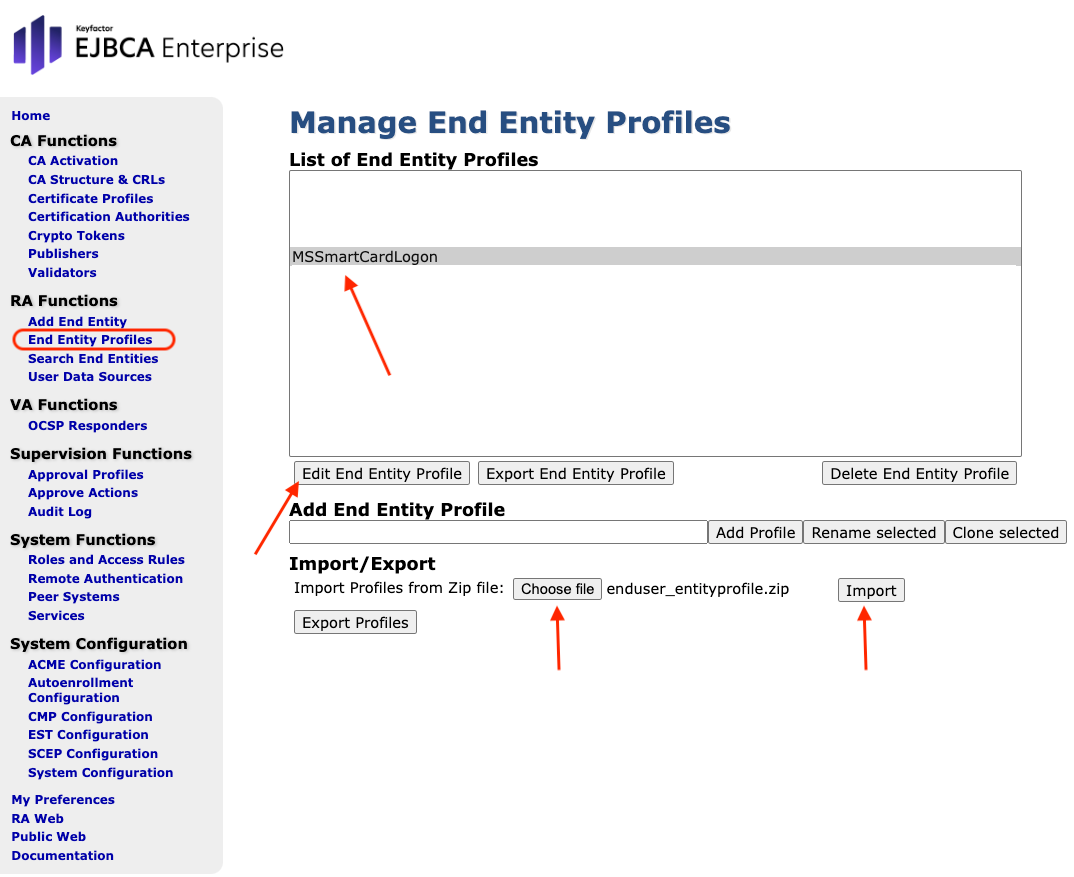
Import - Verify the End Entity Profile with the name
DomainControllerimported successfully and listed in theList of End Entity Profiles

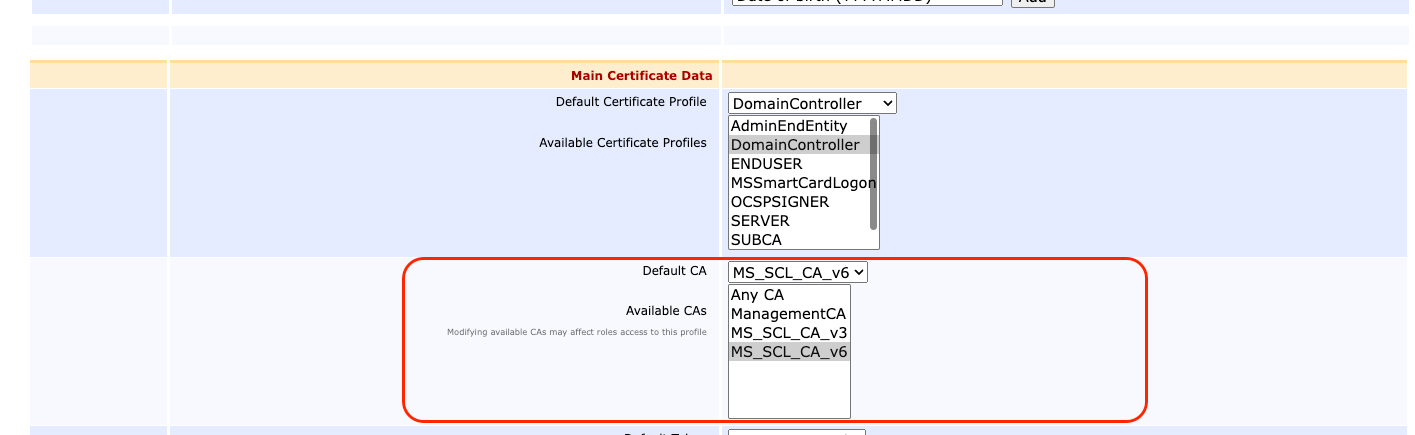
- Click
Edit End Entity Profile-> Choose the relevant CA inDefault CA&Available CAssections -> ClickSave
Step 5: Create an End Entity Profile for end users
- Login to EJBCA Administration GUI
- Navigate
RA Functions->End Entity Profiles - Download the zip file above
- Click
Choose fileand select the downloaded zip file - Click
Import - Verify the End Entity Profile with the name
MSSmartCardLogonimported successfully and listed in theList of End Entity Profiles
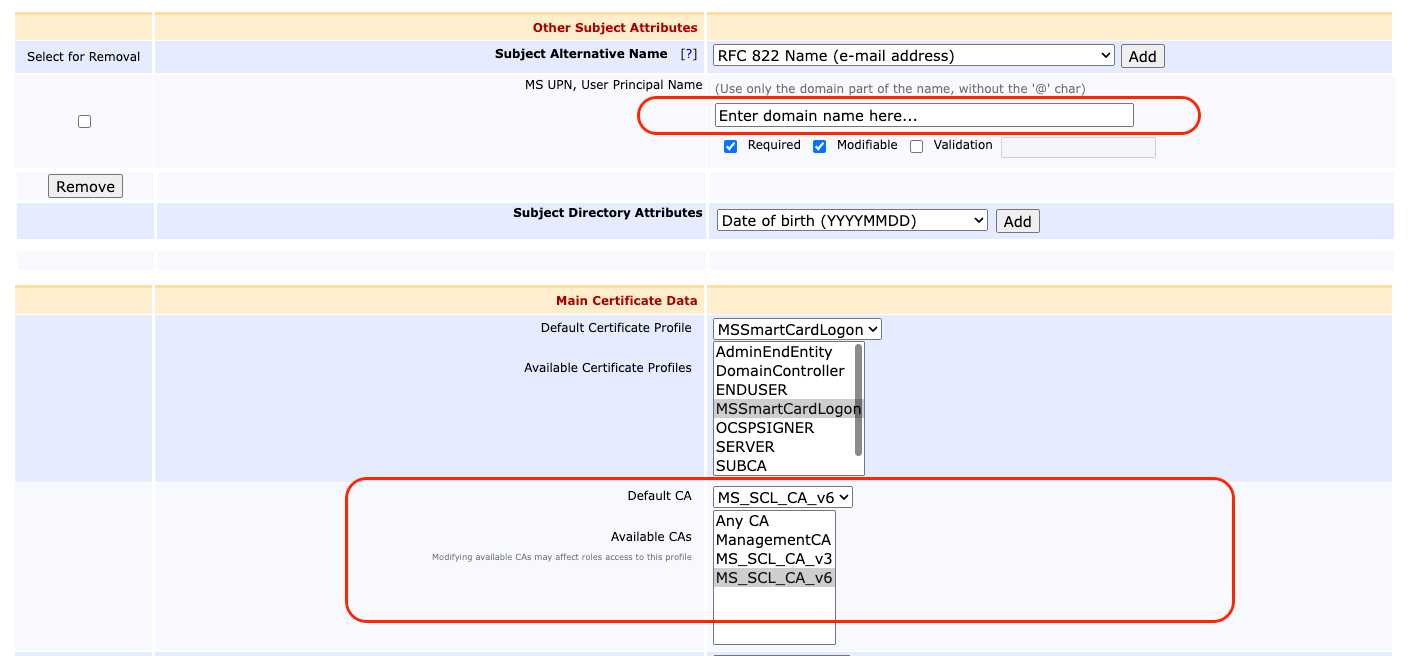
- Click
Edit End Entity Profile - Enter the domain as highlighted.
Example: xyz.com - Choose the relevant CA in
Default CA&Available CAssections - Click
Save
Step 6: Download scripts
Download the above scripts (zip file) onto the Domain Controller to proceed with the next steps.
Step 7: Generate a certificate request for each domain controller
- On Domain Controller
- Run
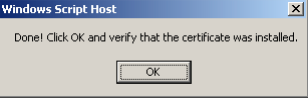
GenerateDCCertRequest.vbsscript file provided above. - Confirm that the script execution is complete by verifying the status as
"Done!" - This script produces
DomainControllerCertRequest-<hostname>.reqcontaining the request and aDomainControllerInfo-<hostname>.txt - The output files generated from the above steps are required in EJBCA for further configuration.
- This Step (7) needs to be repeated for every Domain Controller
Step 8 a: Issue Domain Controller Certificate(s) for all Domain Controllers - Add End Entity
- Login to EJBCA Administration GUI
- Navigate
RA Functions->Add End Entity
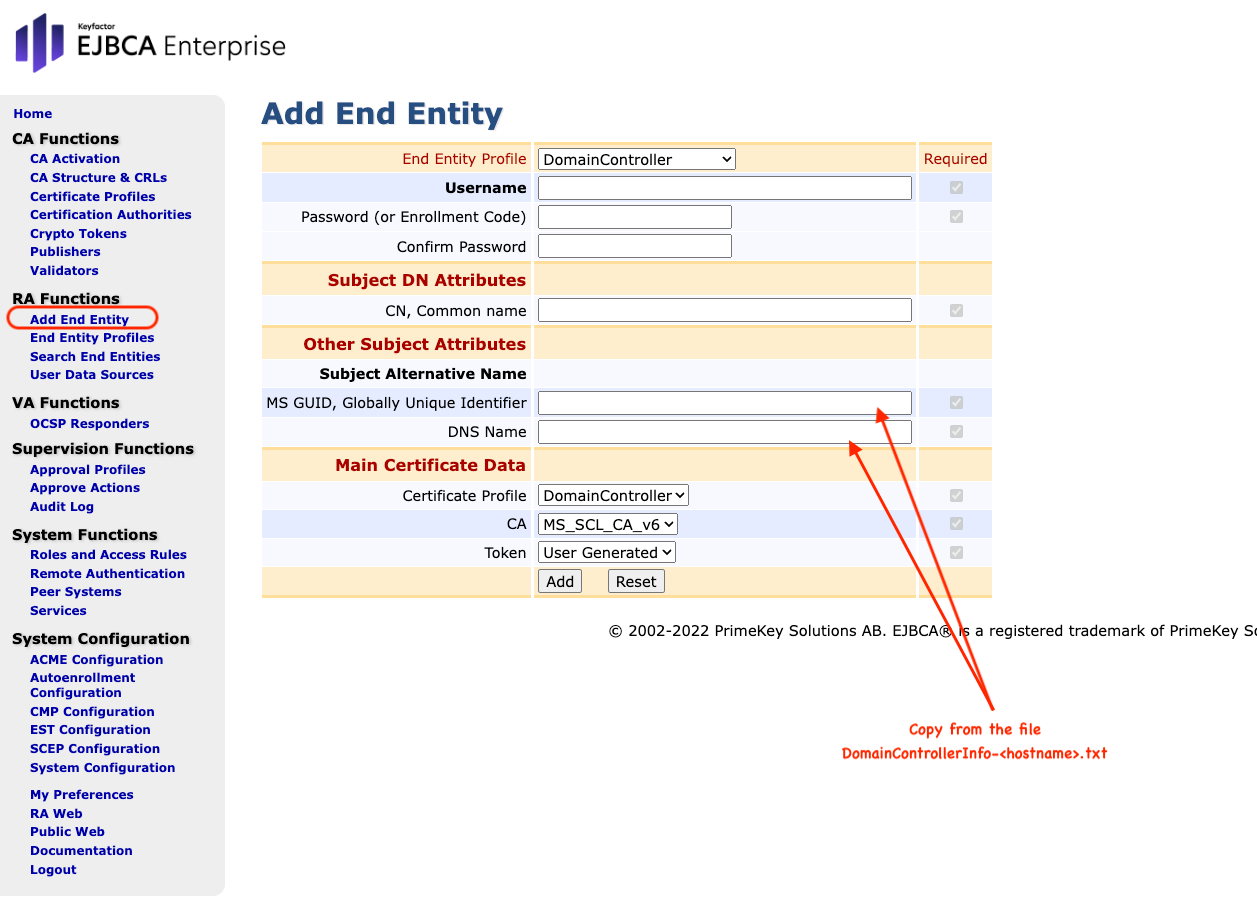
- Set
Usernameto say "DomainController-001" - Set a
Passwordof your choice - Set
CNas <<name of the domain controller>> - Set
DNS Name= fromDomainControllerInfo-<hostname>.txt - Set
MS GUID, Globally Unique Identifier= fromDomainControllerInfo-<hostname>.txt
Step 8 b: Issue Domain Controller Certificate(s) for all Domain Controllers - Fetch Certificate
- Login to EJBCA Administration GUI
- Click
Public Web - Navigate to
Enroll->Create Certificate from CSR
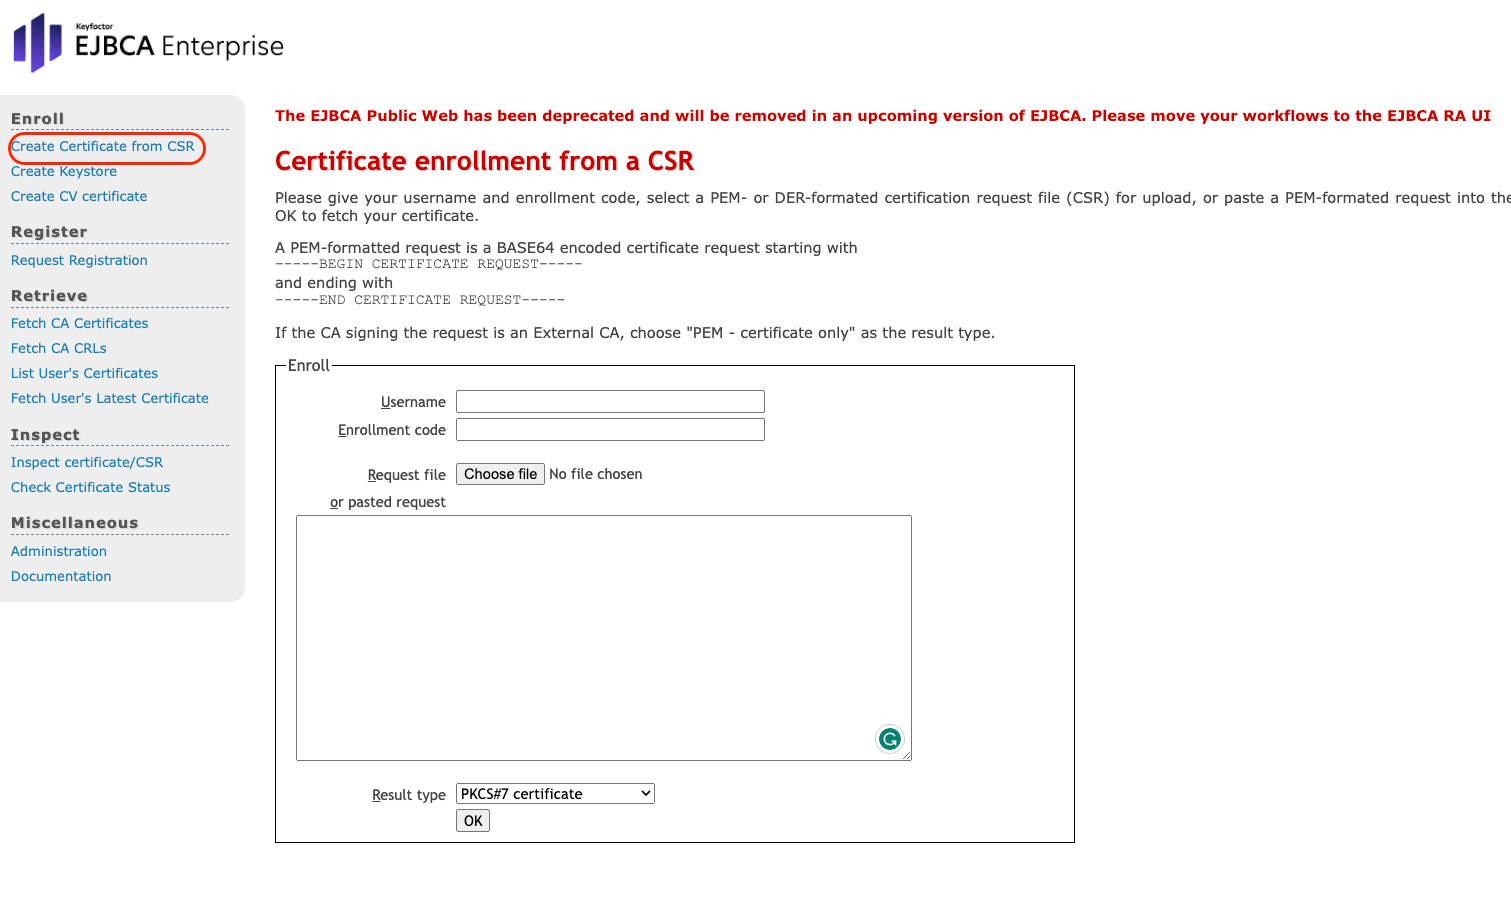
- Enter Username and Enrollment code provided in the above step
- Click
Choose file-> SelectDomainControllerCertRequest-<hostname>.reqgenerated from Step 7 - Choose
PKCS#7 certificateinResult type - Click
OK - After completing the previous step, a p7b certificate file will be generated. If the file does not download automatically, you can download it manually
Step 9: Install and publish the certificate on each Domain Controller
Now that you have the .p7b certificate file acquired from the previous step, you can proceed with installing the certificate
- On Domain Controller
- From the Downloaded scripts, Run
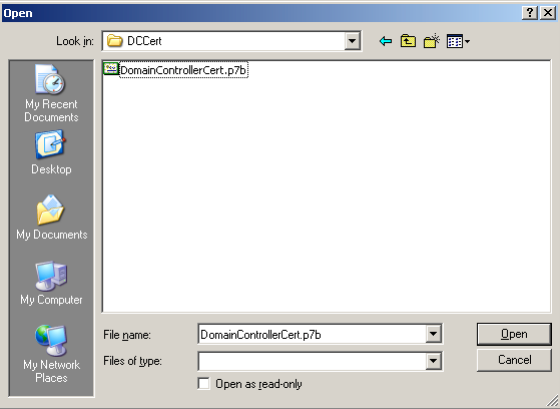
InstallDomainControllerCert.vbsscript file. - Select
.p7bcertificate file when prompted for the DC certificate and clickOpen. This will take some time to process.
- Click
OK
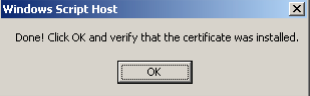
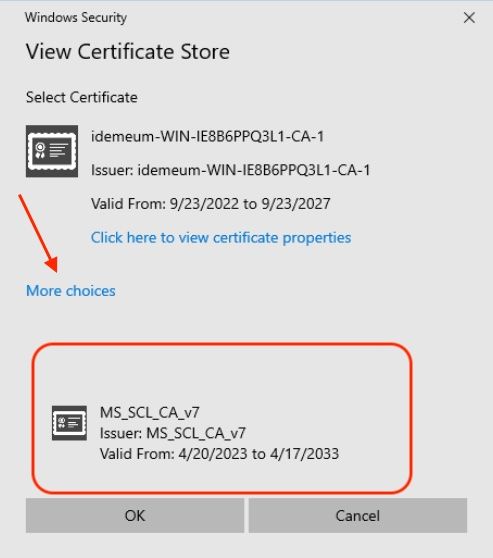
- The certificate should be displayed if everything goes fine. Click on
More choicesit to verify the list if there are multiple.

- Click
Cancelpost verification to close the window
Step 10: Fetch the CA certificate
- Login to EJBCA Administration GUI
- Click
Public Web - Click
Retrieve->Fetch CA Certificates
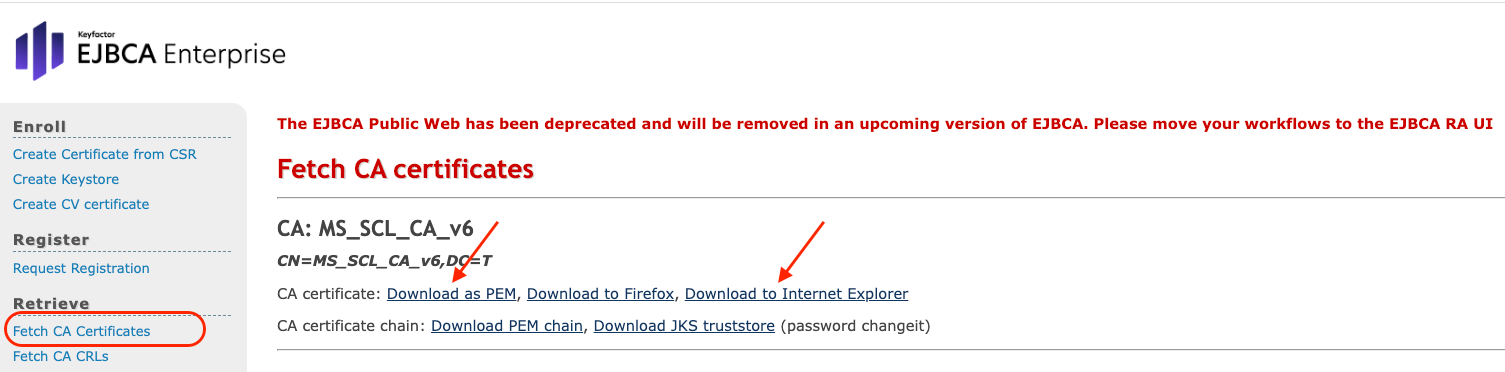
- Click
Download as PEM: This downloads<ca>.pemfile - Click
Download to Internet Explorer: This downloads<ca>.crtfile
Step 11: Import the CA certificate to the "Enterprise NTAuth store"
- On Domain Controller
- From the Downloaded scripts, Run
ImportCACertToNTAuthStore.vbsscript file. - Select the CA certificate
<ca>.pemwhen prompted. This will take some time to process
- Click
OK - The certificate should be displayed if everything goes fine. Click on
More choicesit to verify the list if there are multiple.
- Click
Cancelpost verification to close the window
Step 12 a: Push CA certificate to all clients - Add the CA certificate to the Domain Security Policy
- On Domain Controller
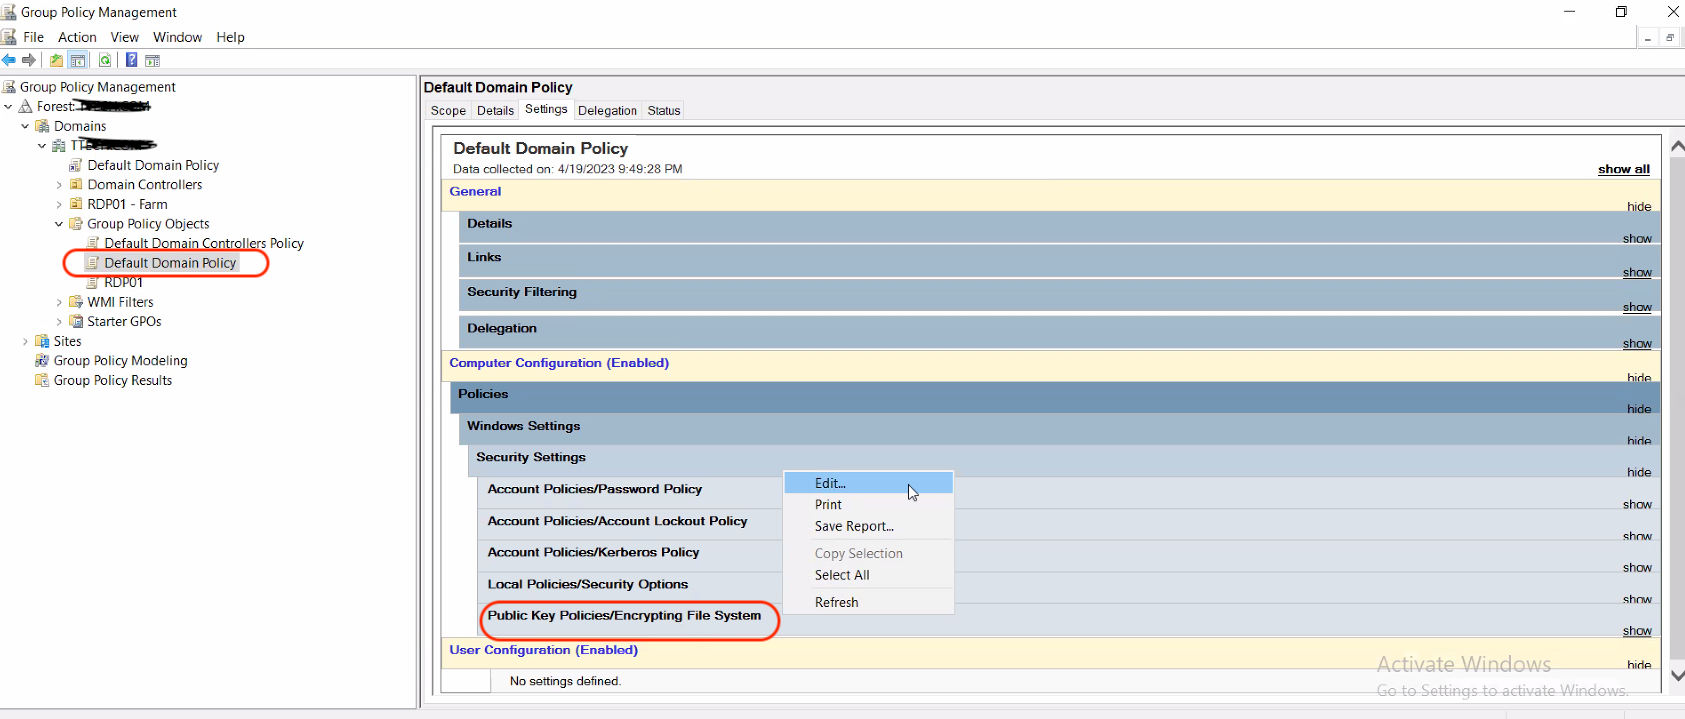
- Start → Administrative Tools → Group Policy Management
- Domains → Choose your Domain → Group Policy Objects → Default Domain Policy → Settings tab → Computer configuration → Polices → Windows Settings → Security Settings → Public Key Policies/Encrypting File System
- Right Click →
Edit...
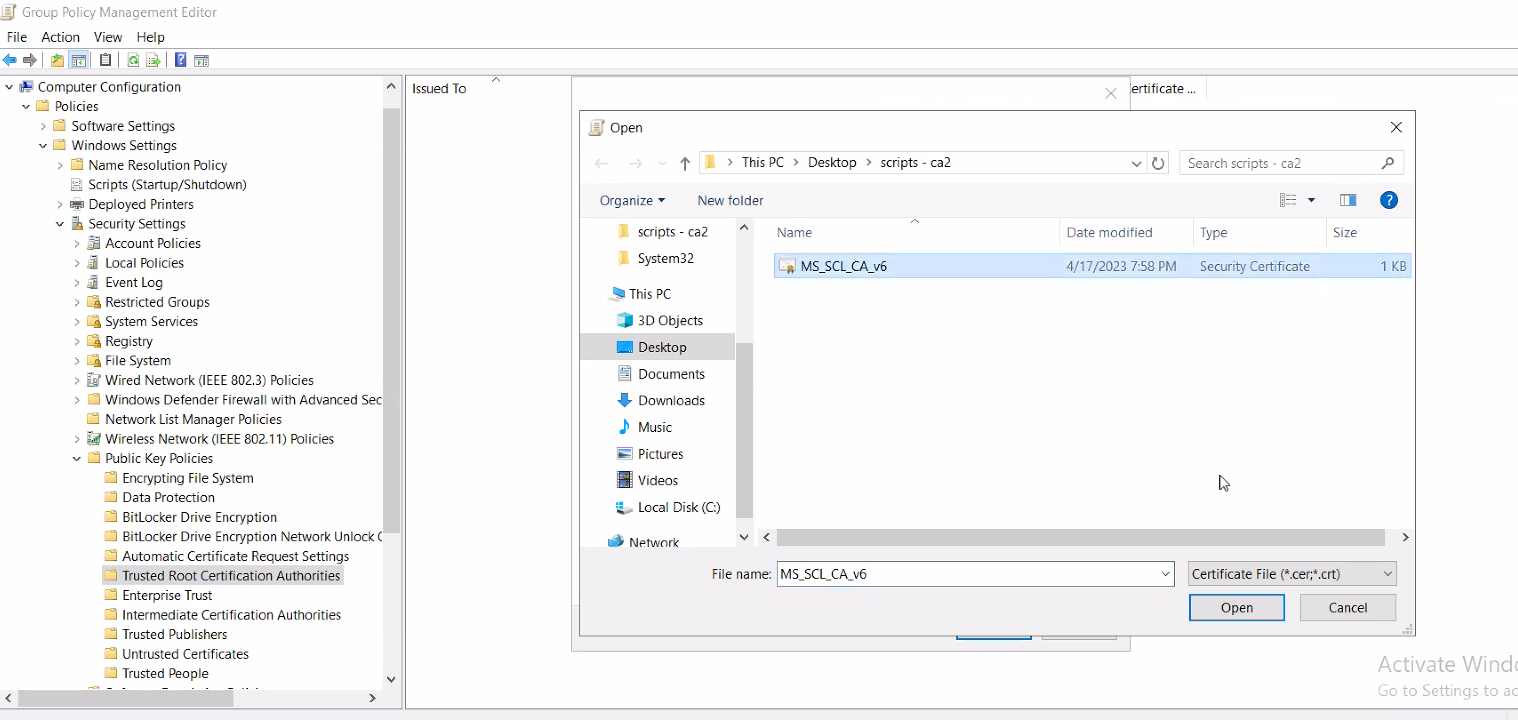
- Navigate to Computer Configuration → Windows Settings → Security Settings → Public Key Policies → Trusted Root Certification Authorities
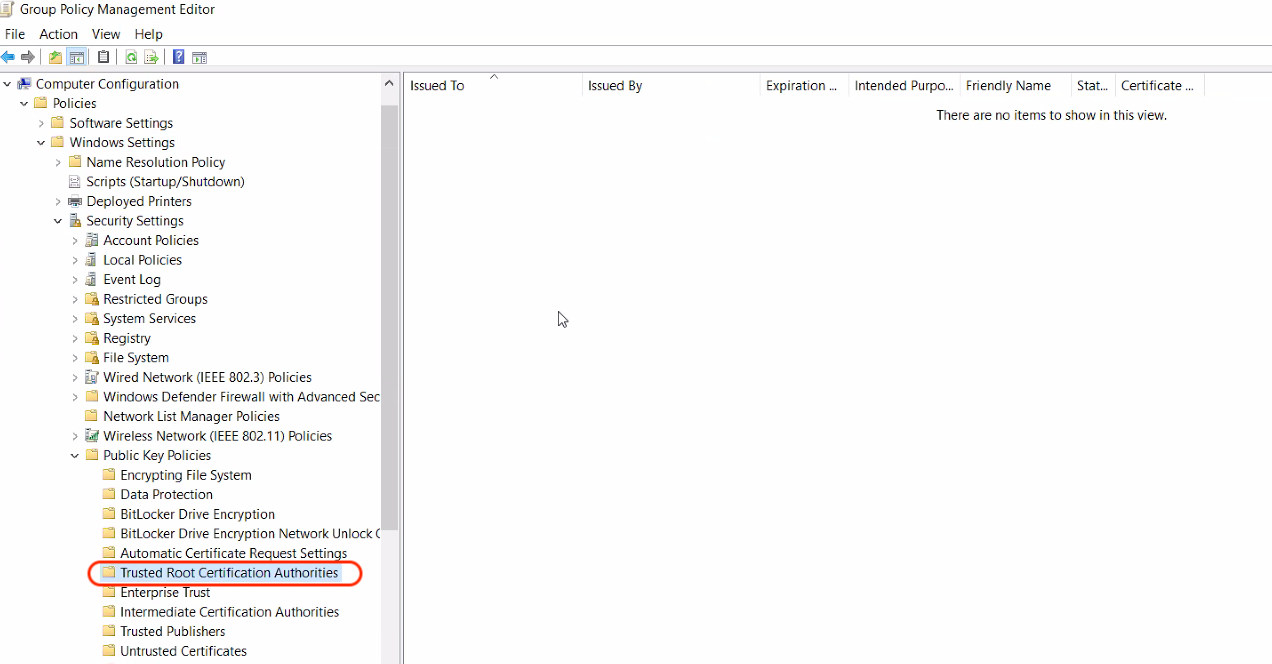
- Right Click ->
Import - Select
<ca>.crtdownloaded from the previous step and continue with the remaining steps as guided.
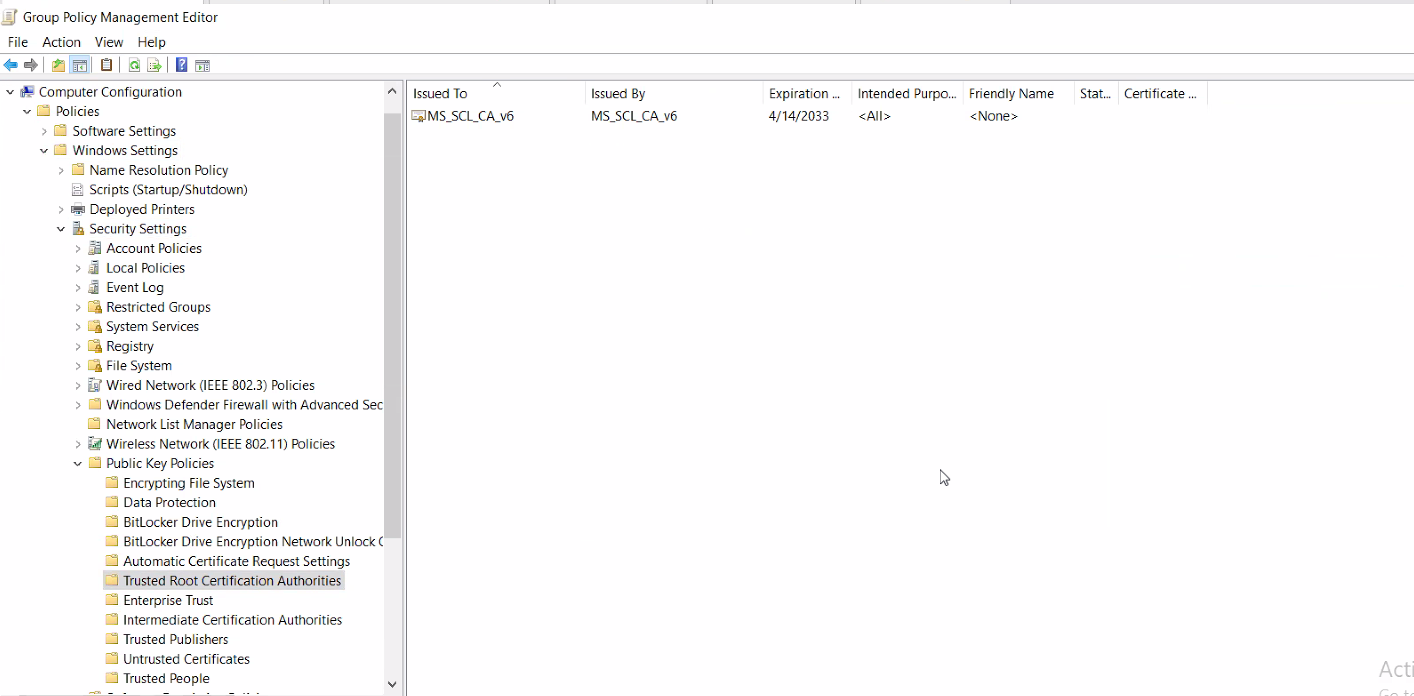
- Verify the confirmation window
The import was successful. The certificate should be displayed if everything goes fine.
Step 12 b: Push CA certificate to all clients - Install the certificate on every client machine
- On client machine
- This should happen automatically every 8 hours. To force the update, run
"gpupdate /force"on the client(s).
Step 13: Retrieve the Keystore file and Keystore password for ReST API authentication
- Ask the EJBCA admin to provide the keystore details for executing user certificate enrollment API.
 idemeum team
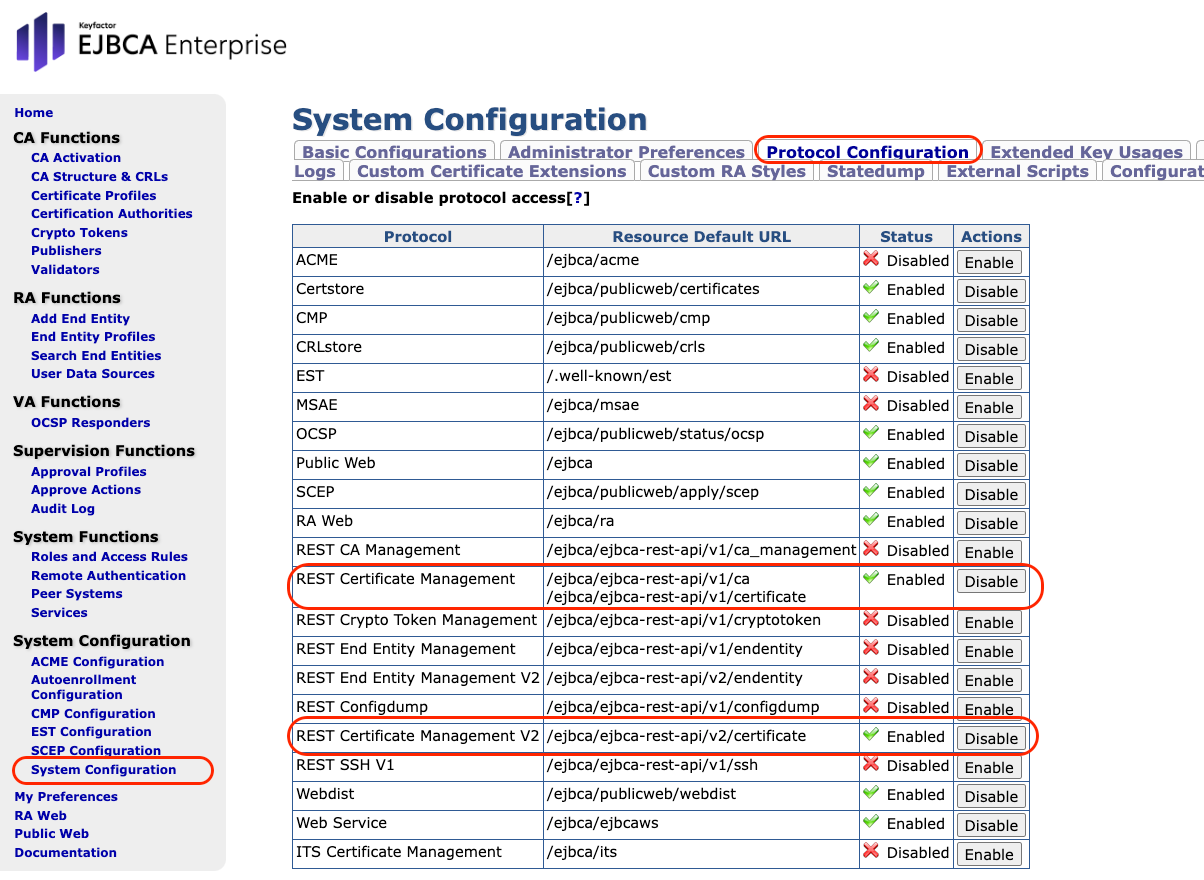
Step 14: Enable ReST API for certificate management
- Login to EJBCA Administration GUI
- Click
System Configuration->Protocol Configurationtab - Enable
REST Certificate Management&REST Certificate Management V2
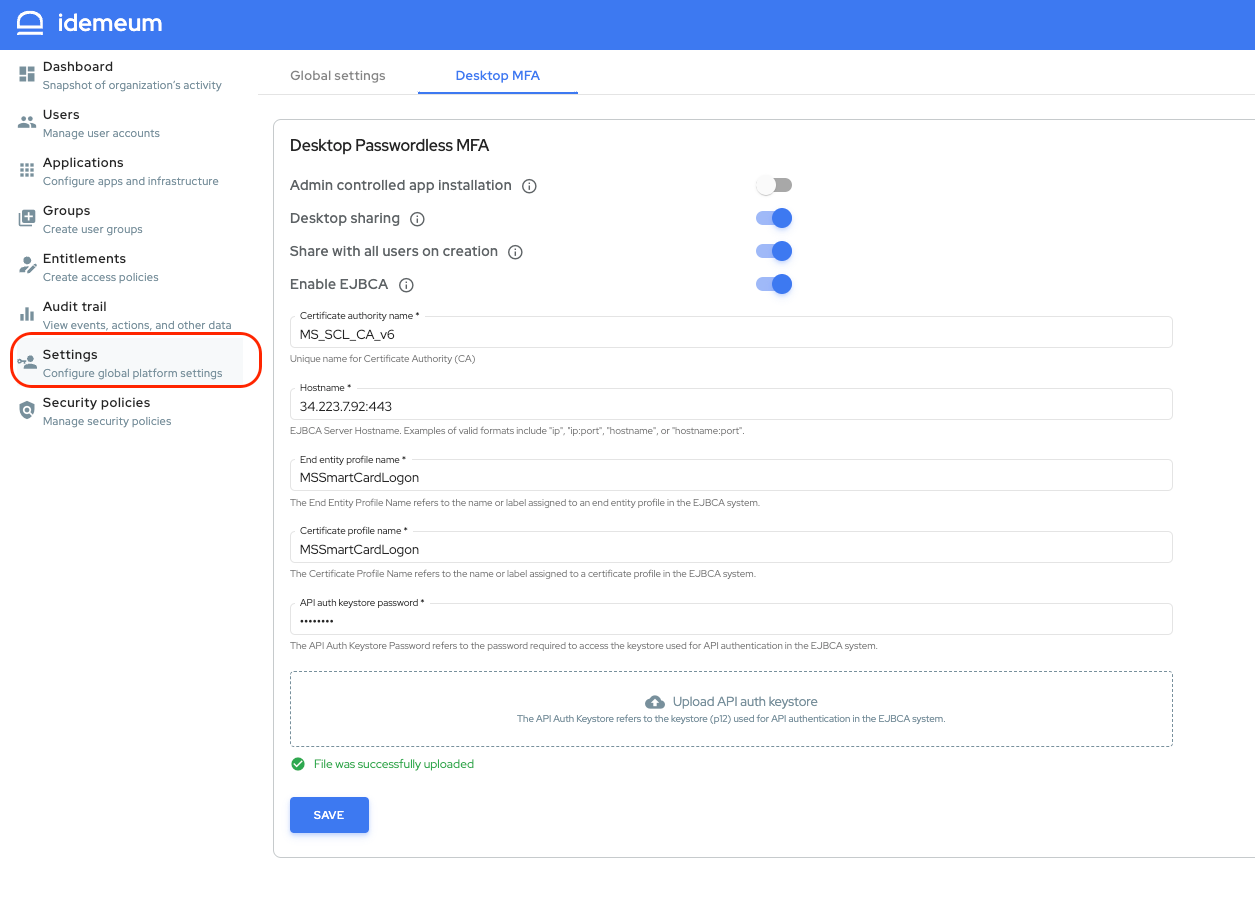
How to enable EJBCA in idemeum
- Navigate to the Admin portal
/adminportal - Click
Settings->Desktop MFAtab - Click Enable EJBCA
- Enter CA name in
Certificate authority namefield - Enter the EJBCA server hostname in
Hostnamefield - Enter the End Entity profile name configured earlier in
End entity profile namefield. As per the profile created earlier, it is "MSSmartCardLogon" - Enter the Certificate profile name configured earlier in
Certificate profile namefield. As per the profile created earlier, it is "MSSmartCardLogon" - For
API auth keystore passwordandAPI auth keystorefields, retrieve the API Auth keystore file (.p12 file) and API Auth keystore password from Step 13. - Click
Save
Validation
Refer below guide to validate all of the above configurations before installing the idemeum Desktop app.
idemeum team