
Capabilities overview
Sentry is a performance monitoring software that helps every developer diagnose, fix, and optimize the performance of their code.
| Supported capability | Required plan | Details |
|---|---|---|
| Passwordless SSO | Business plan | Medium SSO tax |
| Automated provisioning | Business plan | SCIM 2.0 (create, remove, update accounts) |
| Password manager | Any | Auto-fill / Auto-capture |
Prerequisites
To configure SSO integration between Sentry and idemeum you will need to obtain SAML XML metadata values for your idemeum tenant. Specifically, you will need:
- Tenant metadata URL
Instructions for how to obtain metadata values are below.
How to obtain SAML metadata for idemeum
SAML metadata is the data that describes the information needed to communicate between your SaaS application and idemeum in order to enable Single Sign-On. Based on SAML terminology SaaS application is called Service Provider (SP) and idemeum will be Identity Provider (IDP). Typically you will be a…
 idemeum team
Passwordless Single Sign-On (SAML)
Configure SSO in idemeum
- Navigate to your idemeum admin portal at https://[your domain].idemeum.com/adminportal
- Click Applications in the left menu
- Search for Sentry application and click Add App
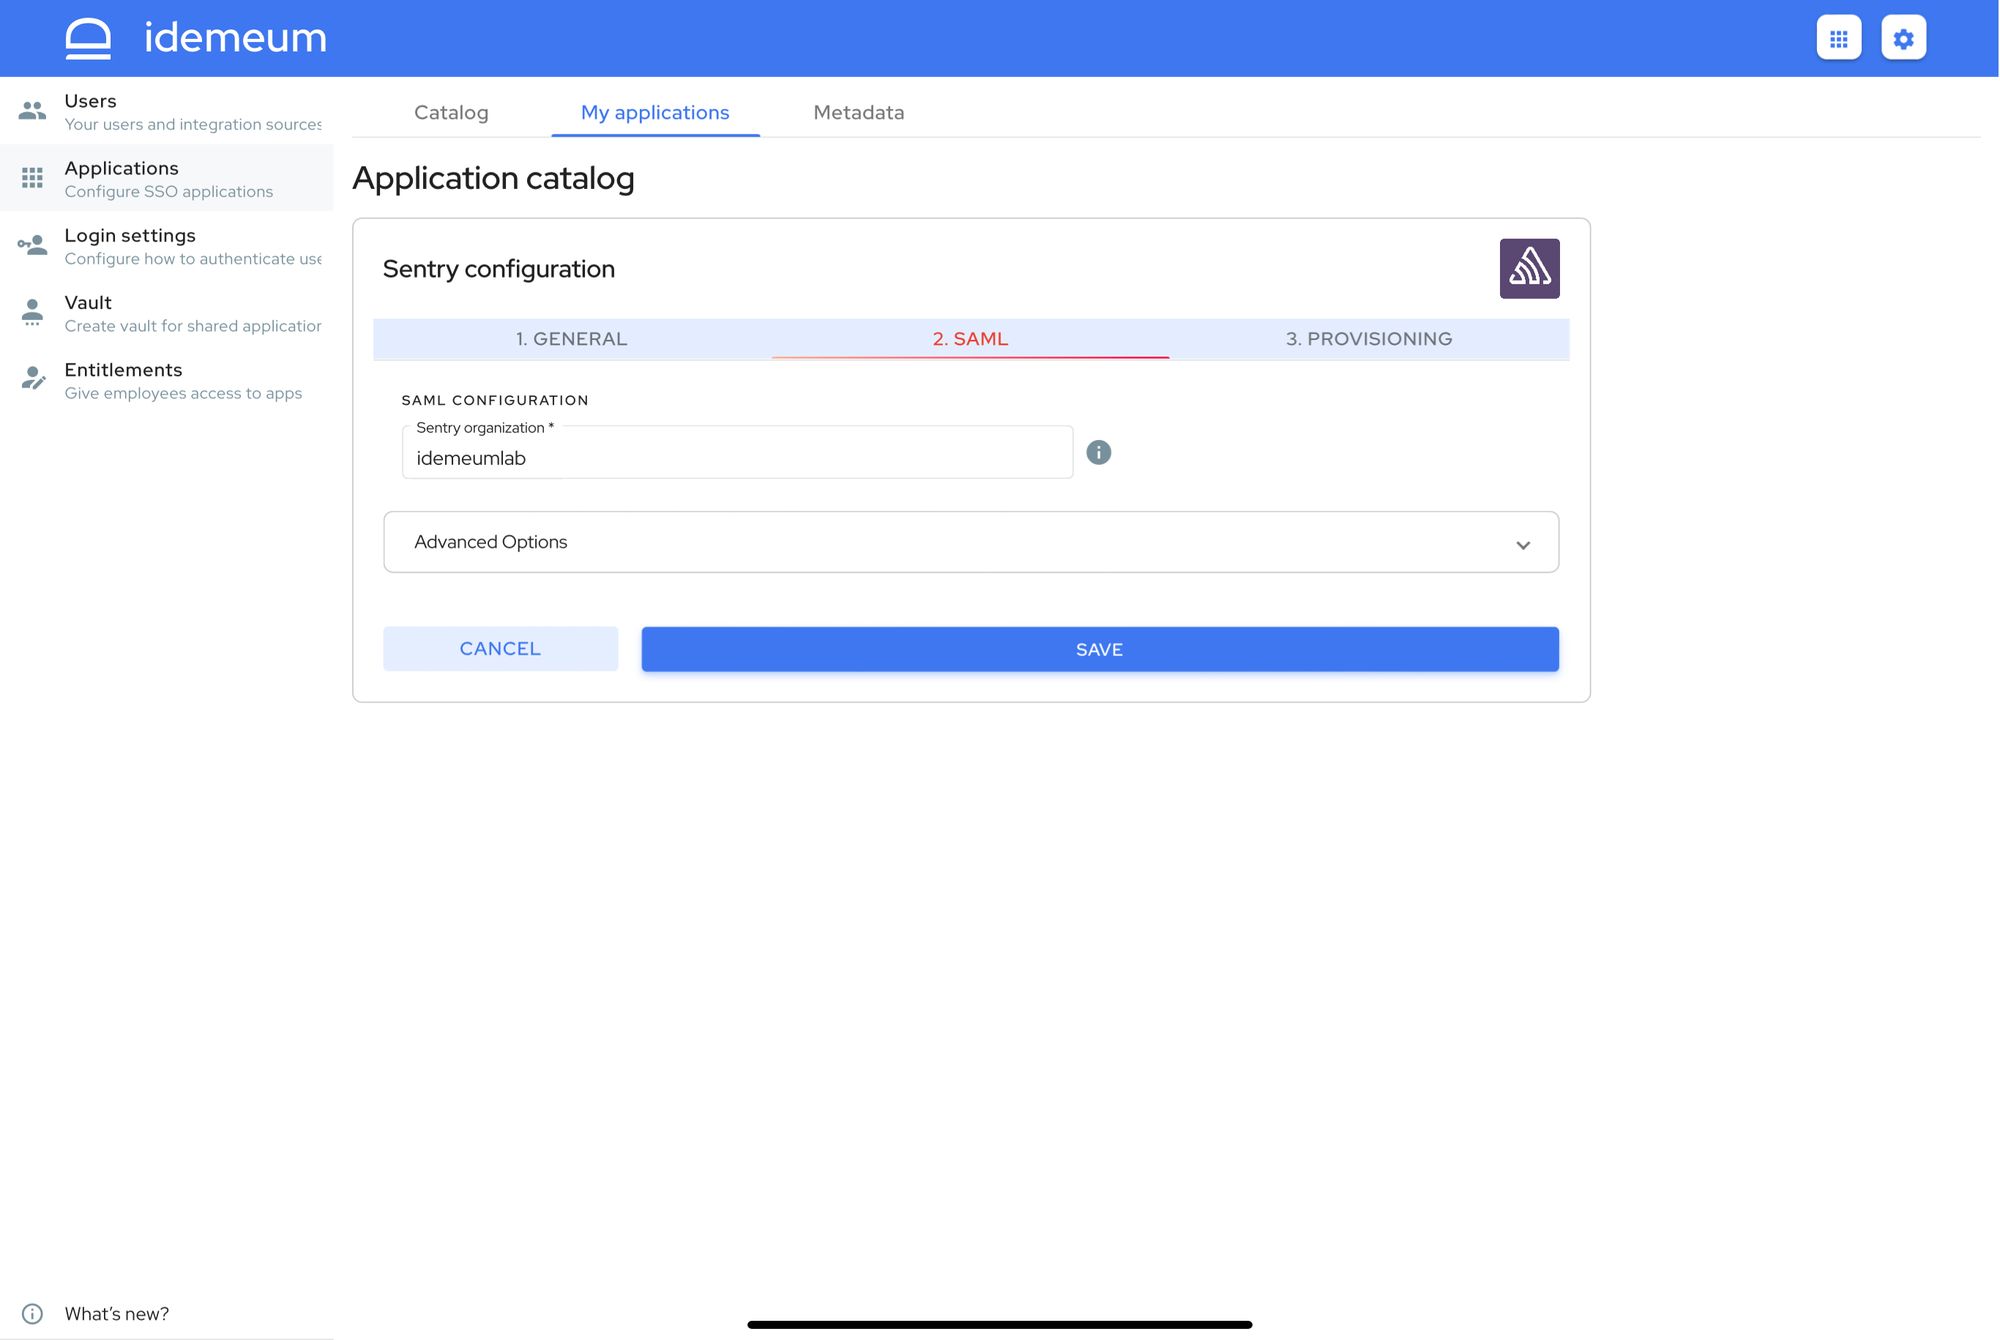
- Click SAML at the top navigation menu
- Enter you sentry organization name
- Click Save
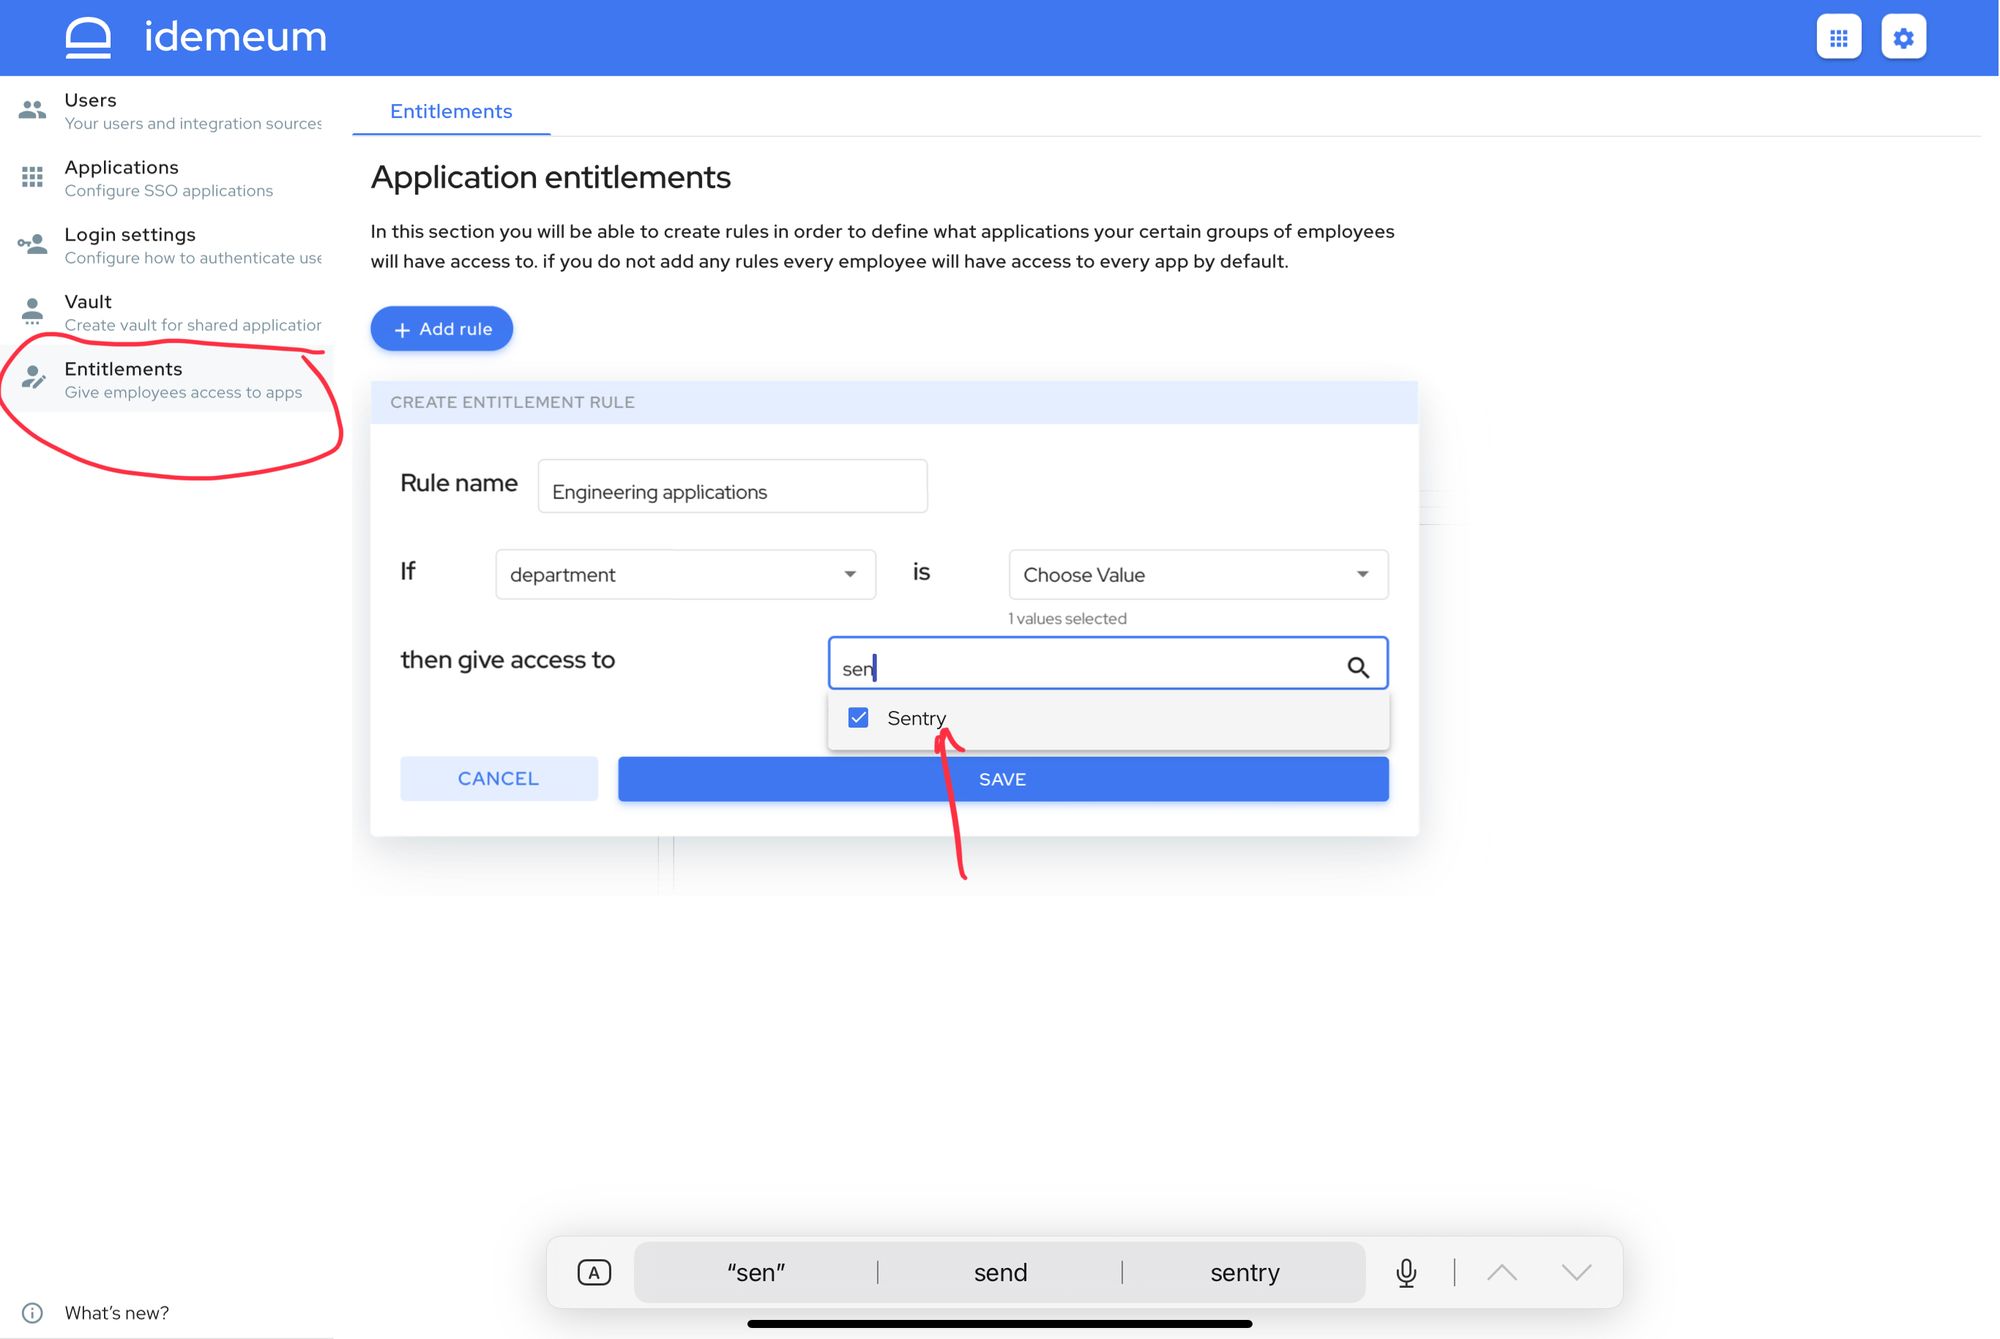
- Now navigate to Entitlements and entitle Sentry to admin account that you are using to set up SSO configuration. You will need that for testing purposes when configuring Sentry in the next section.
Configure SSO in Sentry
- Login to your Sentry admin portal
- Navigate to Settings -> Auth
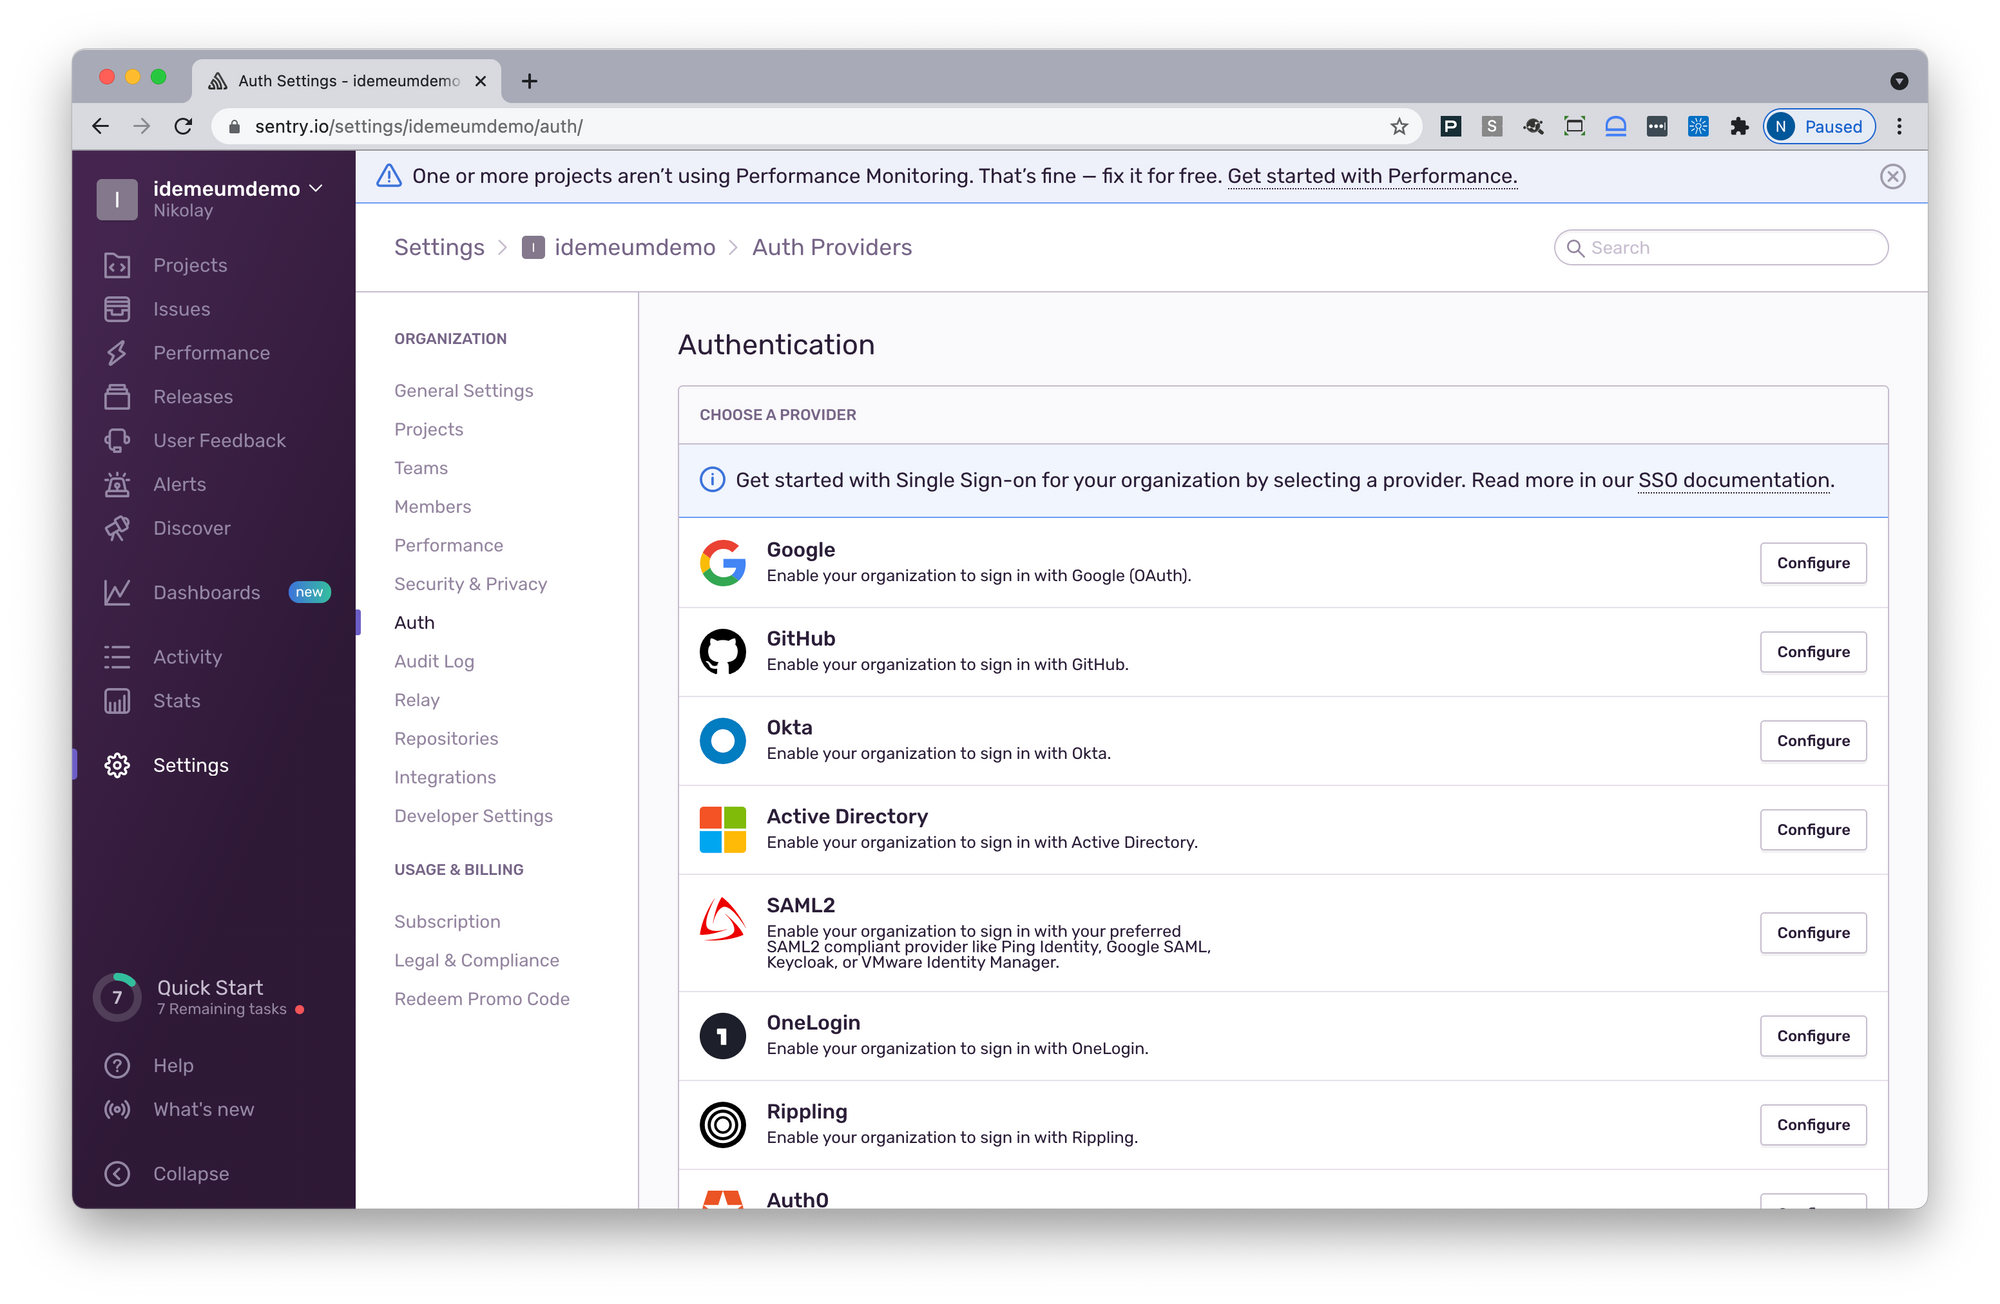
- Choose SAML 2 -> Configure
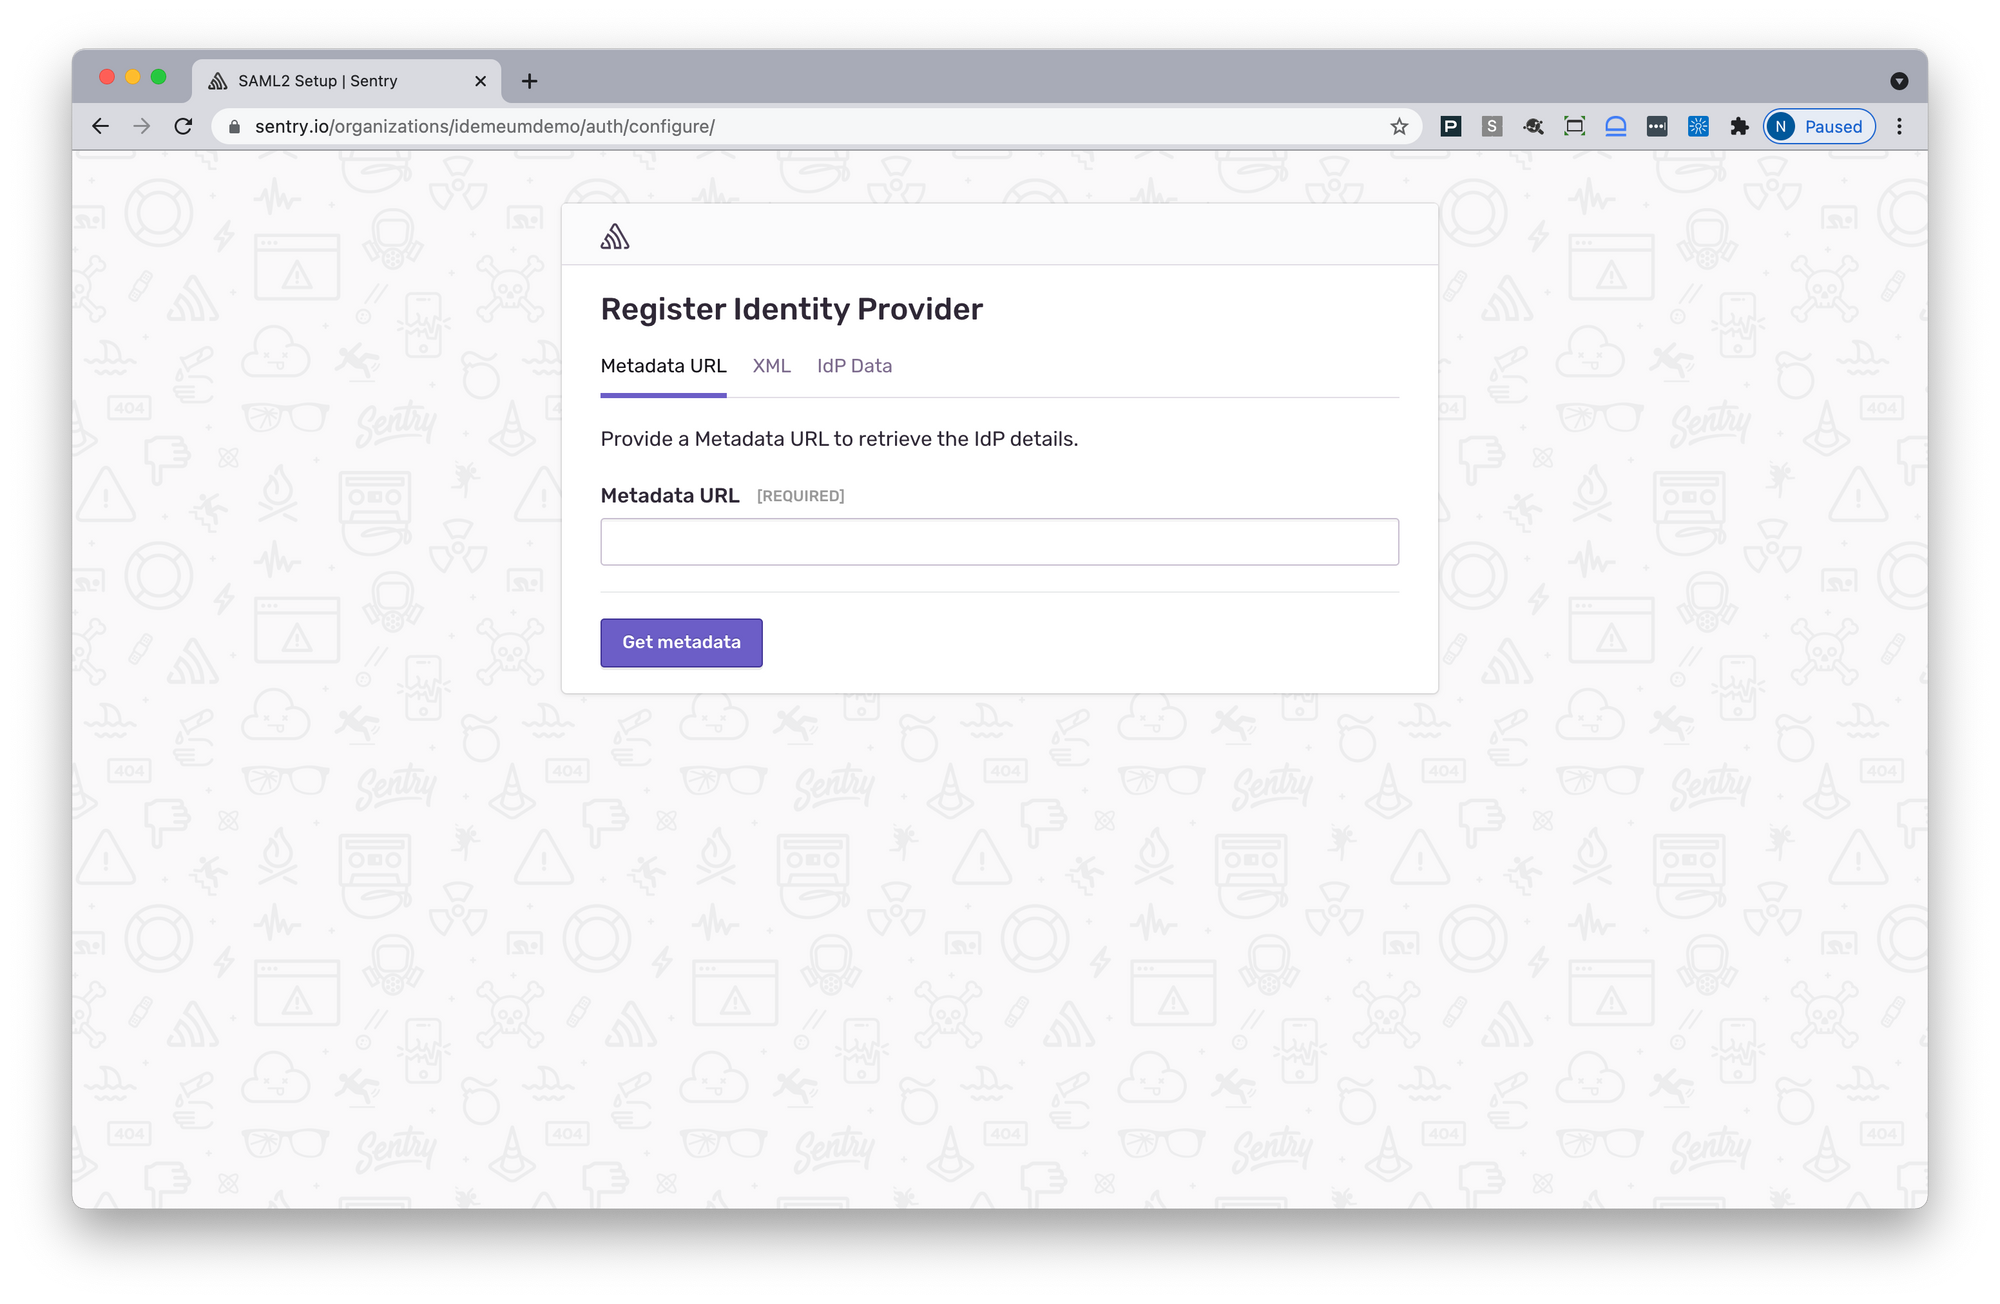
You will now be using the values that you obtained from prerequisites section
- Paste Tenant Metadata URL that you obtained in prerequisites section and click Get Metadata

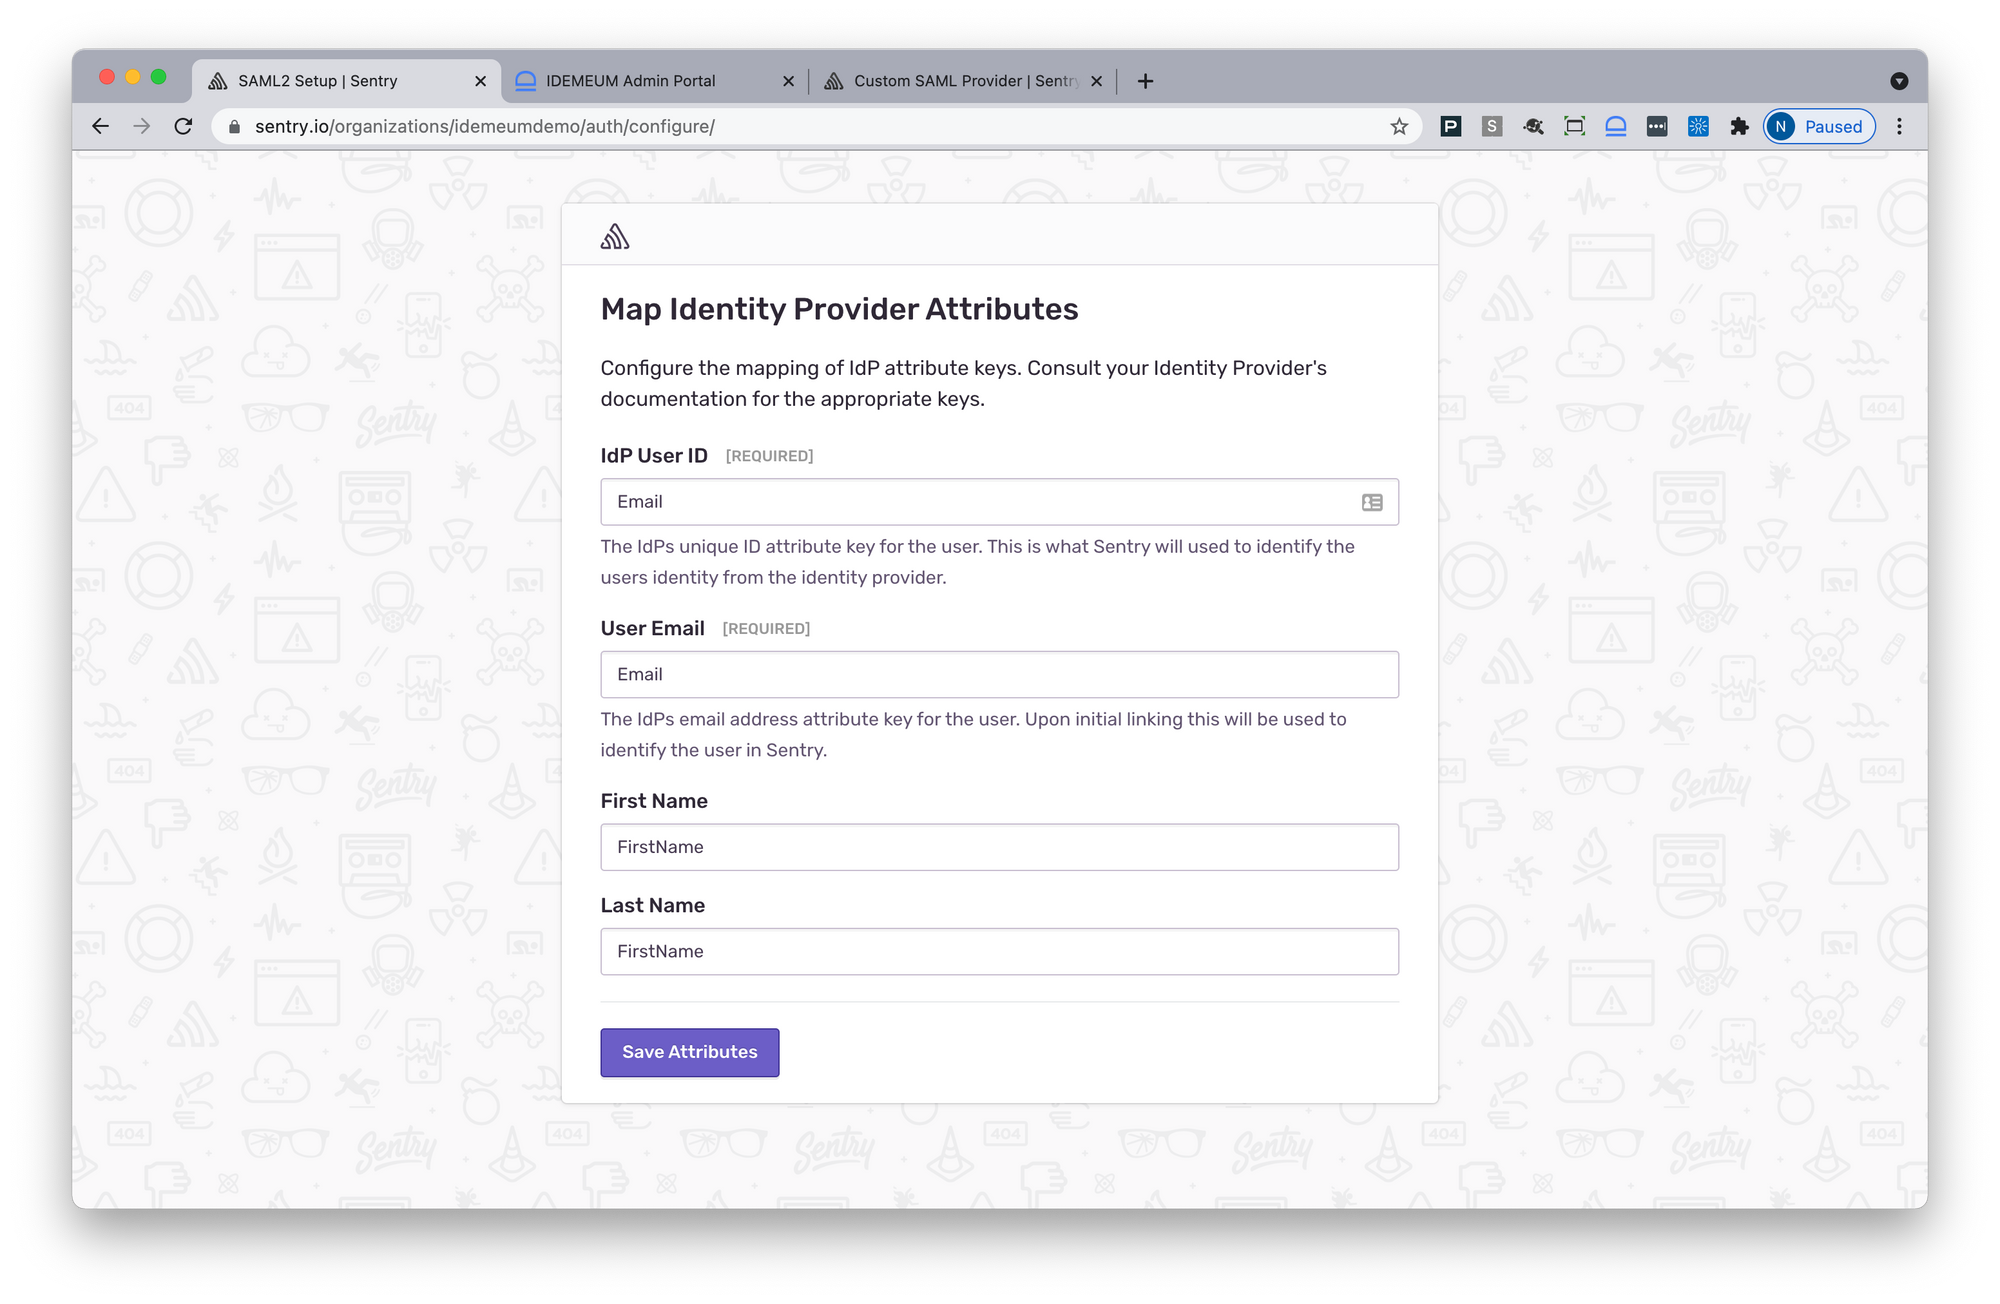
- Type the attribute mappings. These are case sensistive!
- For IdP User ID enter Email
- For User Email enter Email
- For First Name enter FirstName
- For Last Name enter LastName
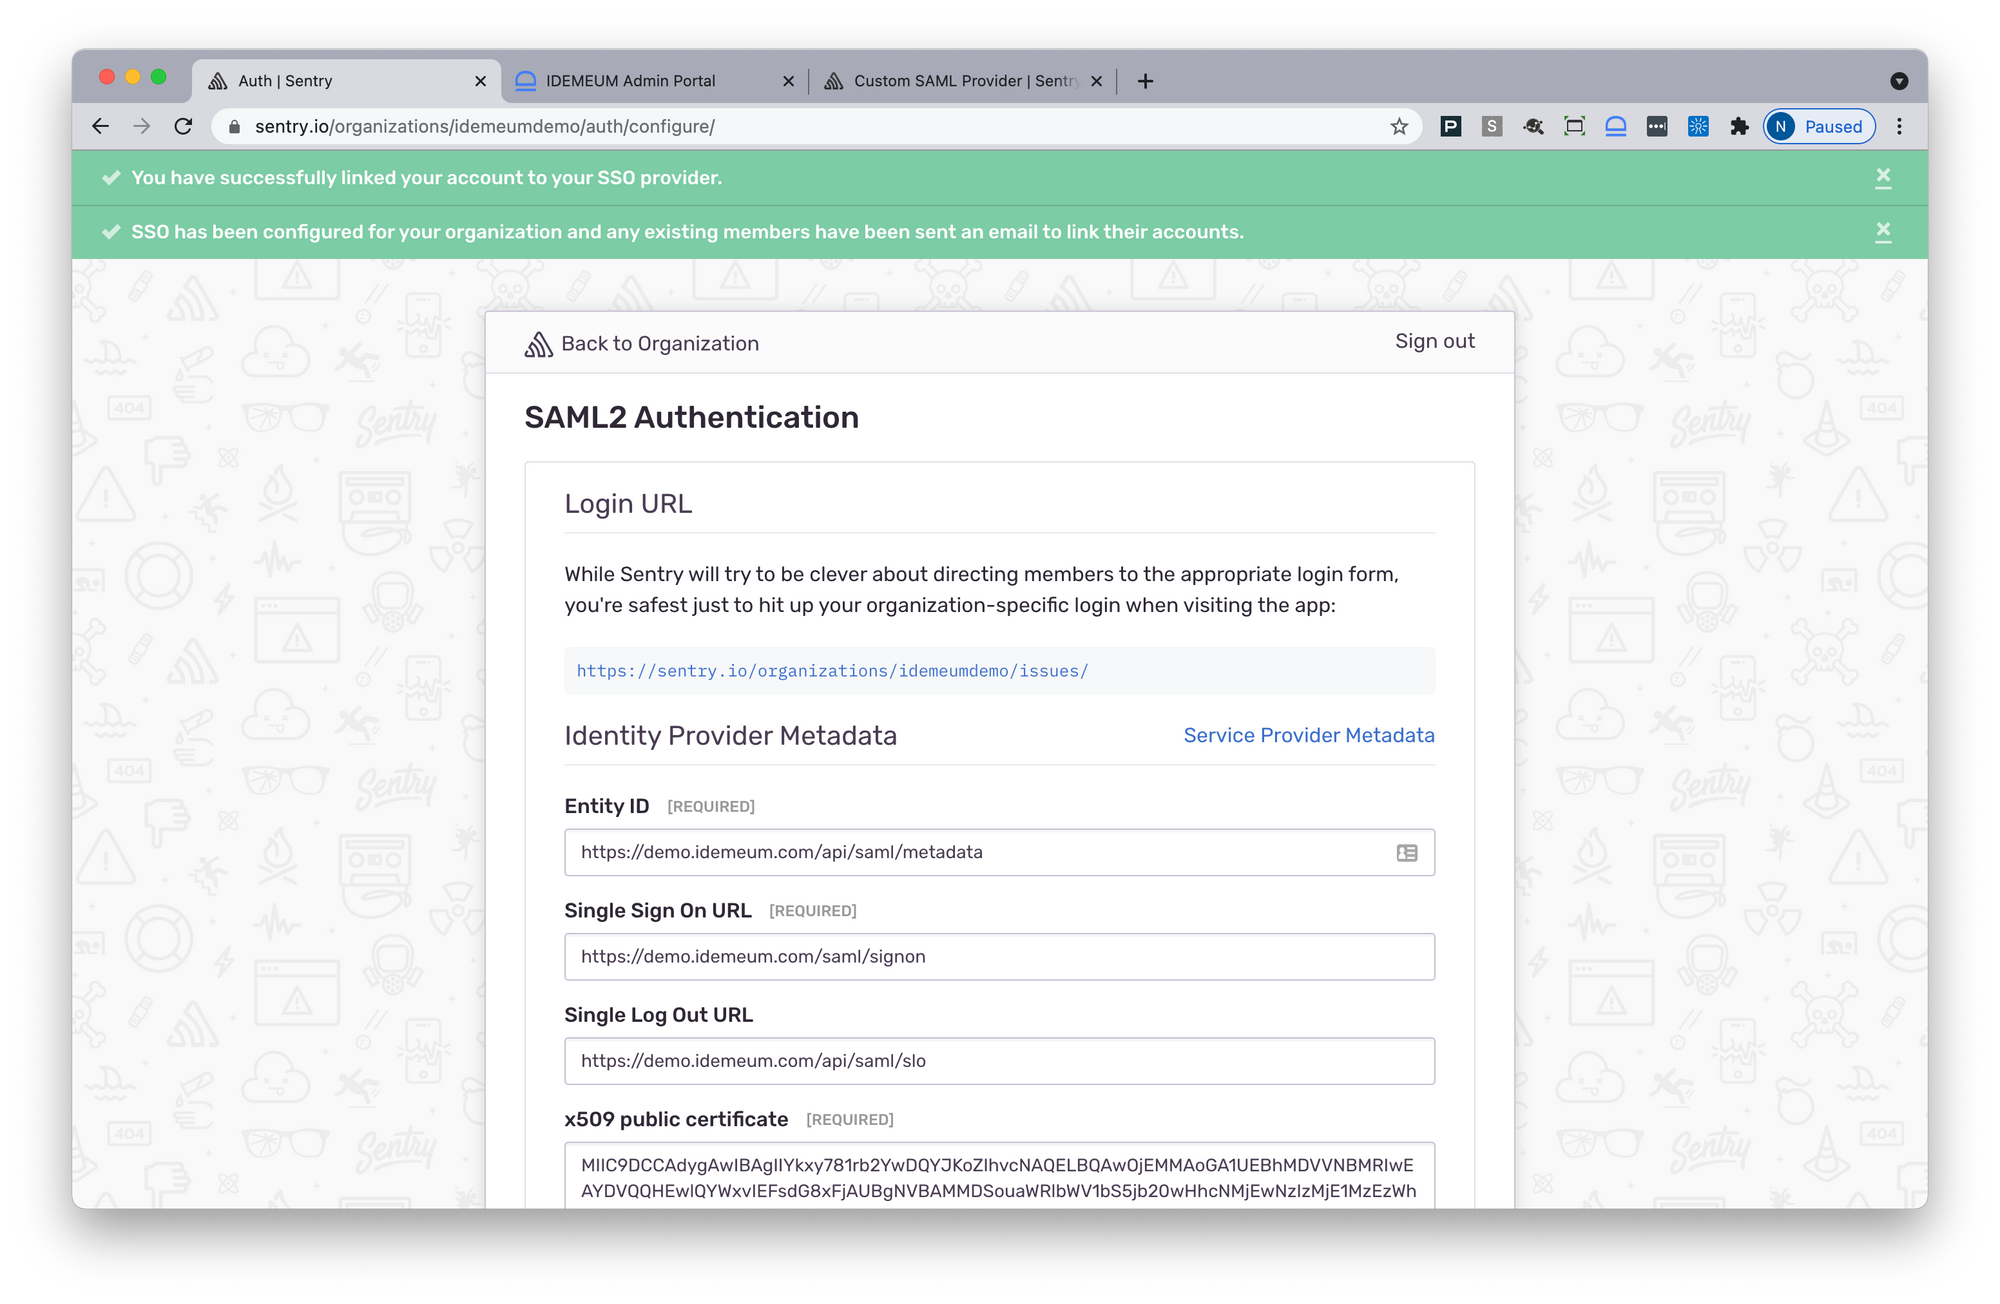
- Sentry will now test the SAML configuration with idemeum. Once you get successful notification you can save the configuration.
Automated provisioning with SCIM
Enable SCIM provisioning in Sentry
- Navigate to Settings -> Auth
- Scroll down to General Settings and click Enable SCIM
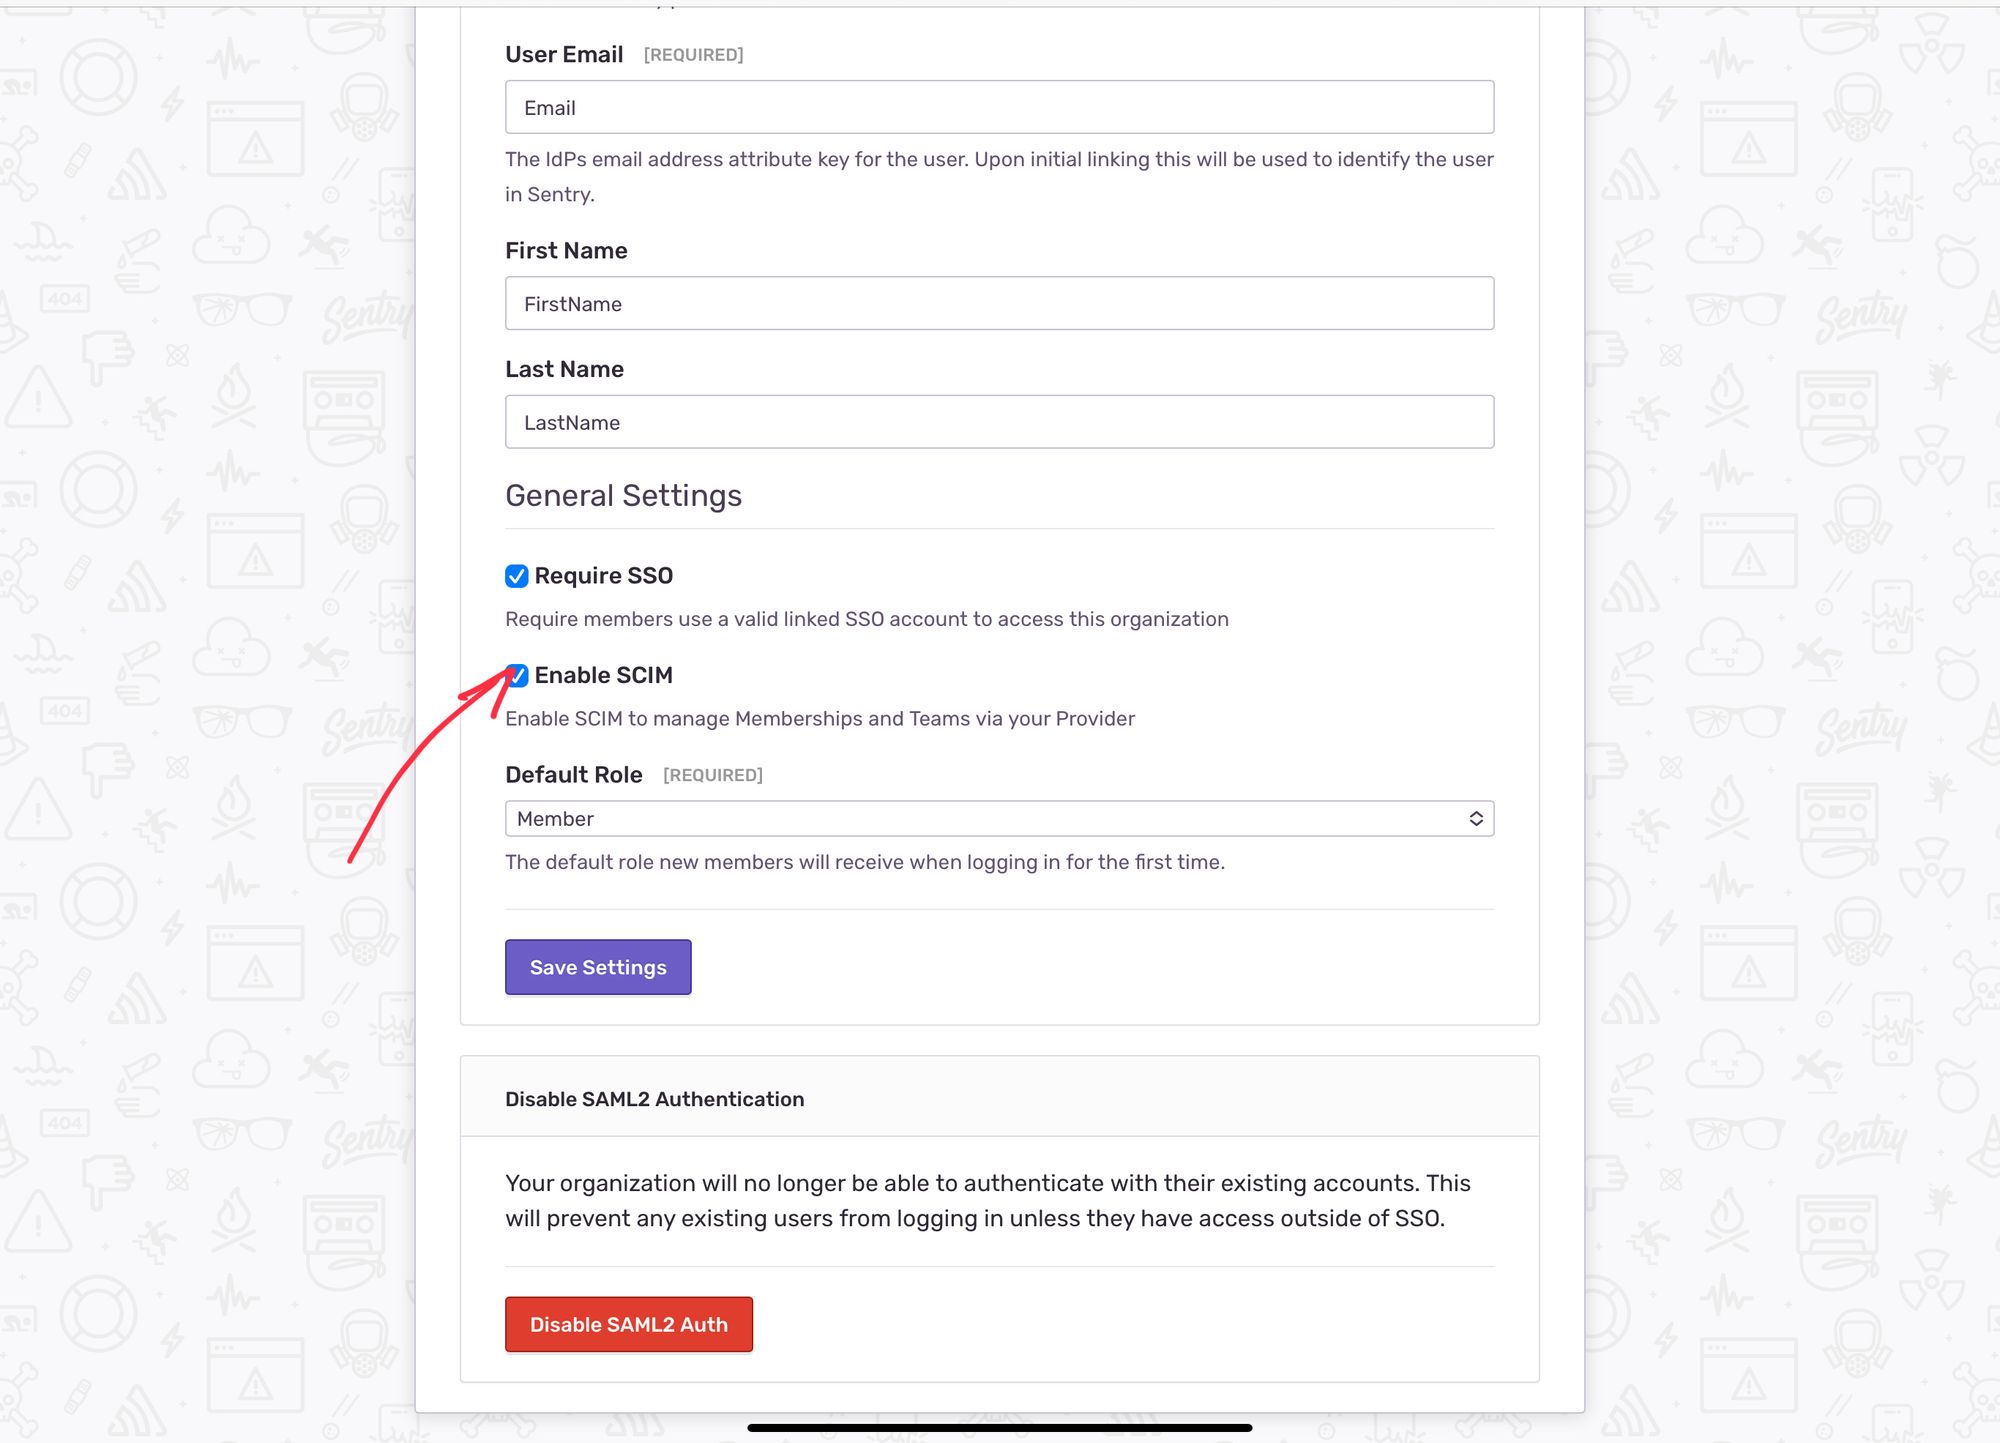
- You can choose the default role that users will be assigned when provisioned with SCIM
- Click Save Settings
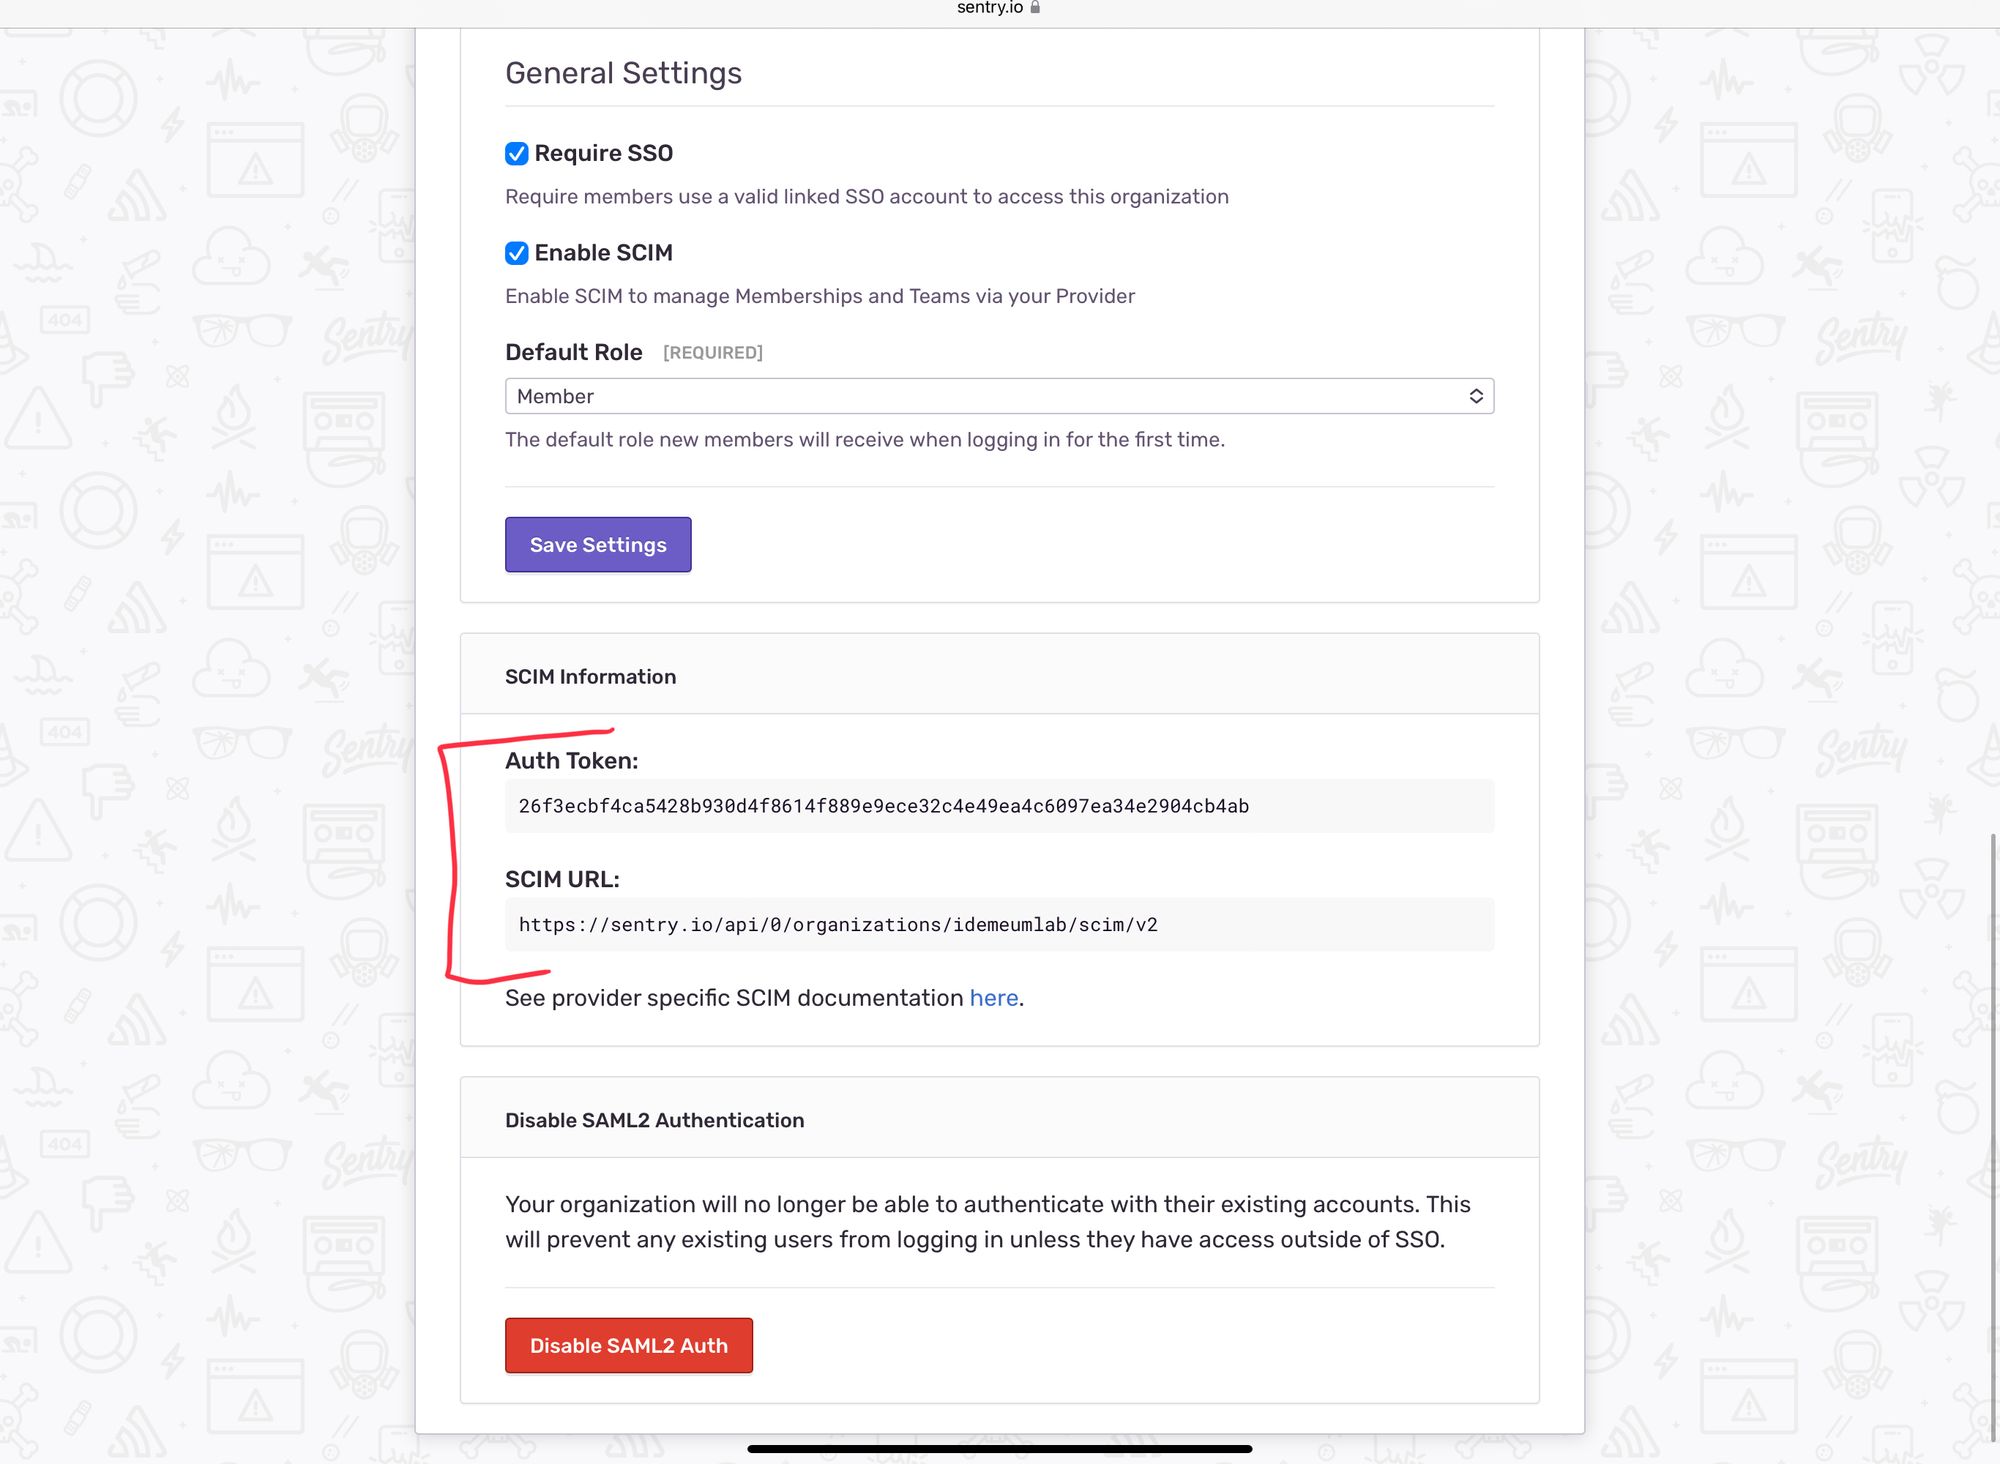
- Once you save the configuration you will be presented with the SCIM configuration options that you will need for idemeum configuration. Copy Auth Token and SCIM URL.
Enable SCIM provisioning in idemeum
- Navigate to your idemeum admin portal at https://[your domain].idemeum.com/adminportal
- Click Applications in the left menu
- Choose My applications
- Click Edit for Sentry application
- Click Provisioning section to configure SCIM provisioning with Sentry. Populate SCIM Base URL and Access Token with the values you obtained in the previous section when enabling provisioning in Sentry.
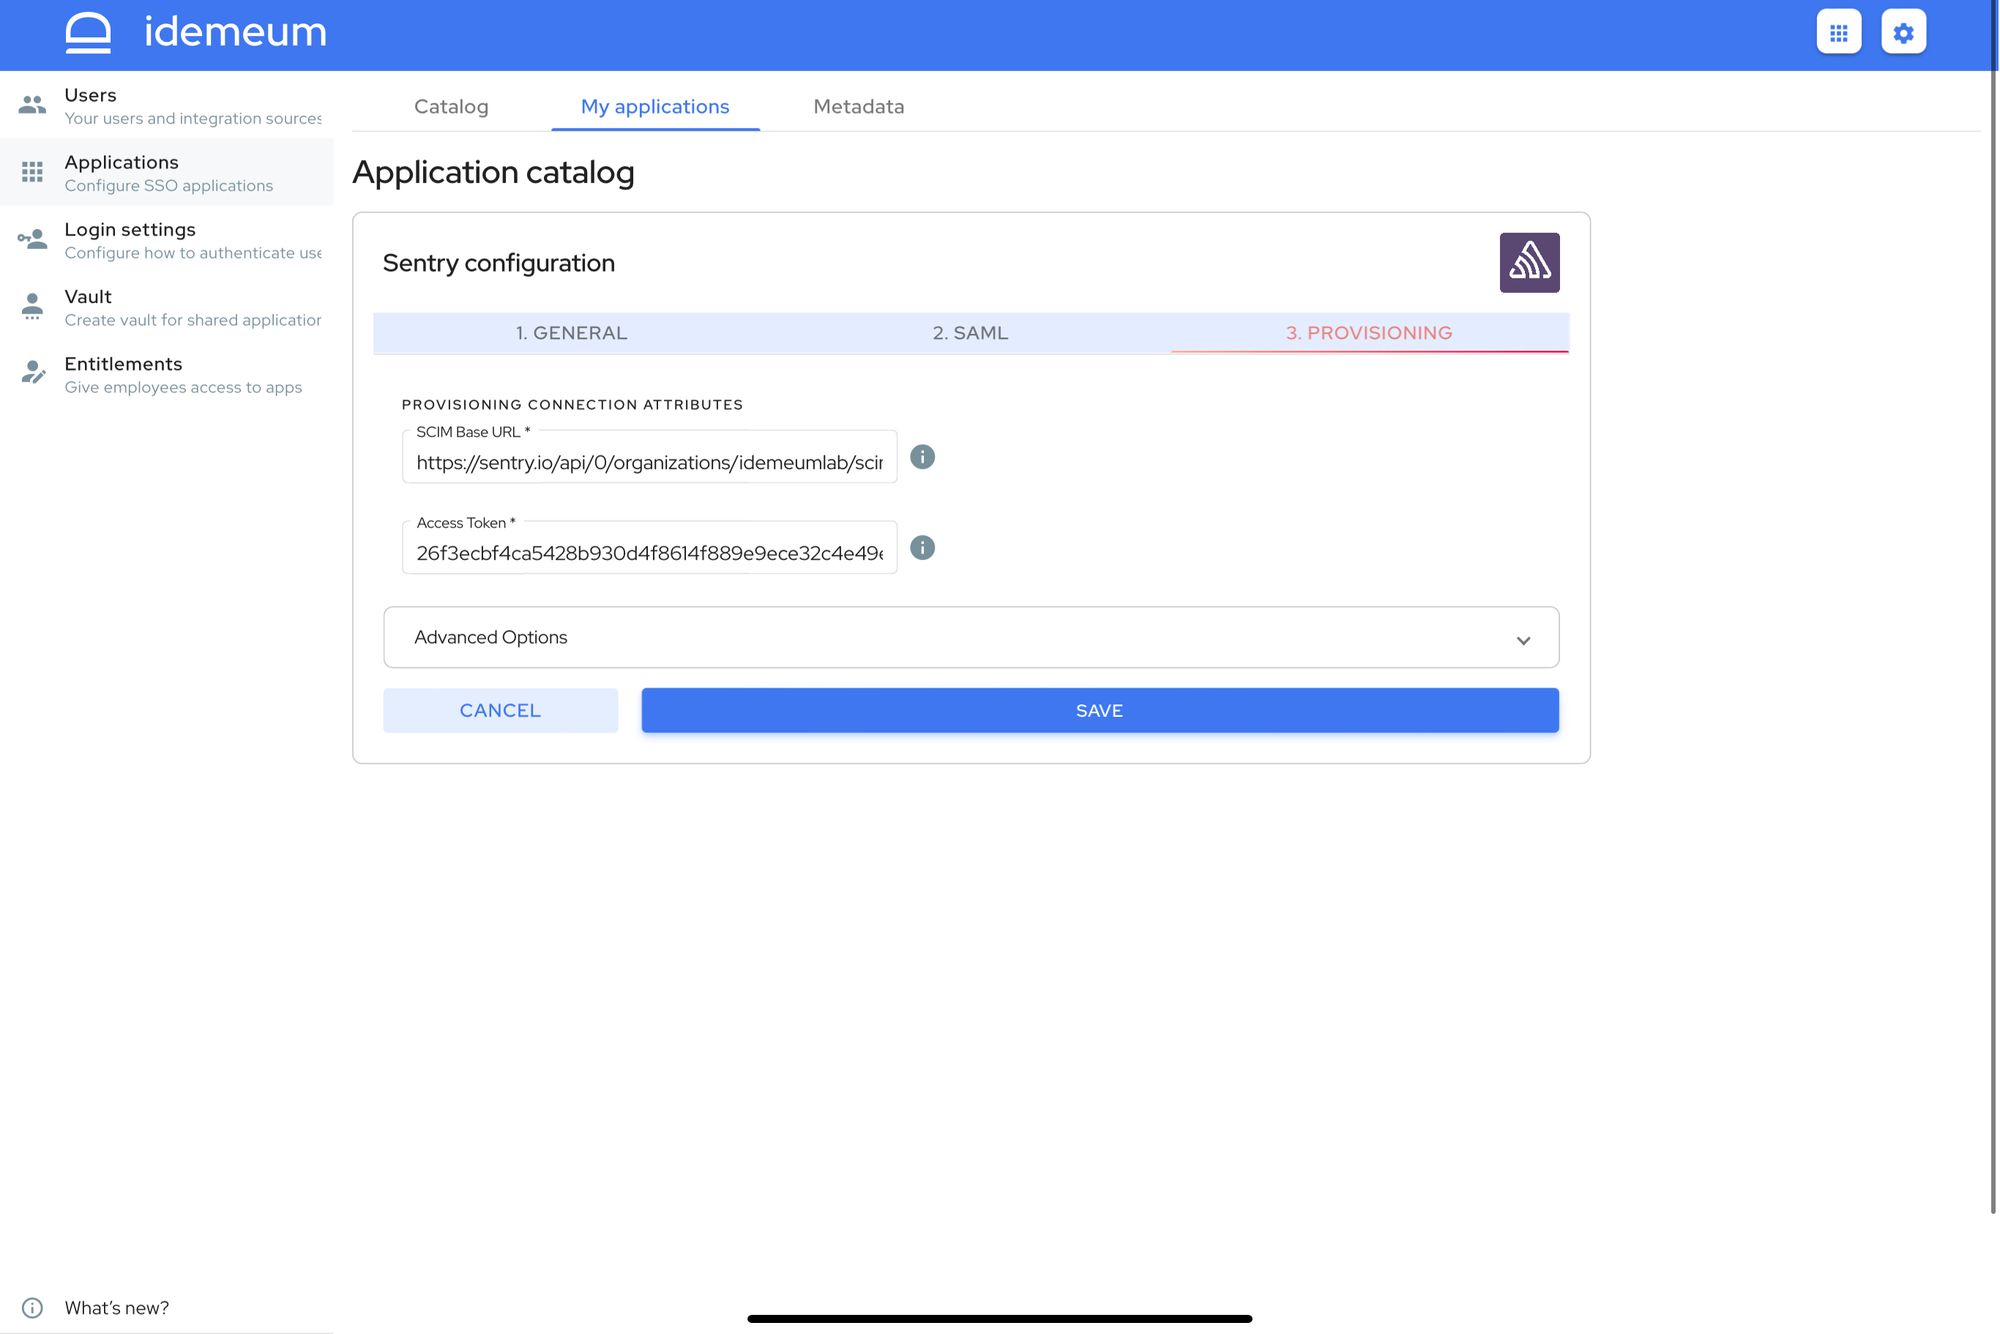
- Click Save
SSO login flows
Sentry supports both IDP Initiated Flow and SP Initiated FlowSP Initiated Flow for SSO.
IDP Initiated flow
With this flow users first navigate to idemeum user catalog and then click on Sentry icon to launch application.
SP Initiated flow
With this flow users can directly go to sentry.io and login with passwordless SSO.
- Go to sentry.io
- Click Sign In
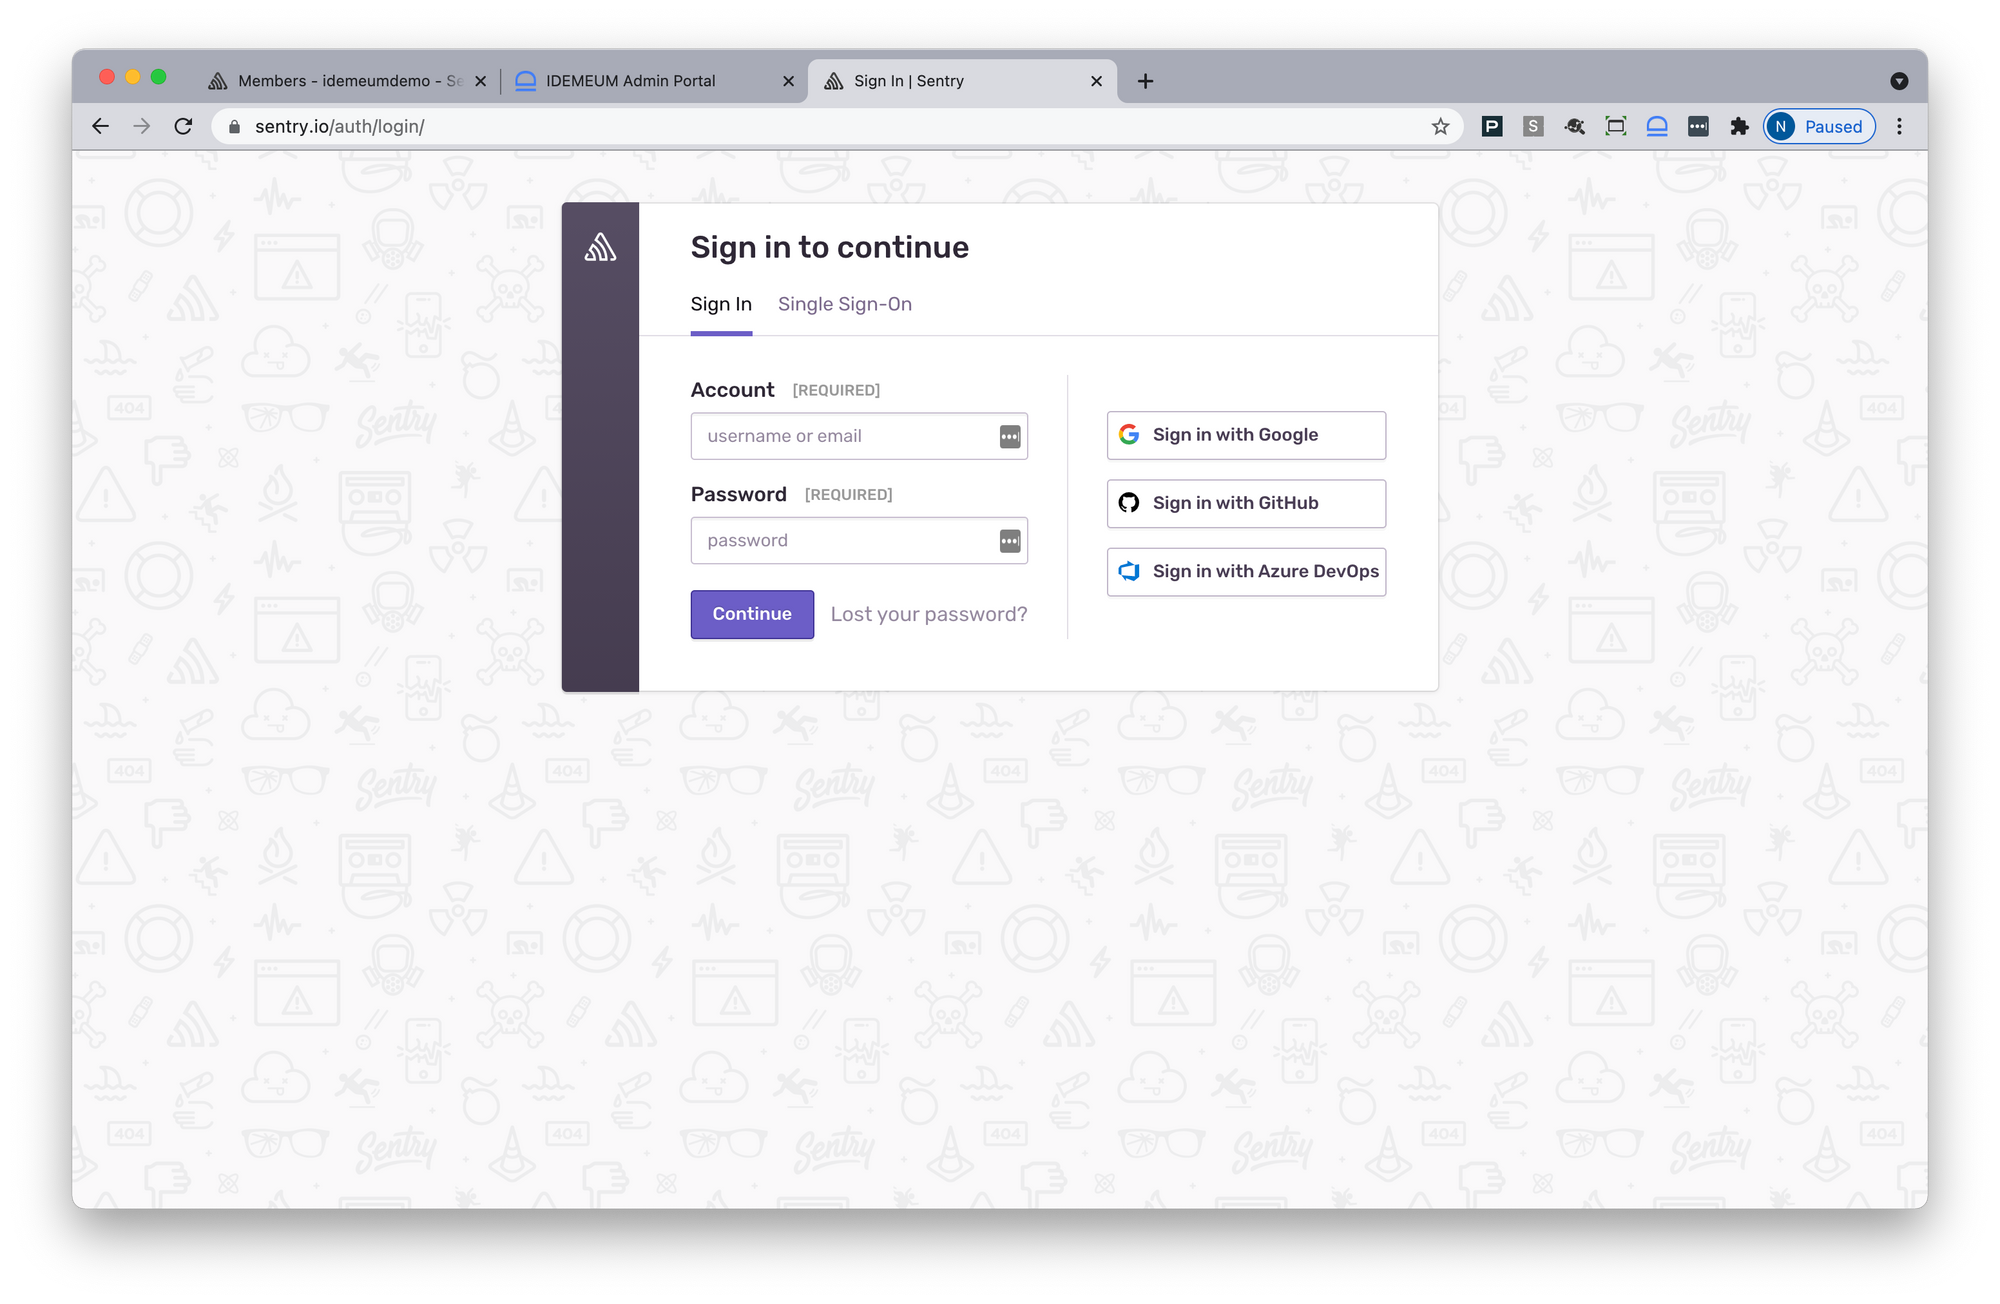
- Click Single Sign On
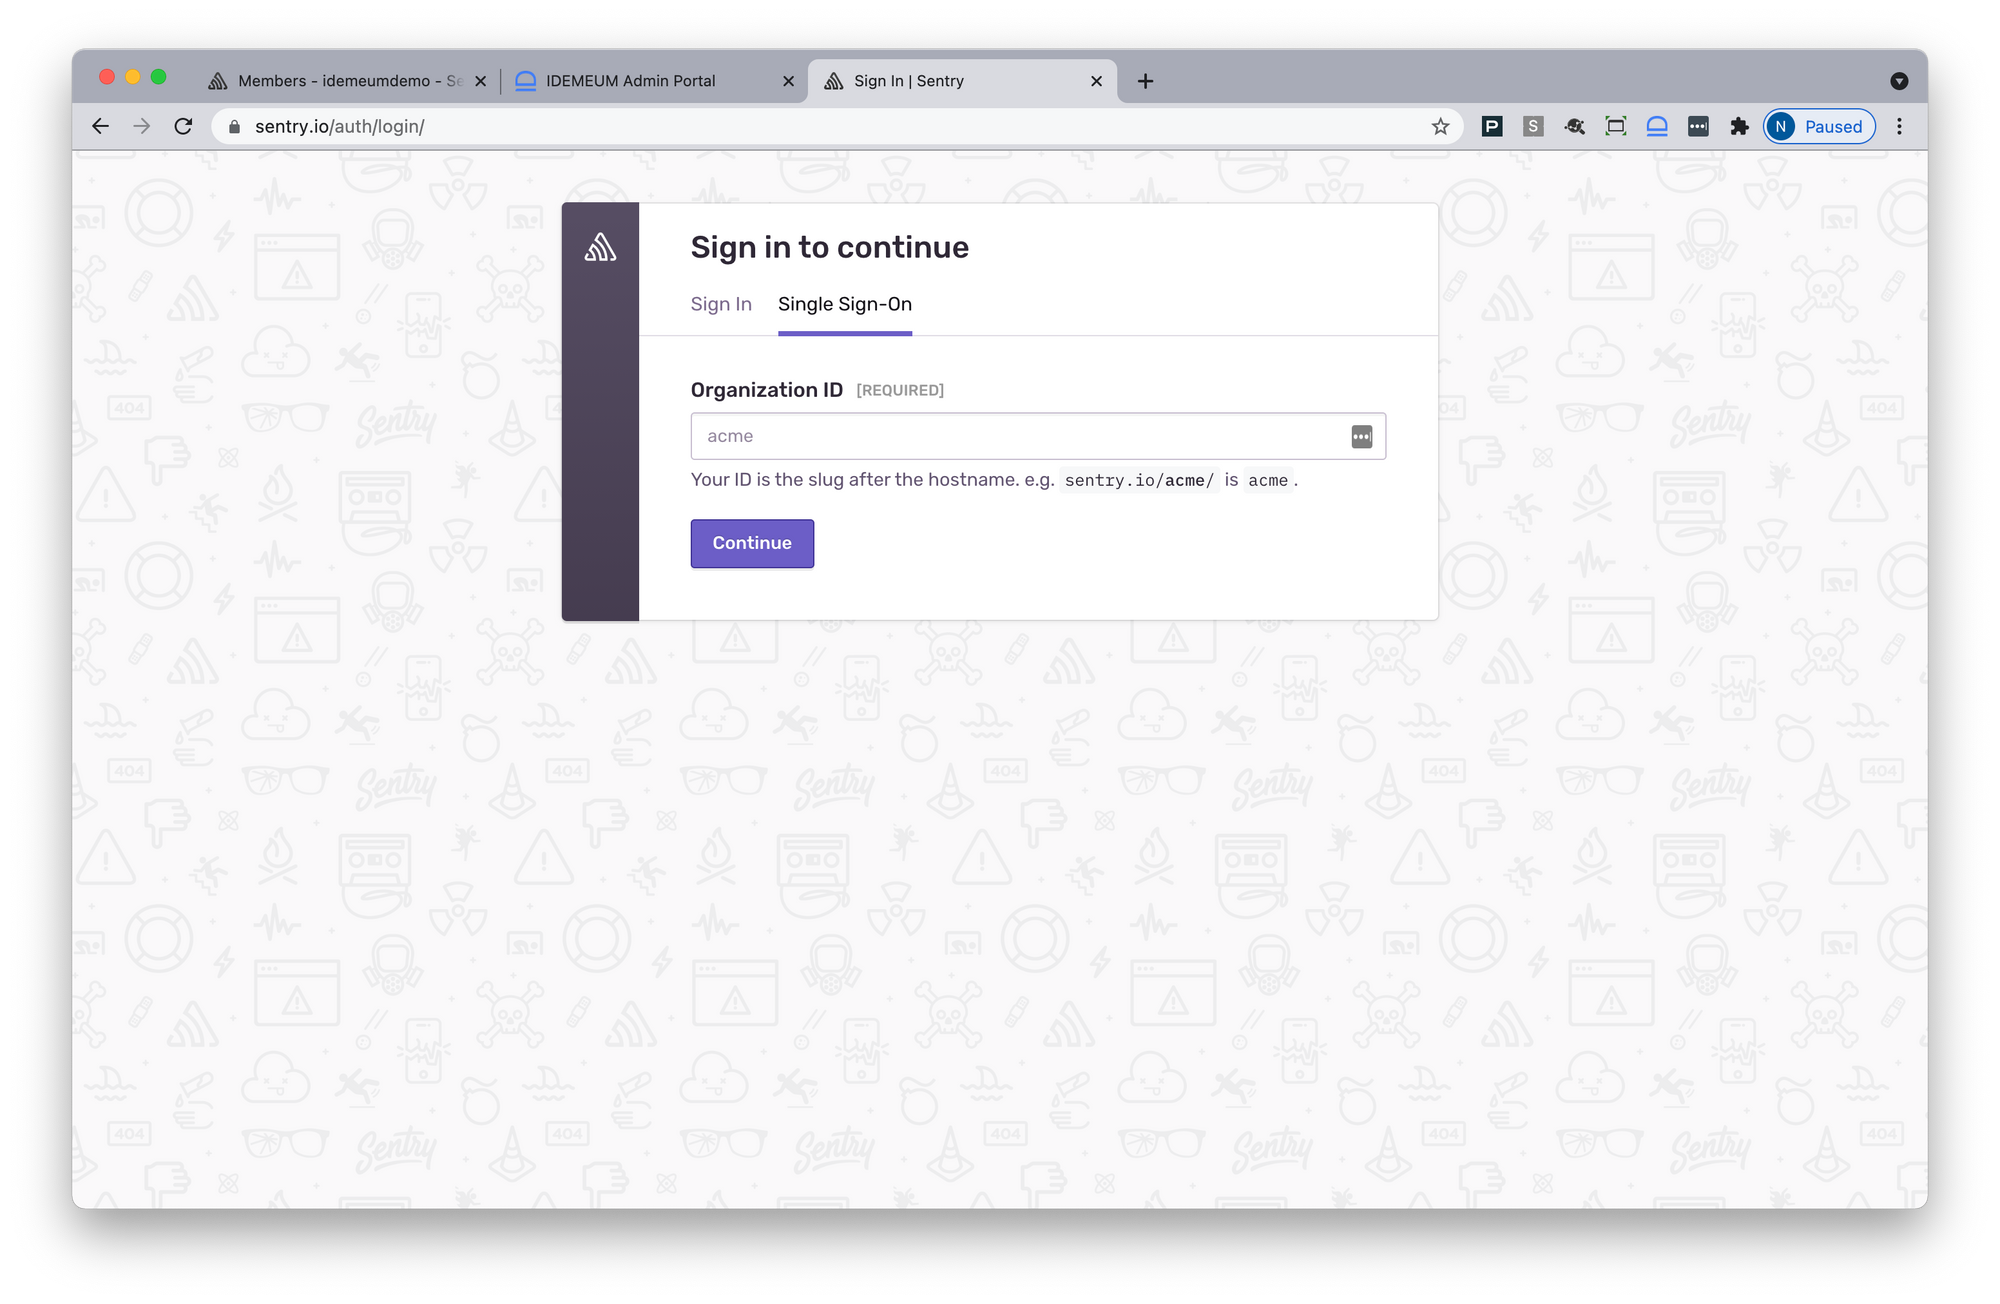
- Enter your Organization ID. After that you will be redirected to authenticate with idemeum. Once authentication is complete you will be able to access Sentry.