Capabilities overview
Message your employees on Slack providing customized security and compliance recommendations for their Linux, Mac, and Windows devices.
Pricing page (include the link to pricing)
| Supported capability | Required plan | Details |
|---|---|---|
| Passwordless SSO | Paid plan | Low SSO tax |
| Automated provisioning | Paid plan | SCIM 2.0 (create, remove, update accounts) |
Prerequisites
In order to integrate idemeum with Kolide you will first need to obtain SAML metadata parameters for your idemeum tenant. Specifically you will need:
- Identity Provider SSO URL
- Public X509 certificate (PEM format)
Instructions for how to obtain these SAML metadata parameters are below.
 idemeum team
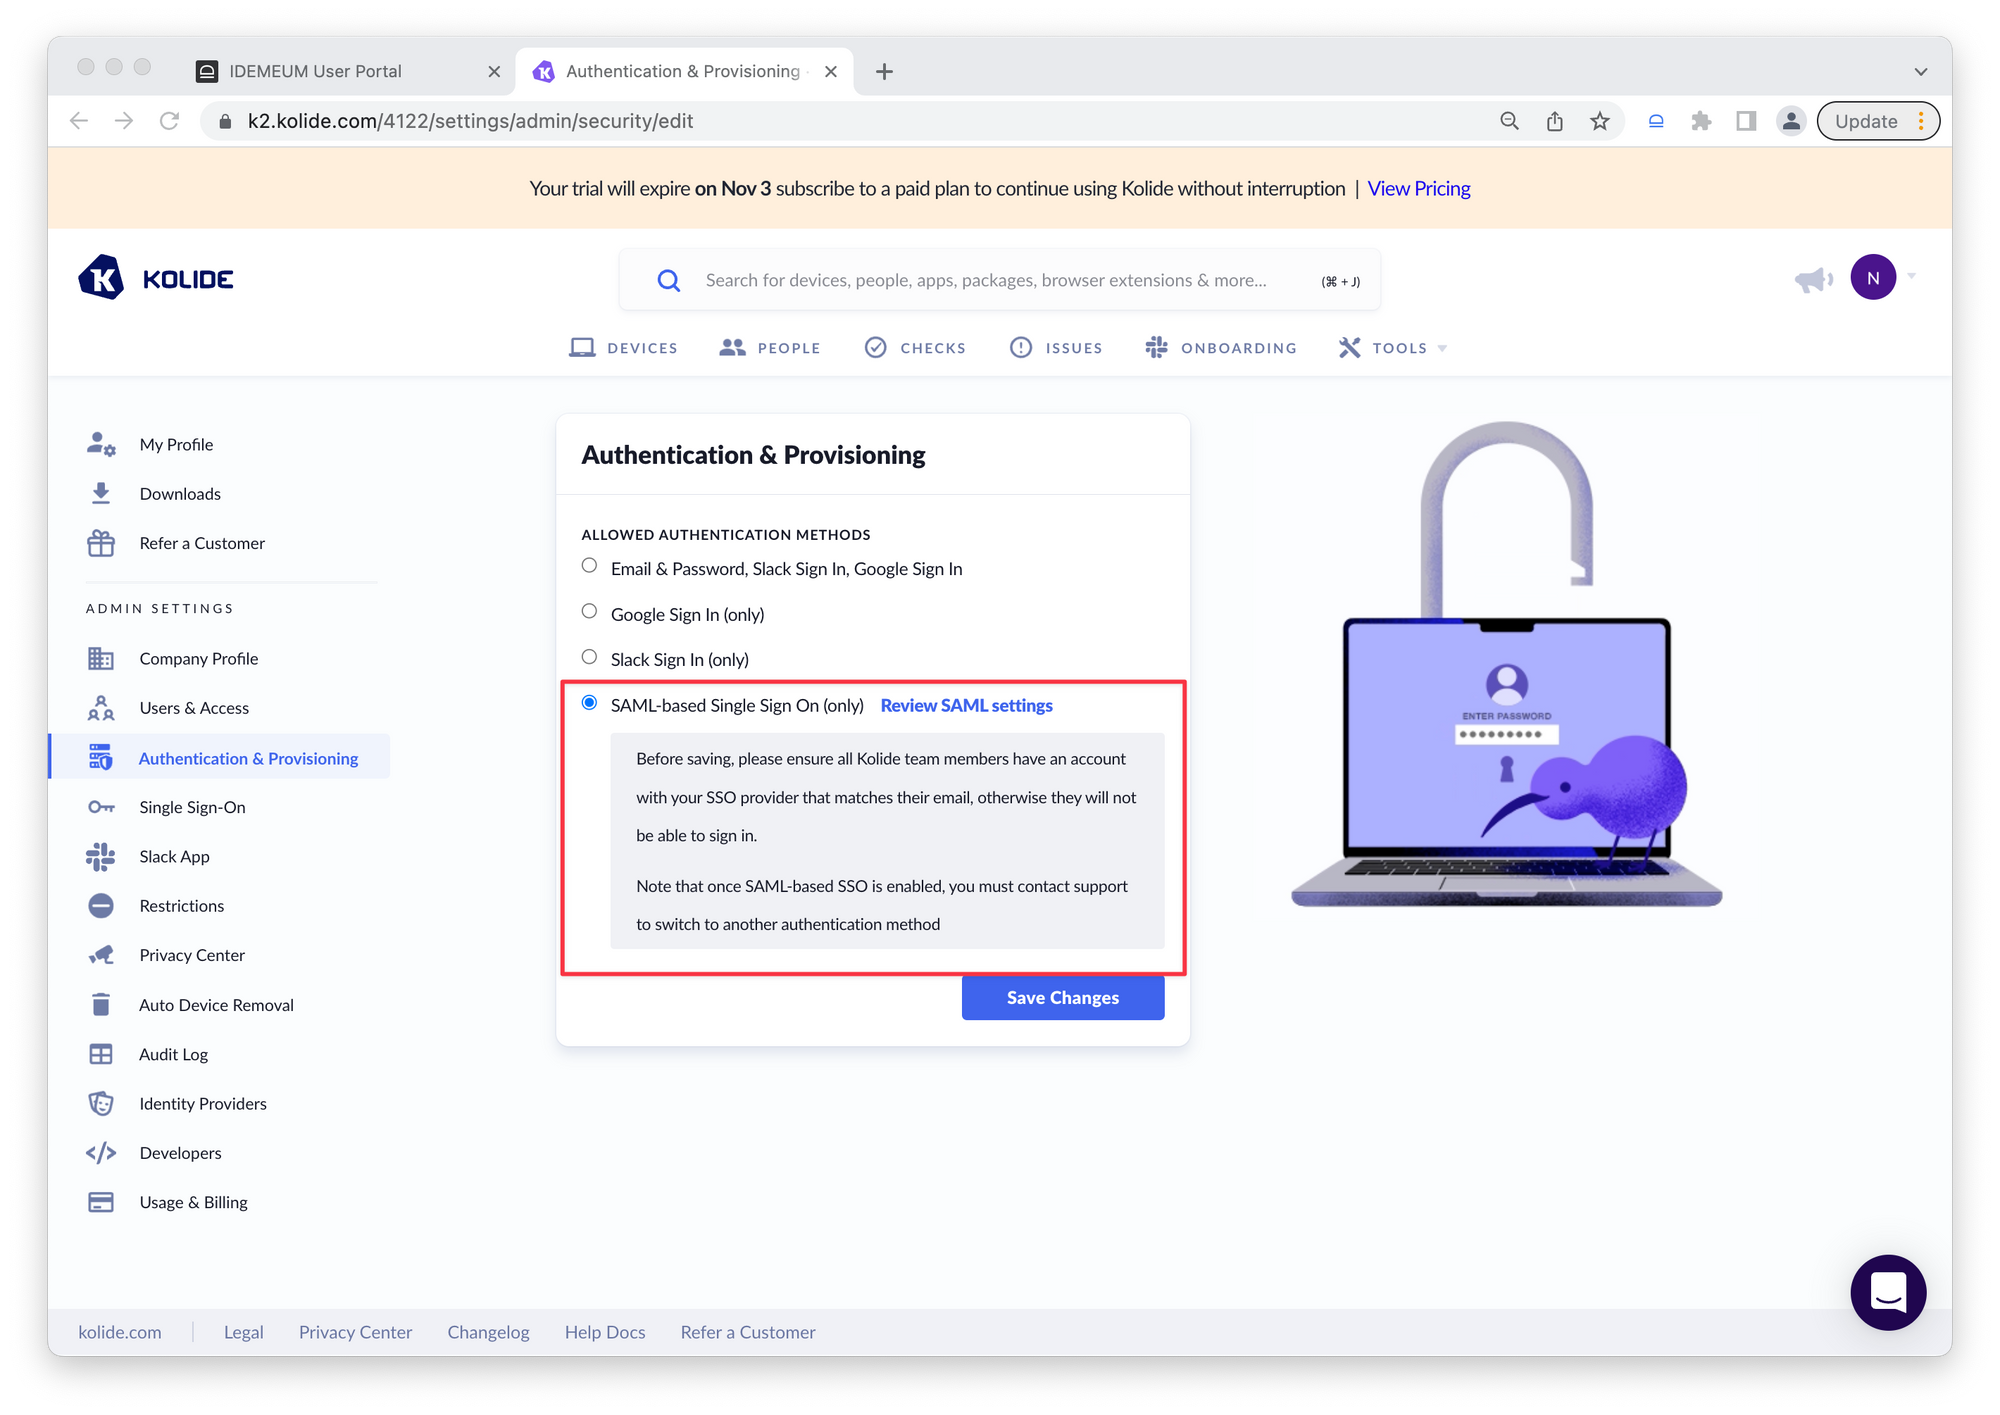
Passwordless Single Sign-On (SAML)
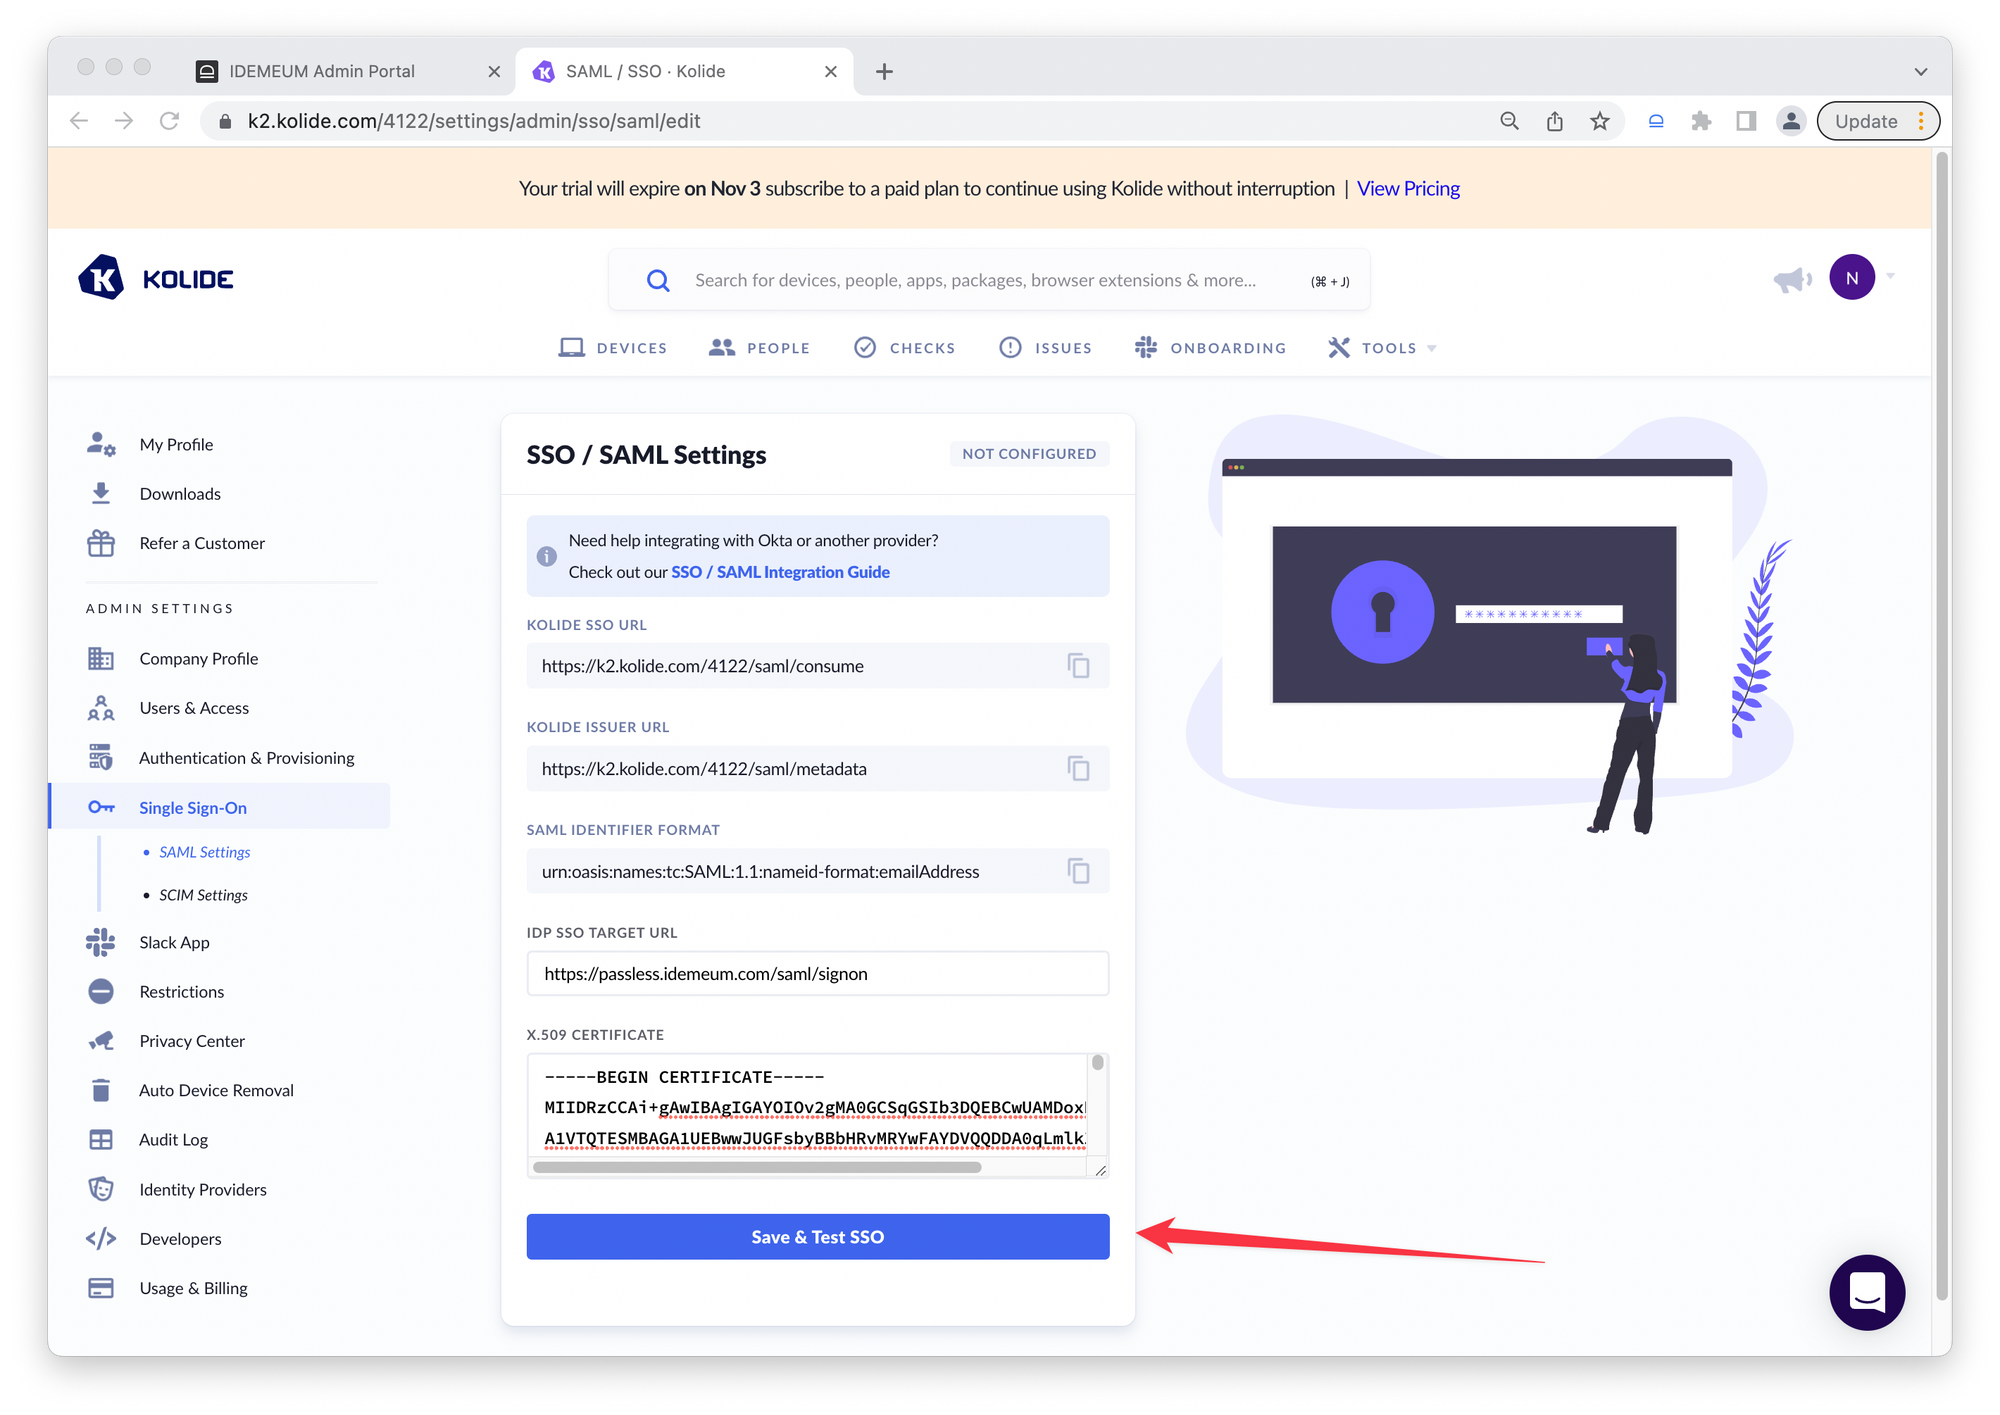
Configure SSO in Kolide
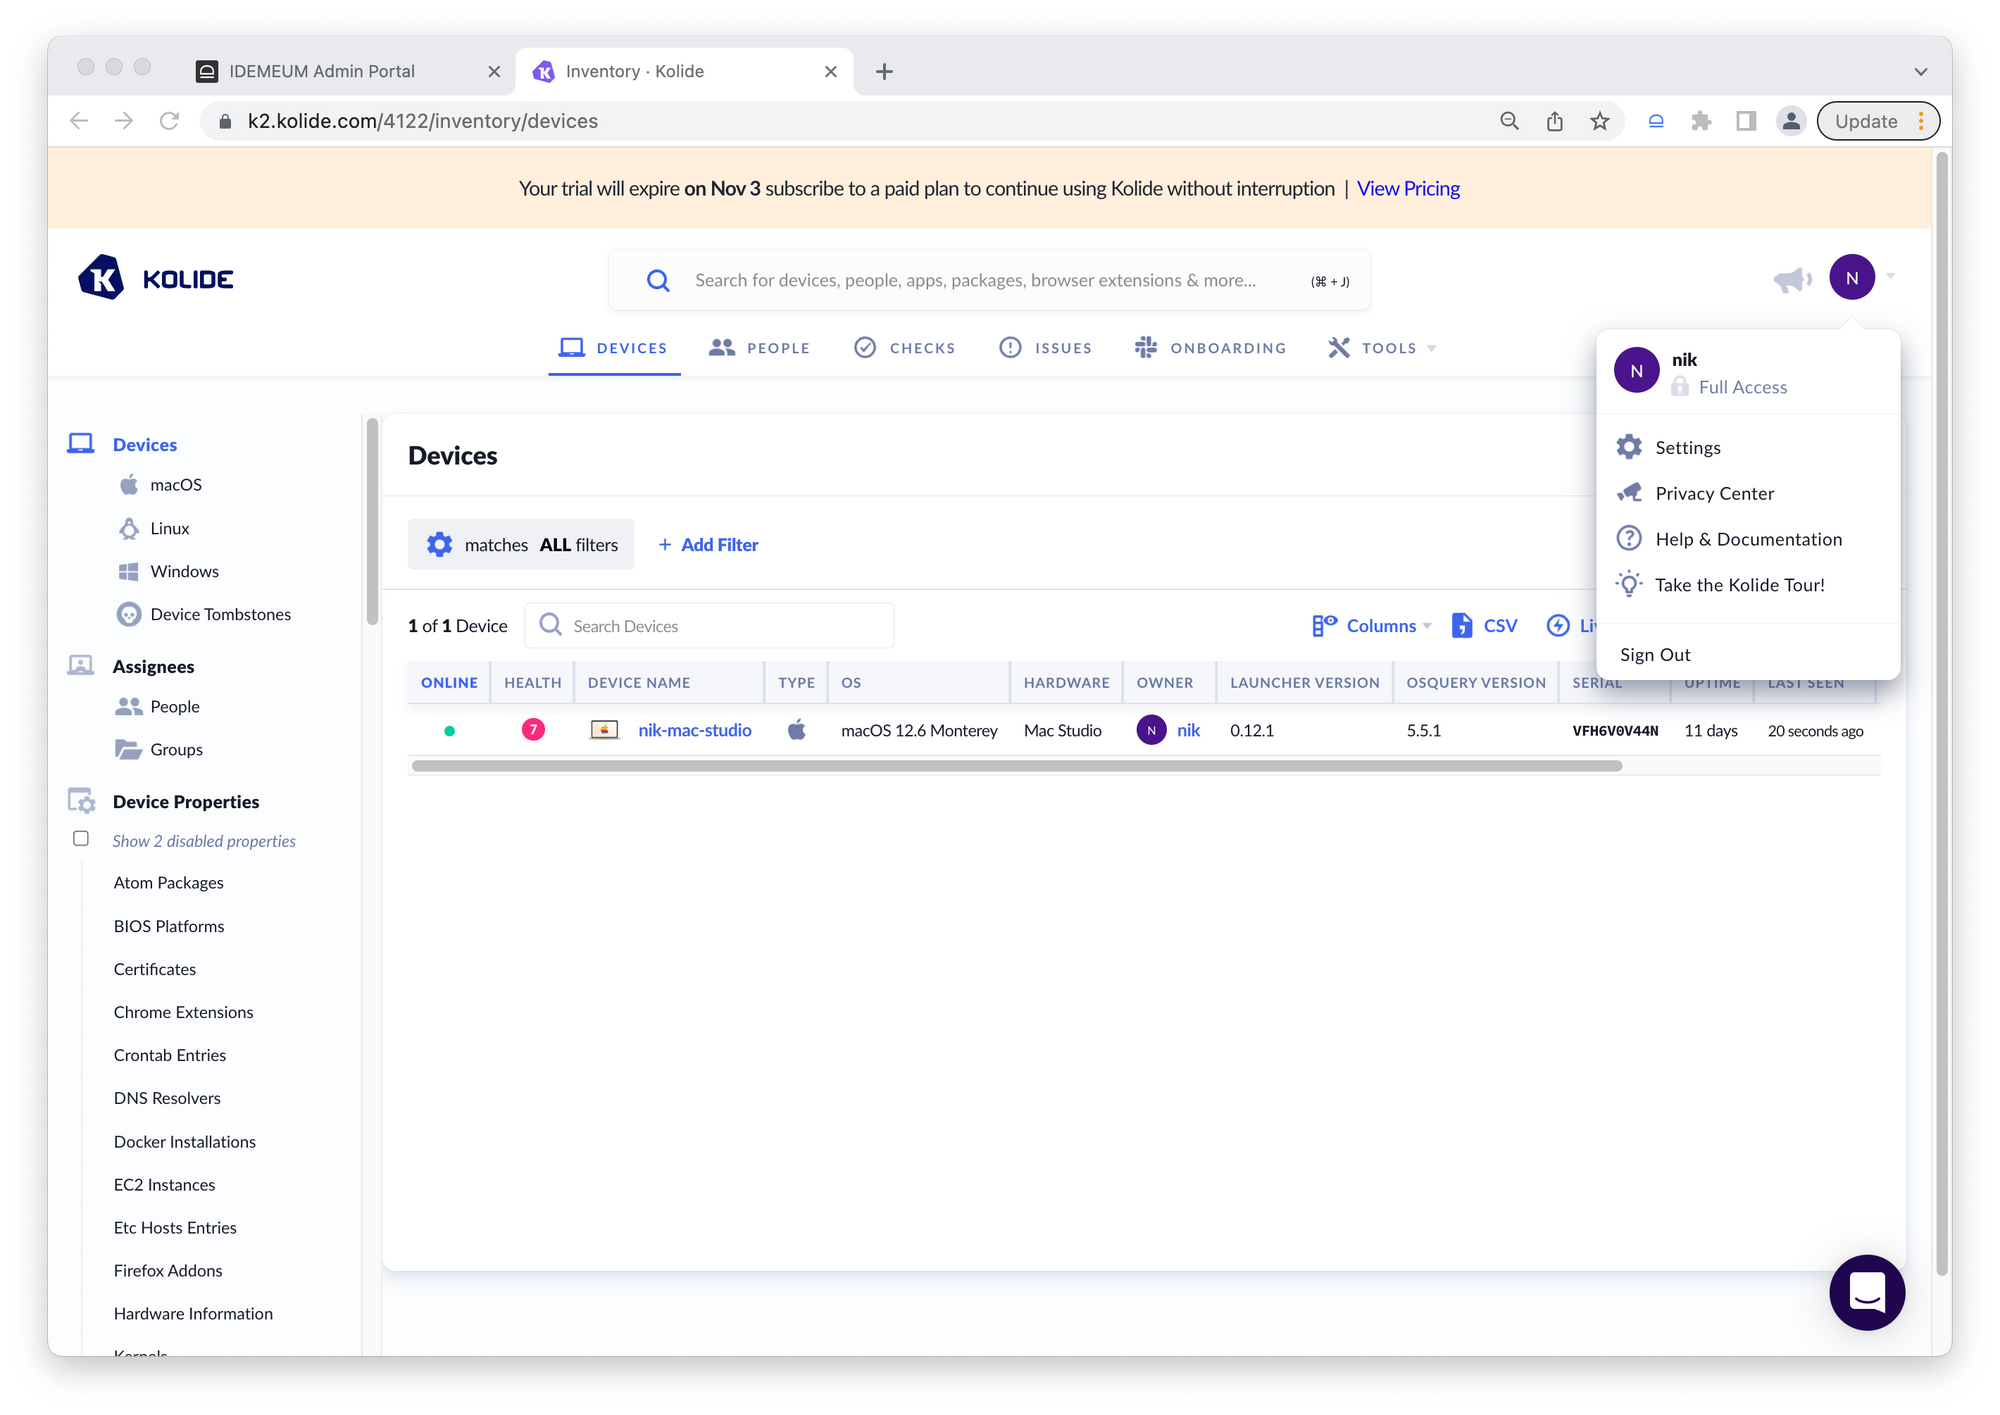
- Navigate to your Kolide admin dashboard
- Click on your user icon and choose
Settings
- Choose
Single Sign-On
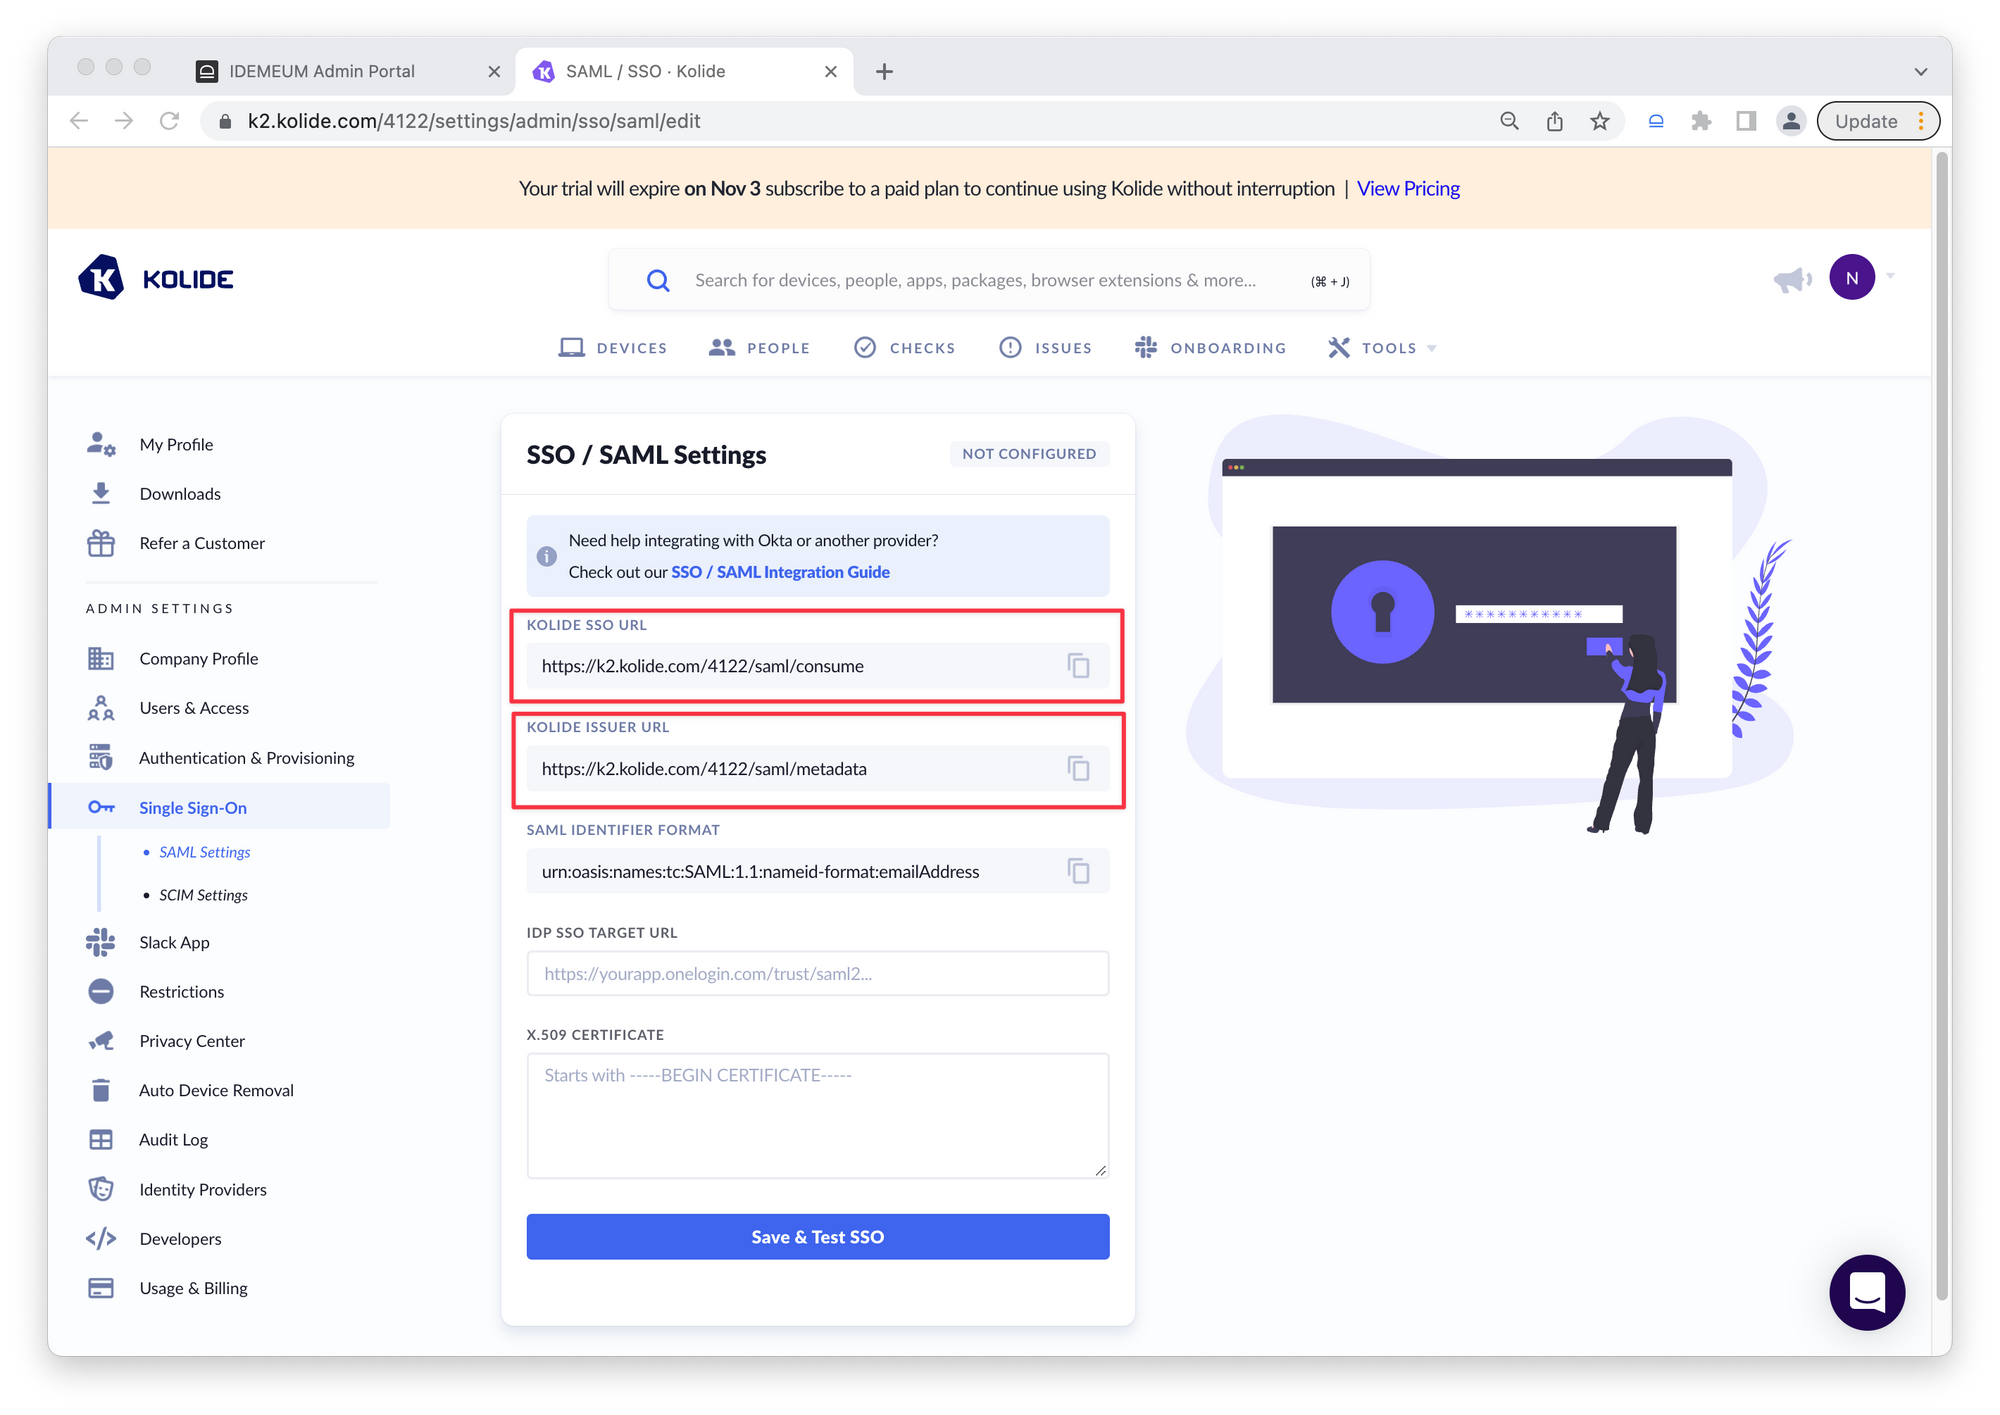
Kolide SSO URL and Kolide issuer URL as you will need these values to configure Kolide application in idemeum.- Paste
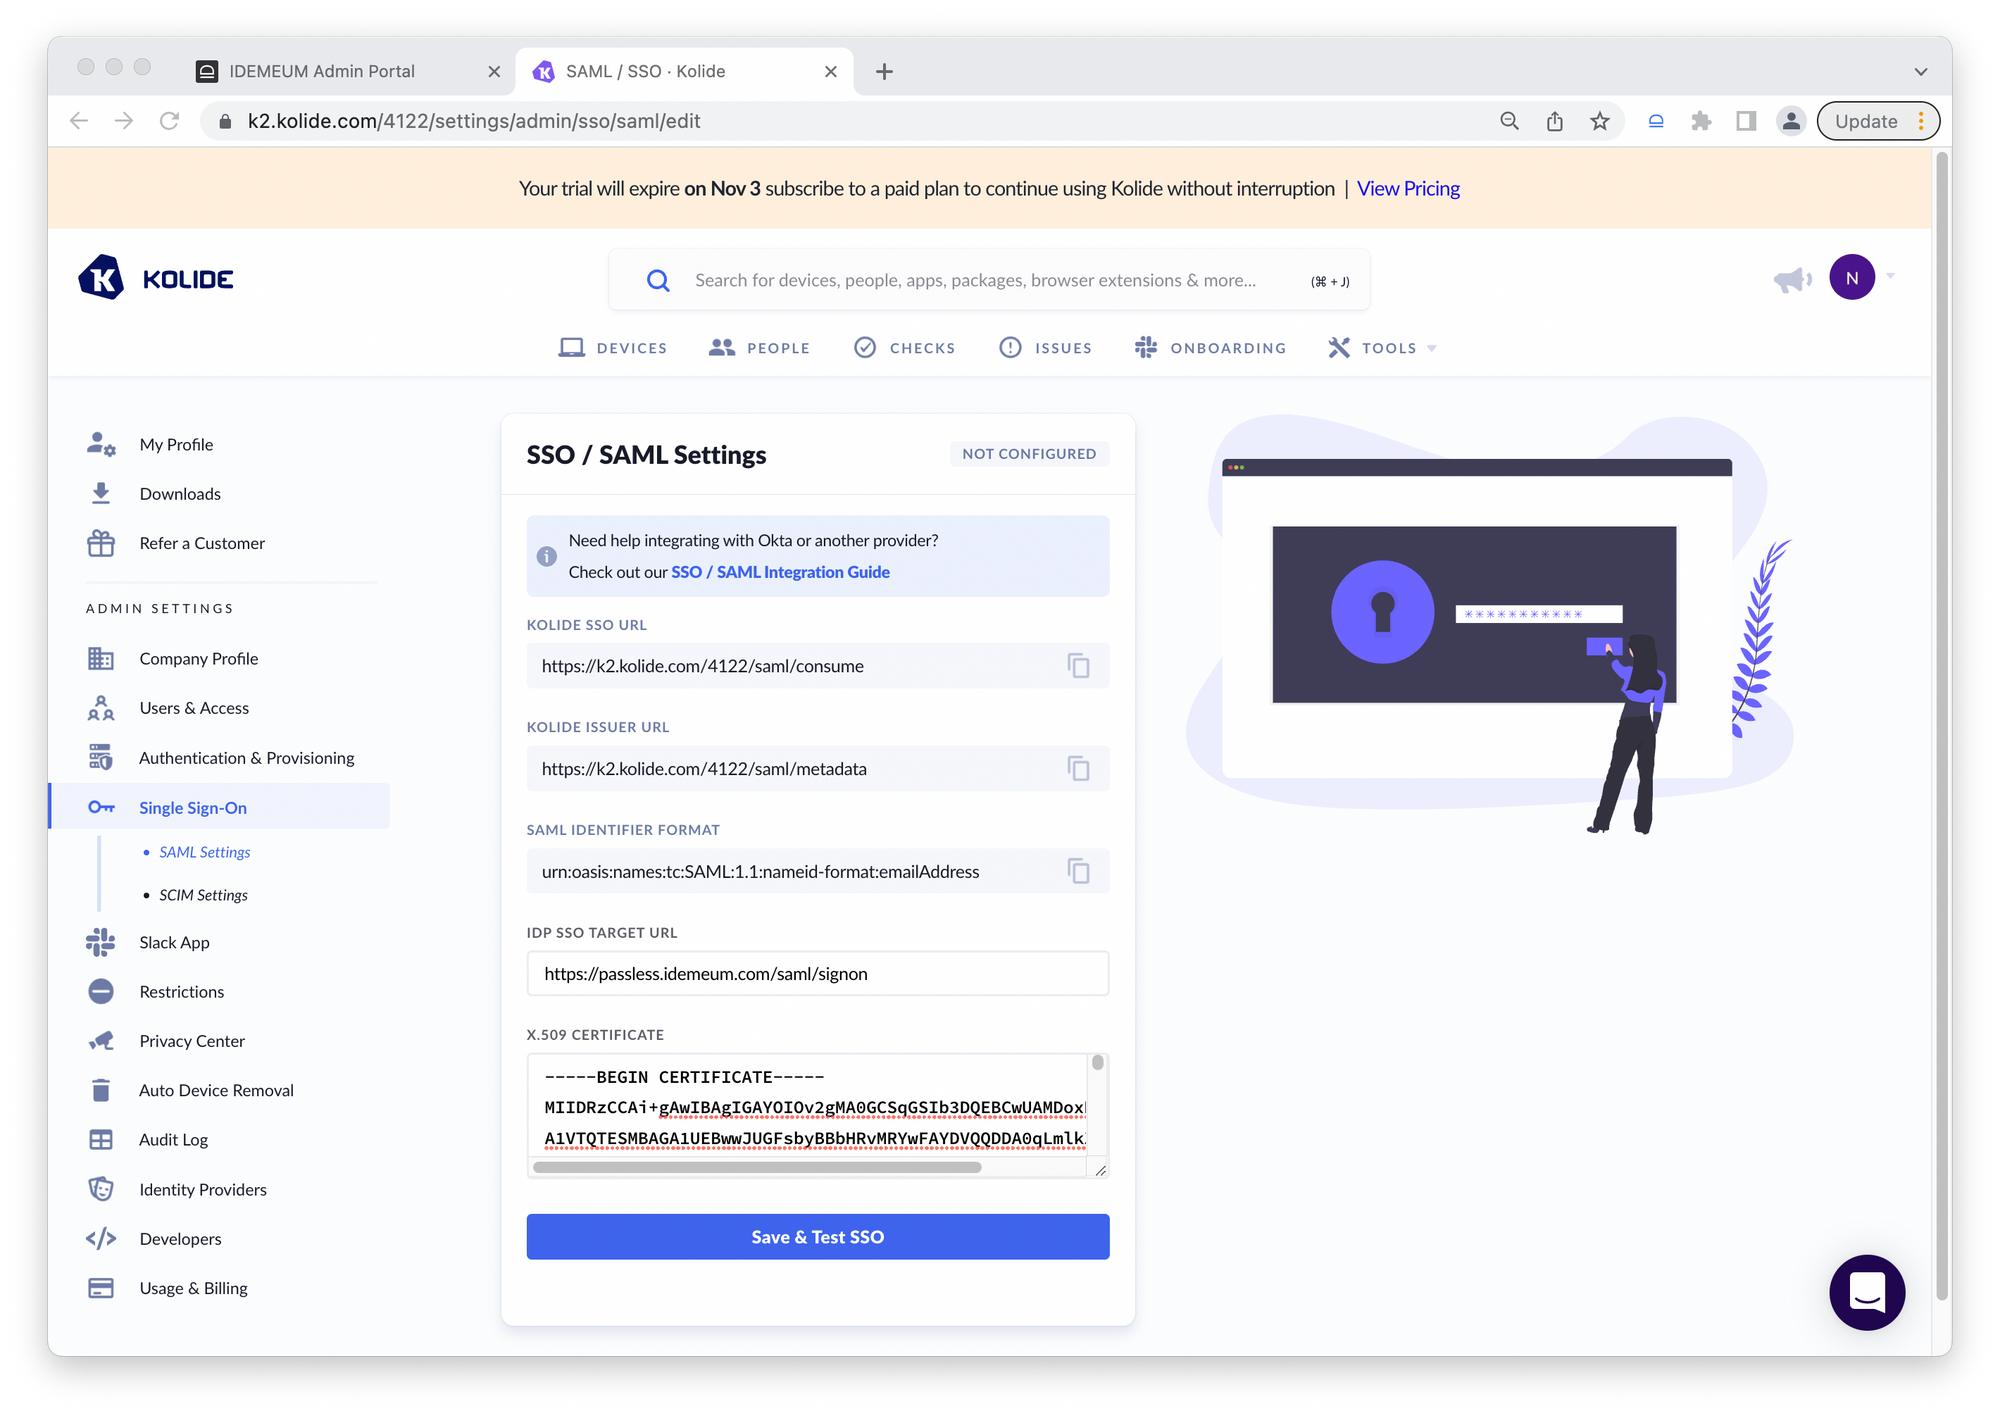
Identity Provider SSO URLthat you obtained from the metadata section intoIDP SSO Target URL - Paste
Public X509 certificate (PEM format)intoX-509 certificate
Configure SSO in idemeum
- Navigate to your idemeum admin portal at https://[your domain].idemeum.com/adminportal
- Click Applications in the left menu
- Search for Kolide application and click Add App
- Click SAML at the top navigation menu
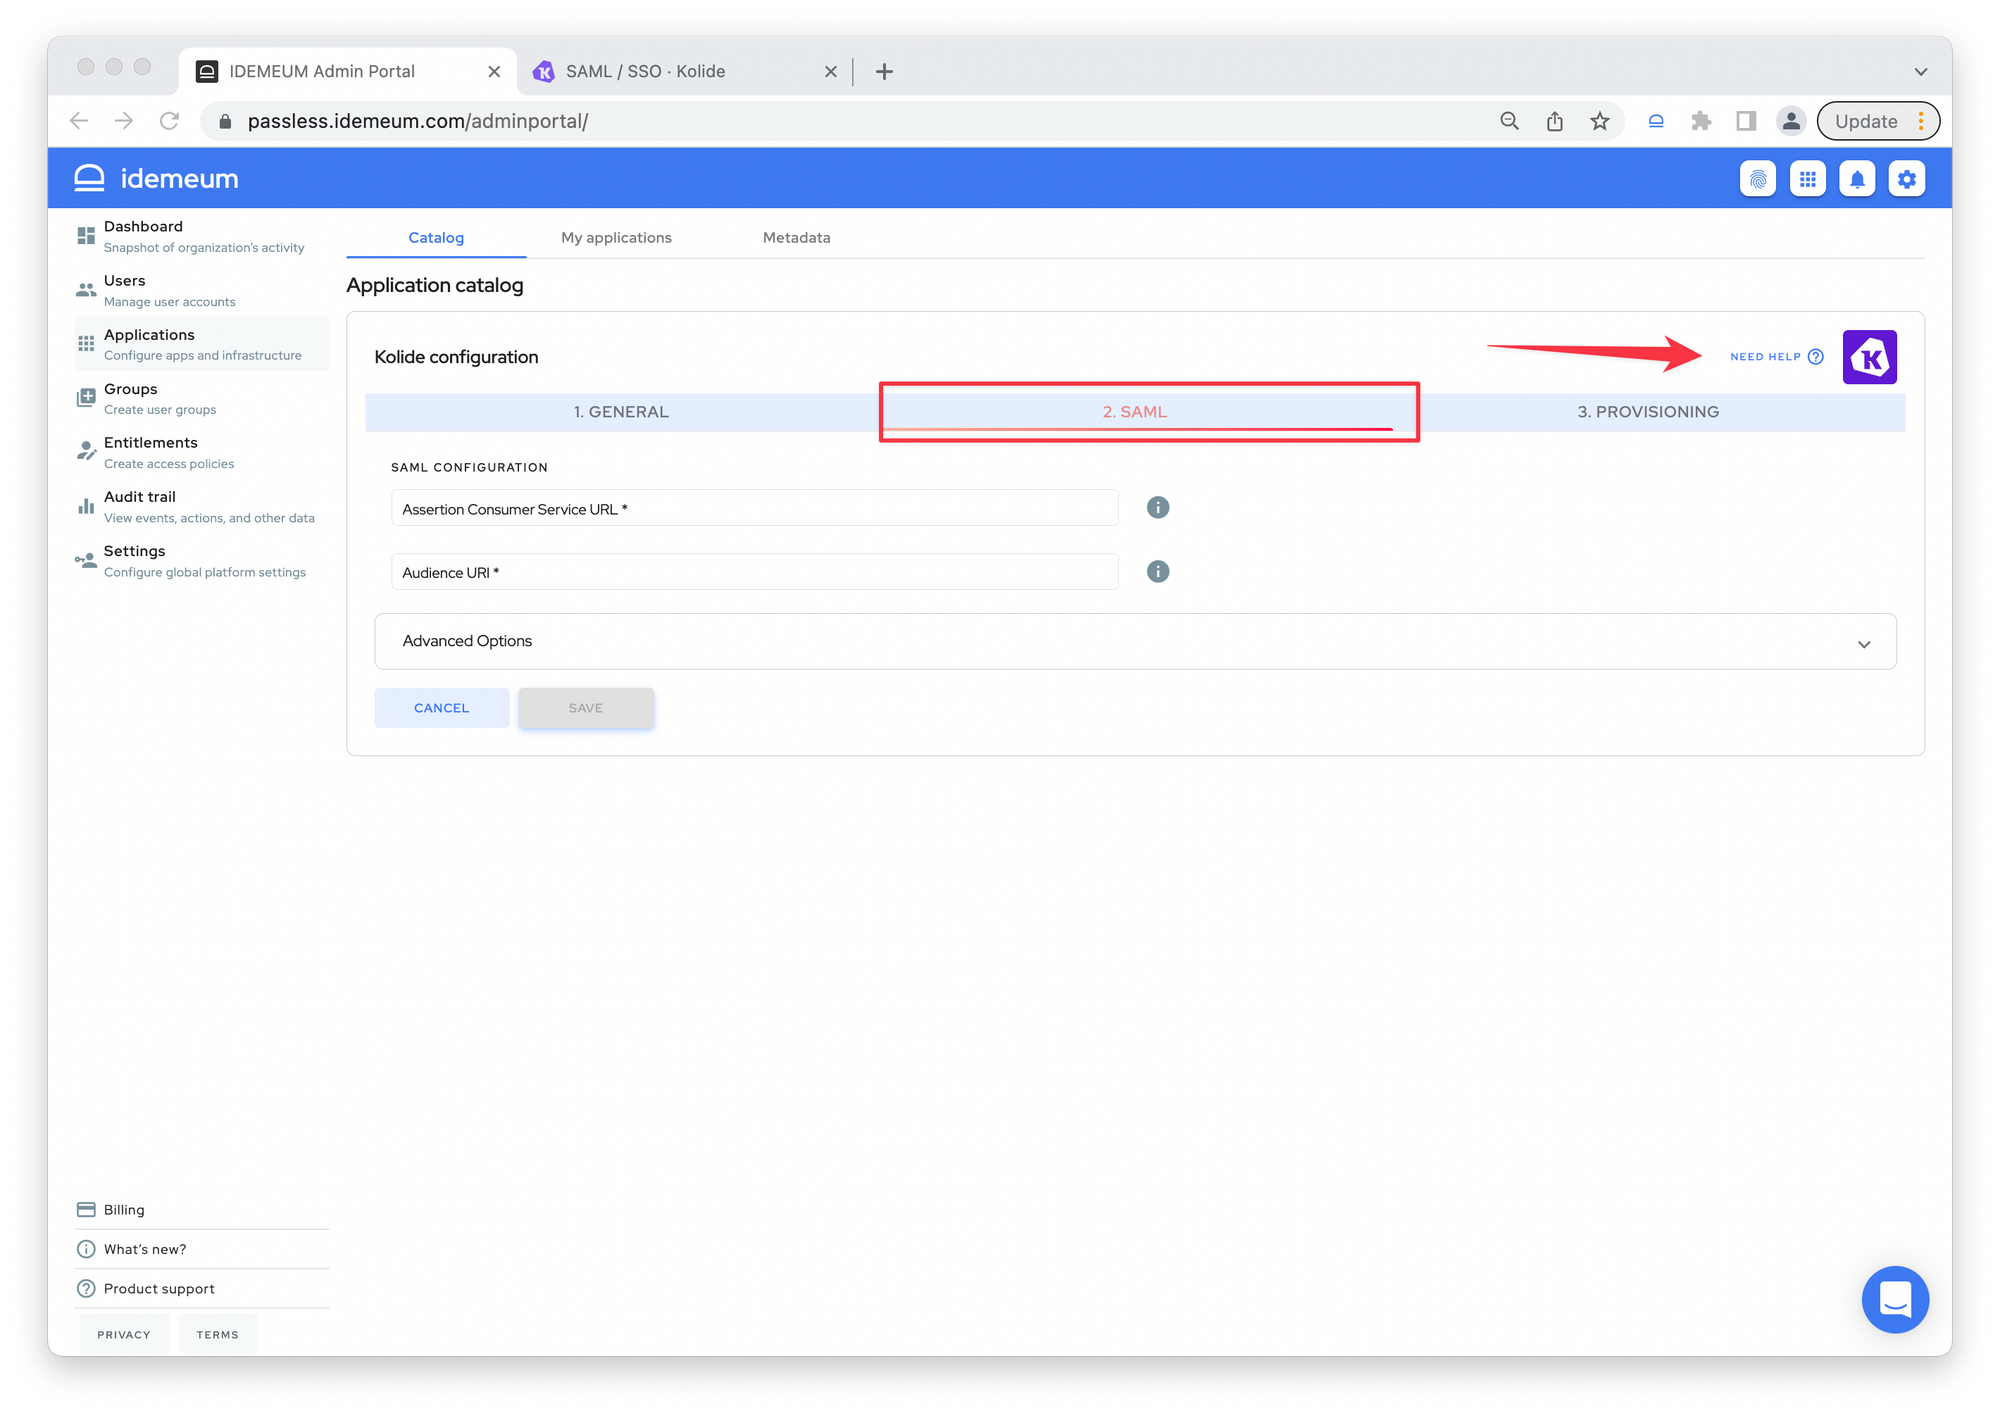
- Paste
Kolide SSO URLandKolide issuer URLintoAssertion Consumer Service URLandAudience URIrespectively
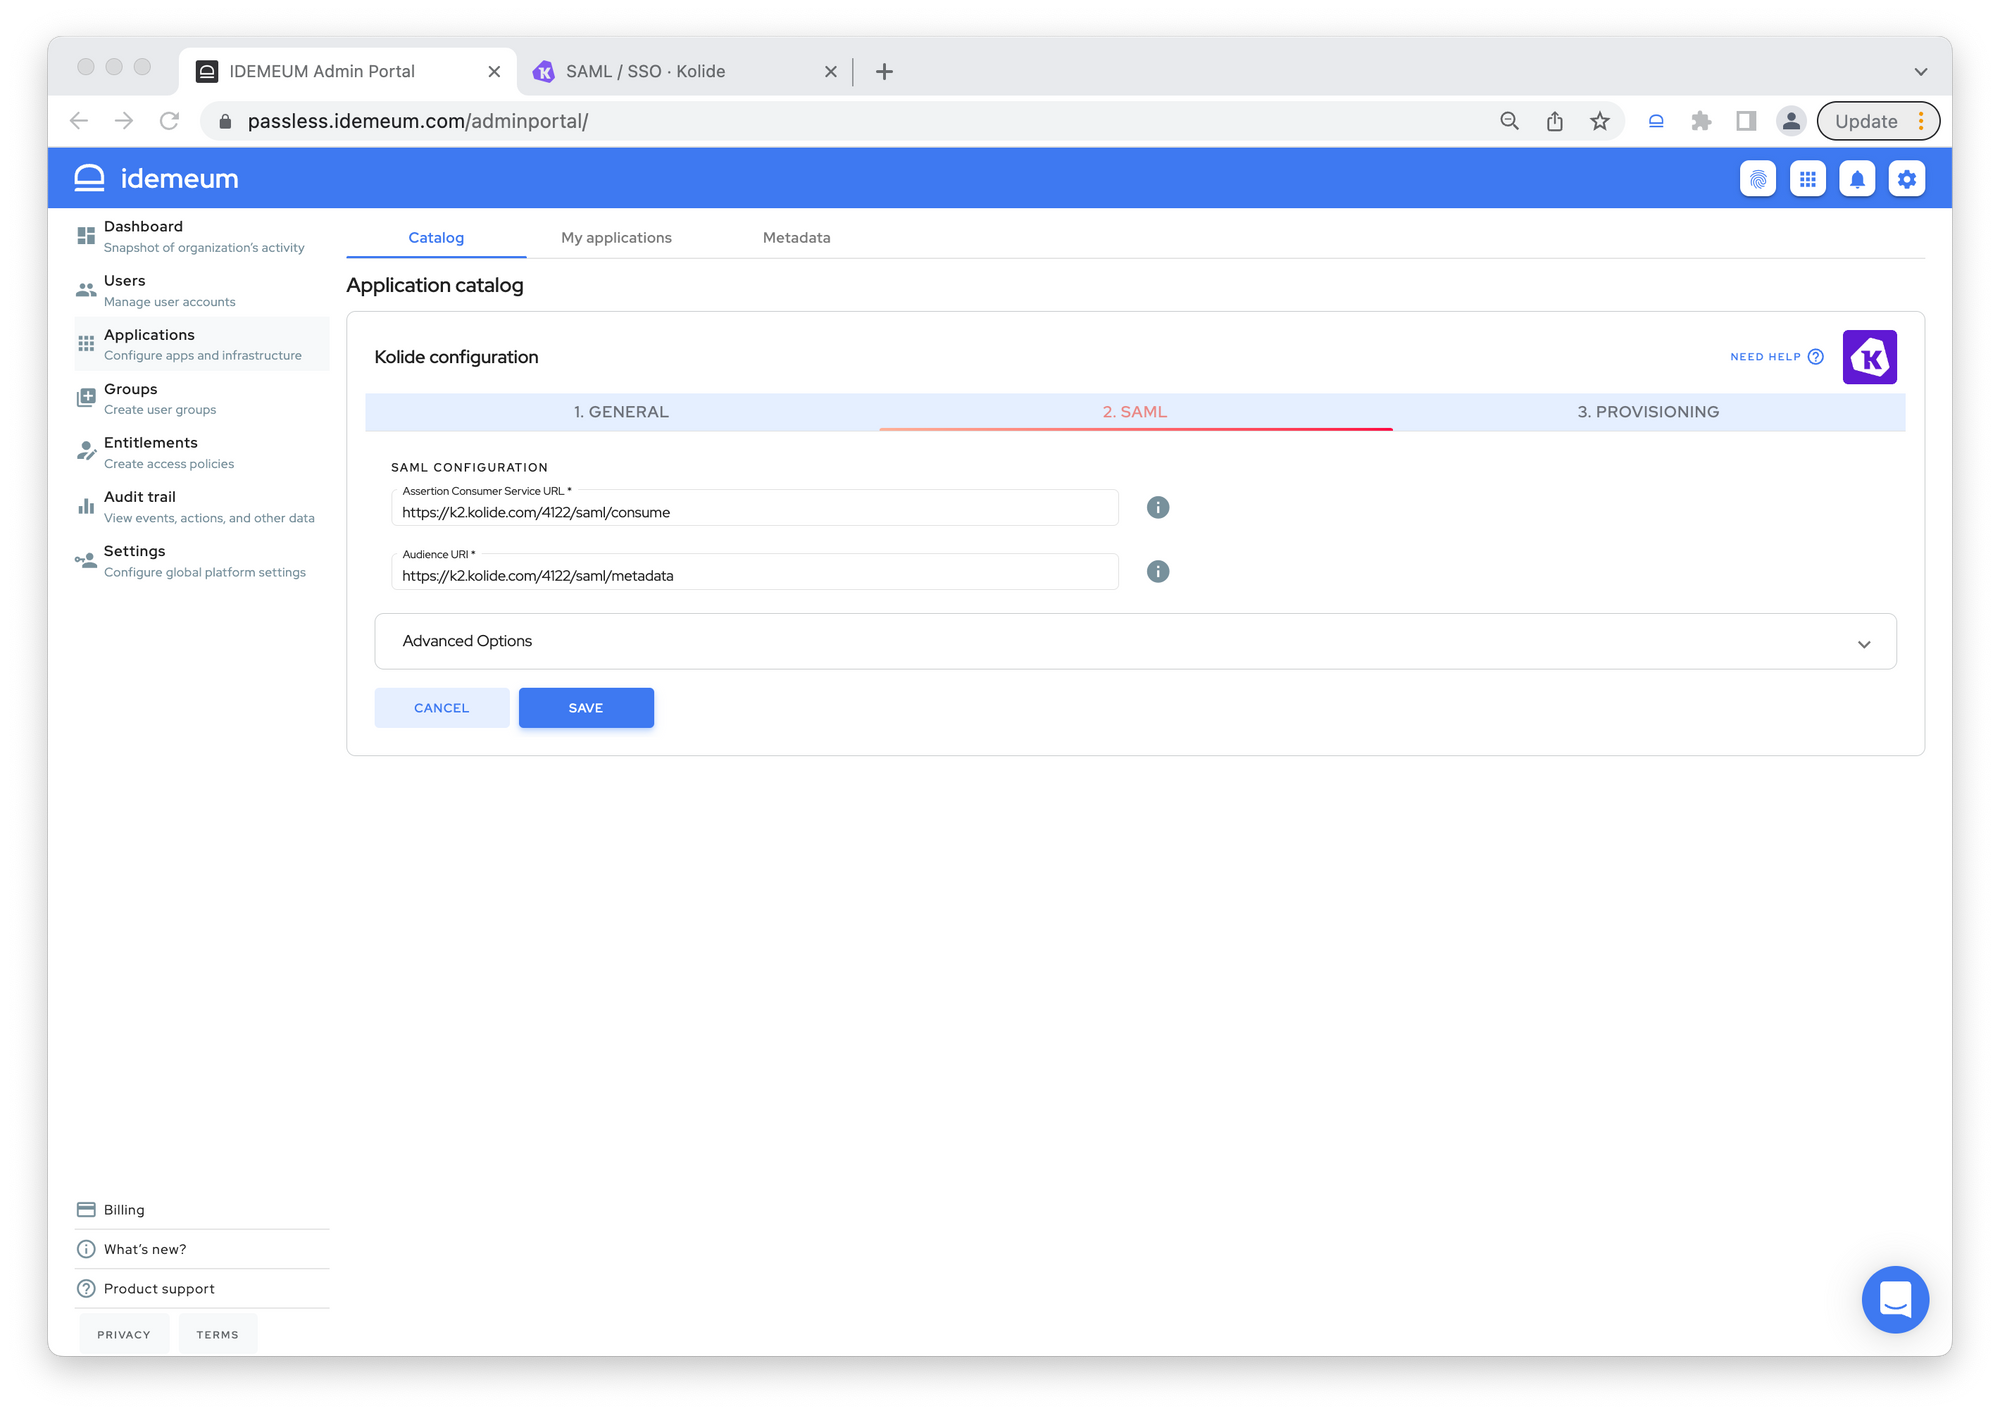
Saveconfiguration- Now navigate to
Entitlementssection and entitle Kolide application to user for Single Sign-On testing - Navigate back to Kolide and click
Save and test SSO
- If configuration is successful you will see the confirmation pop up
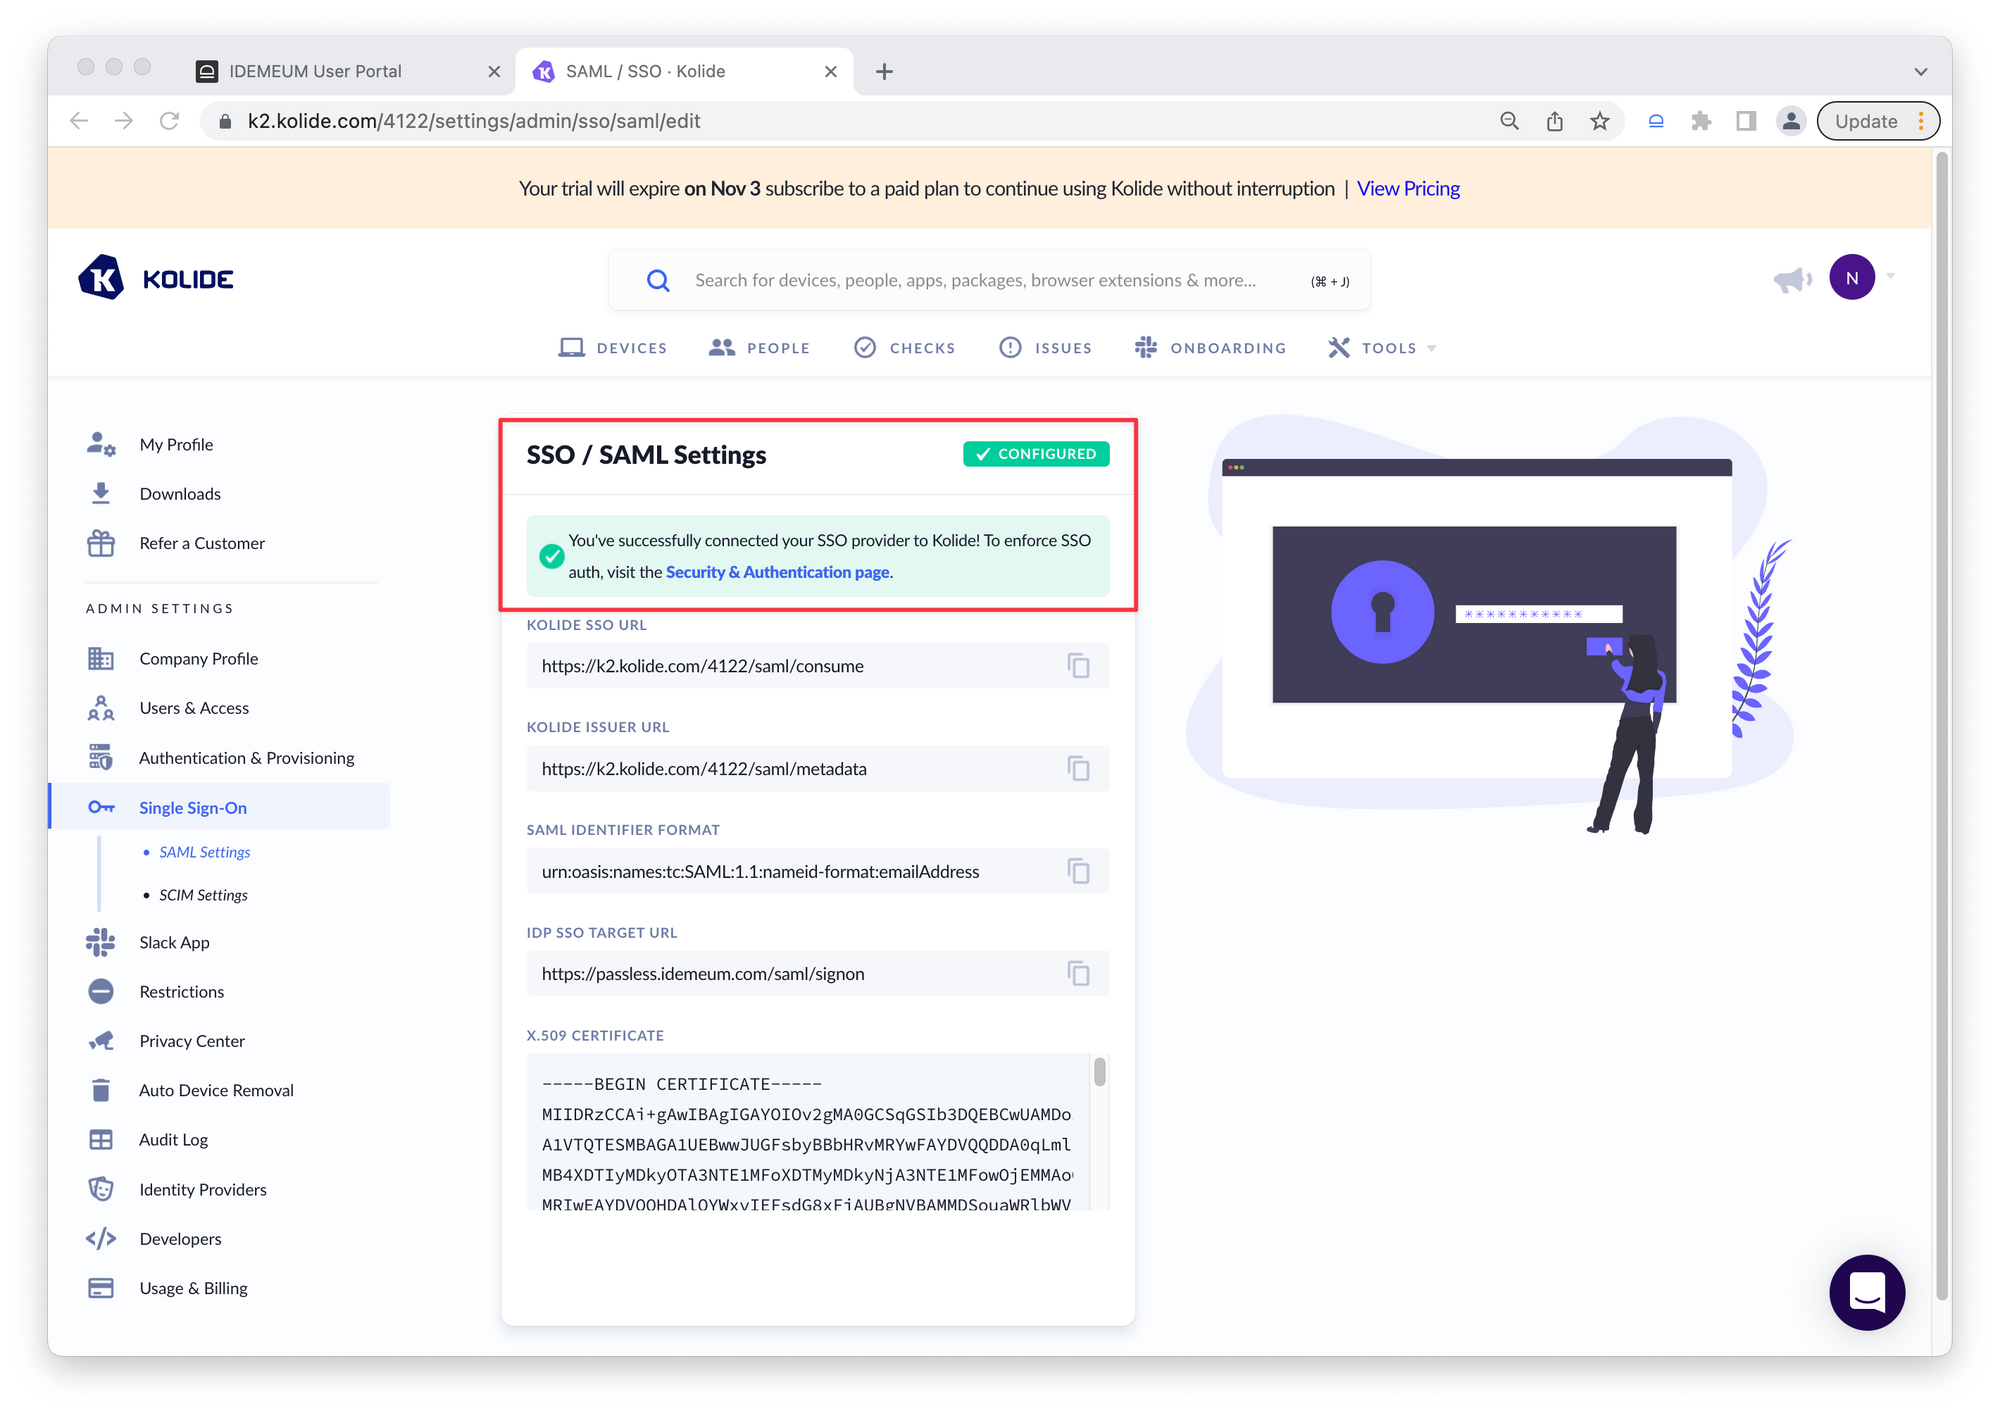
- Now as SAML SSO is configured you can navigate to
Authentication and Provisioningand configure SAML to be the default authentication method
Automated provisioning with SCIM
- Navigate to Kolide admin dashboard and access
Settings->Single Sign-On->SCIM settings
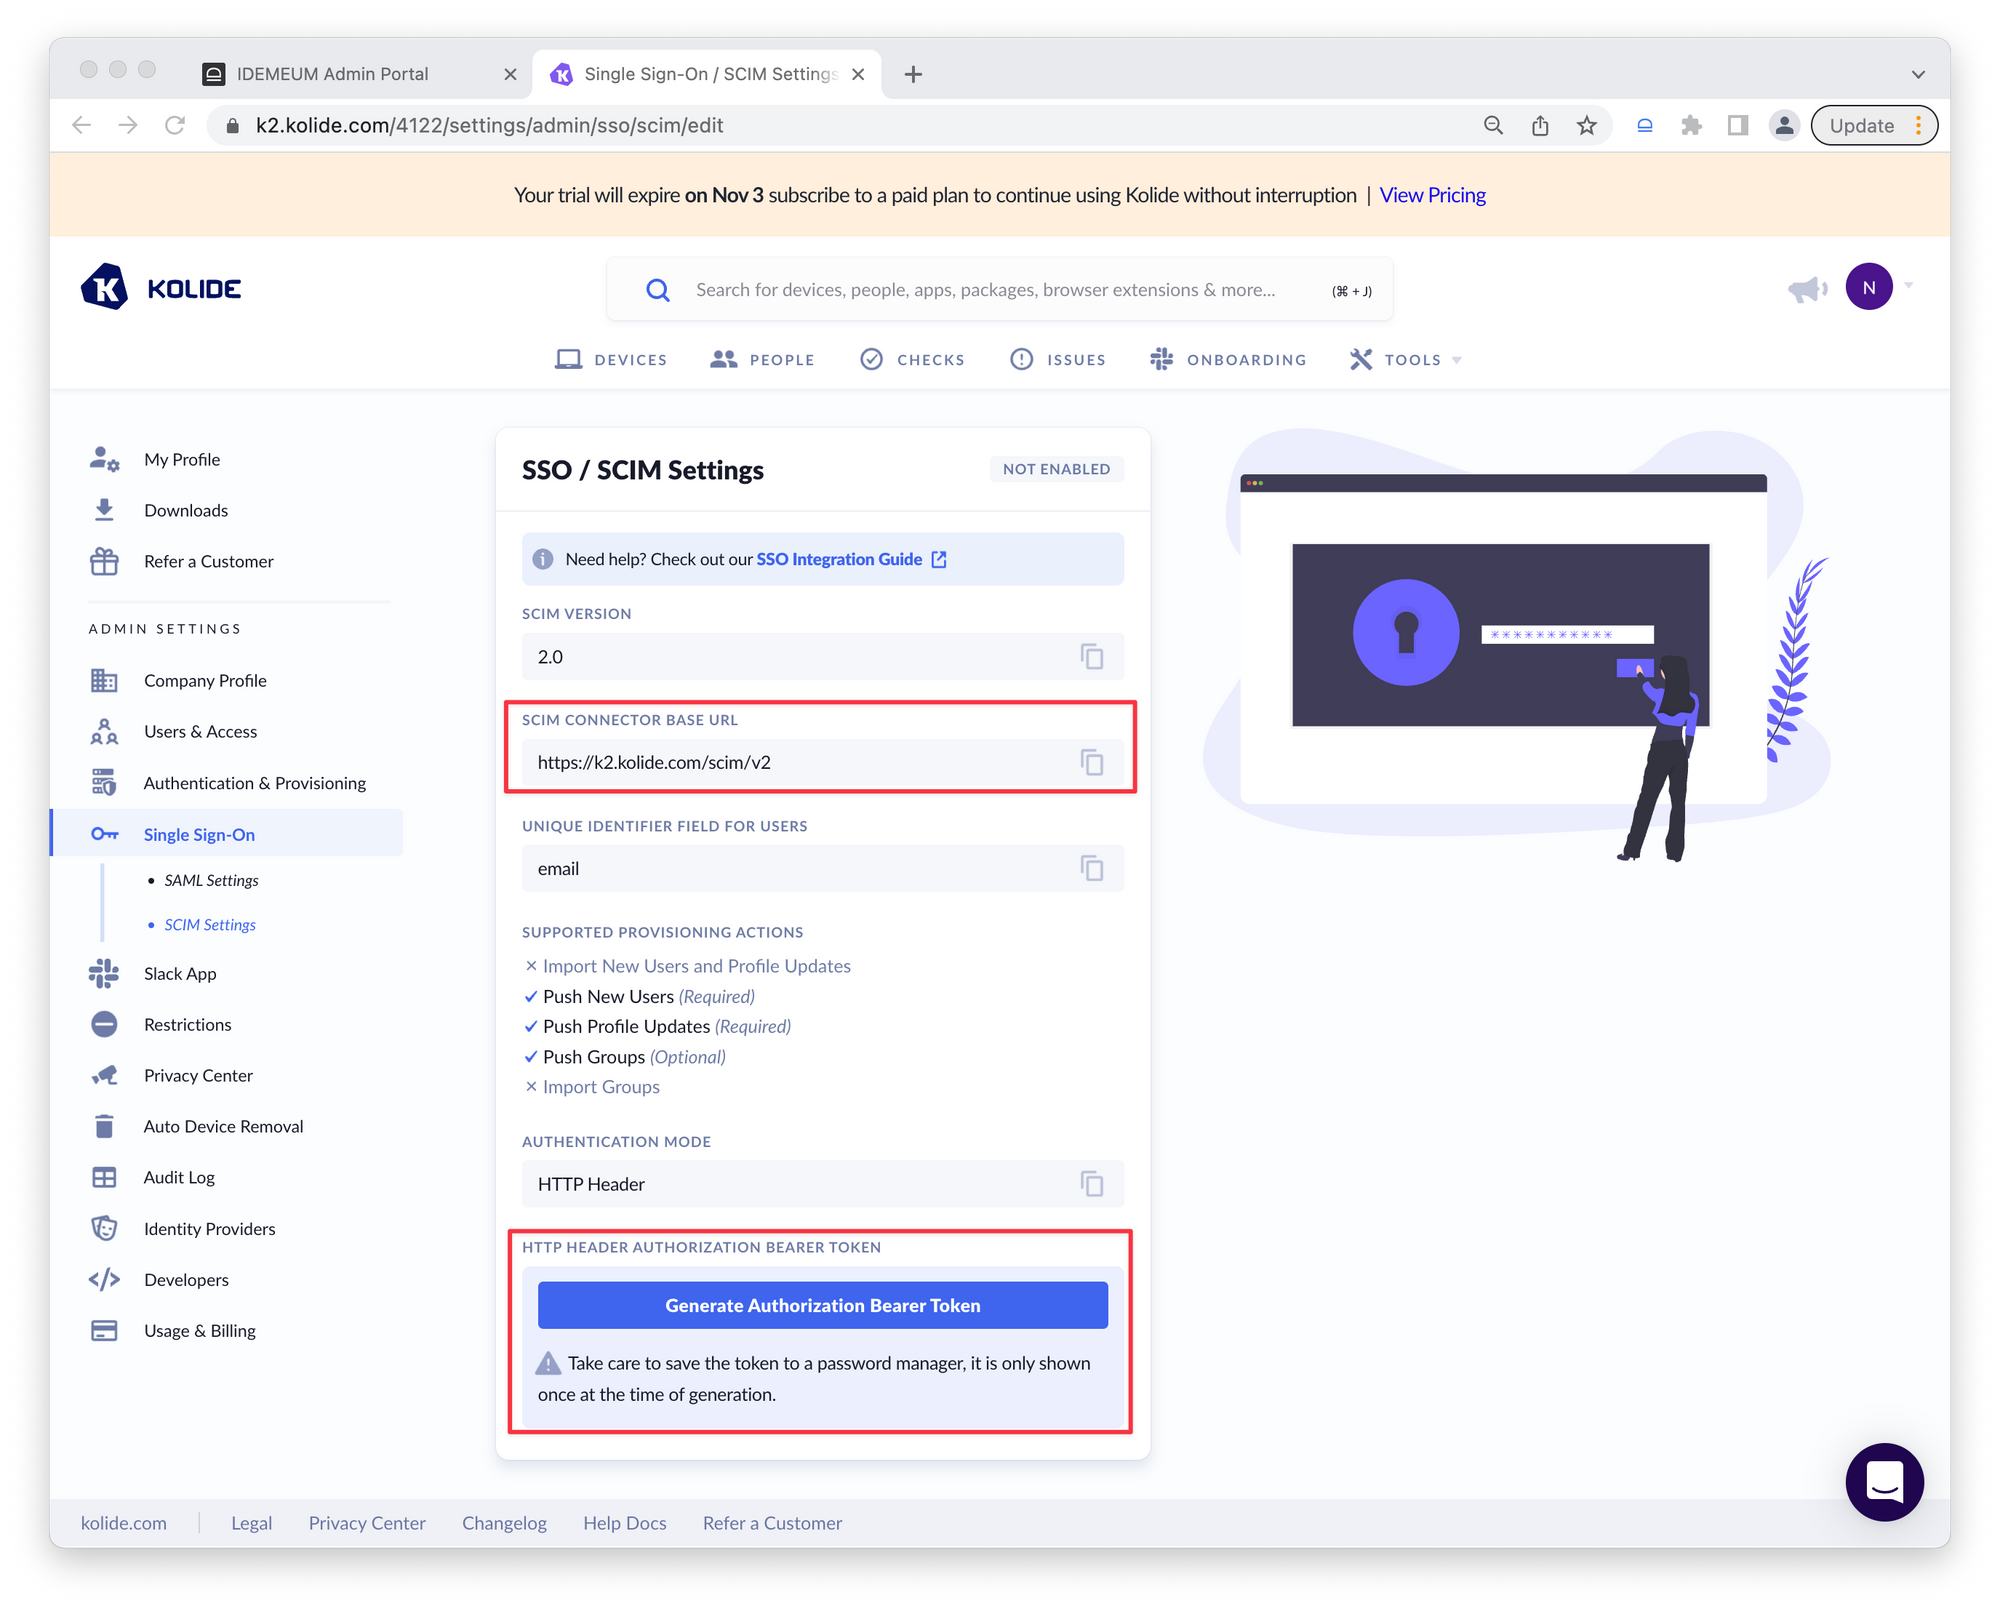
- Copy
SCIM connector base URLand generate bearer token as you will need this information for configuration in idemeum - Navigate to idemeum Kolide application and click
Provisioning section - Paste
SCIM connector base URLand token
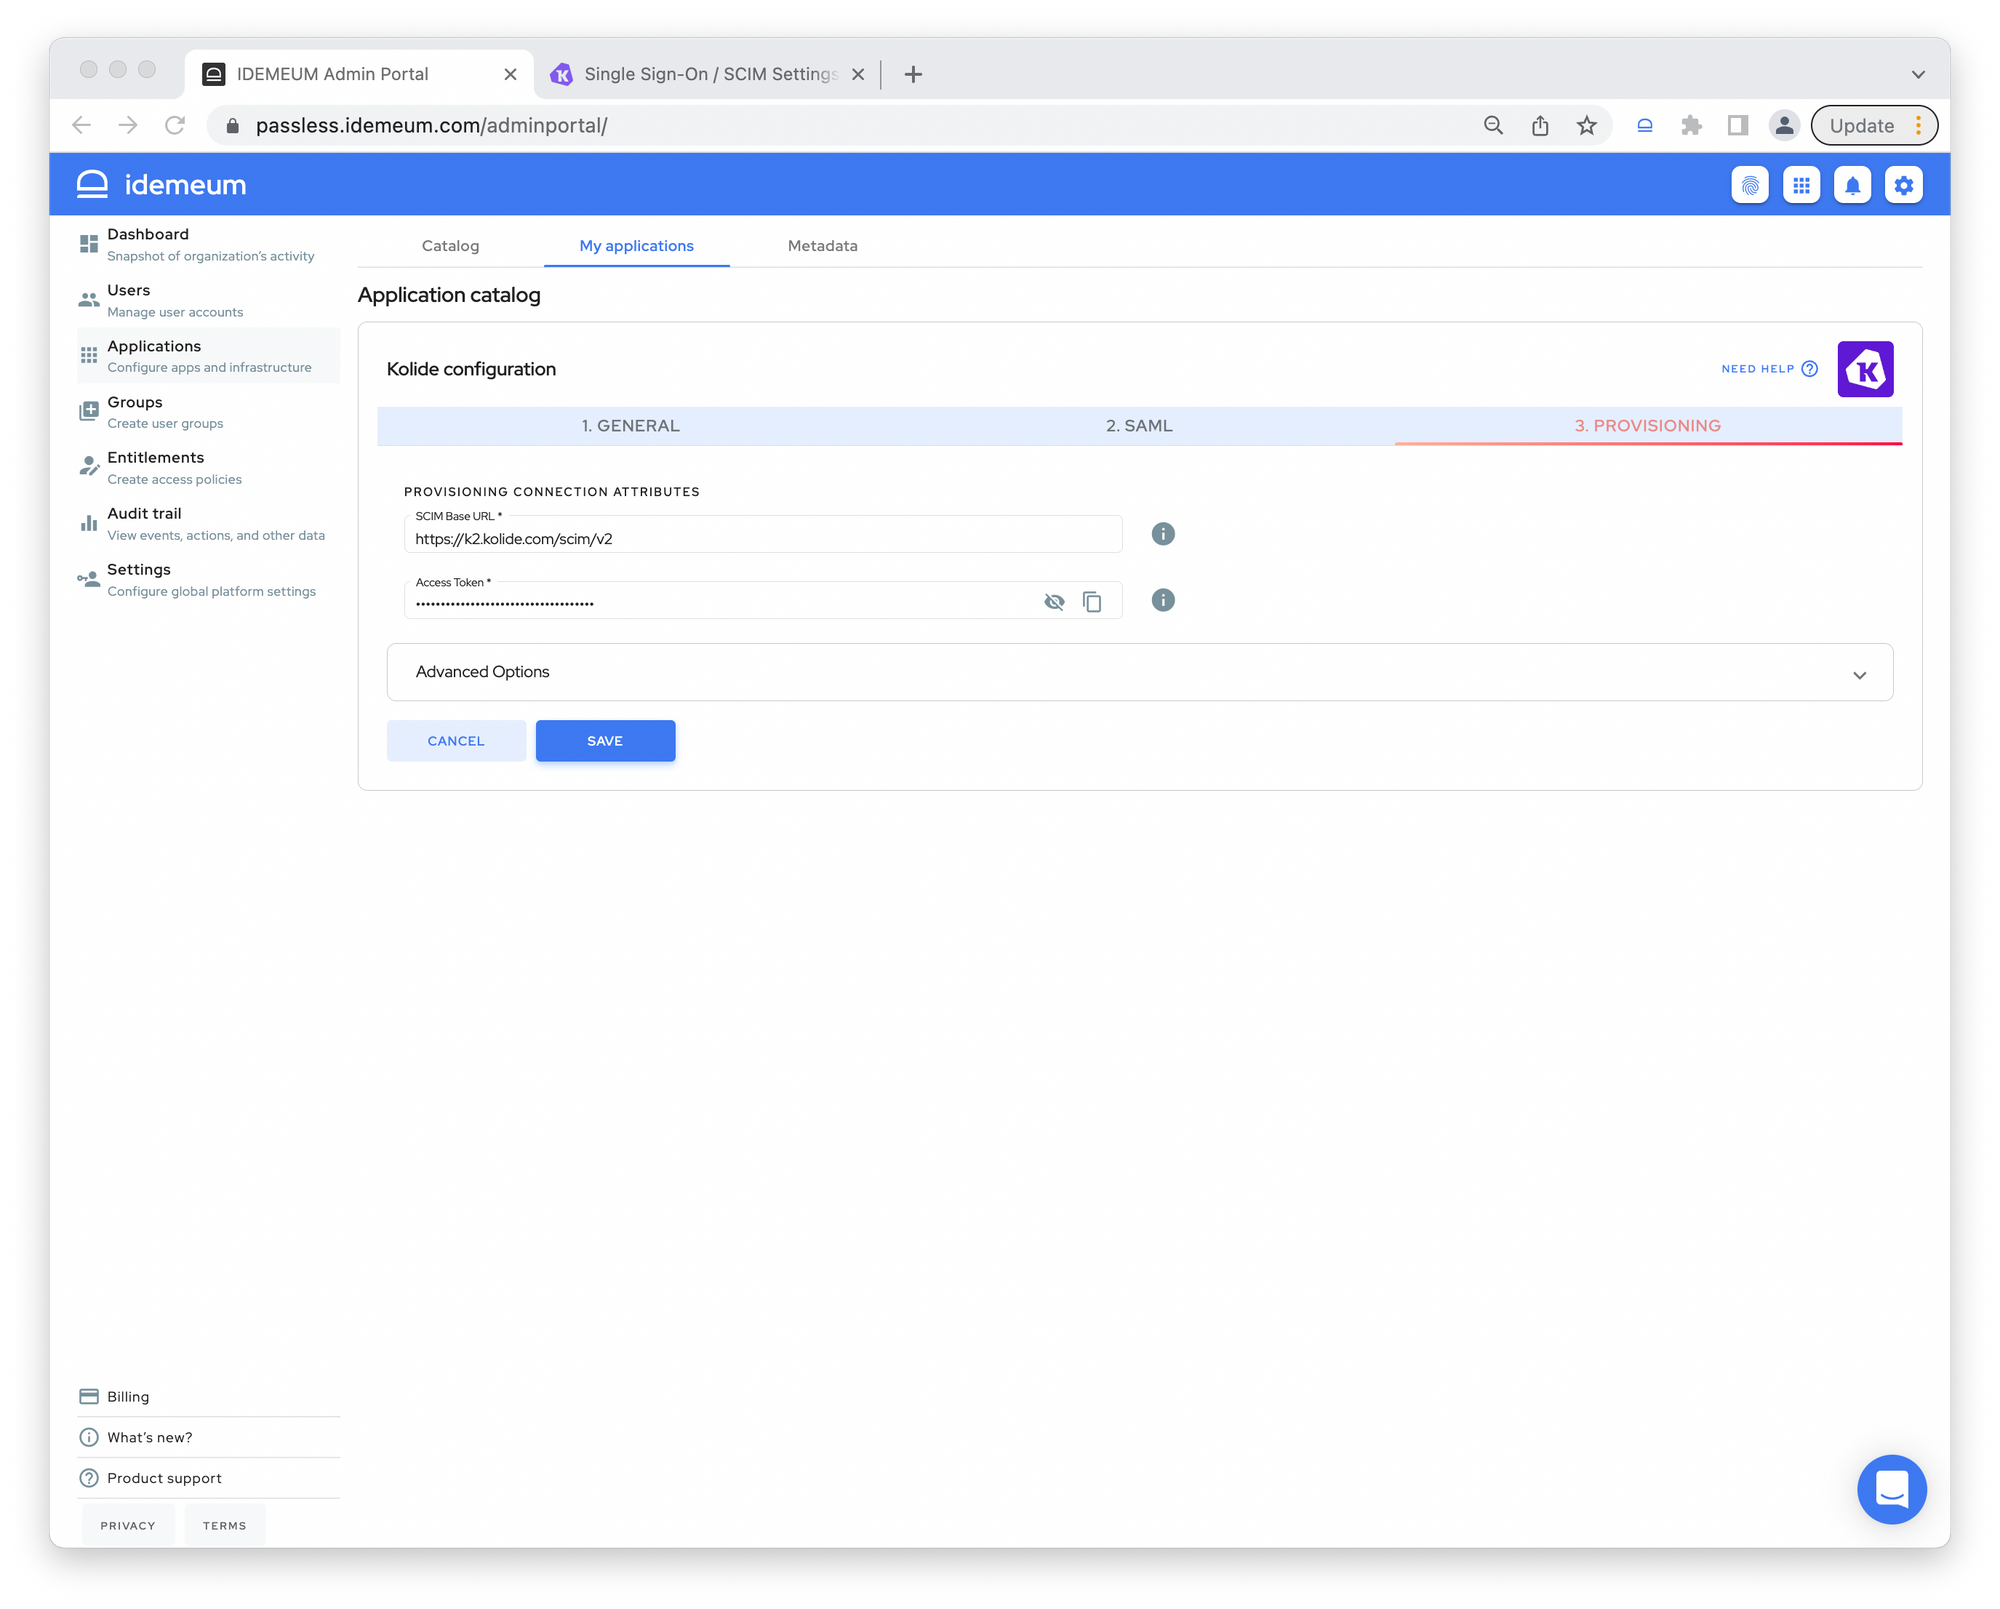
Saveconfiguration
Application entitlements
Before users can access applications you need to make sure you entitle applications to them. In idemeum admin portal navigate to Entitlements section to assign applications to your employees.
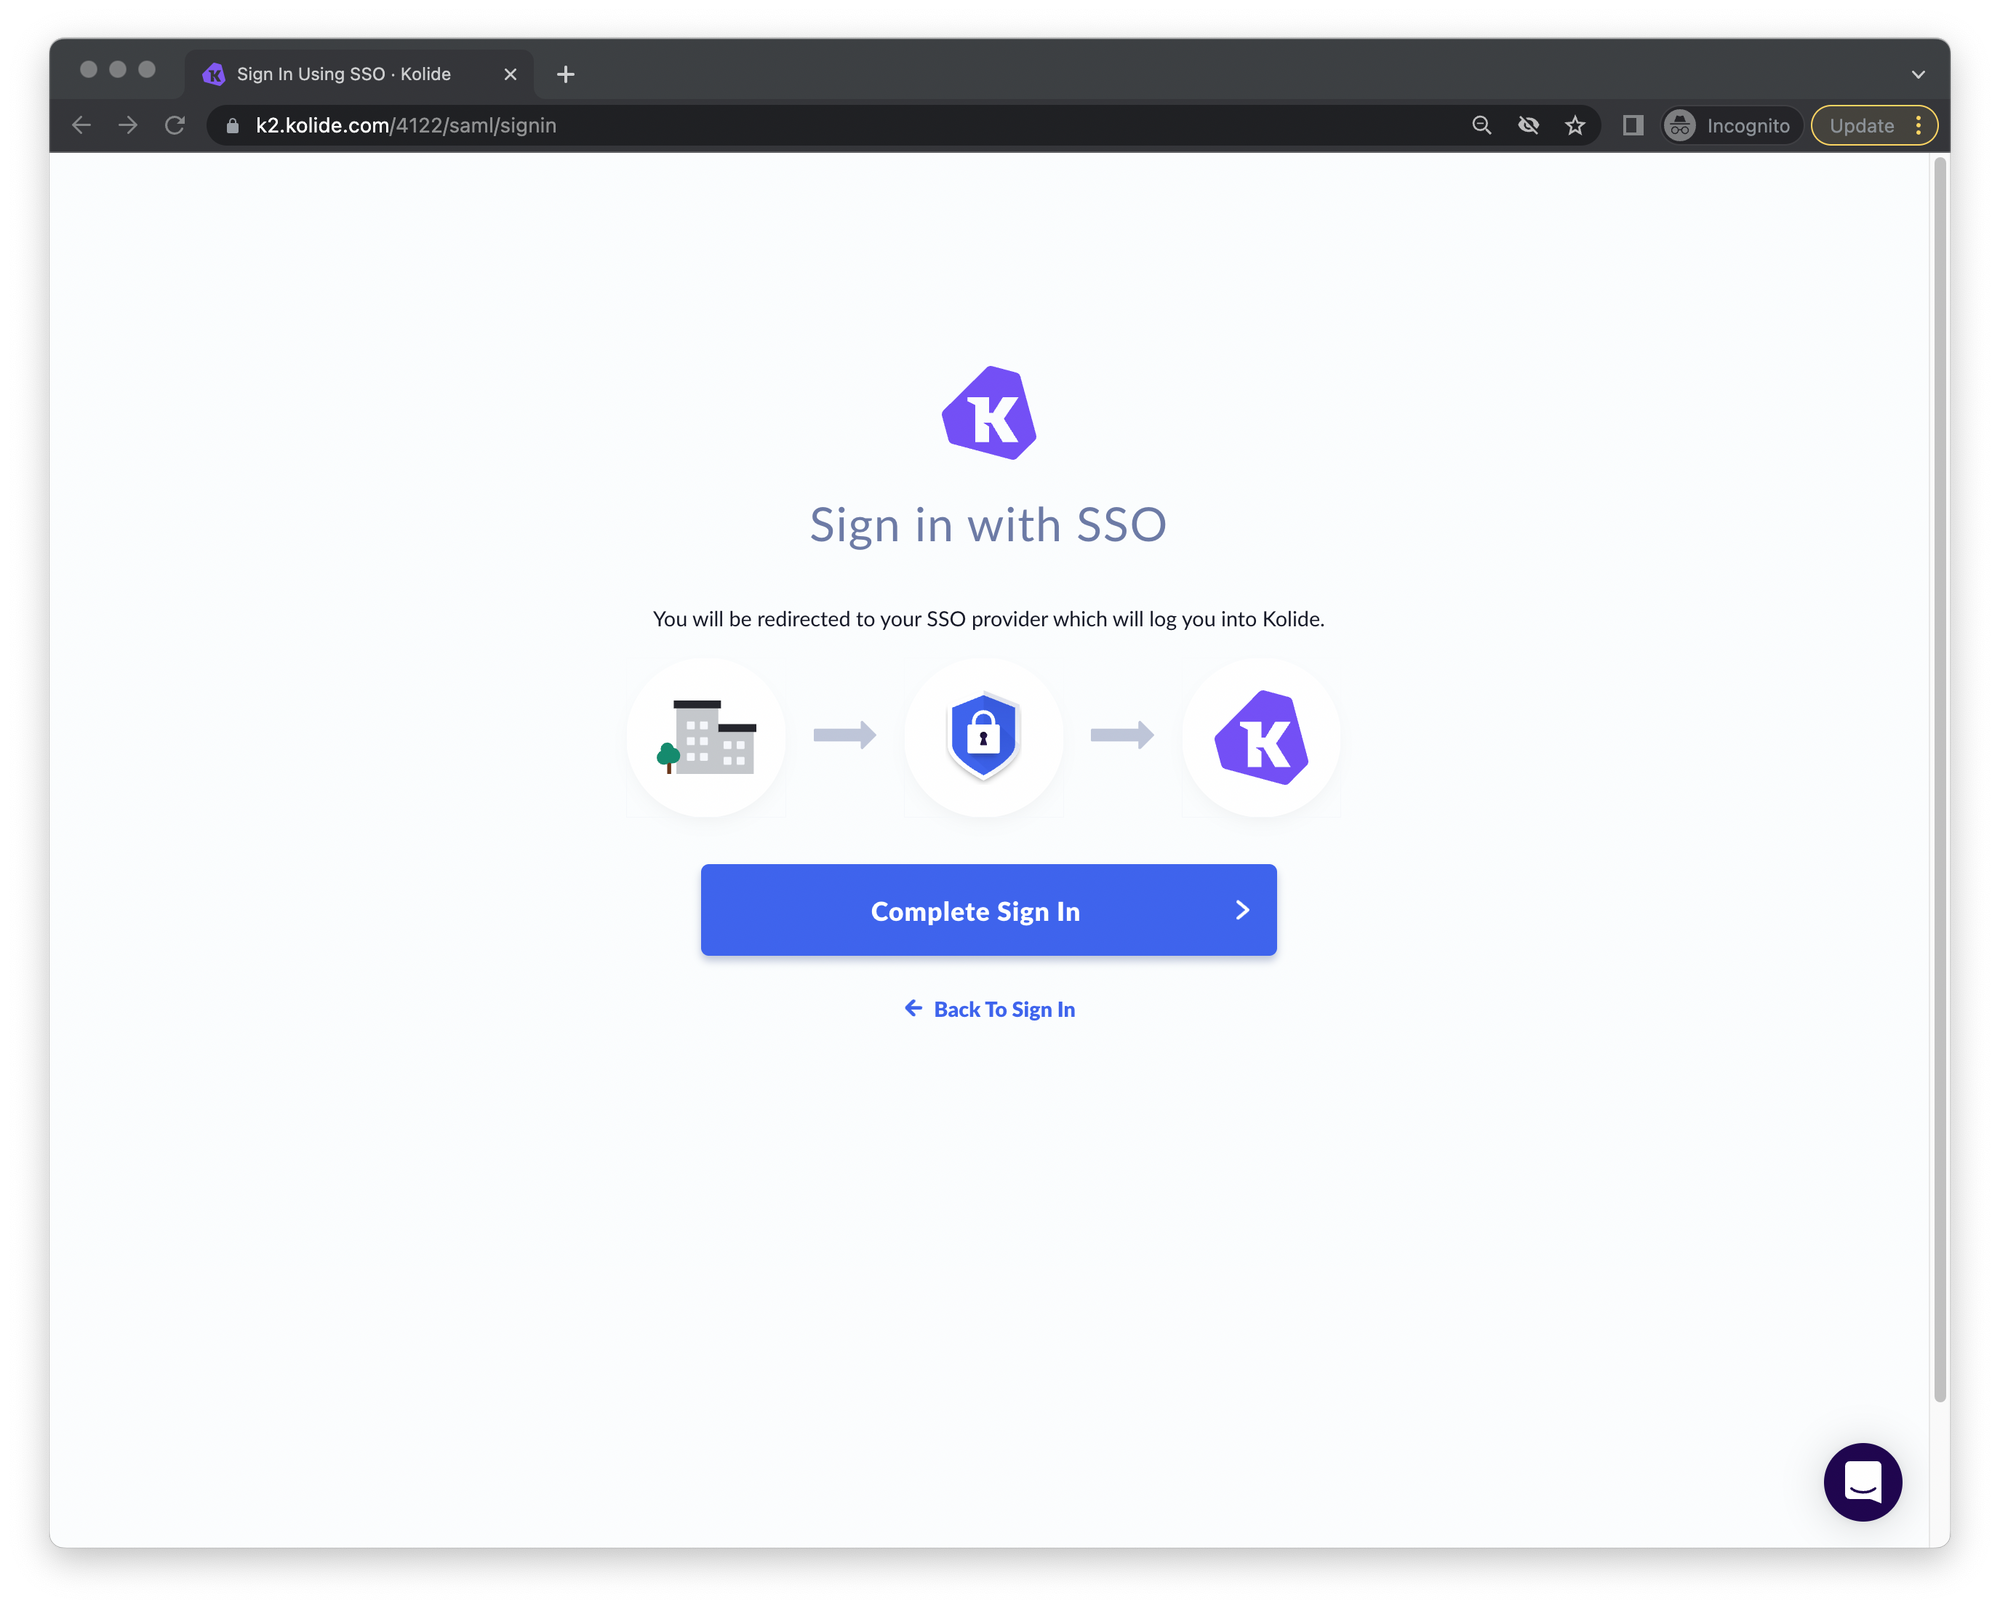
SAML SSO login flows
Kolide supports both:
IDP Initiated Flow
You can navigate to idemeum portal and launch Kolide application by clicking on the application icon.
SP Initiated Flow
Navigate to Kolide and enter your email. You will be asked to sign in with your SSO identity provider.