
Capabilities overview
Salesforce provides customer relationship management service and also provides a complementary suite of enterprise applications focused on customer service, marketing automation, analytics, and application development.
| Supported capability | Required plan | Details |
|---|---|---|
| Passwordless SSO | Essentials plan | Low SSO tax |
| Automated provisioning | Developer, Enterprise, Unlimited | SCIM 2.0 (create, remove, update accounts) |
Prerequisites
To configure SAML integration between idemeum and Salesforce you will first need to obtain SAML XML metadata for your idemeum tenant. You will need the following configuration parameters.
- Identity Provider Entity ID
- Identity Provider SSO URL
- Public X.509 certificate (PEM format)
Instructions for how to obtain these SAML metadata values are below.
 Nikolay Poturnak
Passwordless Single Sign-On (SAML)
Configure SSO in Salesforce
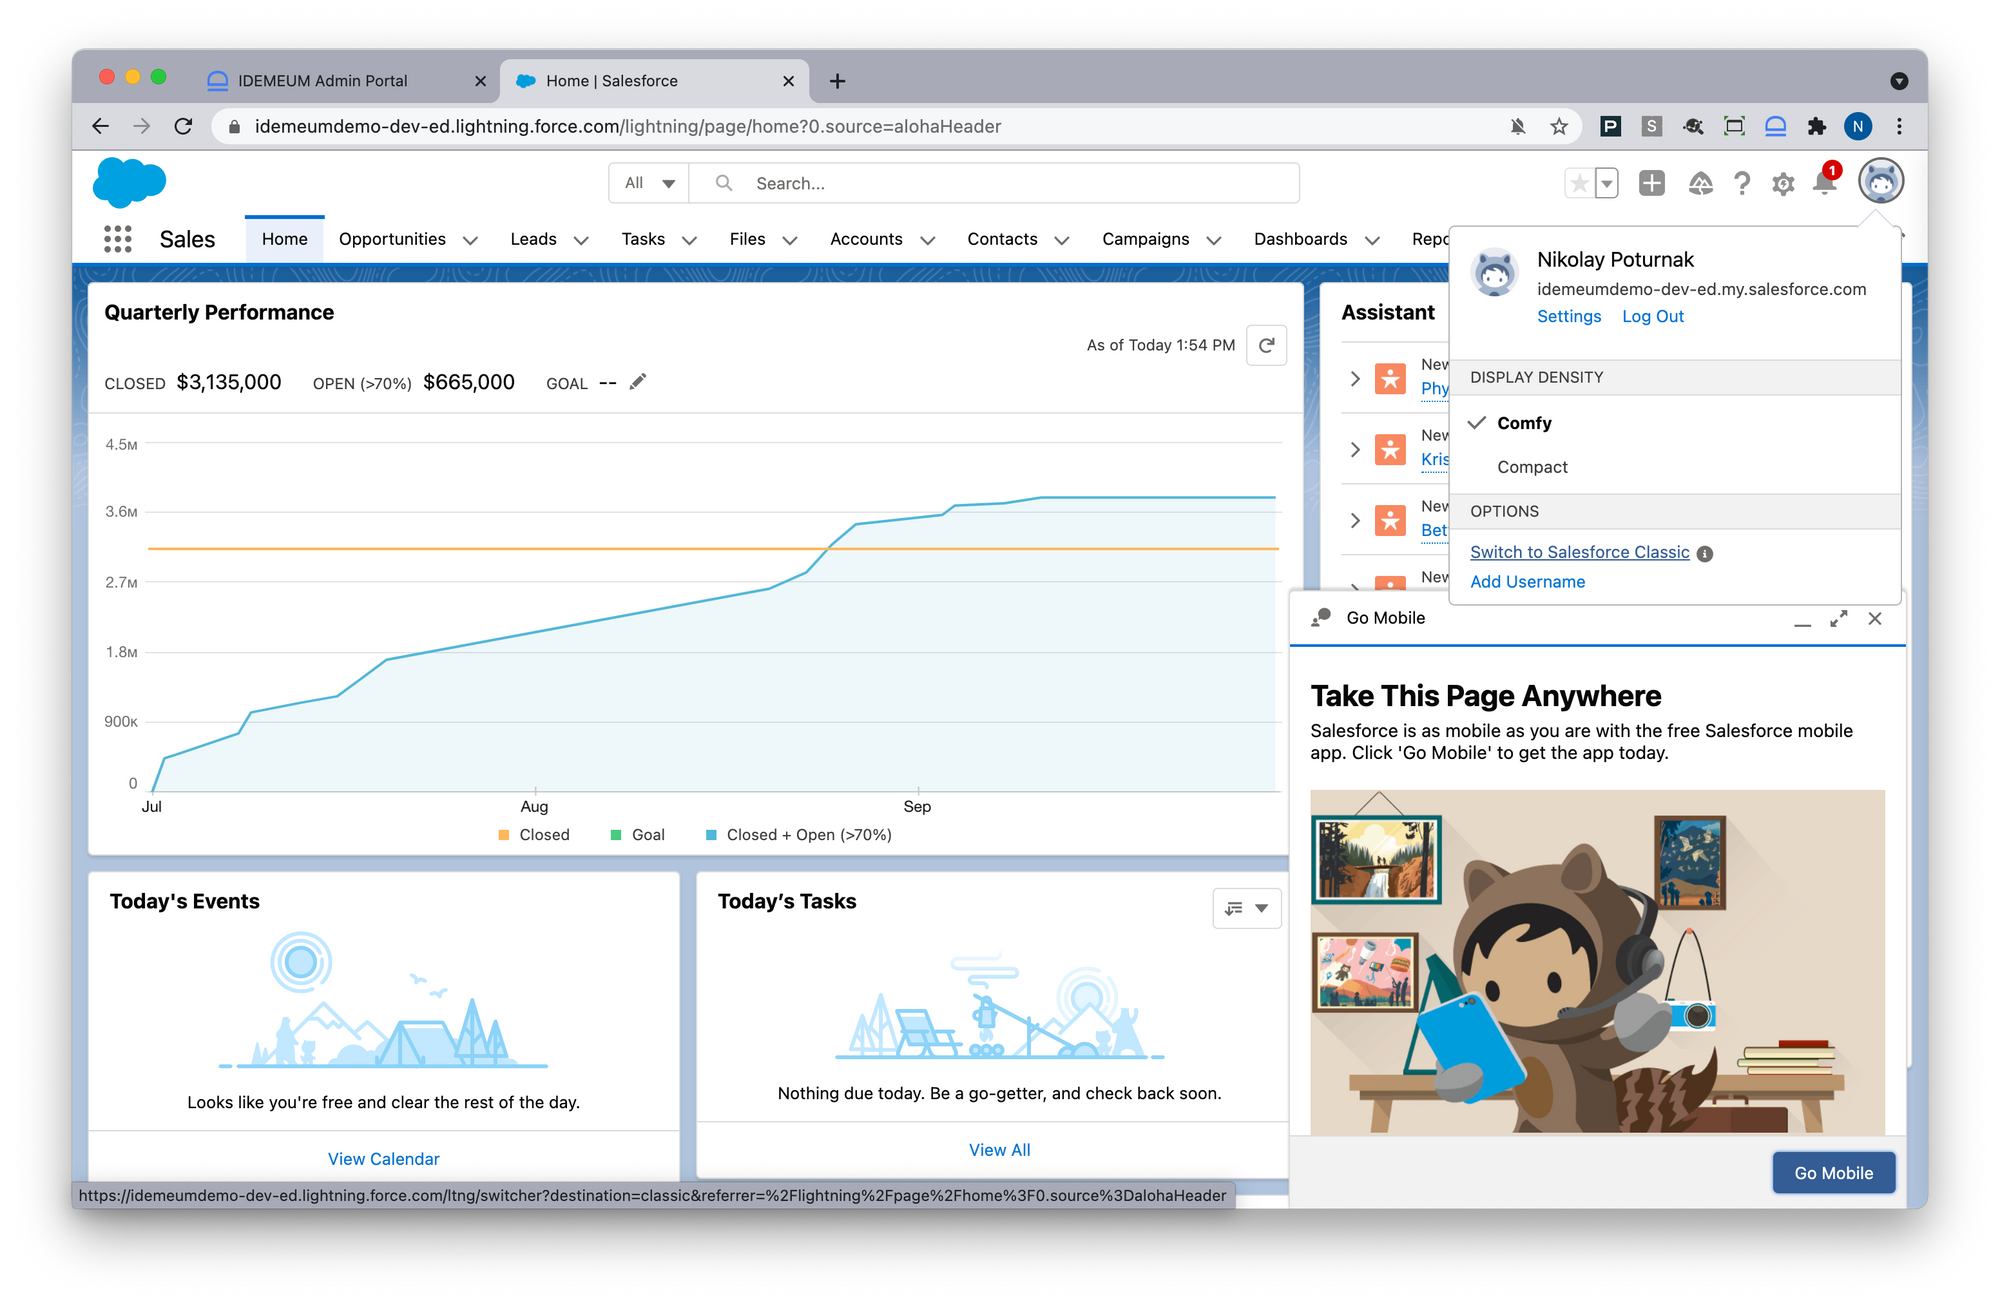
- Access your Salesforce admin dashboard. In this configuration we are using legacy Classic view and NOT Lighting. You can switch by navigating to your profile icon at the top right of the screen and clicking Switch to Salesforce Classic.
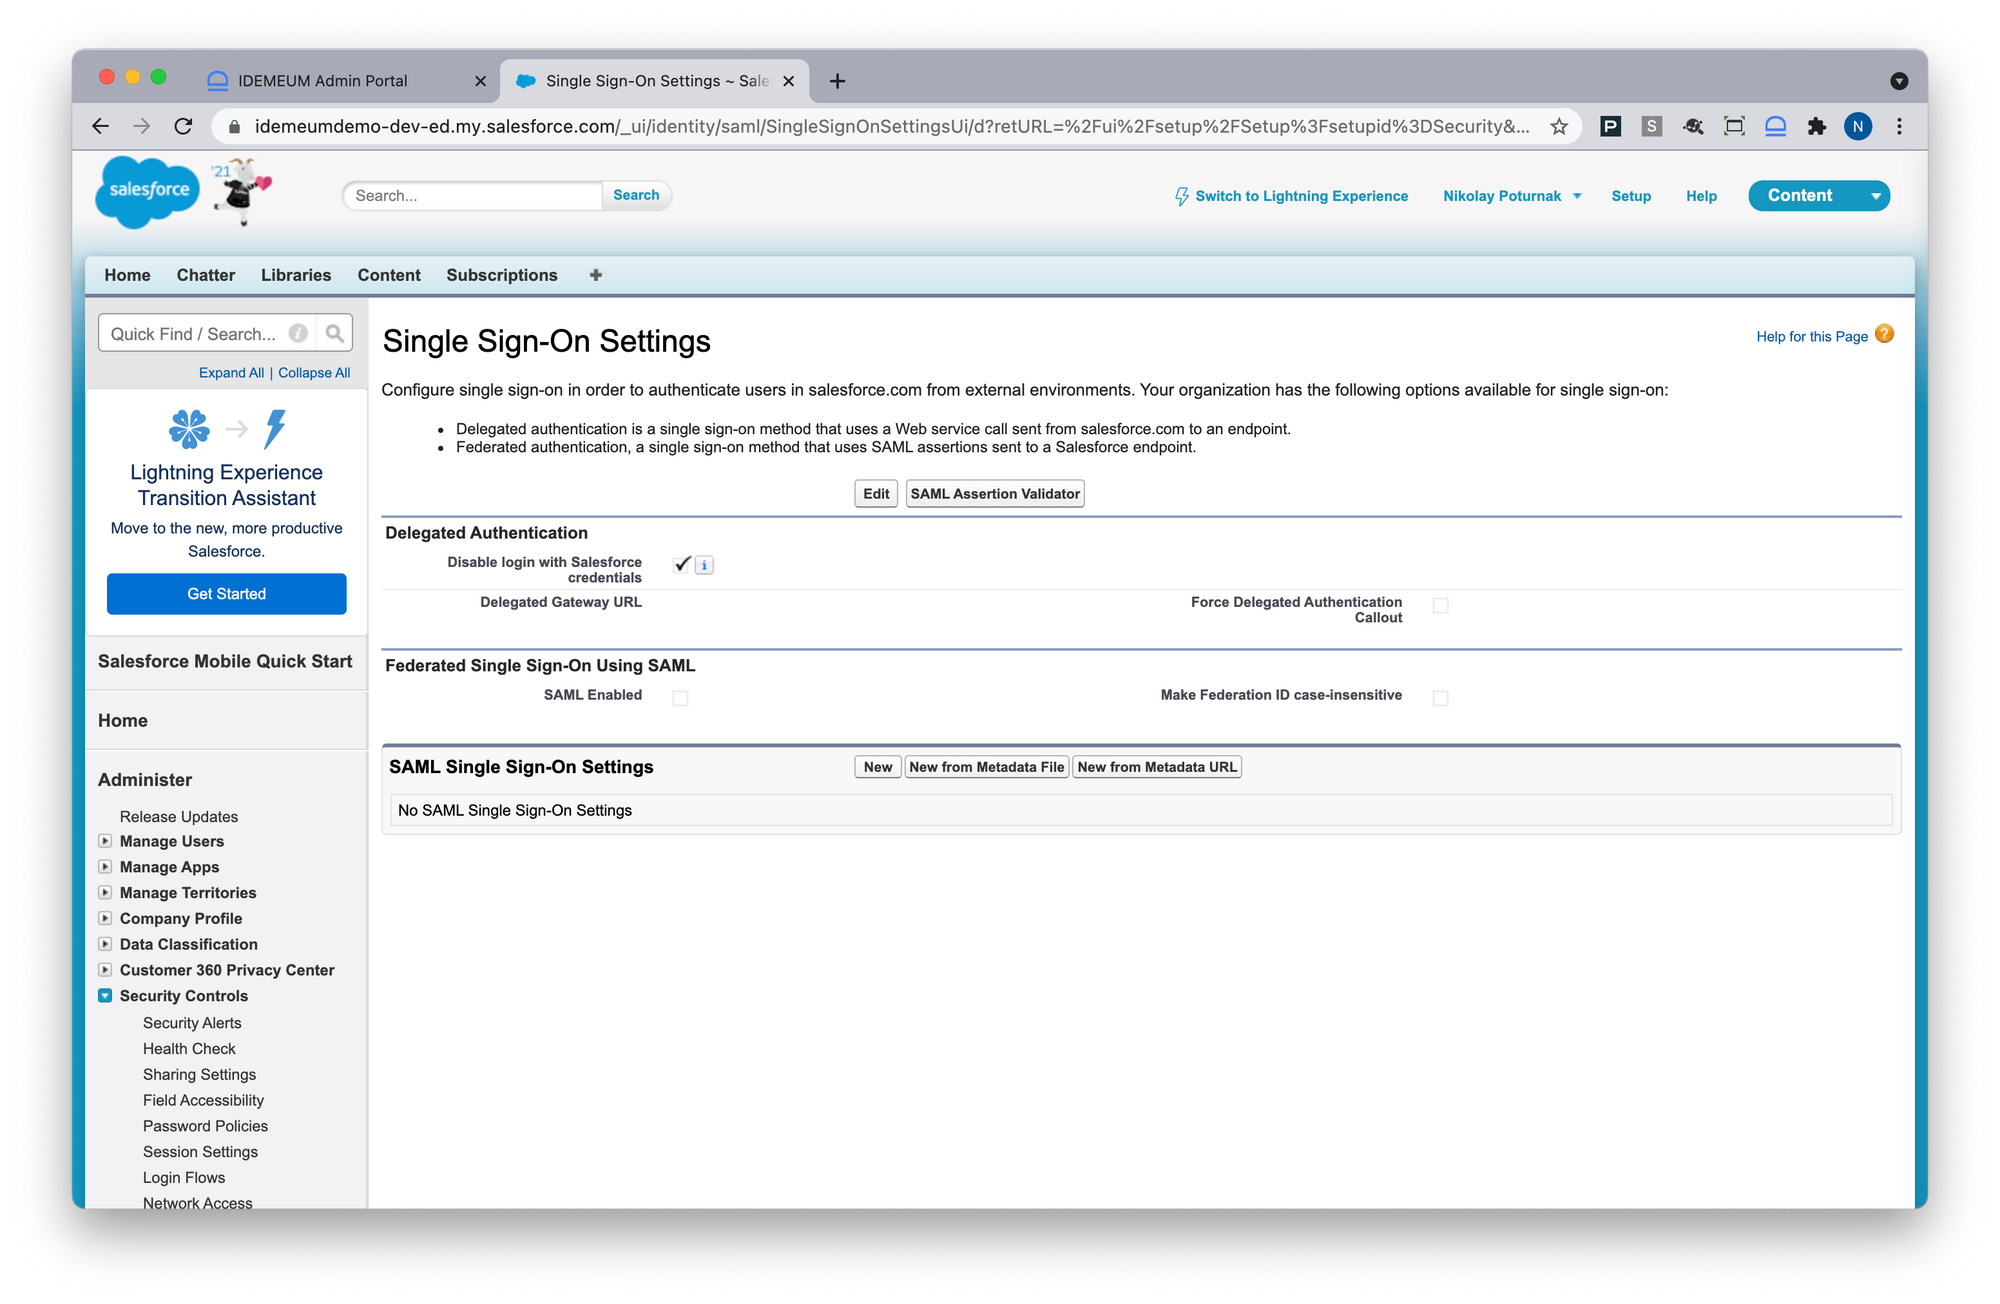
- Navigate to Setup -> Security Controls -> Single Sign On settings

- In the SAML Single Sign-On Settings click New
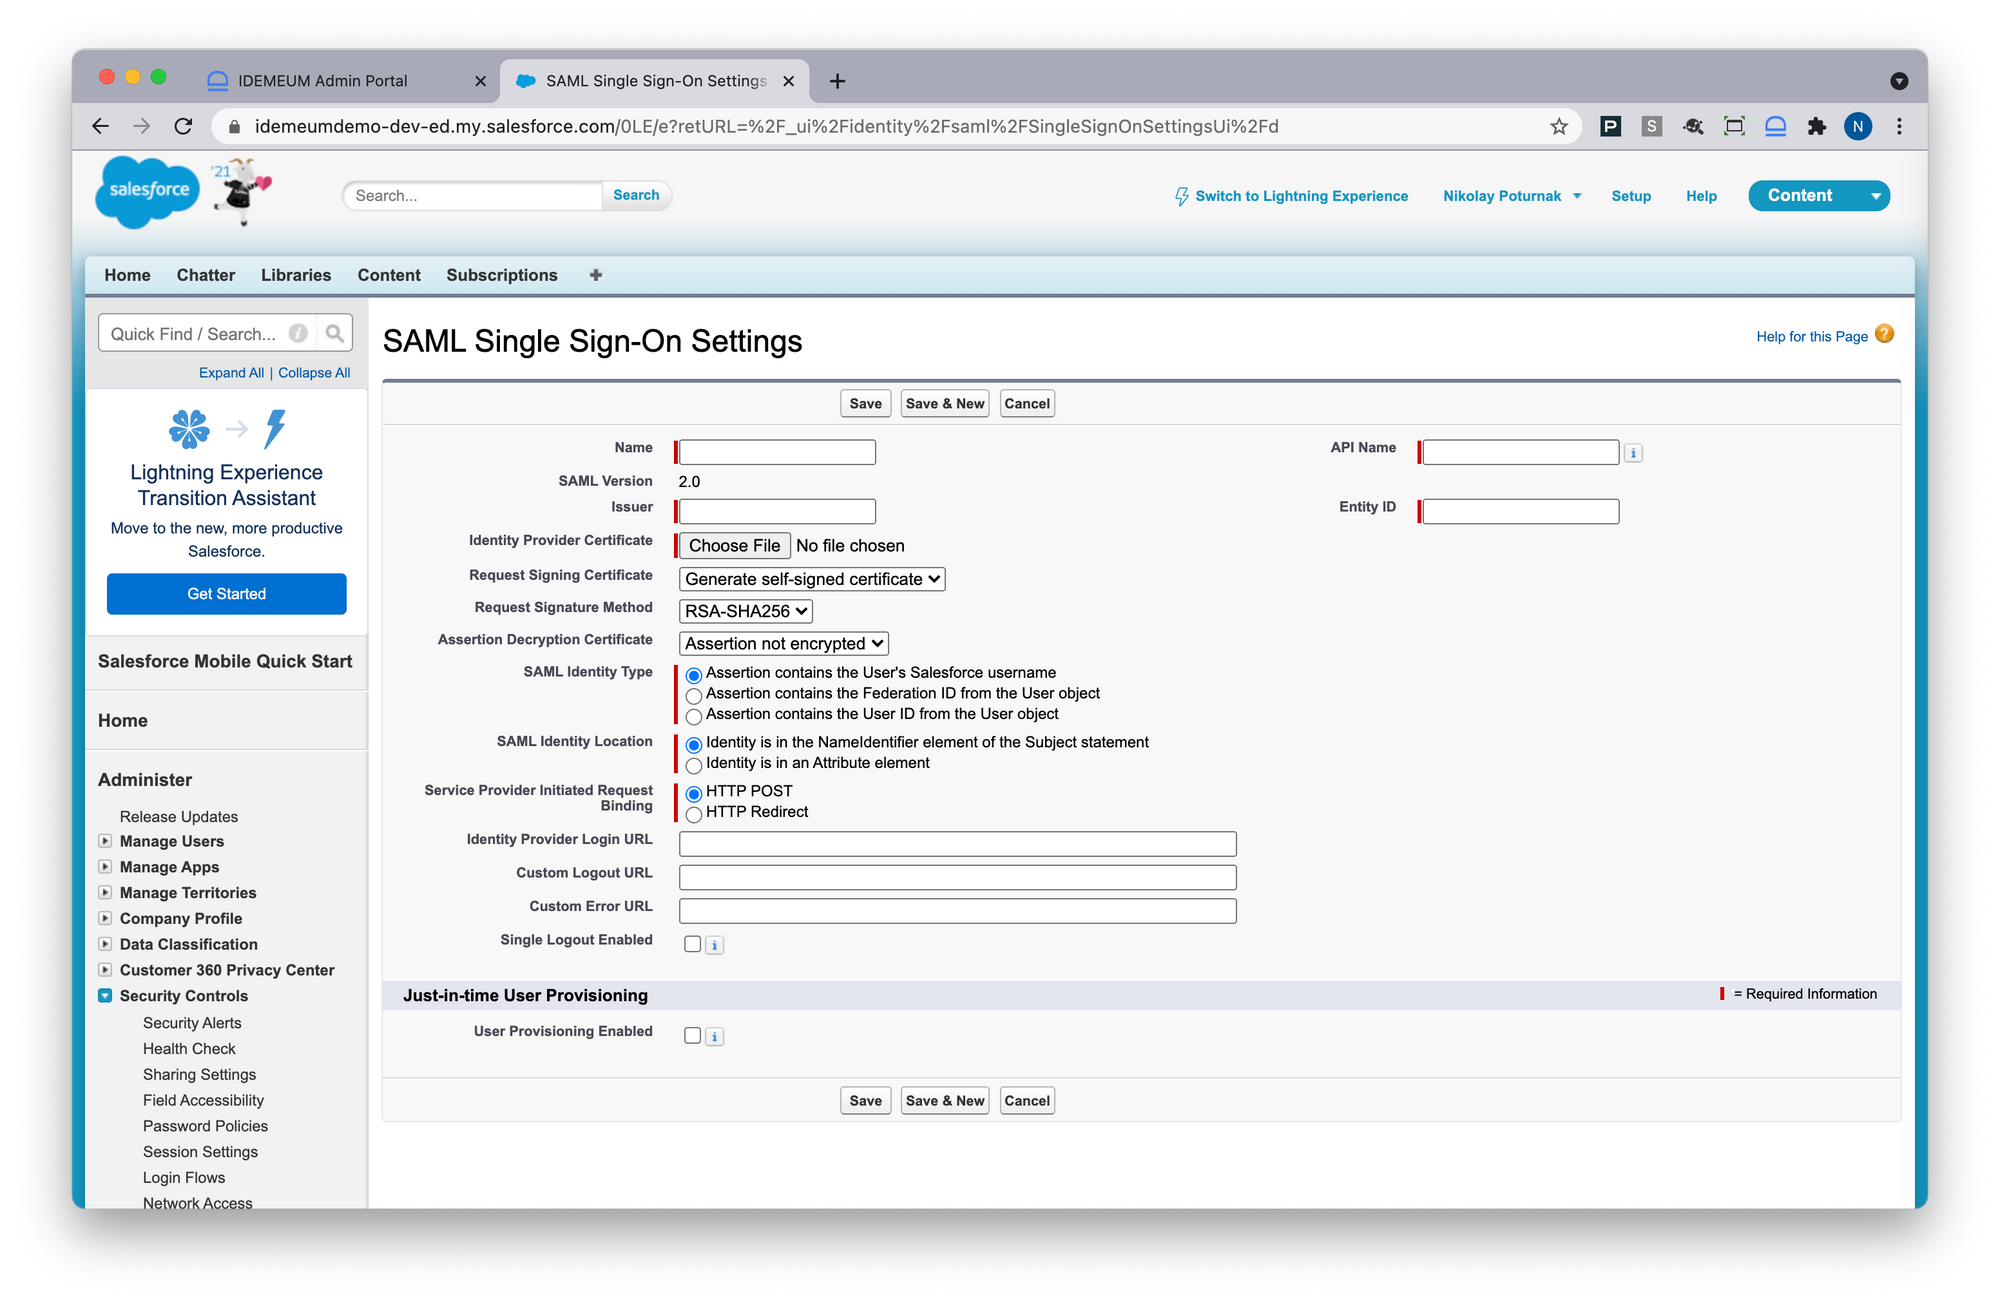
Now you will be using idemeum SAML metadata values obtained from prerequisites section
- For Name type in idemeum
- For Issuer paste Identity Provider Entity ID that you obtained in the prerequisites section
- For Entity ID type https://[your domain].my.salesforce.com and replace [your domain] with your actual domain name
- Take Public X509 certificate (PEM format) value that you obtained from idemeum and upload to Salesforce in the Identity Provider certificate section
- For Identity Provider Login URL paste Identity Provider SSO URL that you obtained from prerequisites section
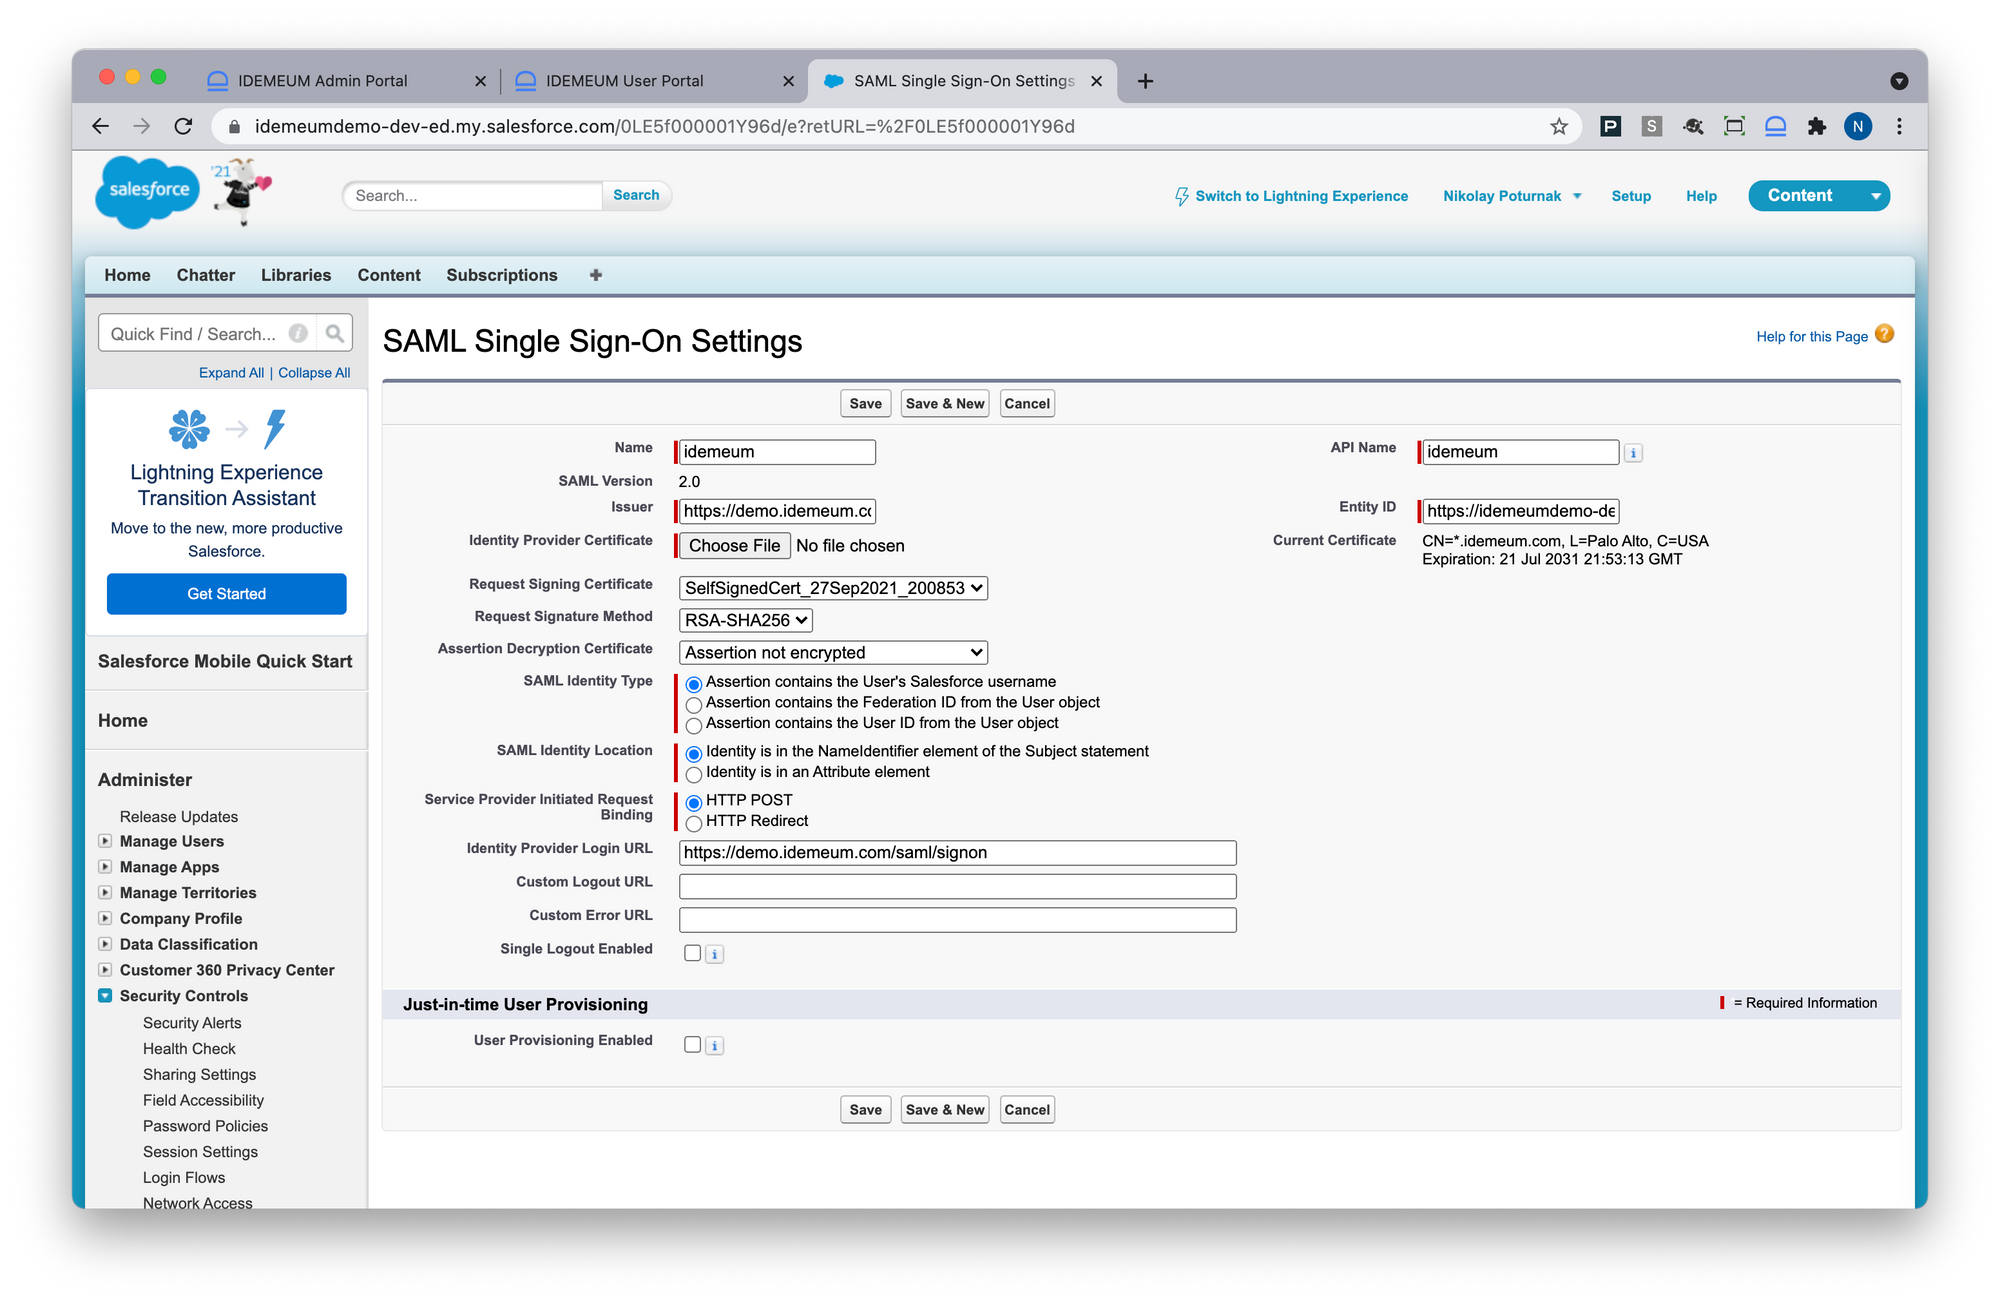
- Click Save
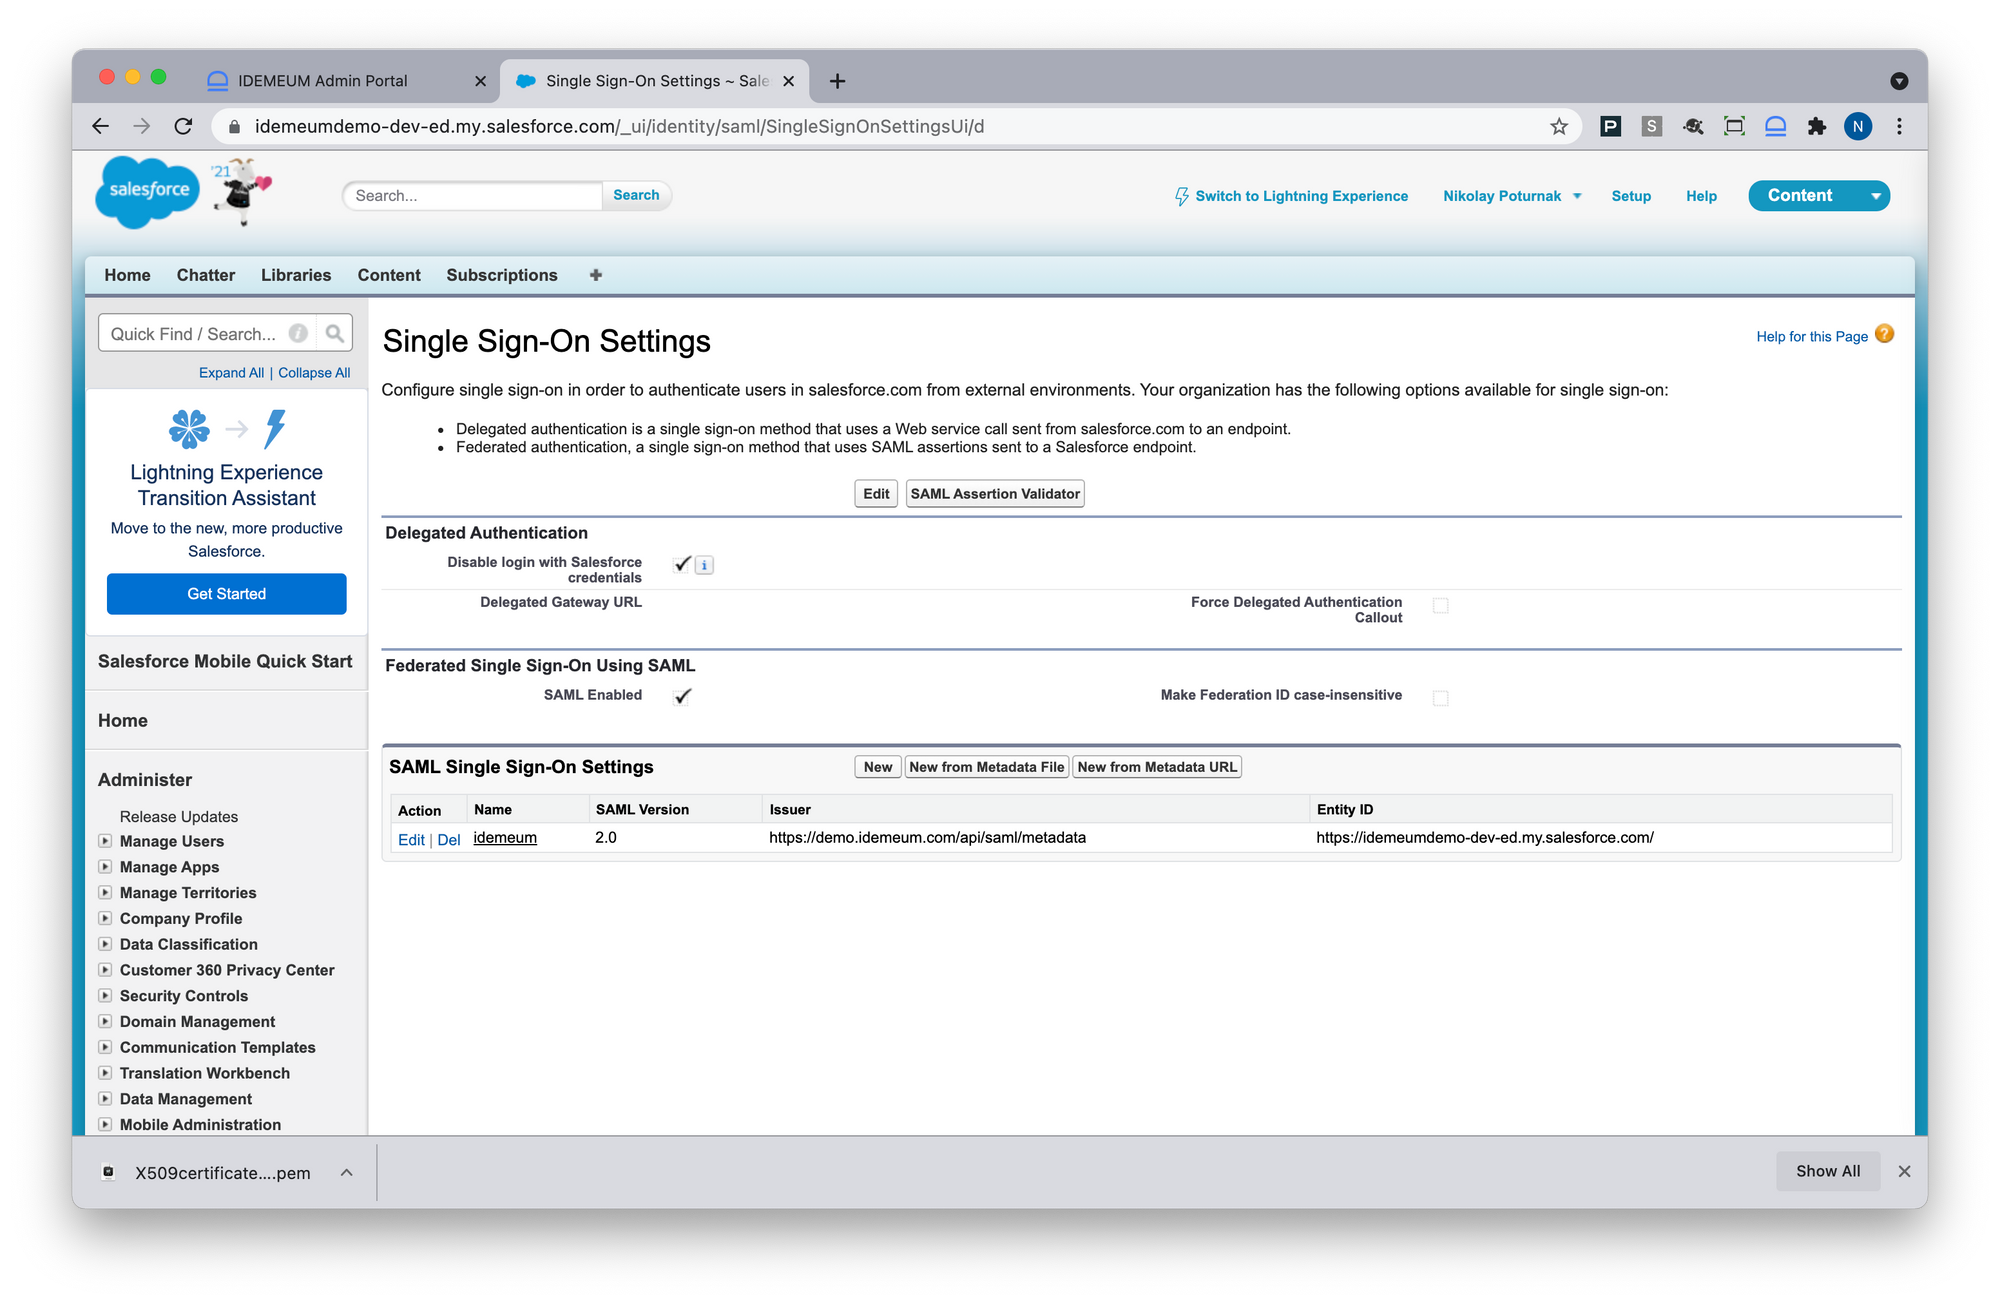
- You will be given values that you will need for idemeum configuration. Specifically Salesforce SAML Metadata. Download metadata file as you will need that for idemeum configuration

- Click Back to Single Sign-On Settings
- Click Edit
- Enable SAML Enabled checkbox
- Click Save
- Navigate to Domain Management - My domain
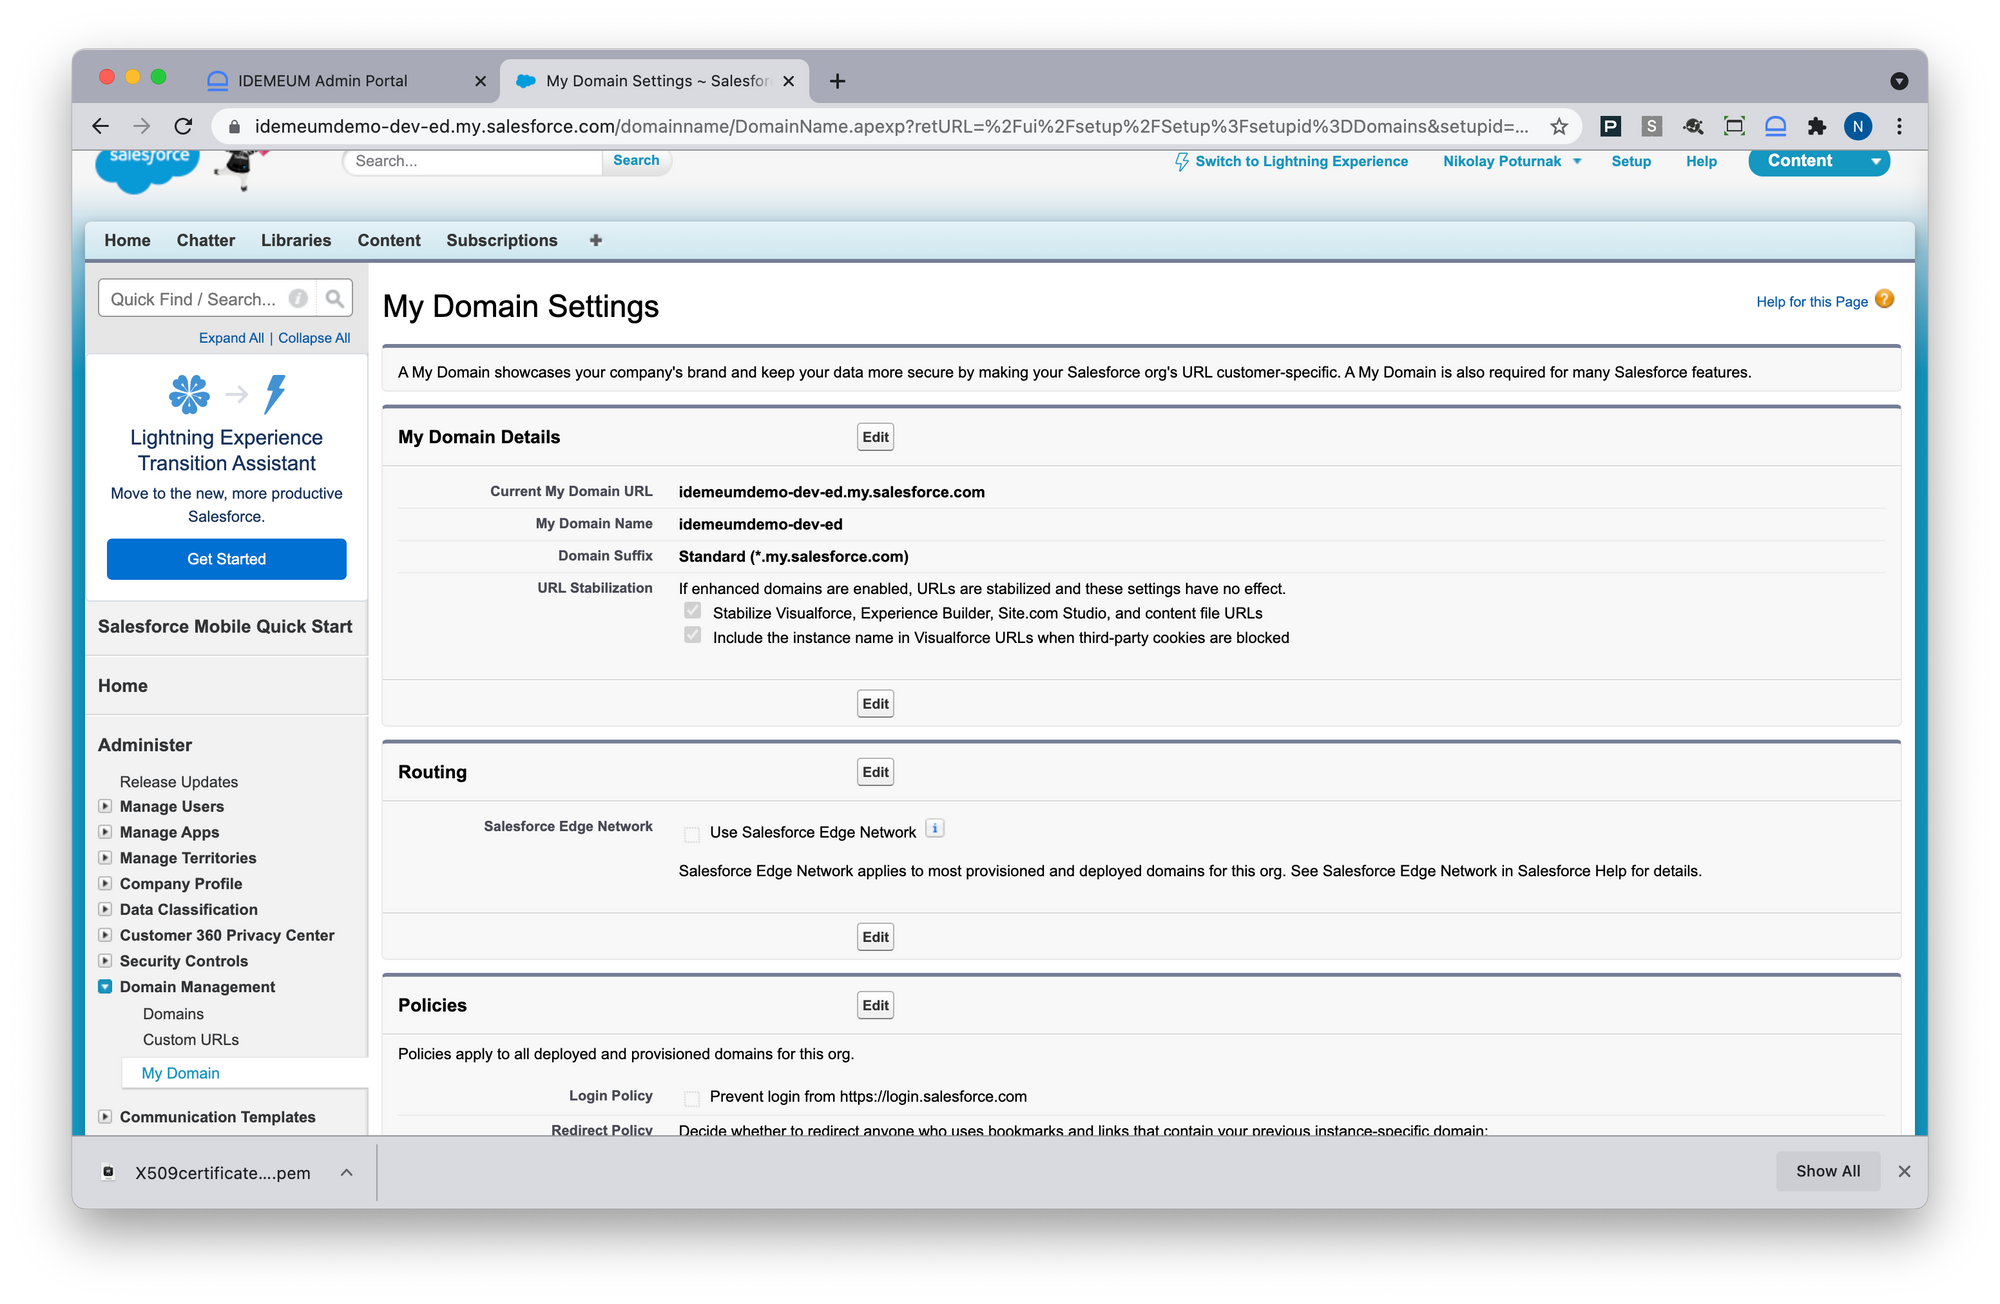
- In the Authentication Configuration section click Edit
- Enable checkbox next to idemeum authentication service (this is how you named idemeum SSO provider in the SAML configuration section)
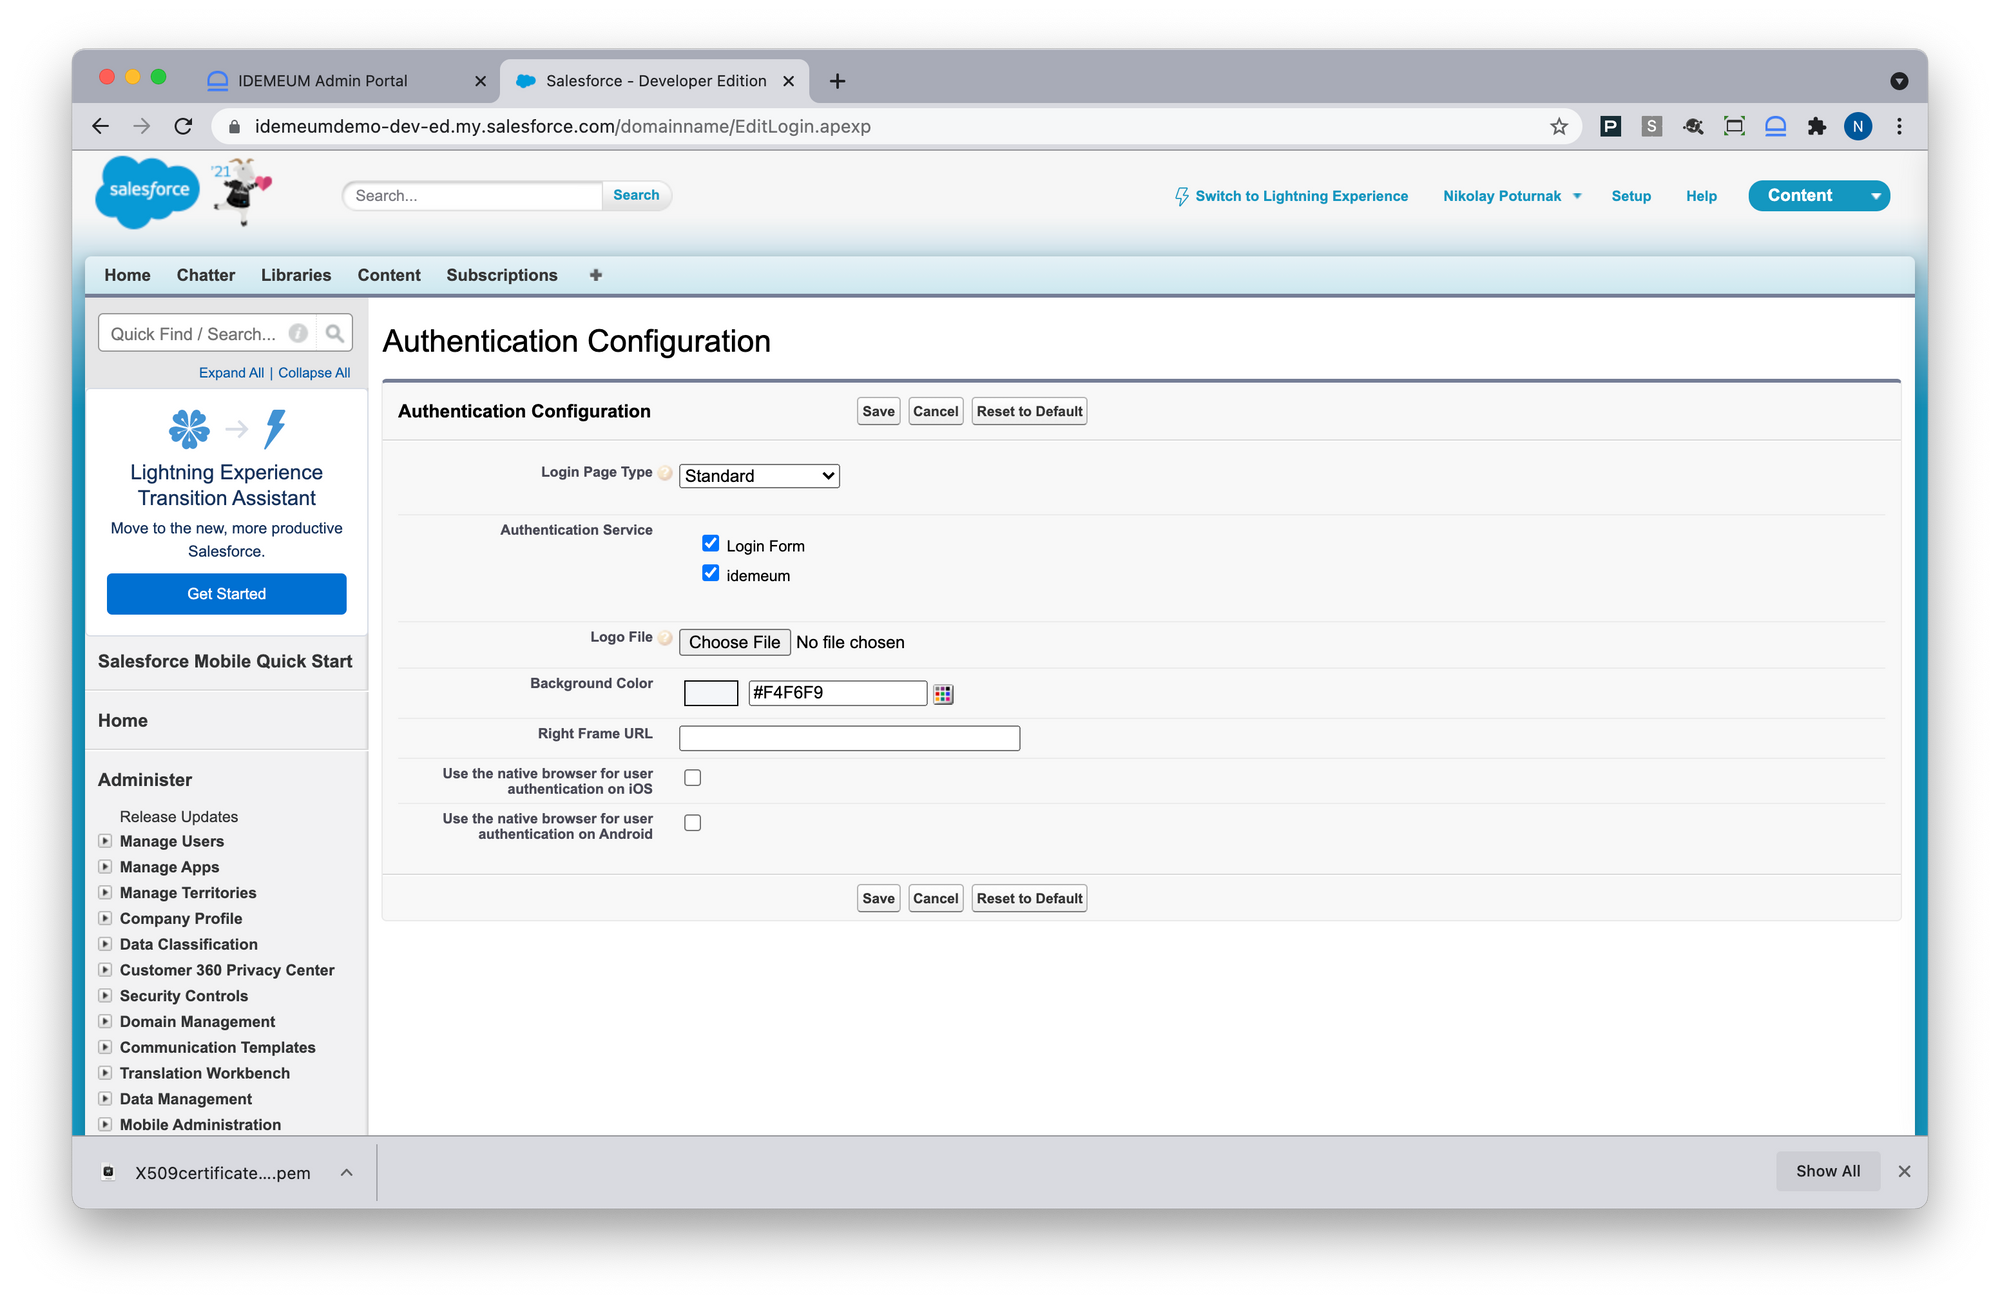
- Click Save
Configure SSO in idemeum
- Navigate to your idemeum admin portal at https://[your domain].idemeum.com/adminportal
- Click Applications in the left menu
- Search for Salesforce application and click Add App
- Click SAML at the top navigation menu
Now you will using metadata file obtained from Salesforce
- Upload Salesforce XML metadata file and click Load config
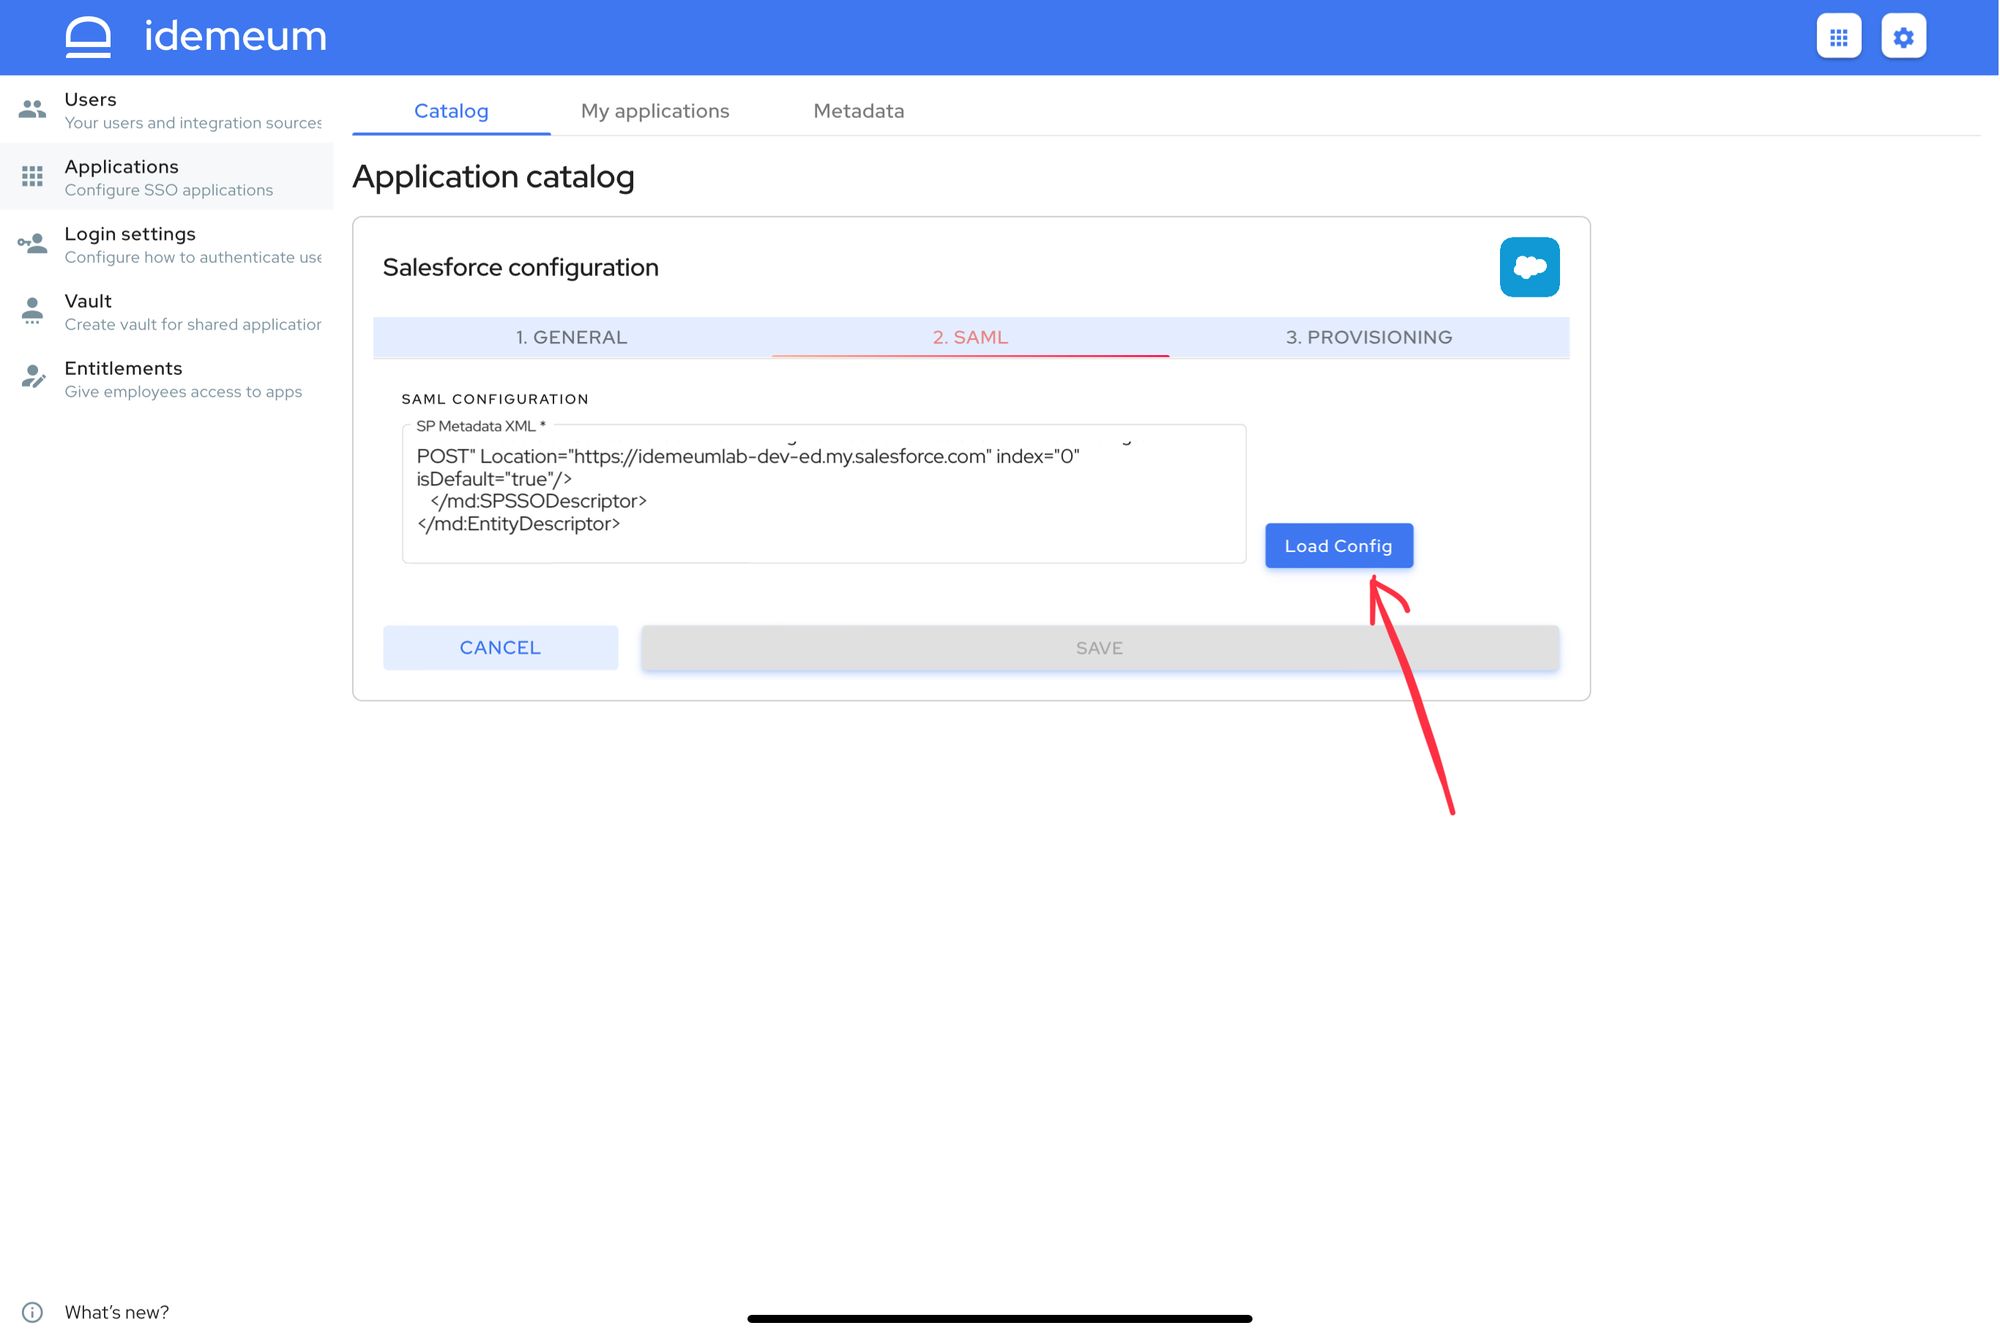
- Click Save
Automated provisioning (SCIM)
- Make sure you Disable login with Salesforce credentials for delegated authentication in salesforce. Navigate to Setup -> Security Controls -> Single Sign-On Settings and check Disable login with Salesforce credentials.
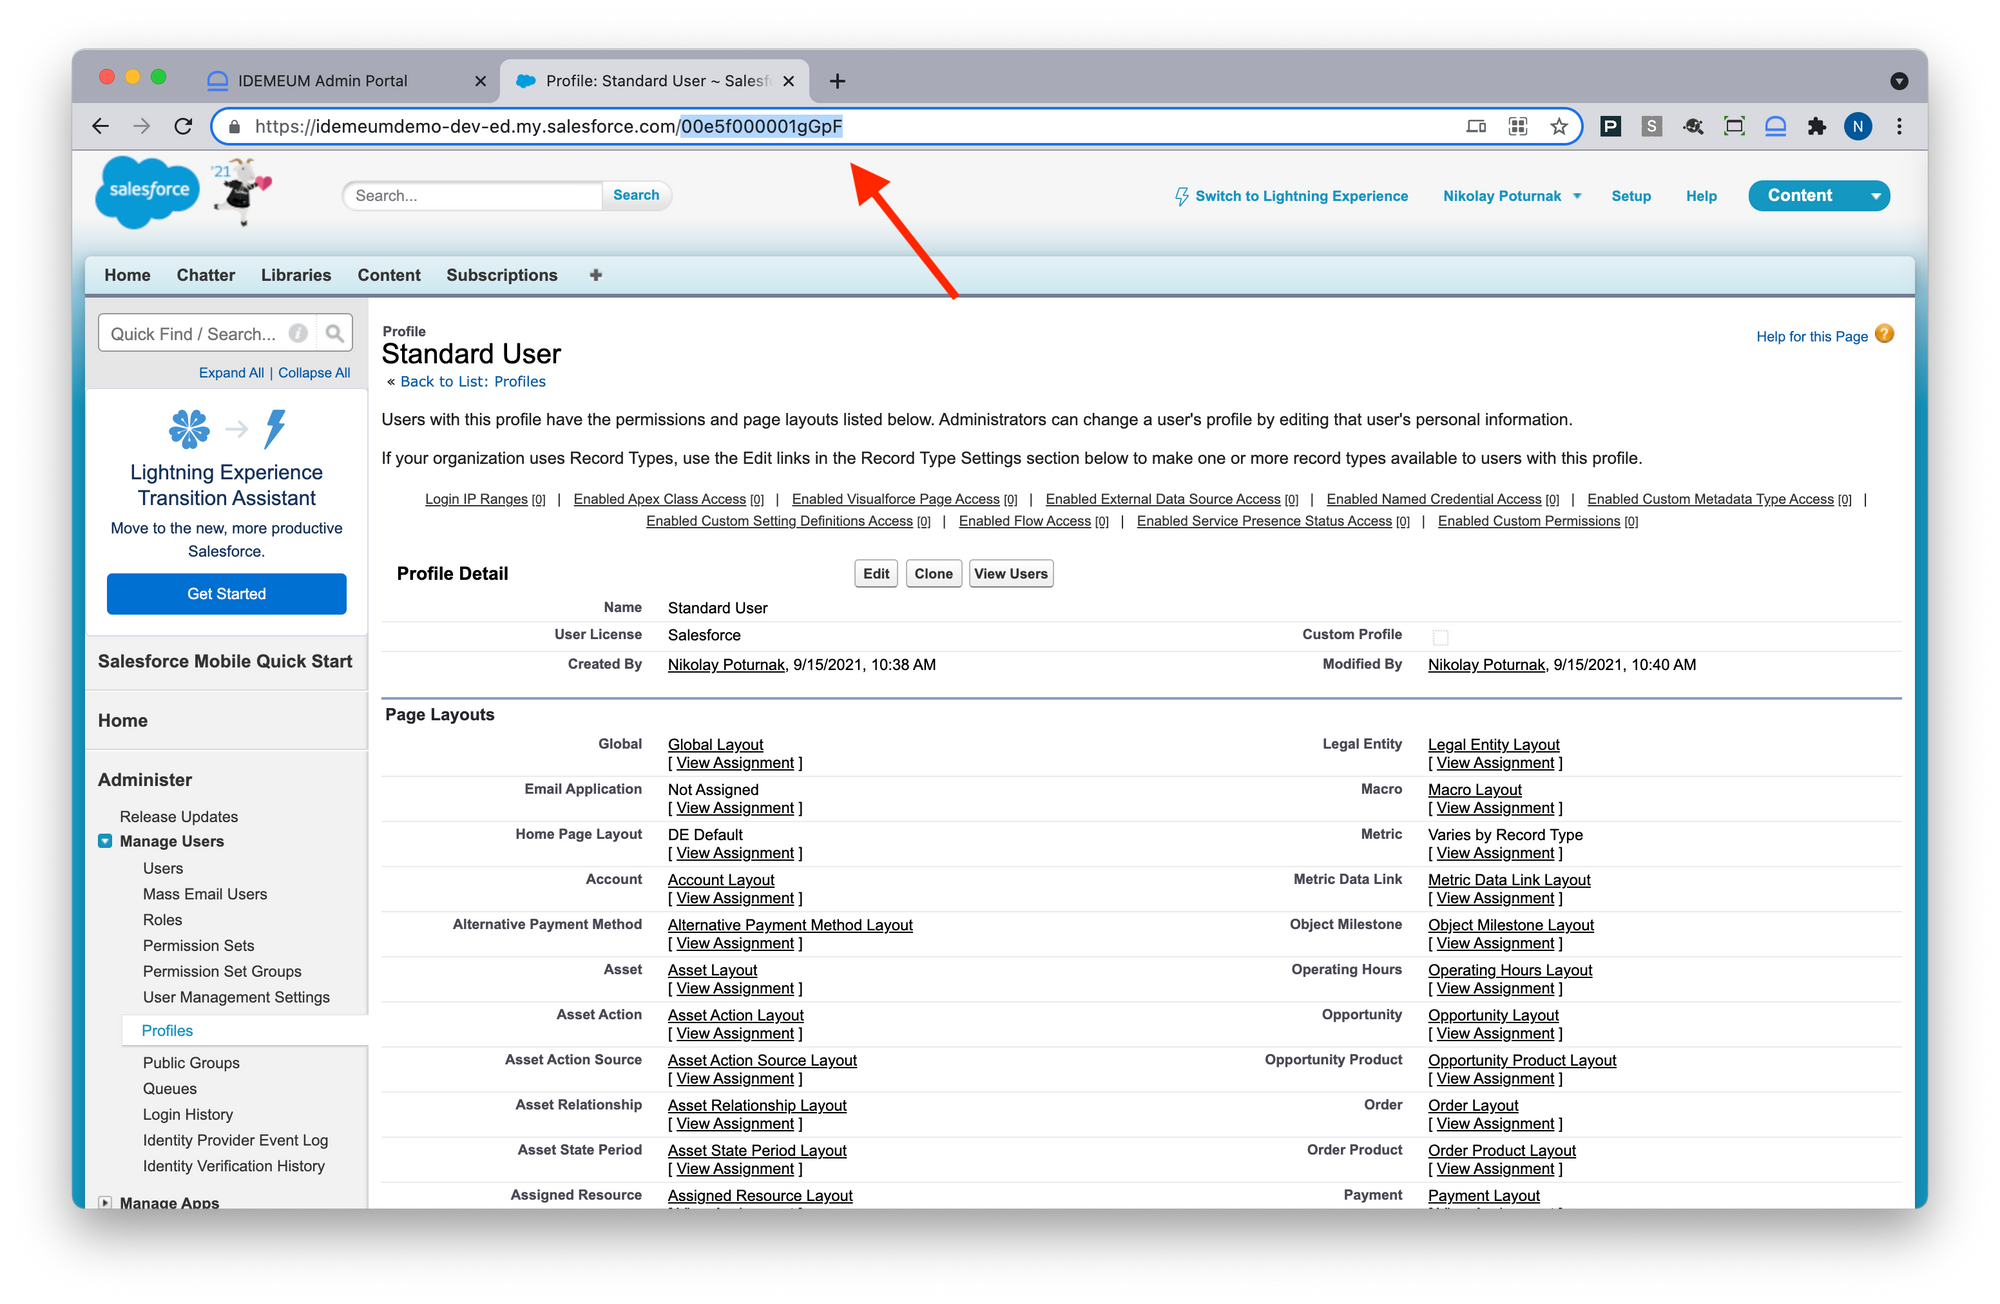
- Obtain default profile that users will be assigned when they are provisioned into salesforce. You will need to get profile id.
- Navigate to salesforce admin console, access Setup -> Manage users -> Profiles
- Click on any profile that you want your provisioned users to be assigned to
- In the browser URL bar grab the numerical id of that profile
- Navigate to Salesforce app configuration in idemeum
- Access Provisioning section
- Now enter SCIM URL to enable provisioning. The SCIM URL is https://[your-domain].my.salesforce.com/services/scim/v2. Replace your-domain with your actual domain name. For instance, https://idemeumdemo.my.salesforce.com/services/scim/v2
- Now enter the default user profile that you obtained in the previous step
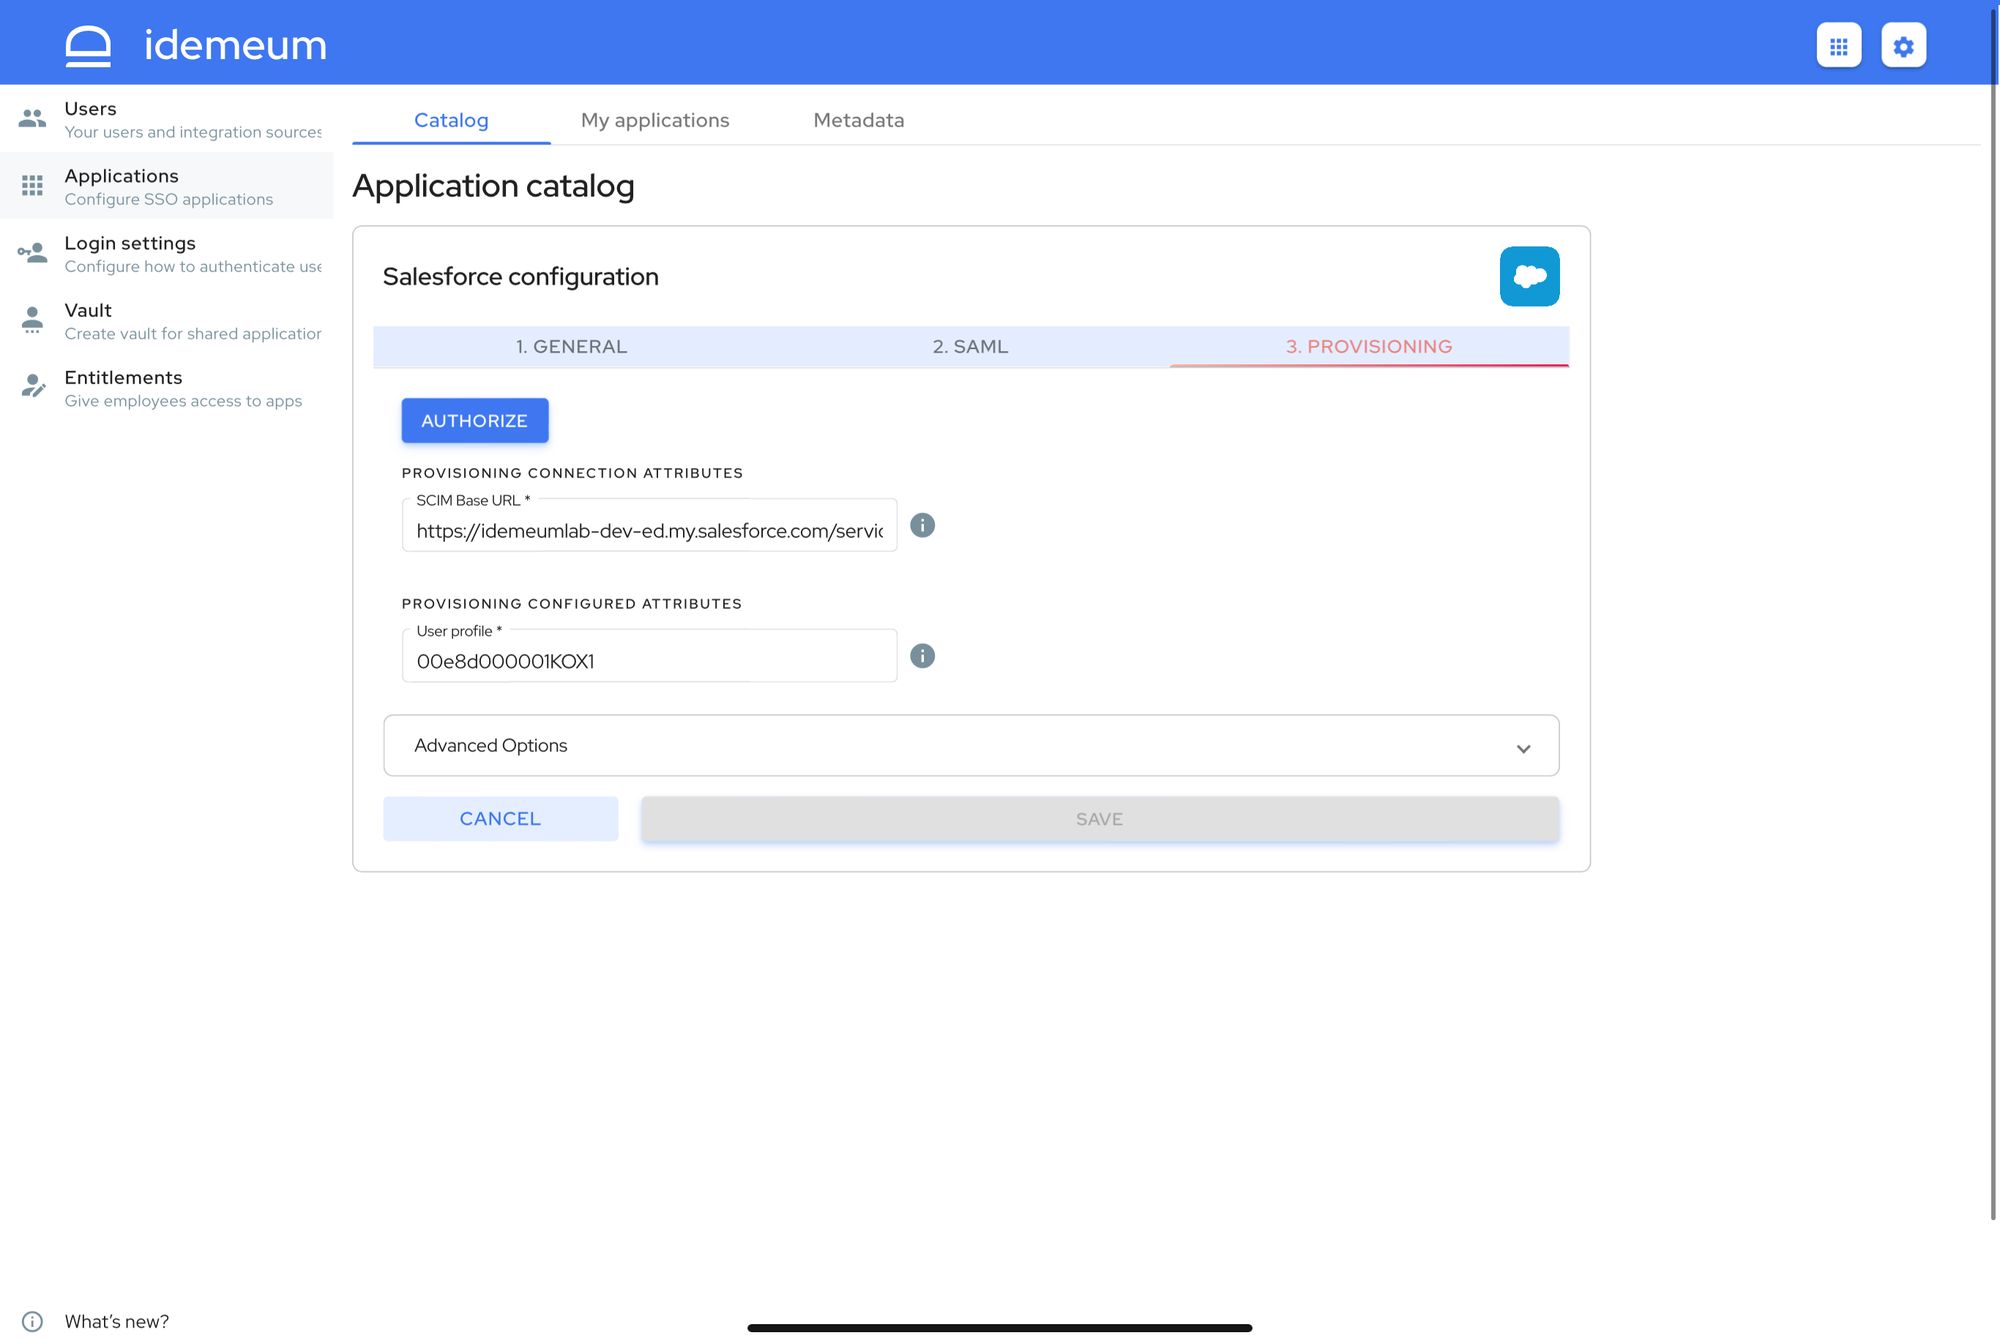
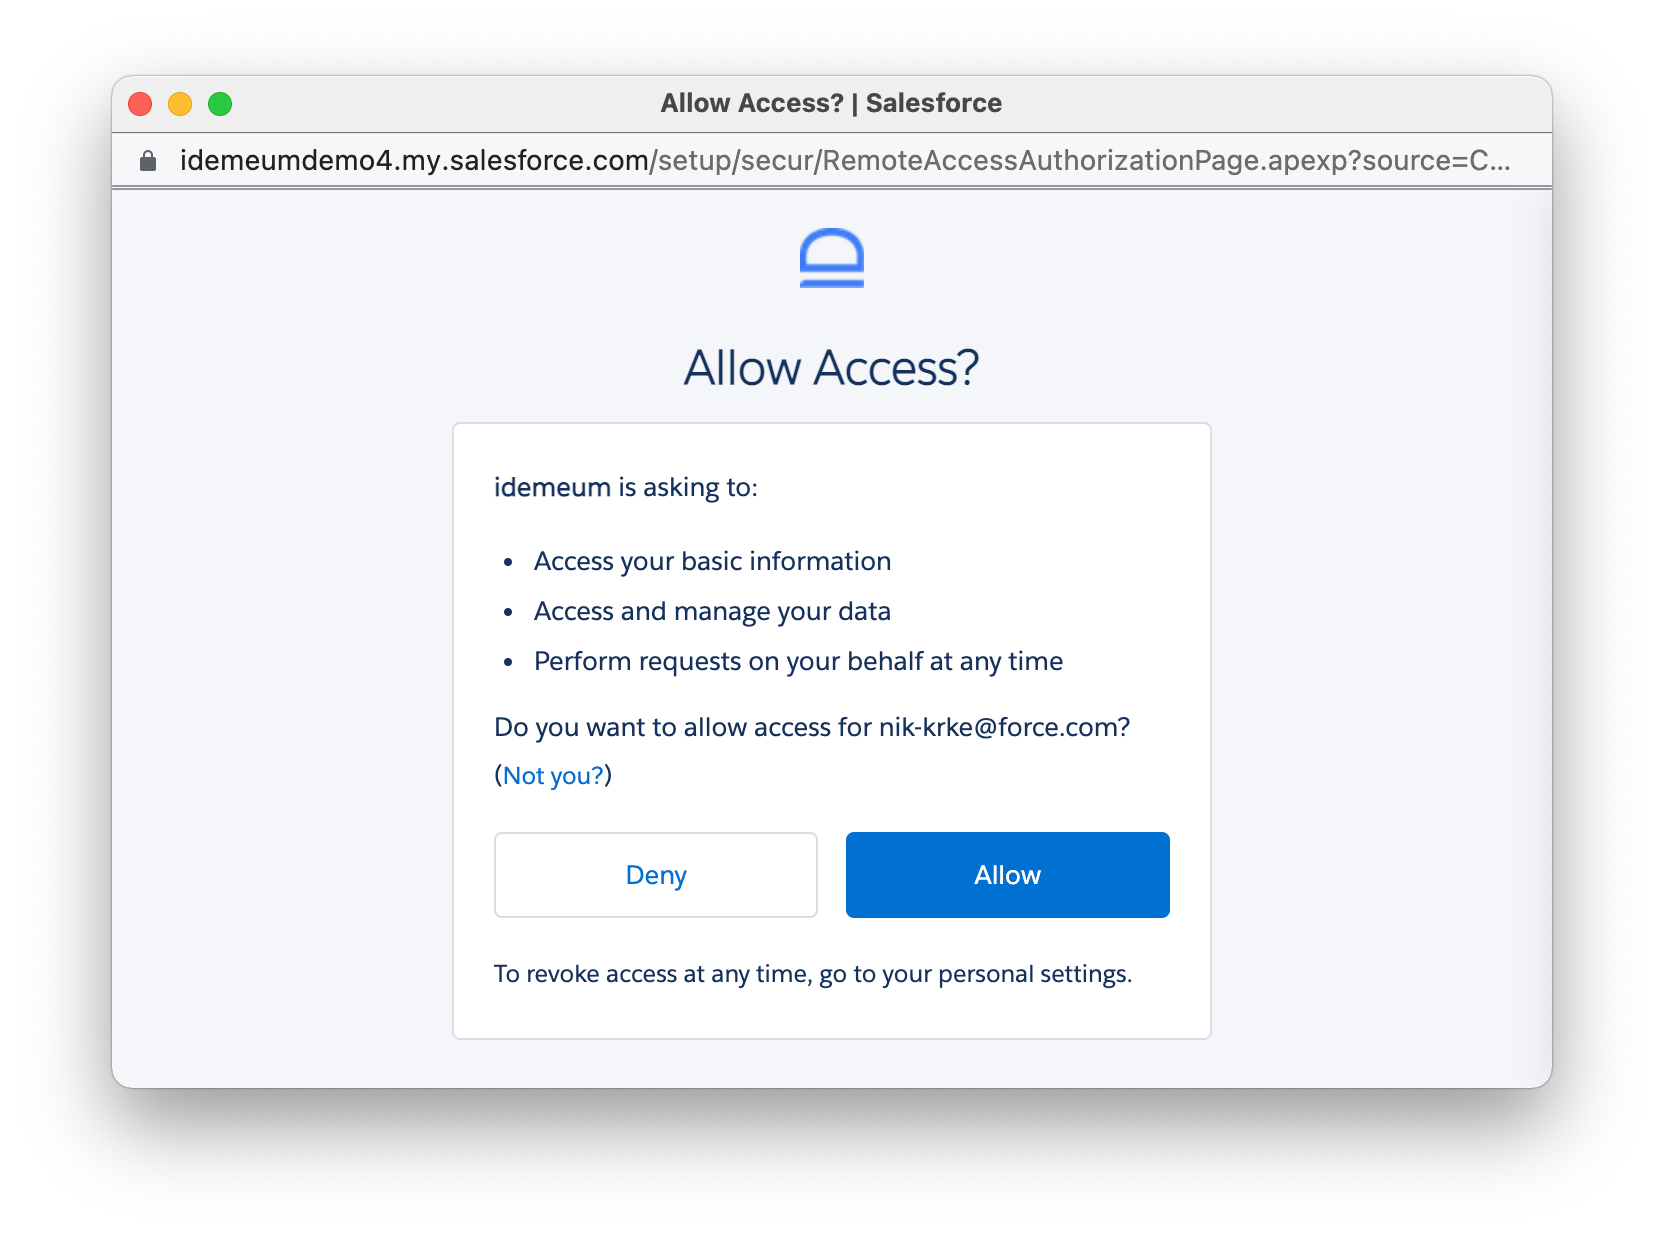
- Click Authorize button. You will need to enter administrator credentials to make sure idemeum has access to provisioning APIs. Then click Allow.
- Click Save
Application entitlements
Before users can access applications you need to make sure you entitle applications to them. In idemeum admin portal navigate to Entitlements section to assign applications to your employees.
SAML SSO login flows
Salesforce supports both:
- IDP Initiated Flow
- SP Initiated Flow
IDP Initiated flow
With this flow users first navigate to idemeum user catalog and then click on Salesforce icon to launch application.
SP Initiated flow
- With this flow users can directly go to https://login.salesforce.com
- Click Use custom domain
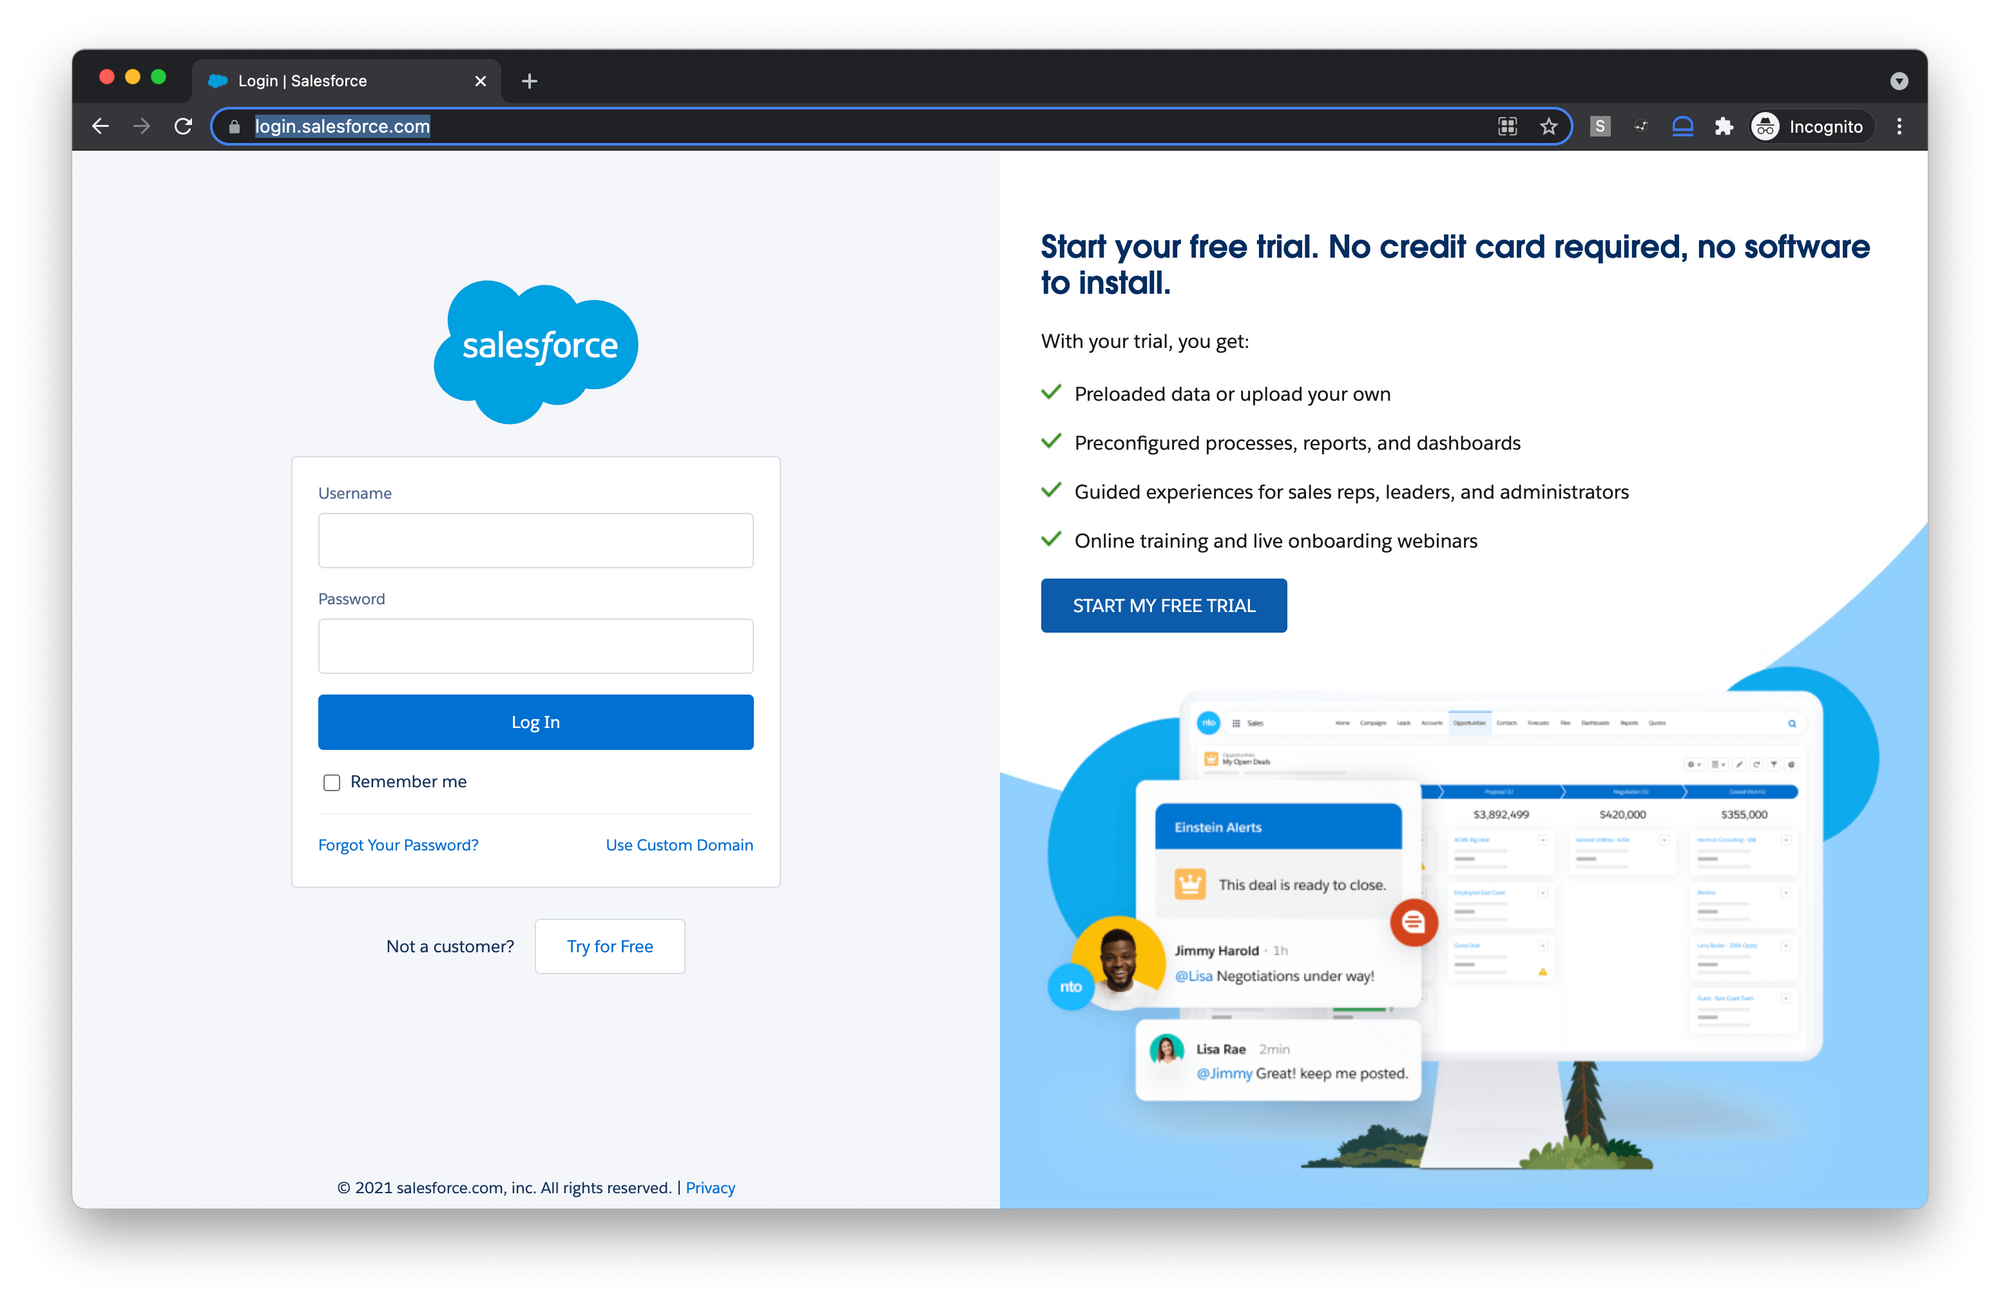
- Enter your domain and click Continue
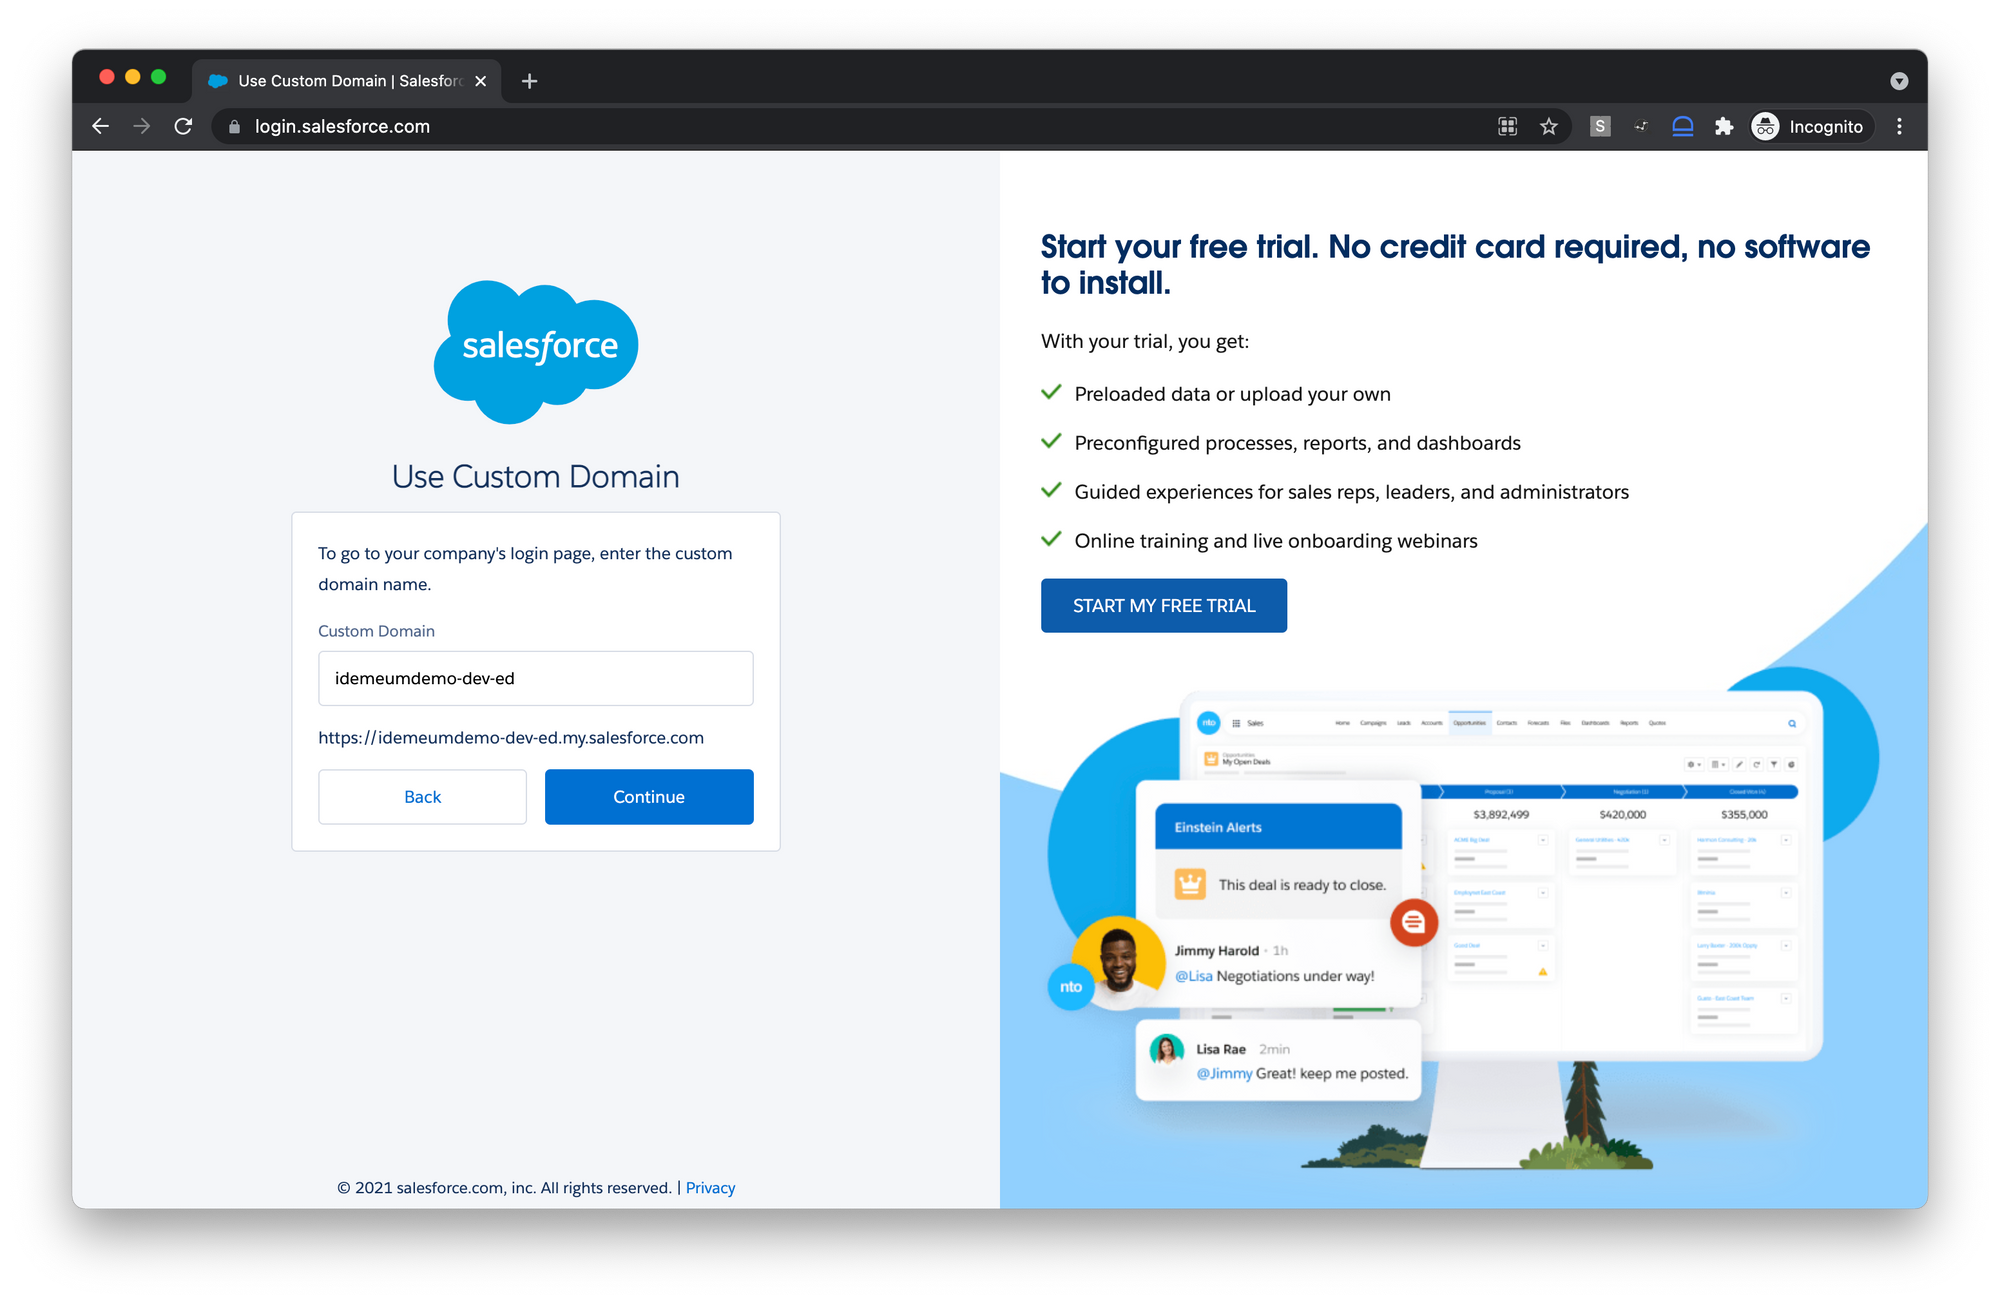
- Now you can click the name of your SSO IDP at the bottom and login with passwordless SSO