Capabilities overview
idemeum Passwordless MFA integrates with Okta to enable:
- Remote identity verification - digitally verify identity of employees to make every login trusted. Right from the mobile app, verify email, phone number, or government ID. idemeum app is not just an authenticator, it is an employee owned identity that you can trust.
- Passwordless onboarding - employees are onboarded into organization without any passwords. No need to send credentials over email or chat, employees simply install mobile application and create digital identity.
- Passwordless access - employees access any corporate application with biometrics. Every login is protected by Multi-Factor authentication - biometrics (something you are) and certificates (something you have).
High-level architecture overview
idemeum integrates with Okta in minutes - no need to synchronize users or deploy any connectors or servers. Just federate with Okta using SAML and connect idemeum to your user source system.

In the diagram above, we see the deployment where Okta is deployed as a primary IDP and all applications are federated directly with Okta. When user is trying to authenticate to a corporate application, the sign in request is sent first to Okta, and is then subsequently redirected to idemeum. idemeum performs Passwordless Multi-Factor authentication and returns necessary user information to Okta, which in turn forwards that user information to federated application. As a result users can access application without any passwords.
Upon the very first login, idemeum onboards and verifies employee information with user source system. idemeum can use personal email address, phone number, or ID document to onboard new employees. You can learn more about onboarding here.
Prerequisites
In order to integrate idemeum with Okta you will first need to obtain SAML metadata parameters for your idemeum tenant. Specifically you will need:
- Identity Provider SSO URL
- Identity Provider Entity ID
- Public X509 certificate (download file)
Instructions for how to obtain these SAML metadata parameters are below.
 idemeum team
Configure Okta
Create Identity Provider in Okta
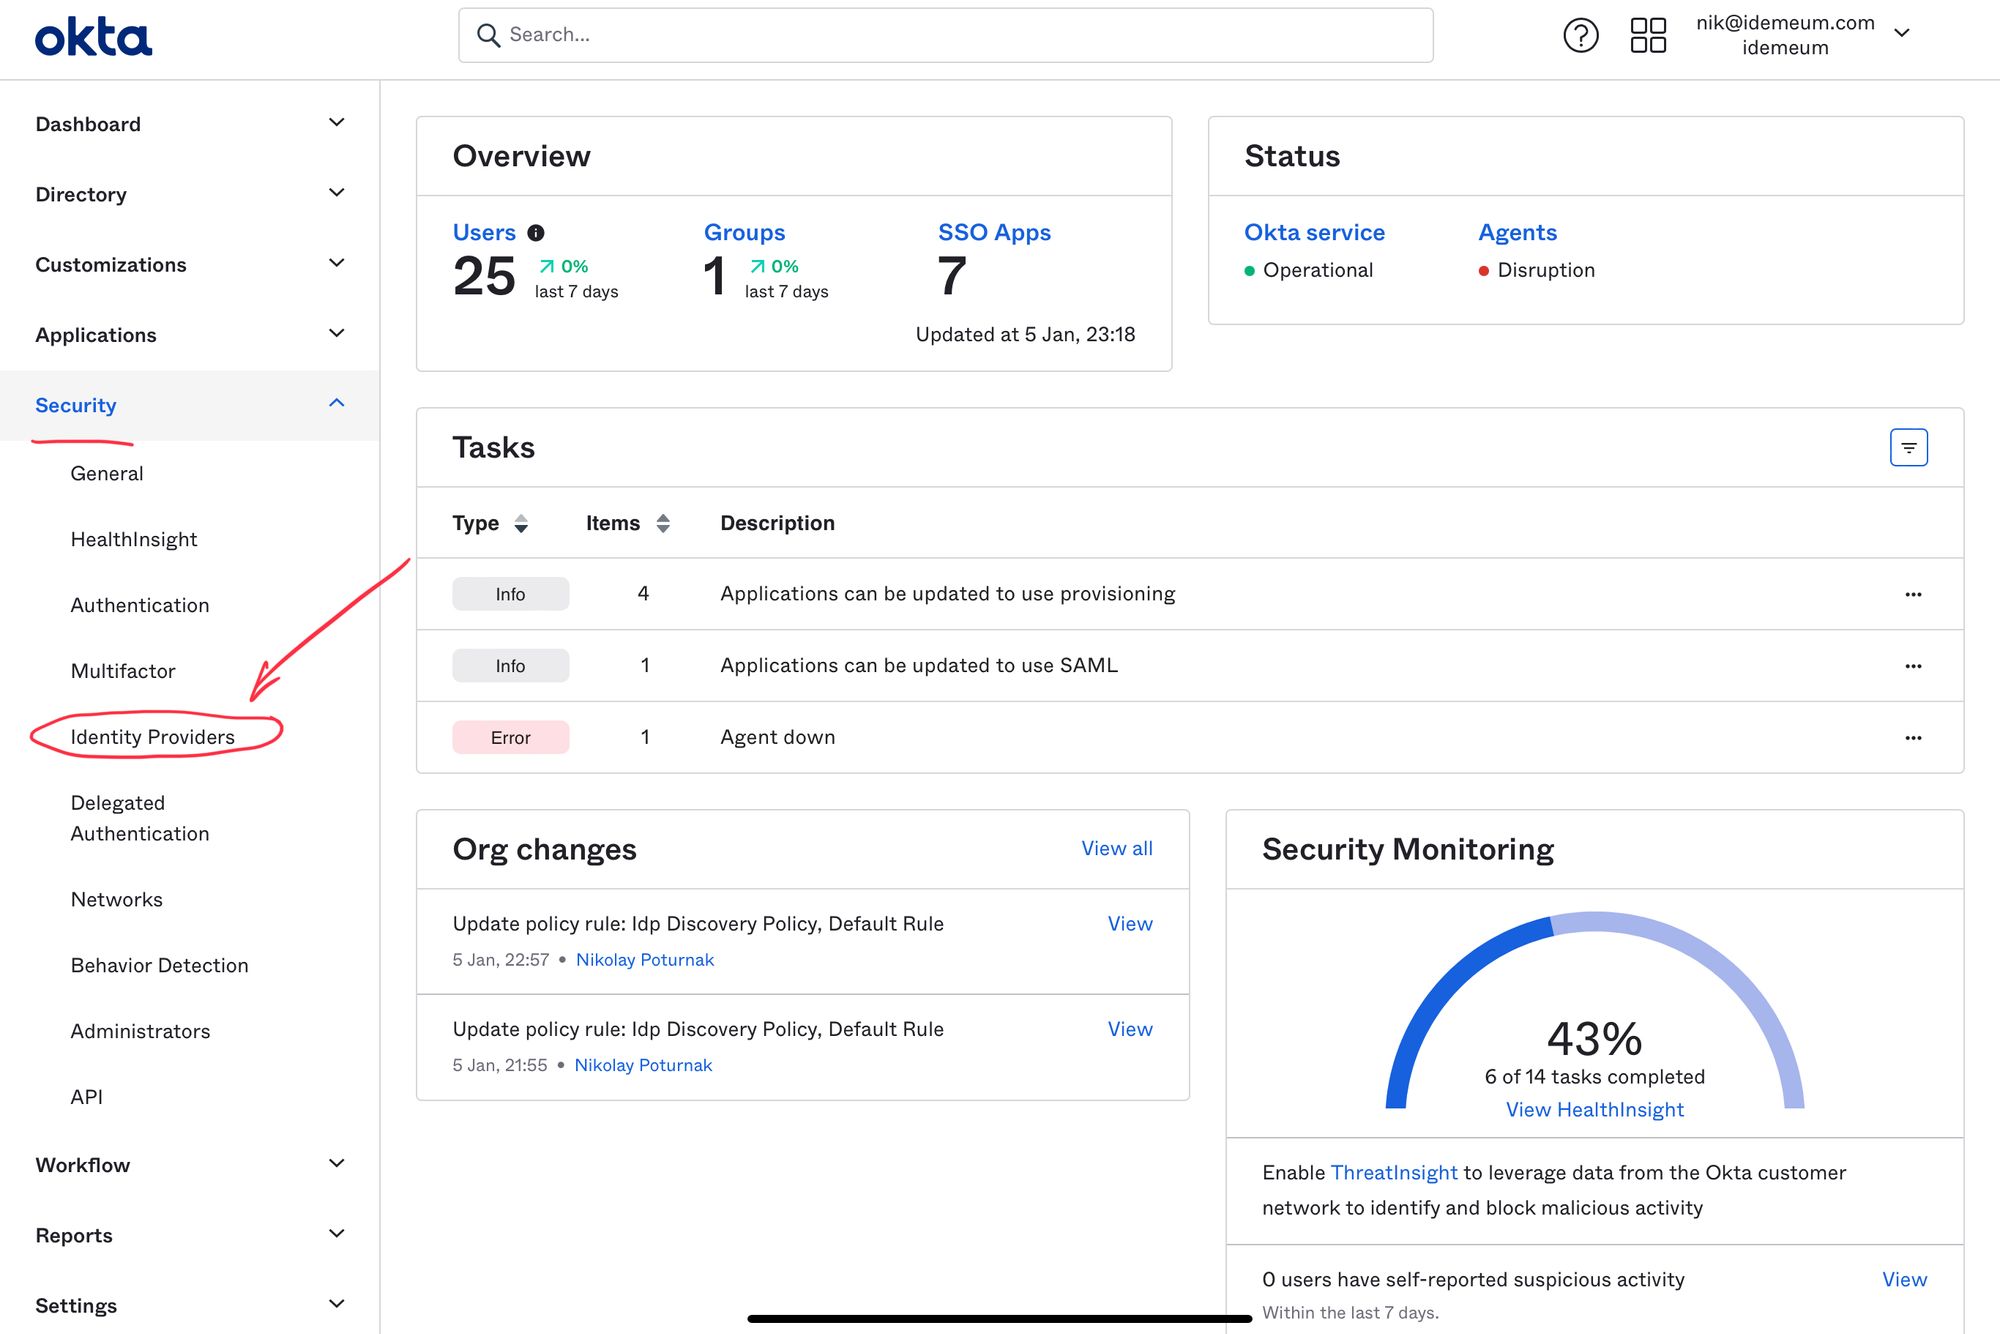
- Access your Okta admin dashboard and navigate to Security -> Identity Providers
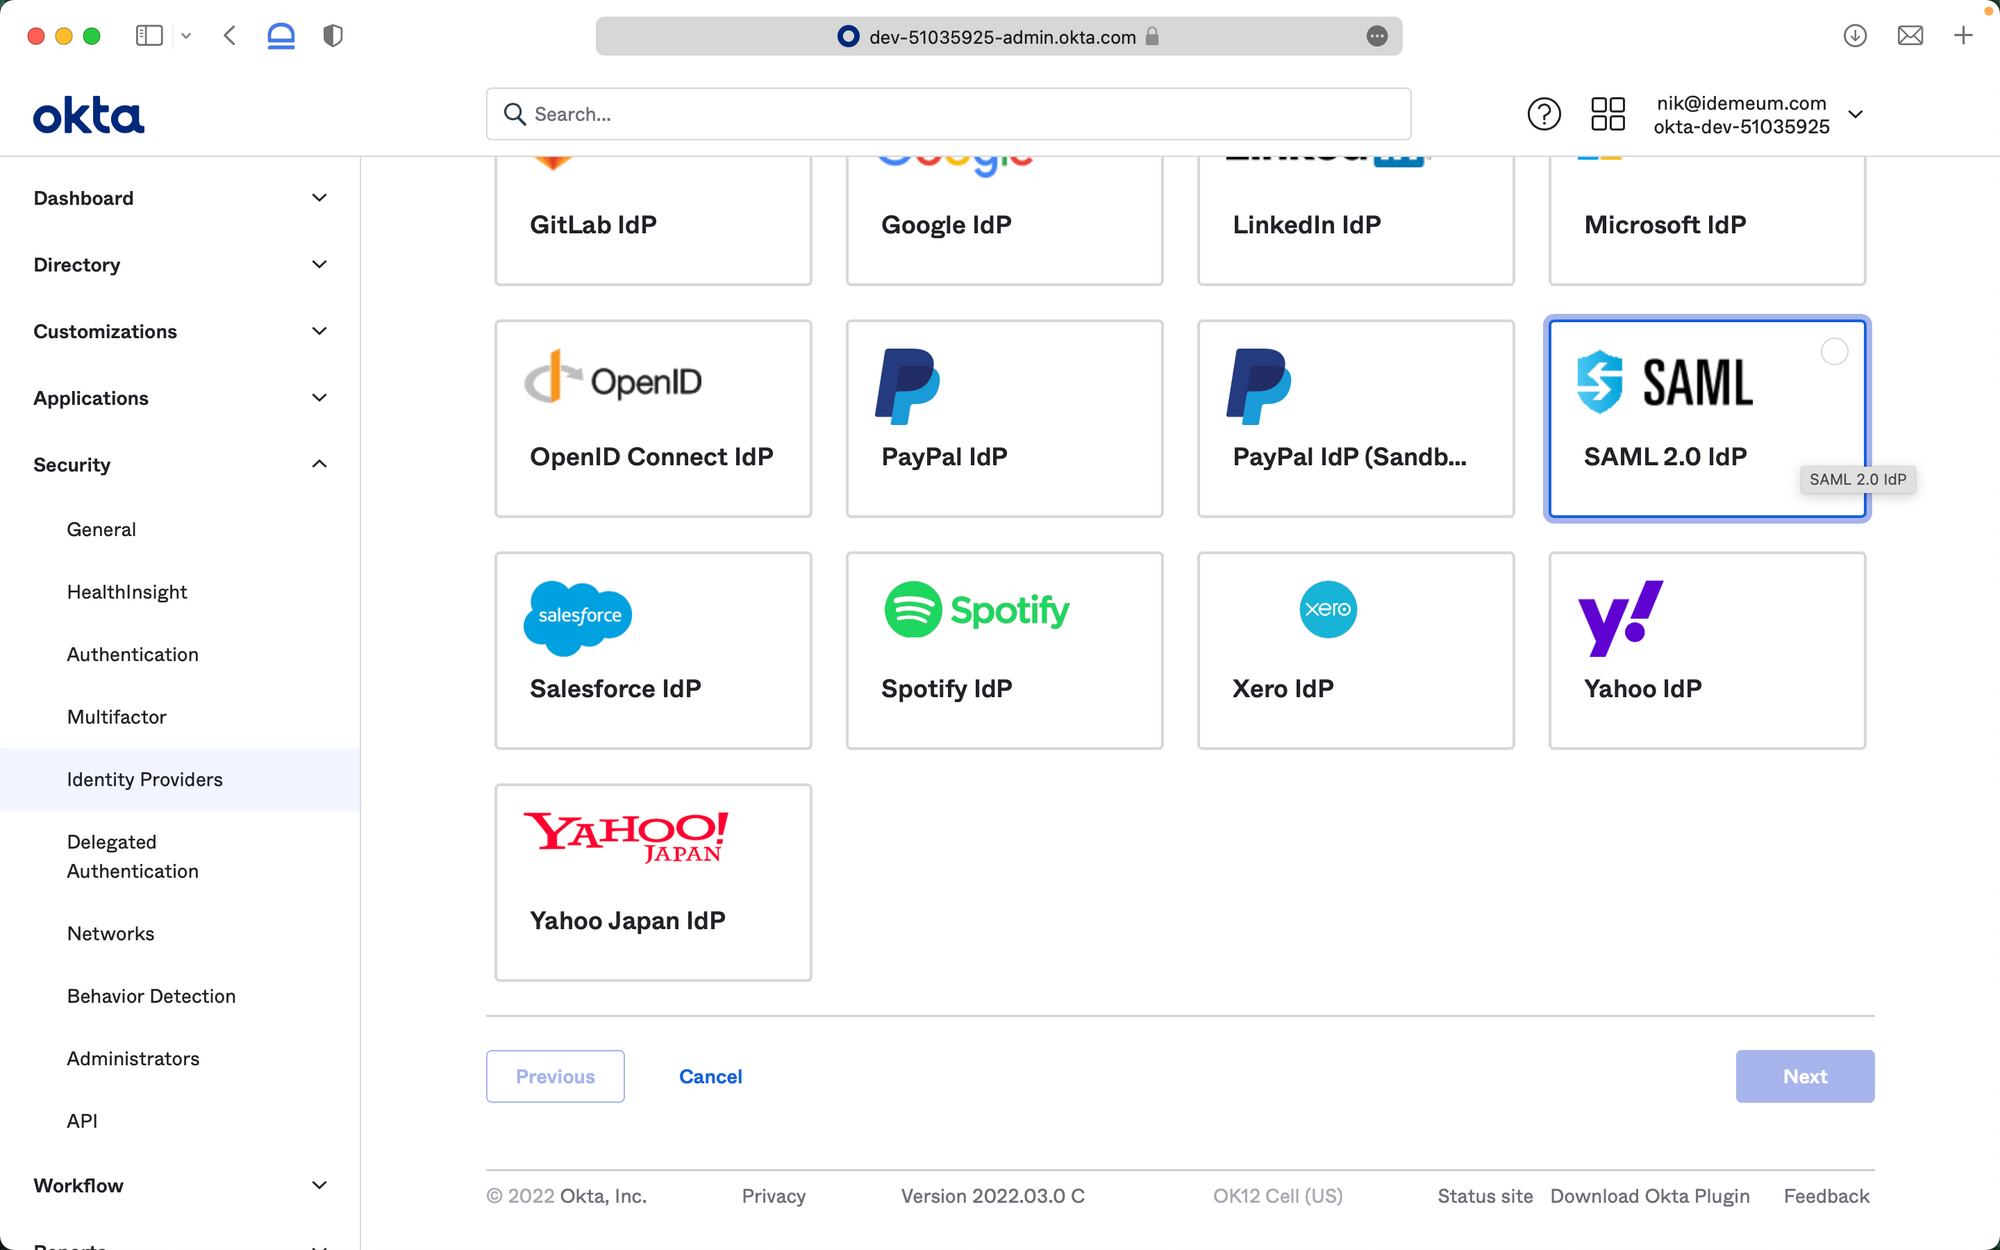
- Click Add Identity Provider and choose SAML 2.0 IDP
Now you will be using SAML metadata values obtained in the prerequisites section
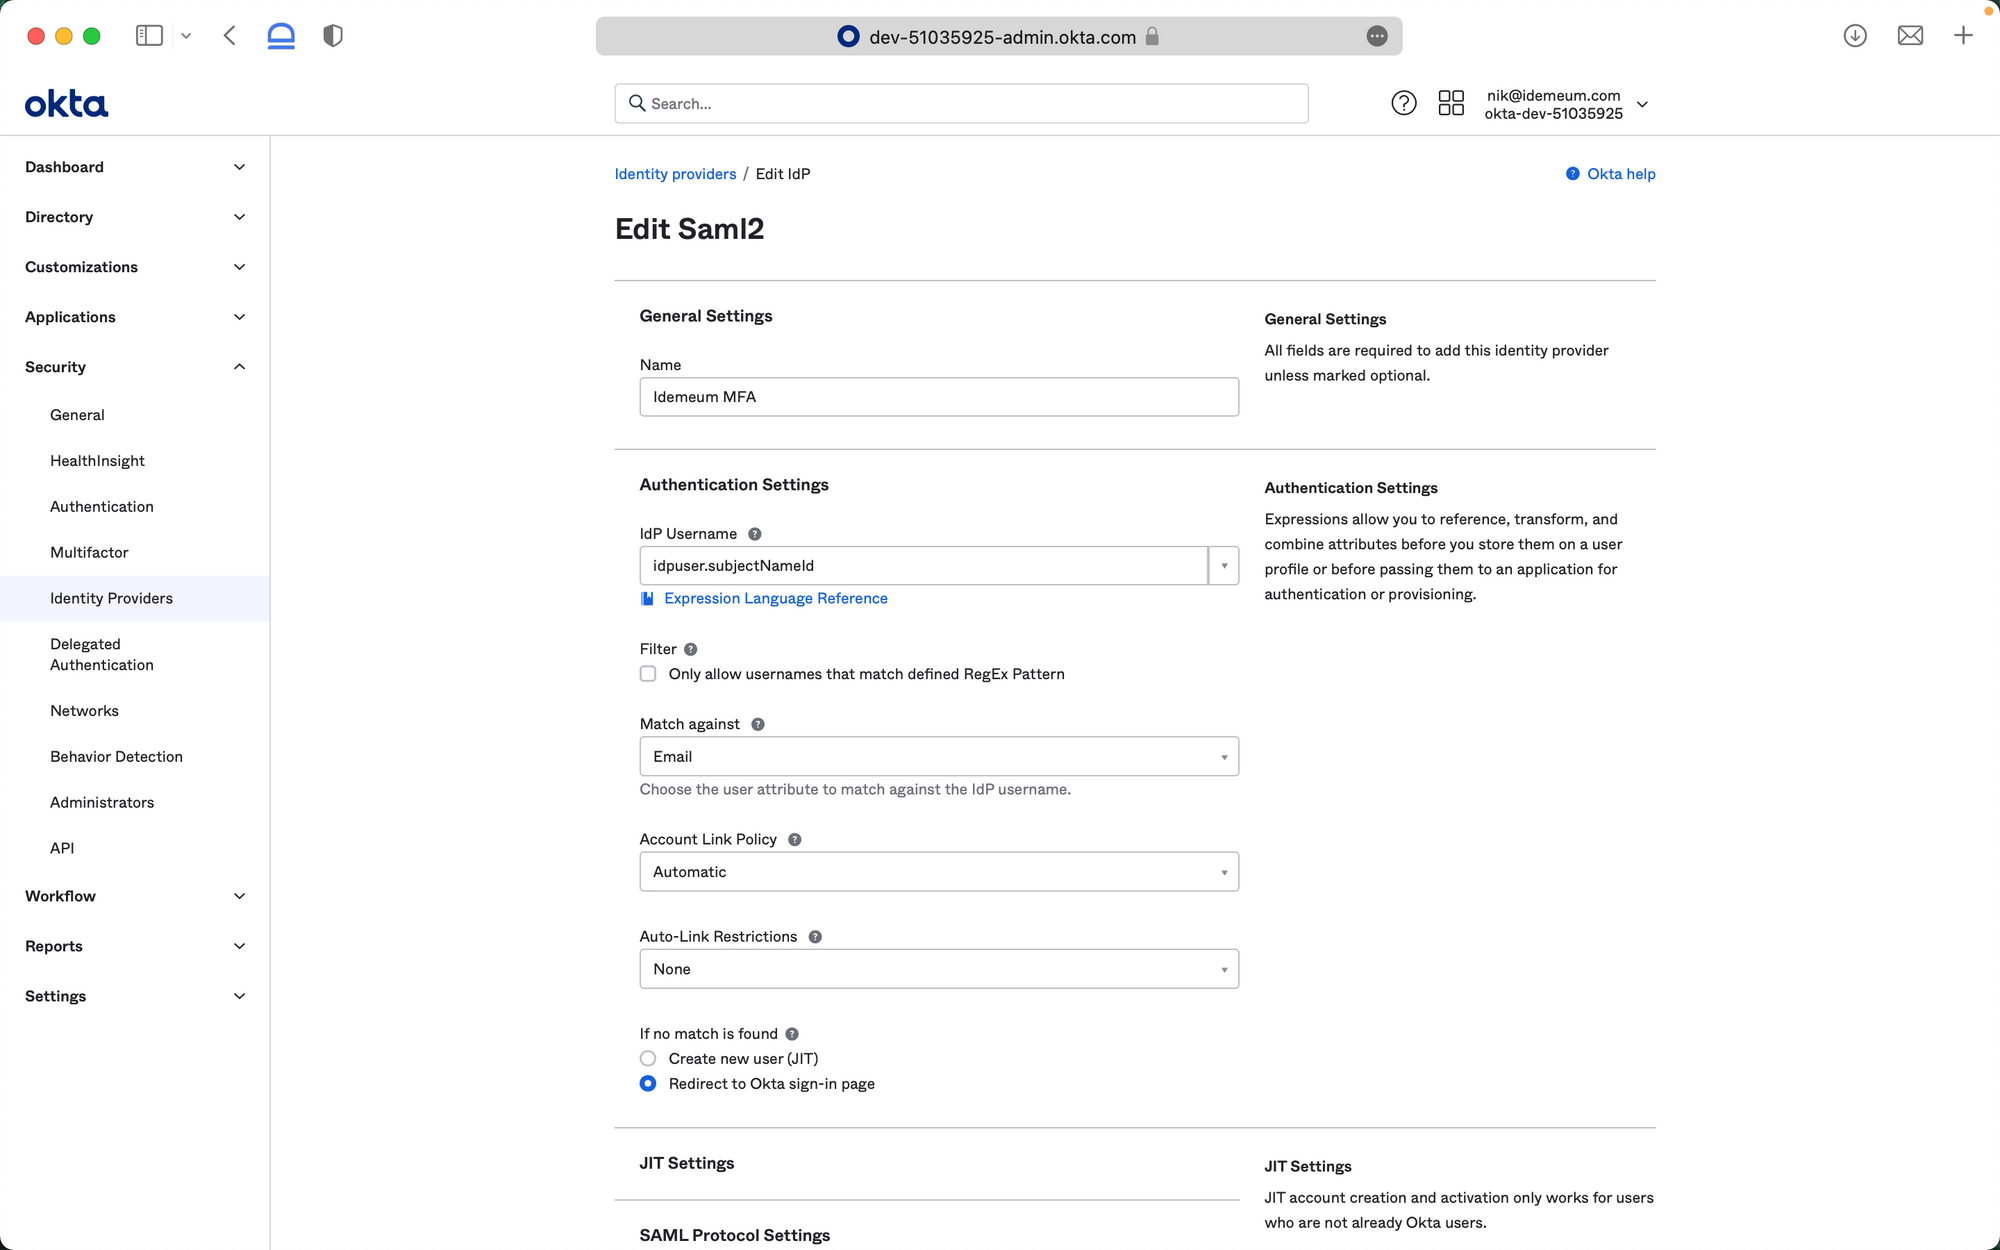
- For Name enter any name to identify your passwordless identity provider
- For IdP Username select idpuser.subjectNameId from the dropdown list
- For Match against make sure you choose Email
- For If no match is found choose Redirect to Okta sign-in page
- For IdP issuer URI enter Identity Provider Entity ID that you obtained in the prerequisites section
- For IdP Single Sign-On URL enter Identity Provider SSO URL that you obtained in the prerequisites section
- For IdP Signature Certificate upload Public X509 certificate that you downloaded in the prerequisites section
- For Destination enter Identity Provider Entity ID that you obtained in the prerequisites section
- Now you can Save your identity provider
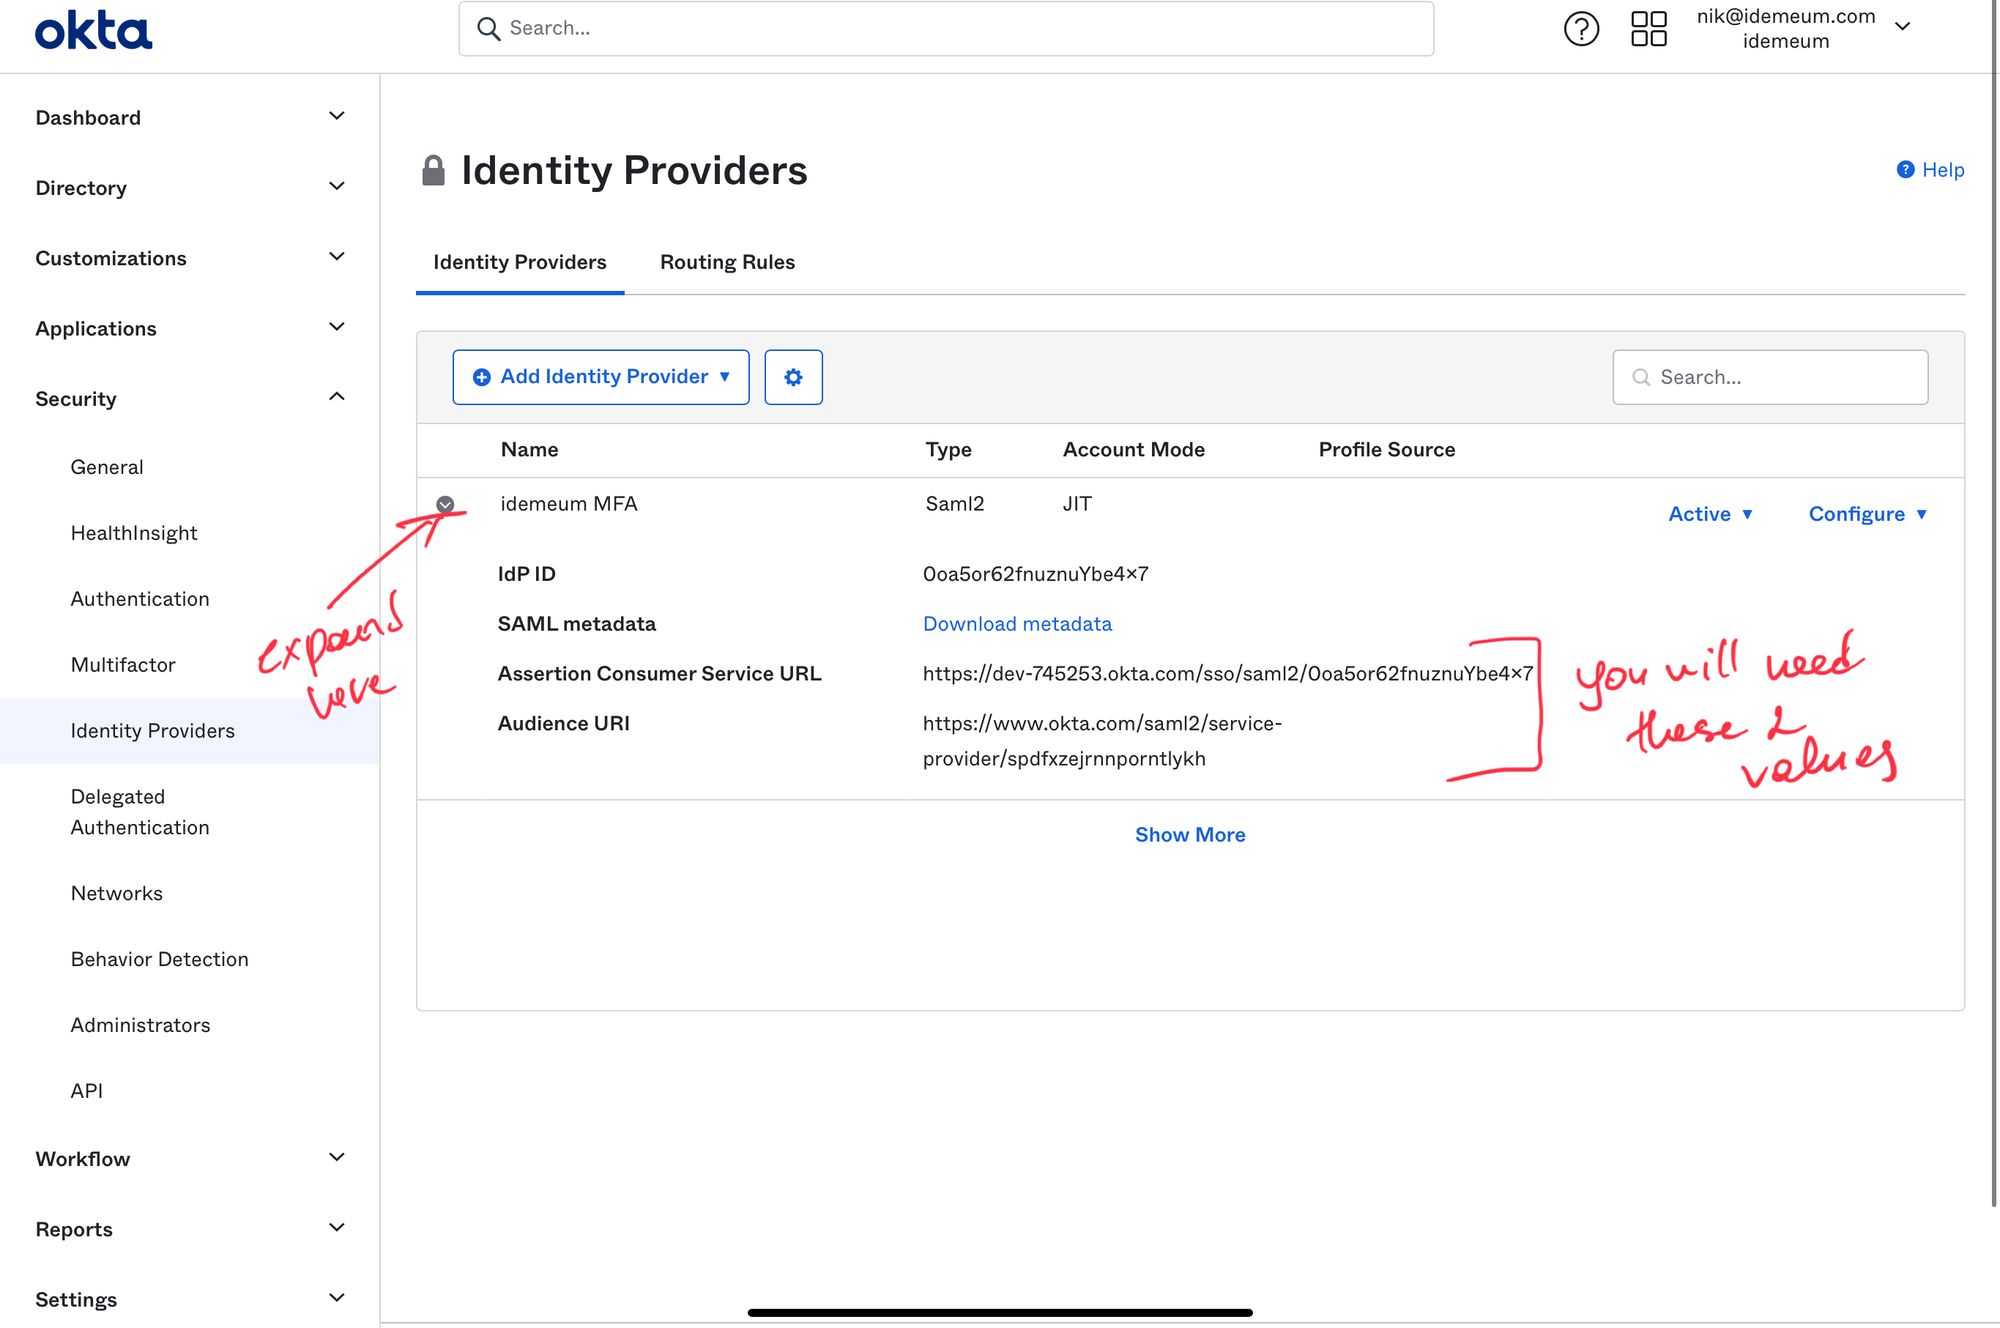
- Once you save configuration you will be able to copy the values that you will need for your idemeum set up. On the main Identity Providers screen expand the configuration and copy SAML values. You will need Assertion Consumer Service URL and Audience URI.
Configure routing rule in Okta
- In your Okta admin dashboard navigate to Security -> Identity Providers -> Routing Rules
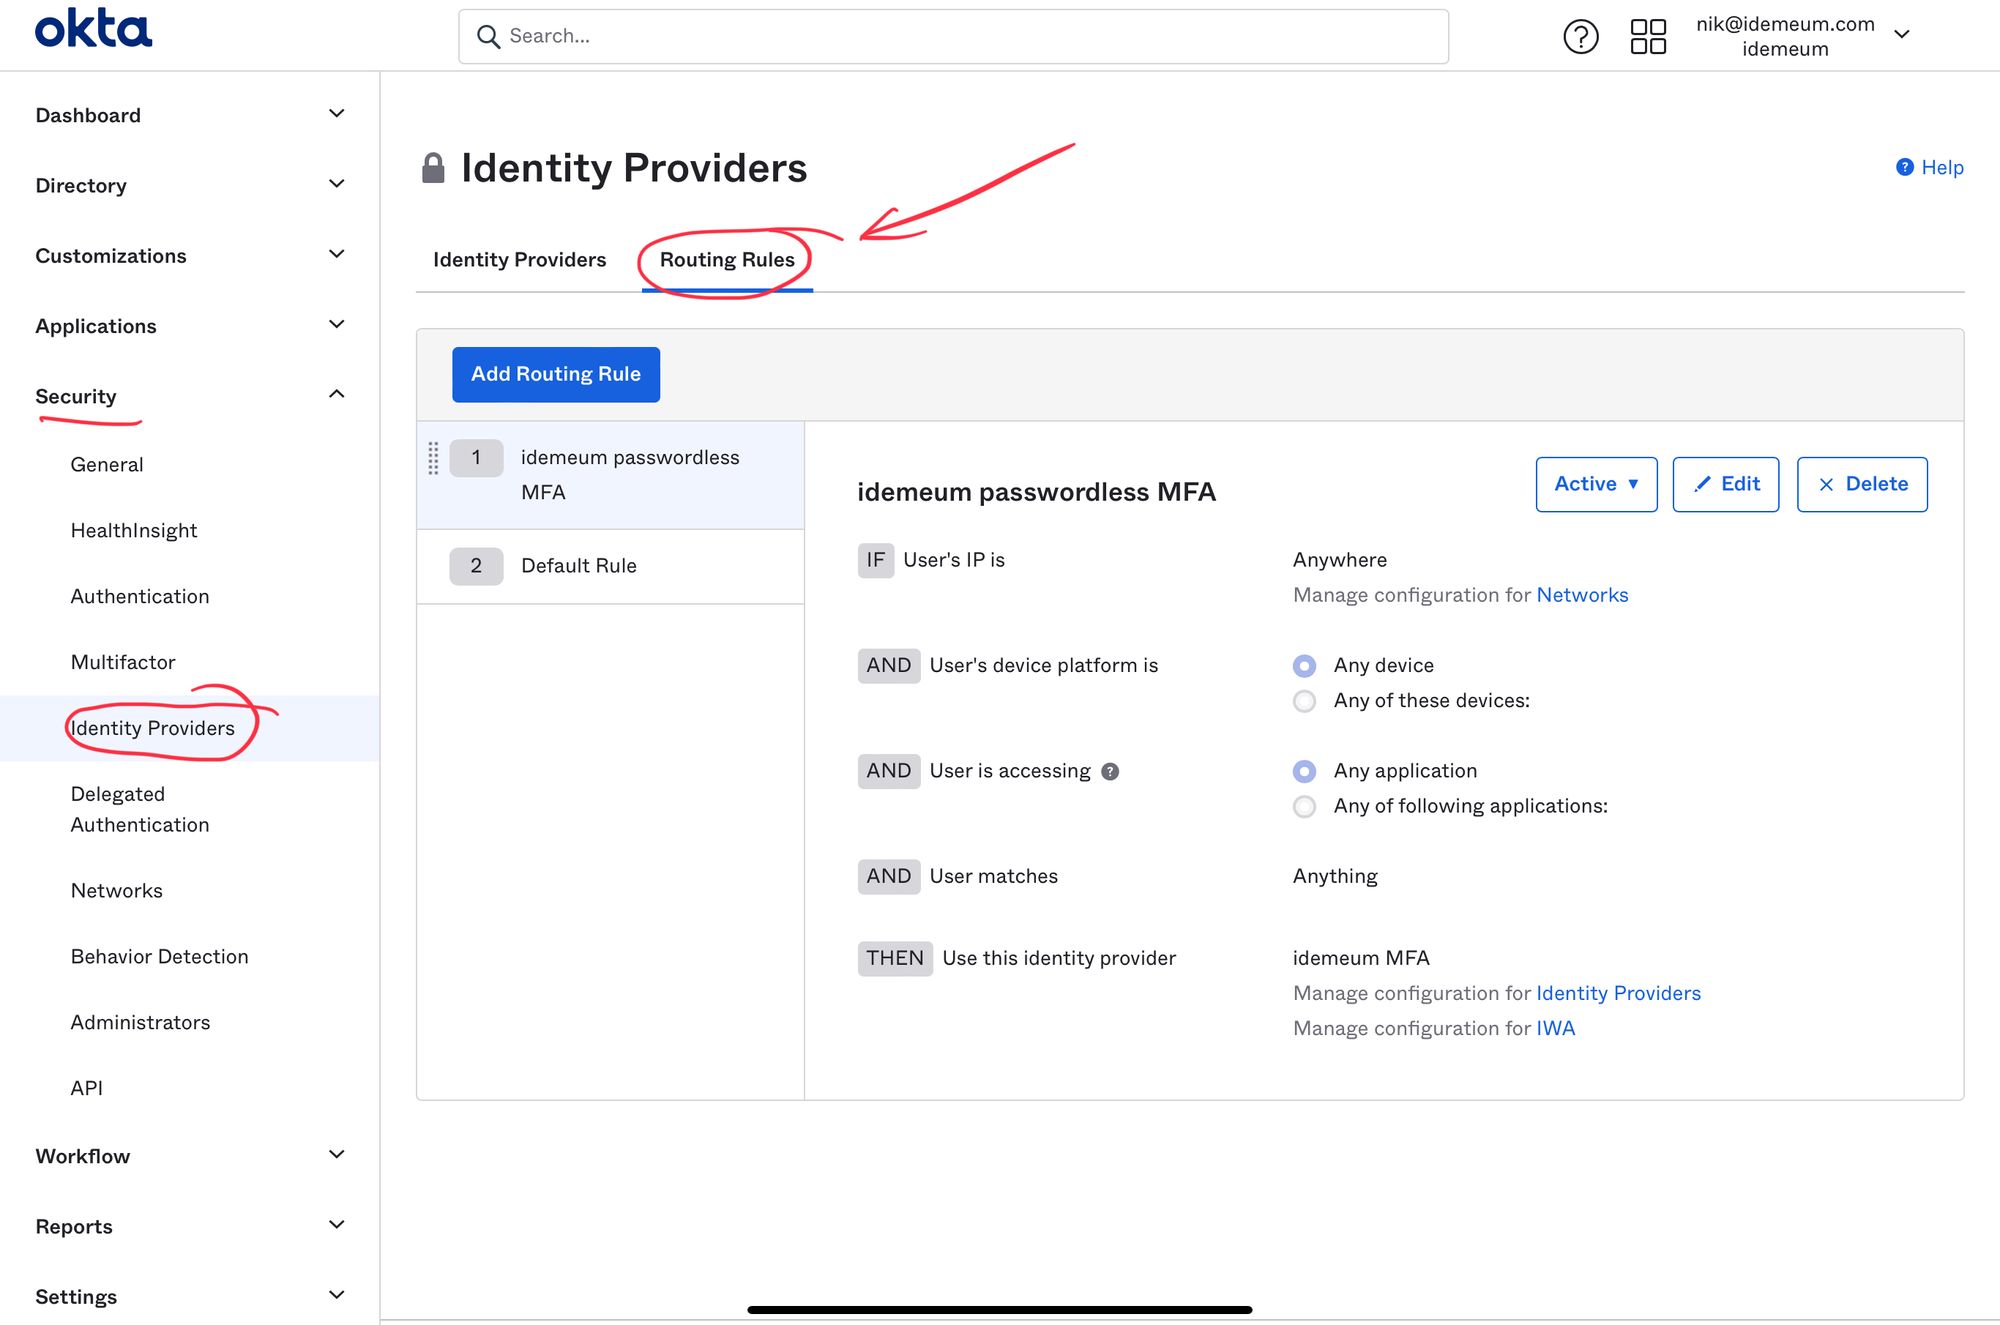
- Click Add Routing Rule
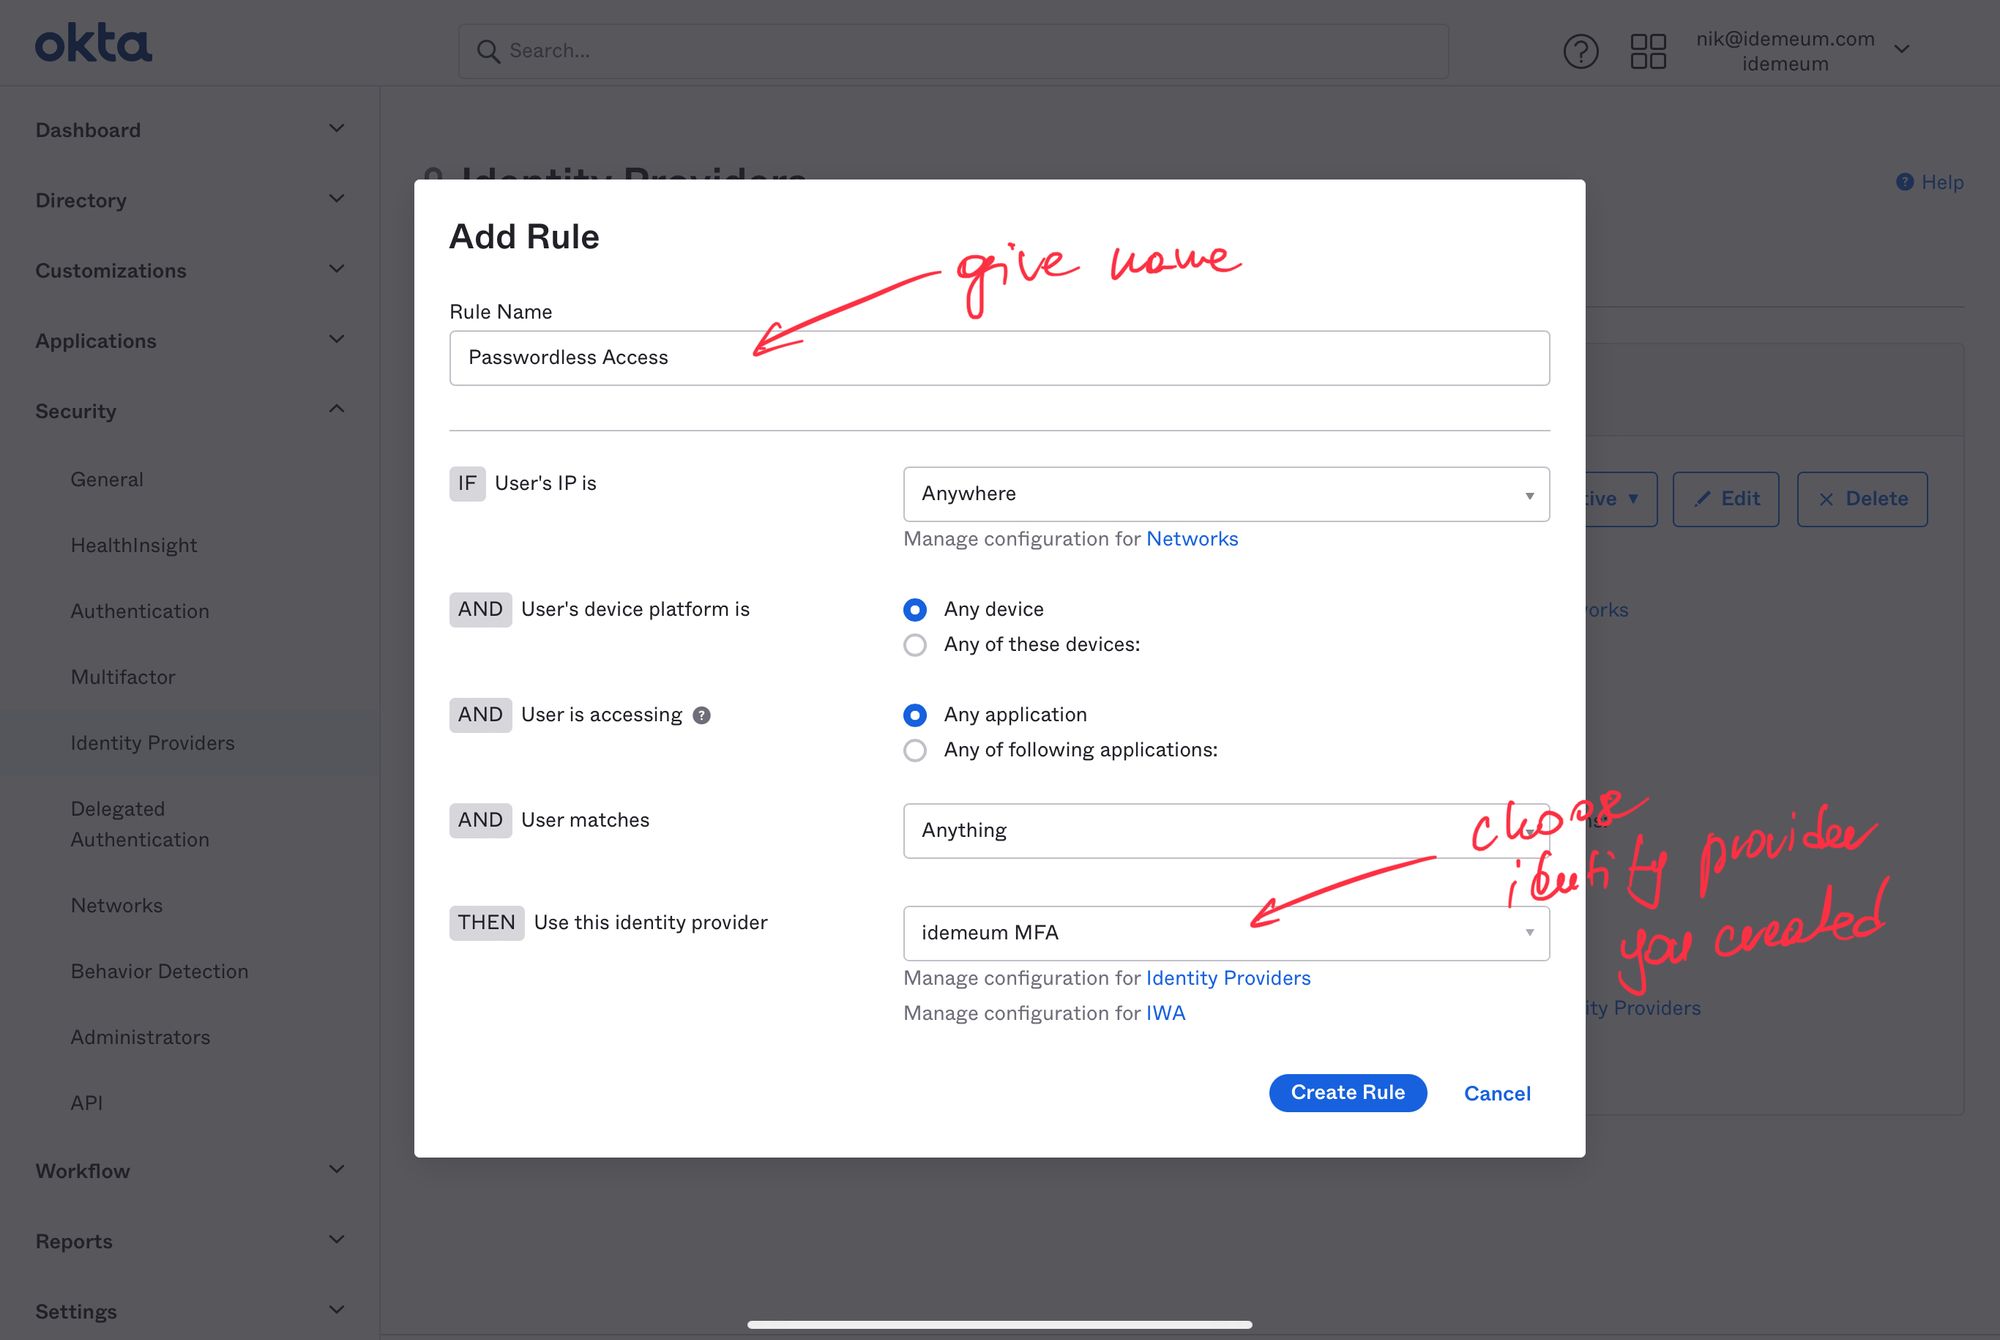
- Give your rule a name and make sure you choose Identity Provider that you created in the previous section.
- You can now click Create Rule
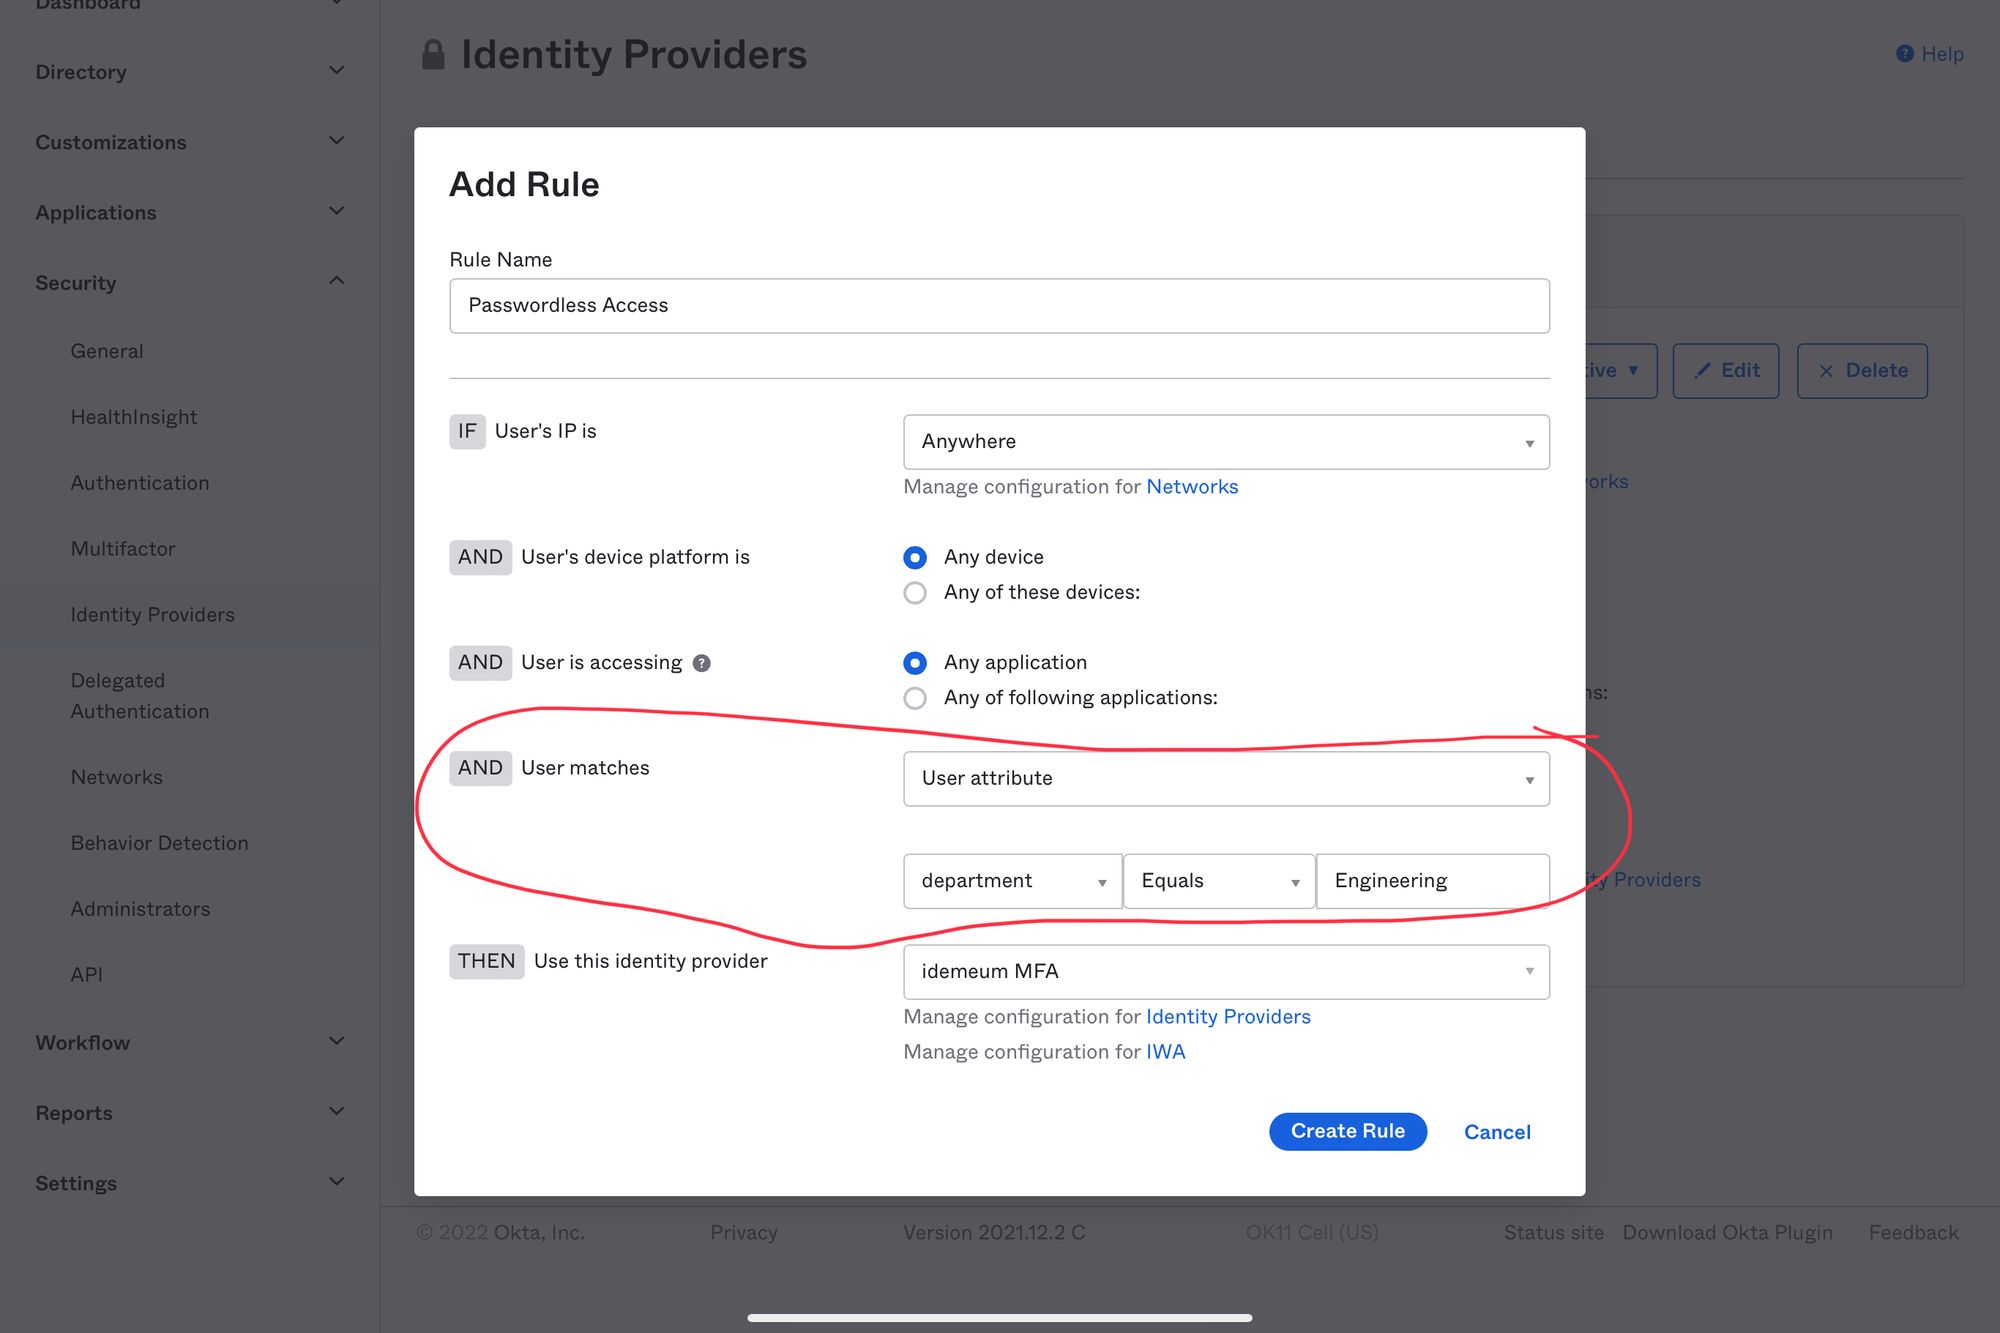
- Let's say you want to enable idemeum only for employees in engineering department. You can use User Matches section to do that.
https://[your Okta tenant]/login/default
Configure Sign-out page
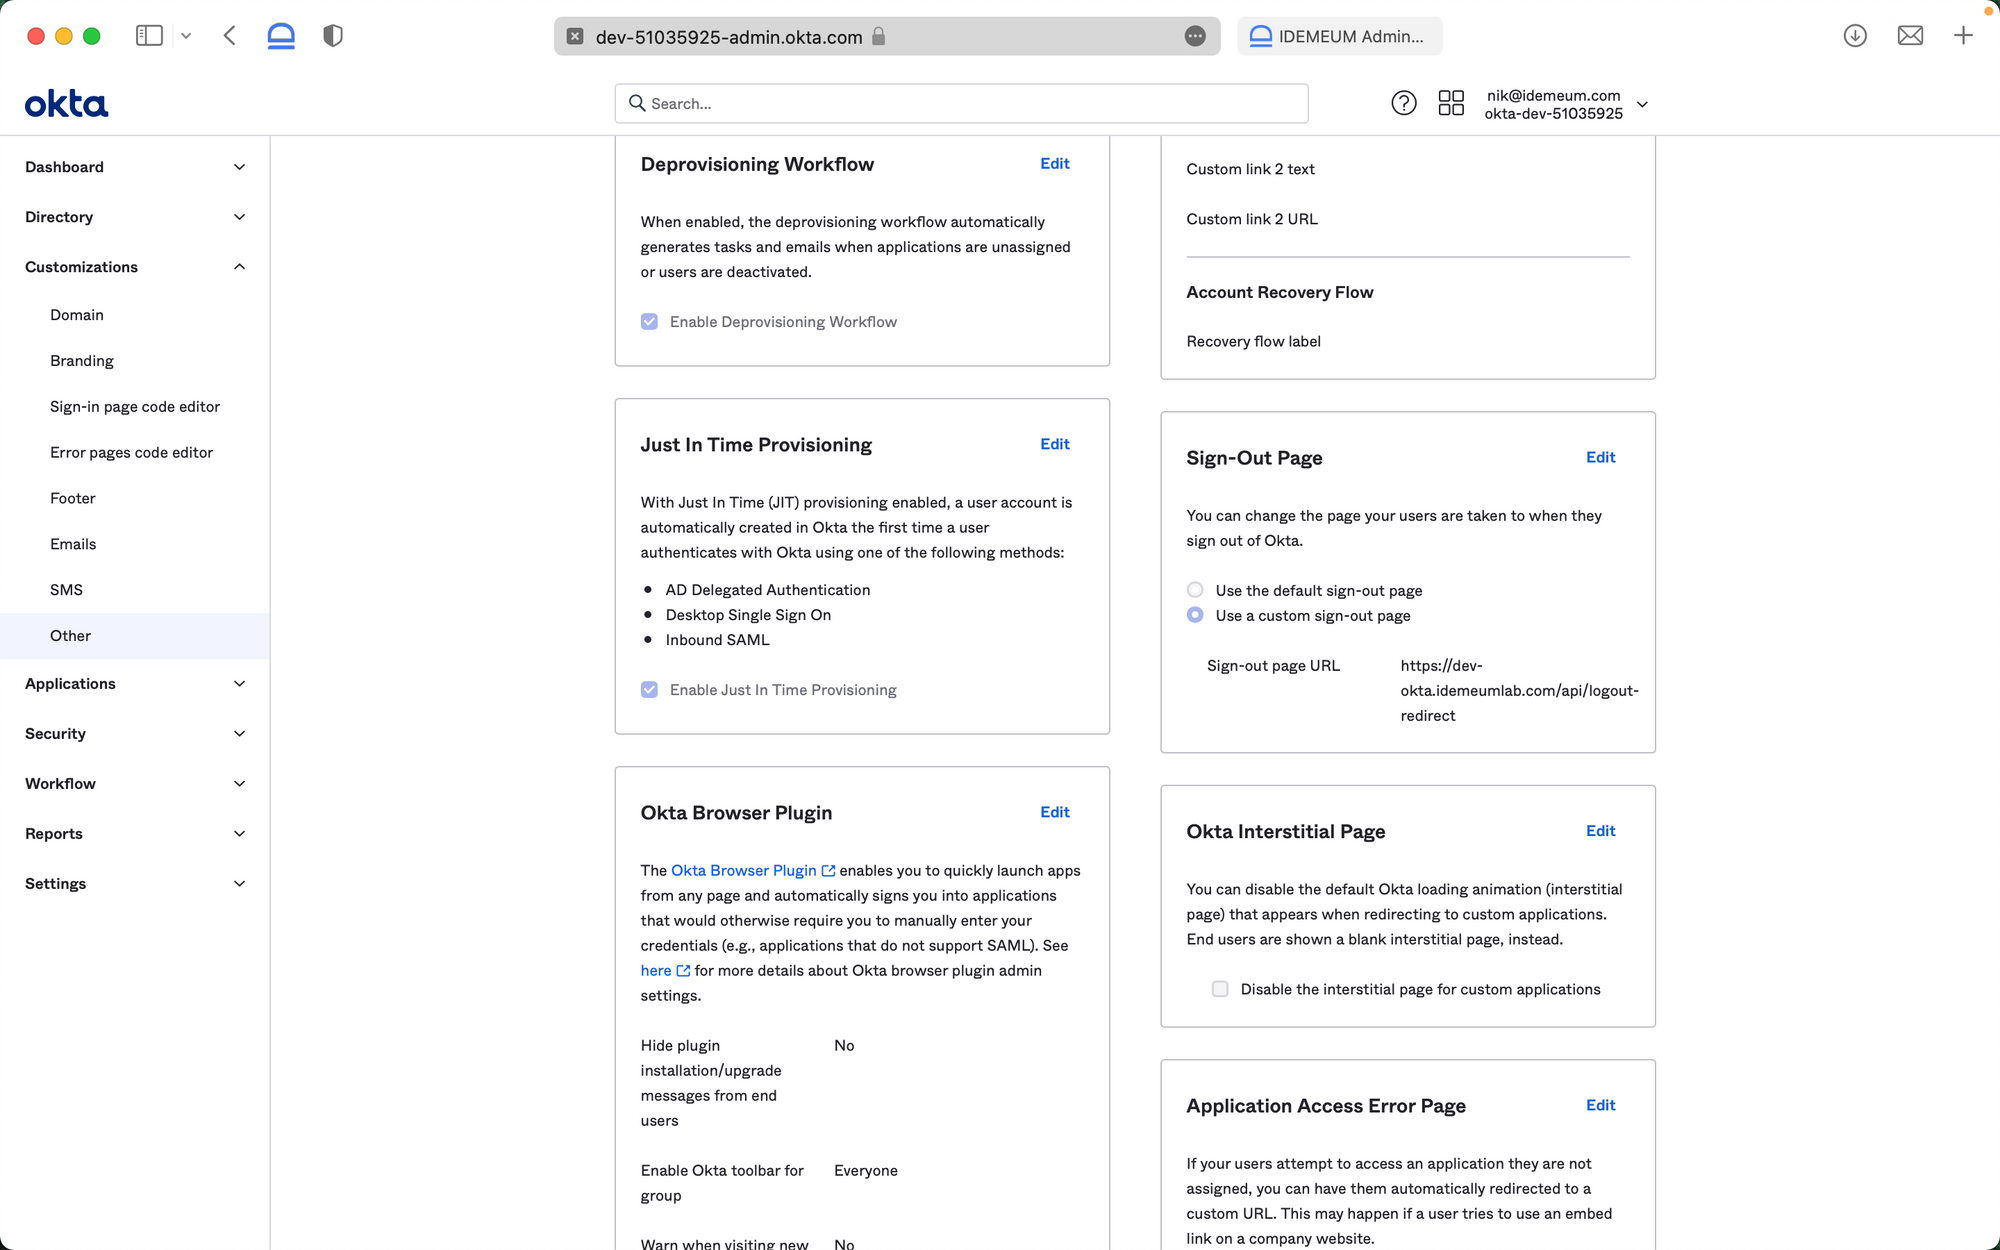
- It is also recommended to update the sign-out page so that employees can have seamless experience when signing out of Okta. Navigate to Customizations -> Other -> Sign-out page

- Click Edit and choose Use a custom sign-out page
- Enter the following URL https://[your tenant URL]/api/logout-redirect. For instance the URL might look like this https://dev-okta.idemeumlab.com/api/logout-redirect
Configure idemeum
Connect to user source system
- As a first step you need to connect your idemeum tenant to your user source system. You can leverage our integrations portal to find detailed guides for each user source that we support.

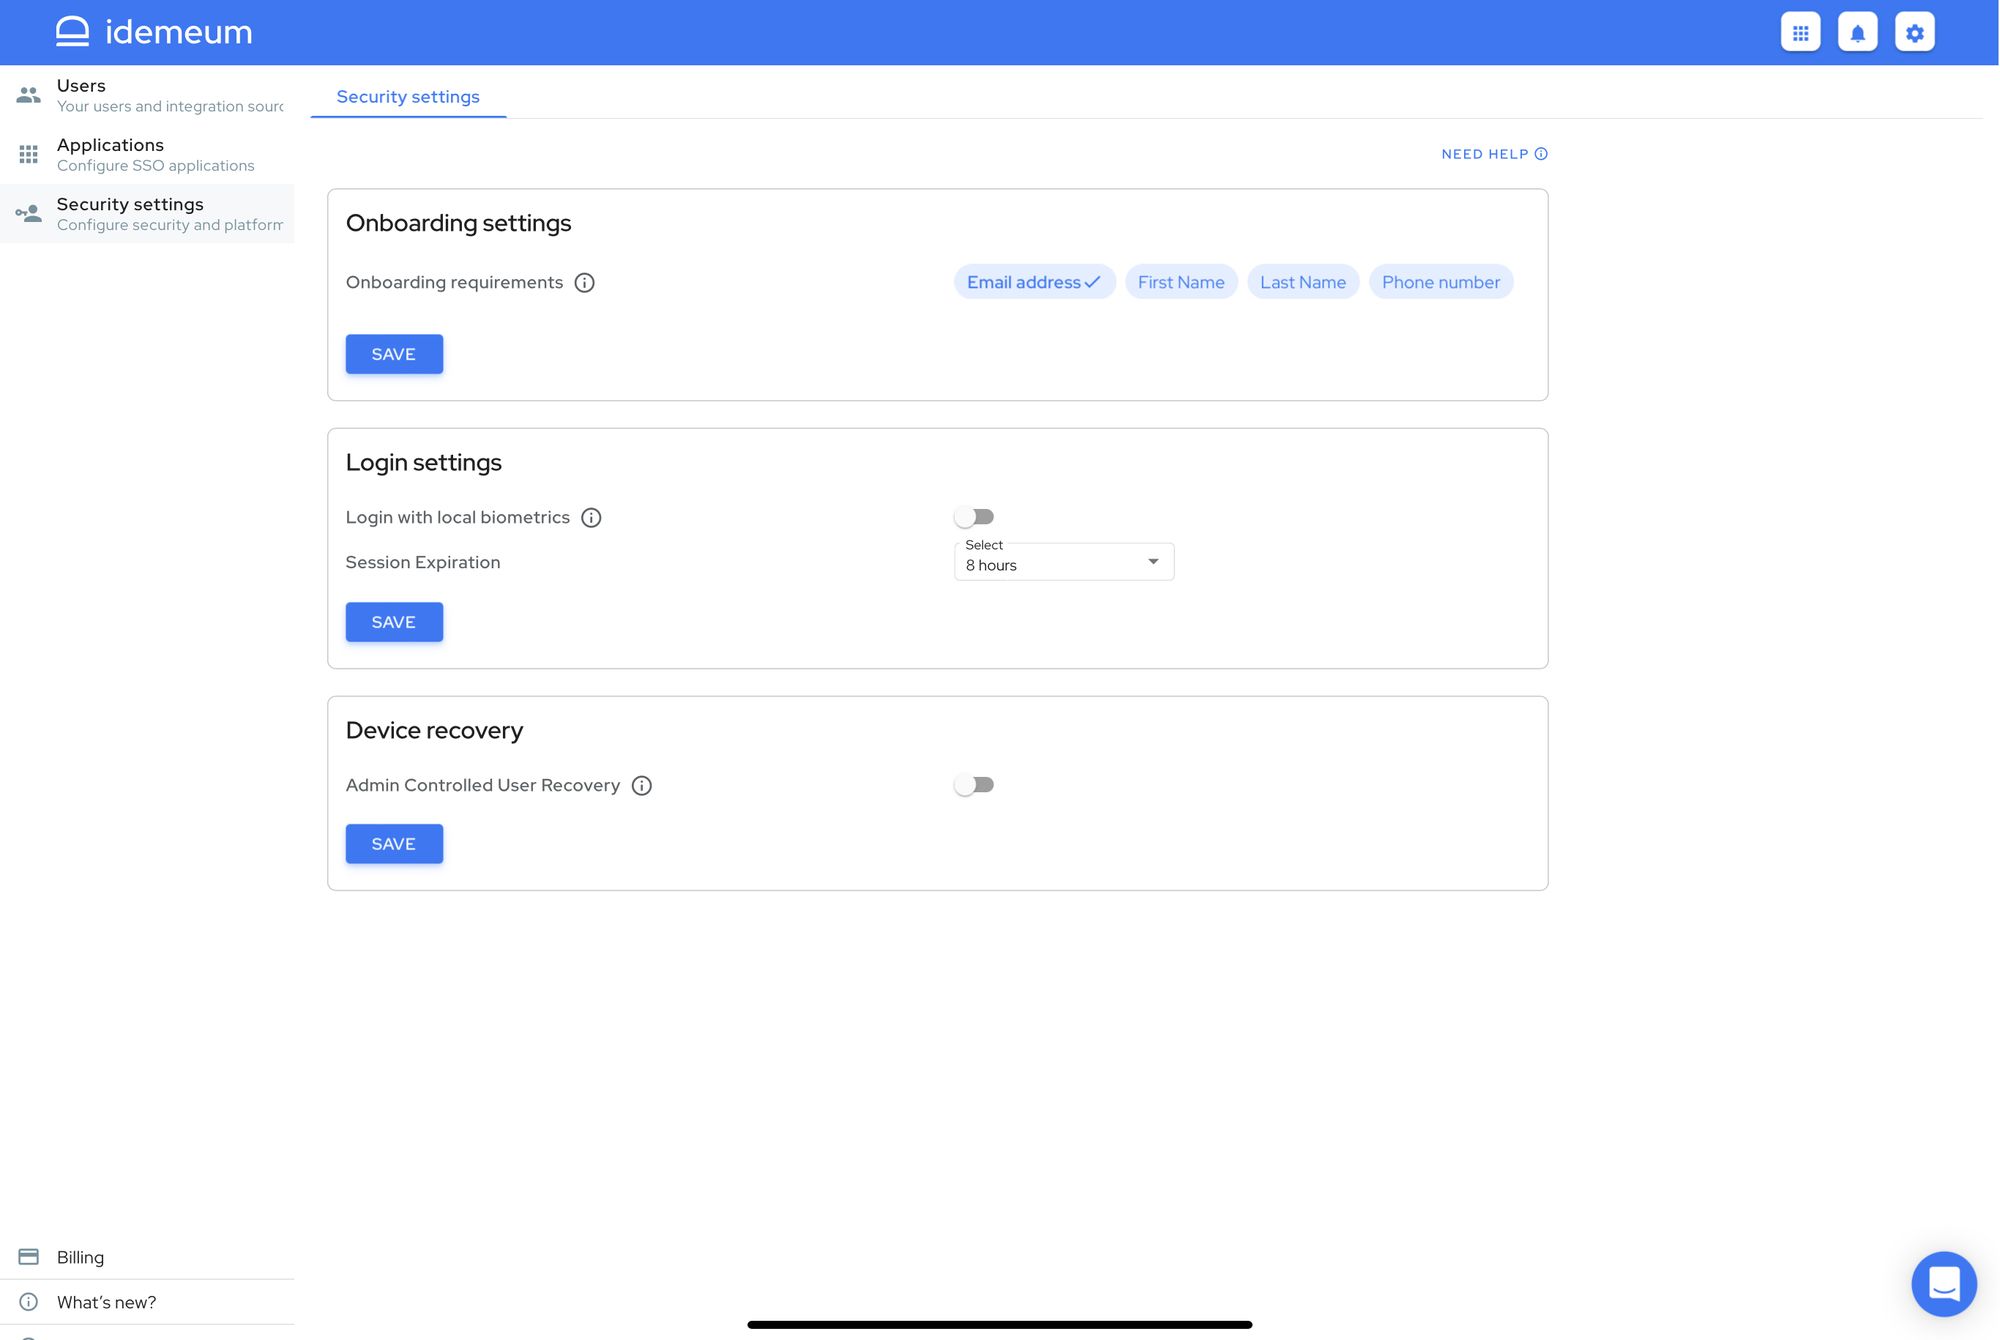
Configure user onboarding
- You also need to decide how you would like to onboard your new employees into passwordless MFA. You can use personal email address, phone number, or ID document.
- Navigate to Security settings in your idemeum portal to configure onboarding
You can learn more about passwordless onboarding in our documentation section.
 Nikolay Poturnak
Set up Okta app
- Navigate to Applications in idemeum admin portal and choose Okta
- Click SAML
Now you will be using SAML values obtained from Okta when setting up an Identity Provider
- Enter Assertion Consumer Service URL and Audience URI that you obtained from Okta
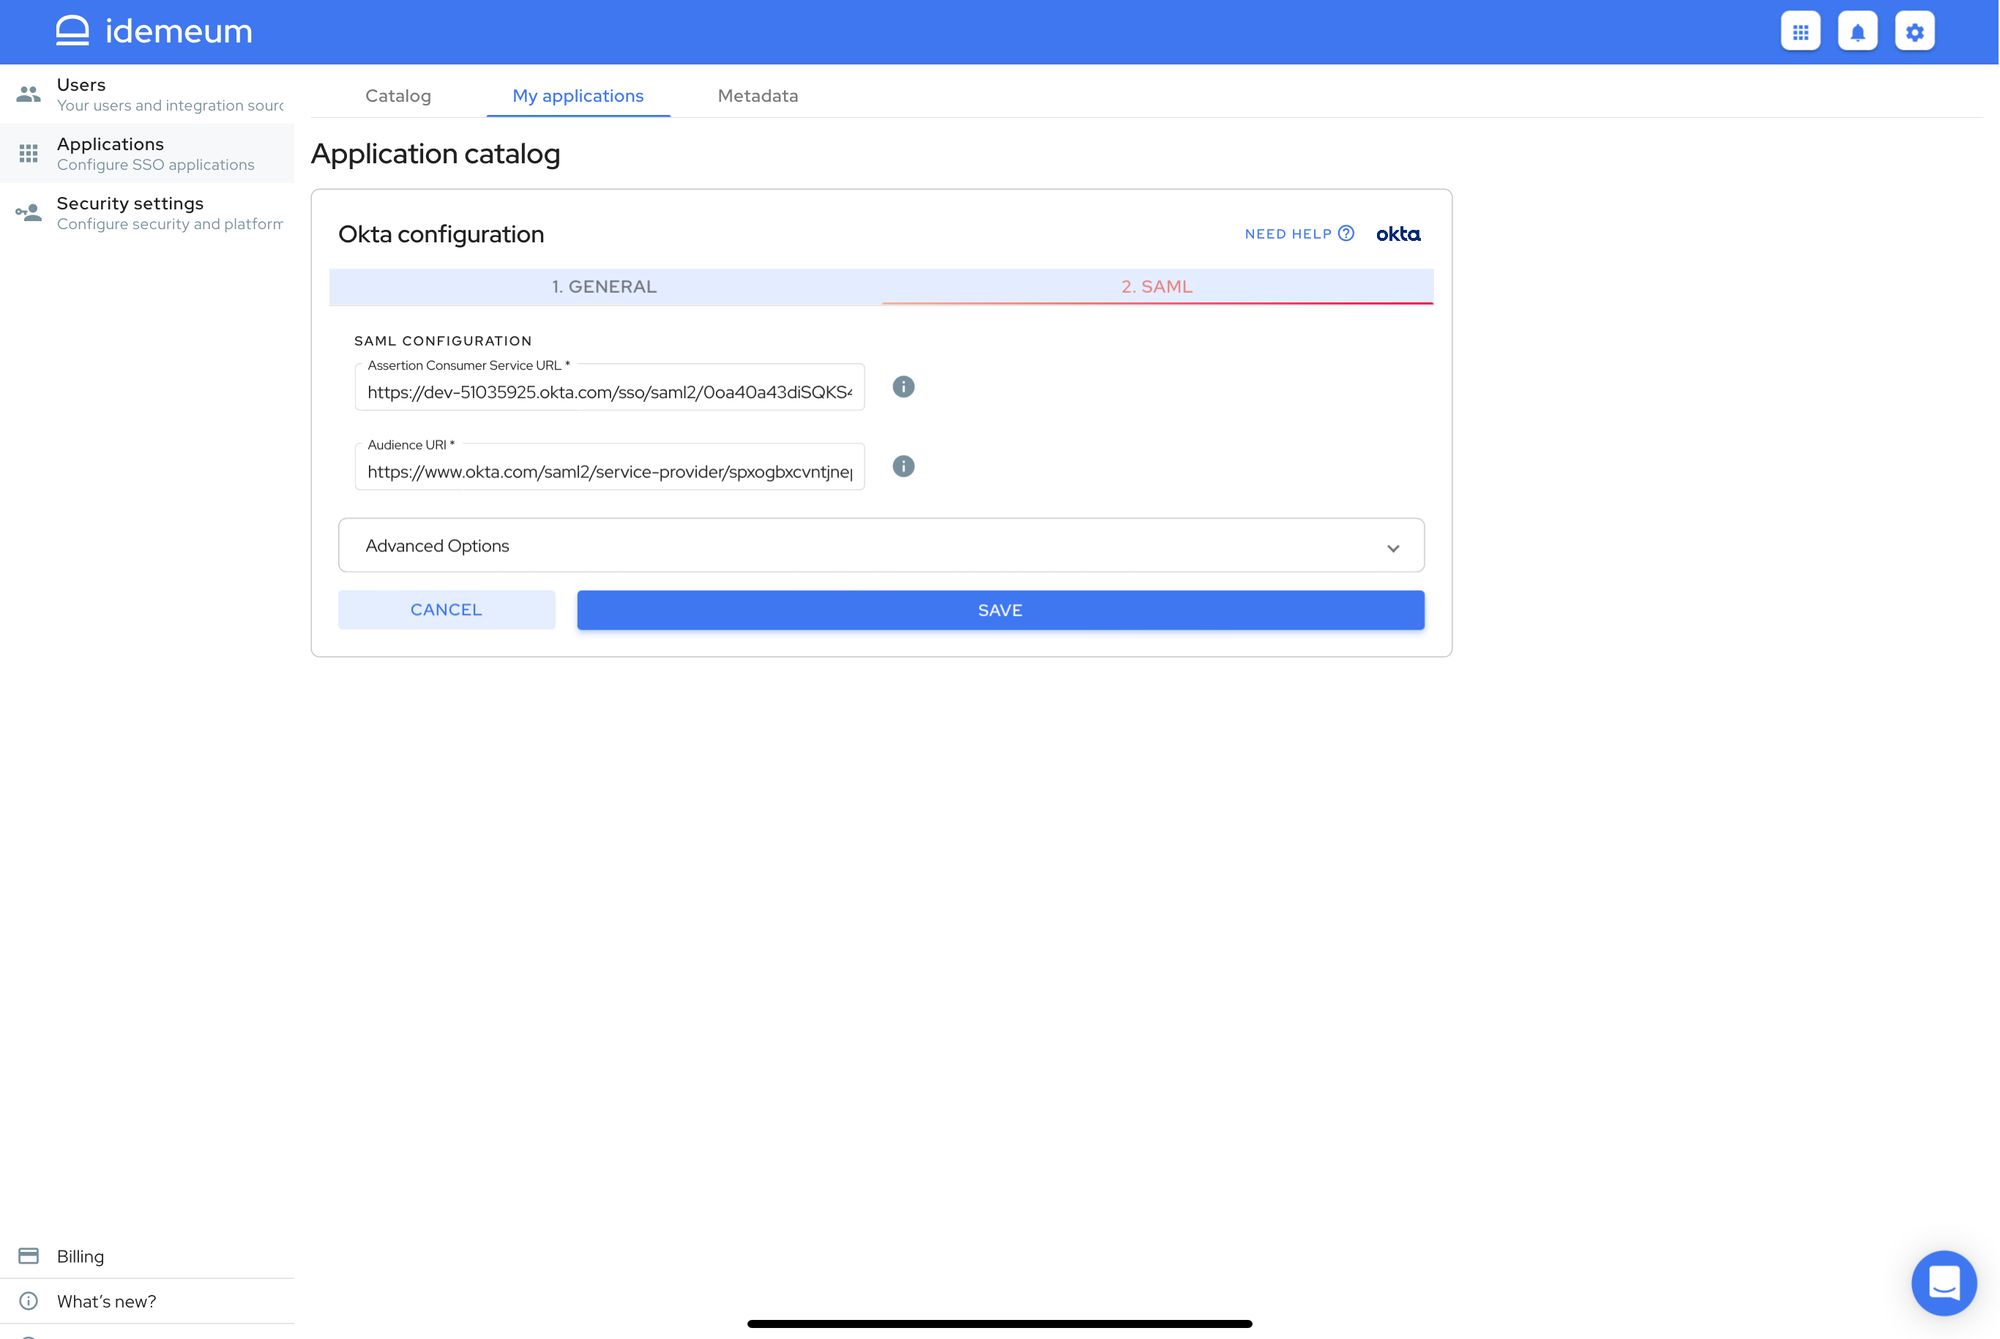
- Click Save
Test Passwordless MFA
- Open incognito browser window and navigate to your Okta tenant URL. Once you do that you will be redirected to idemeum for login. You will see the QR code that you will need to scan with the idemeum application.
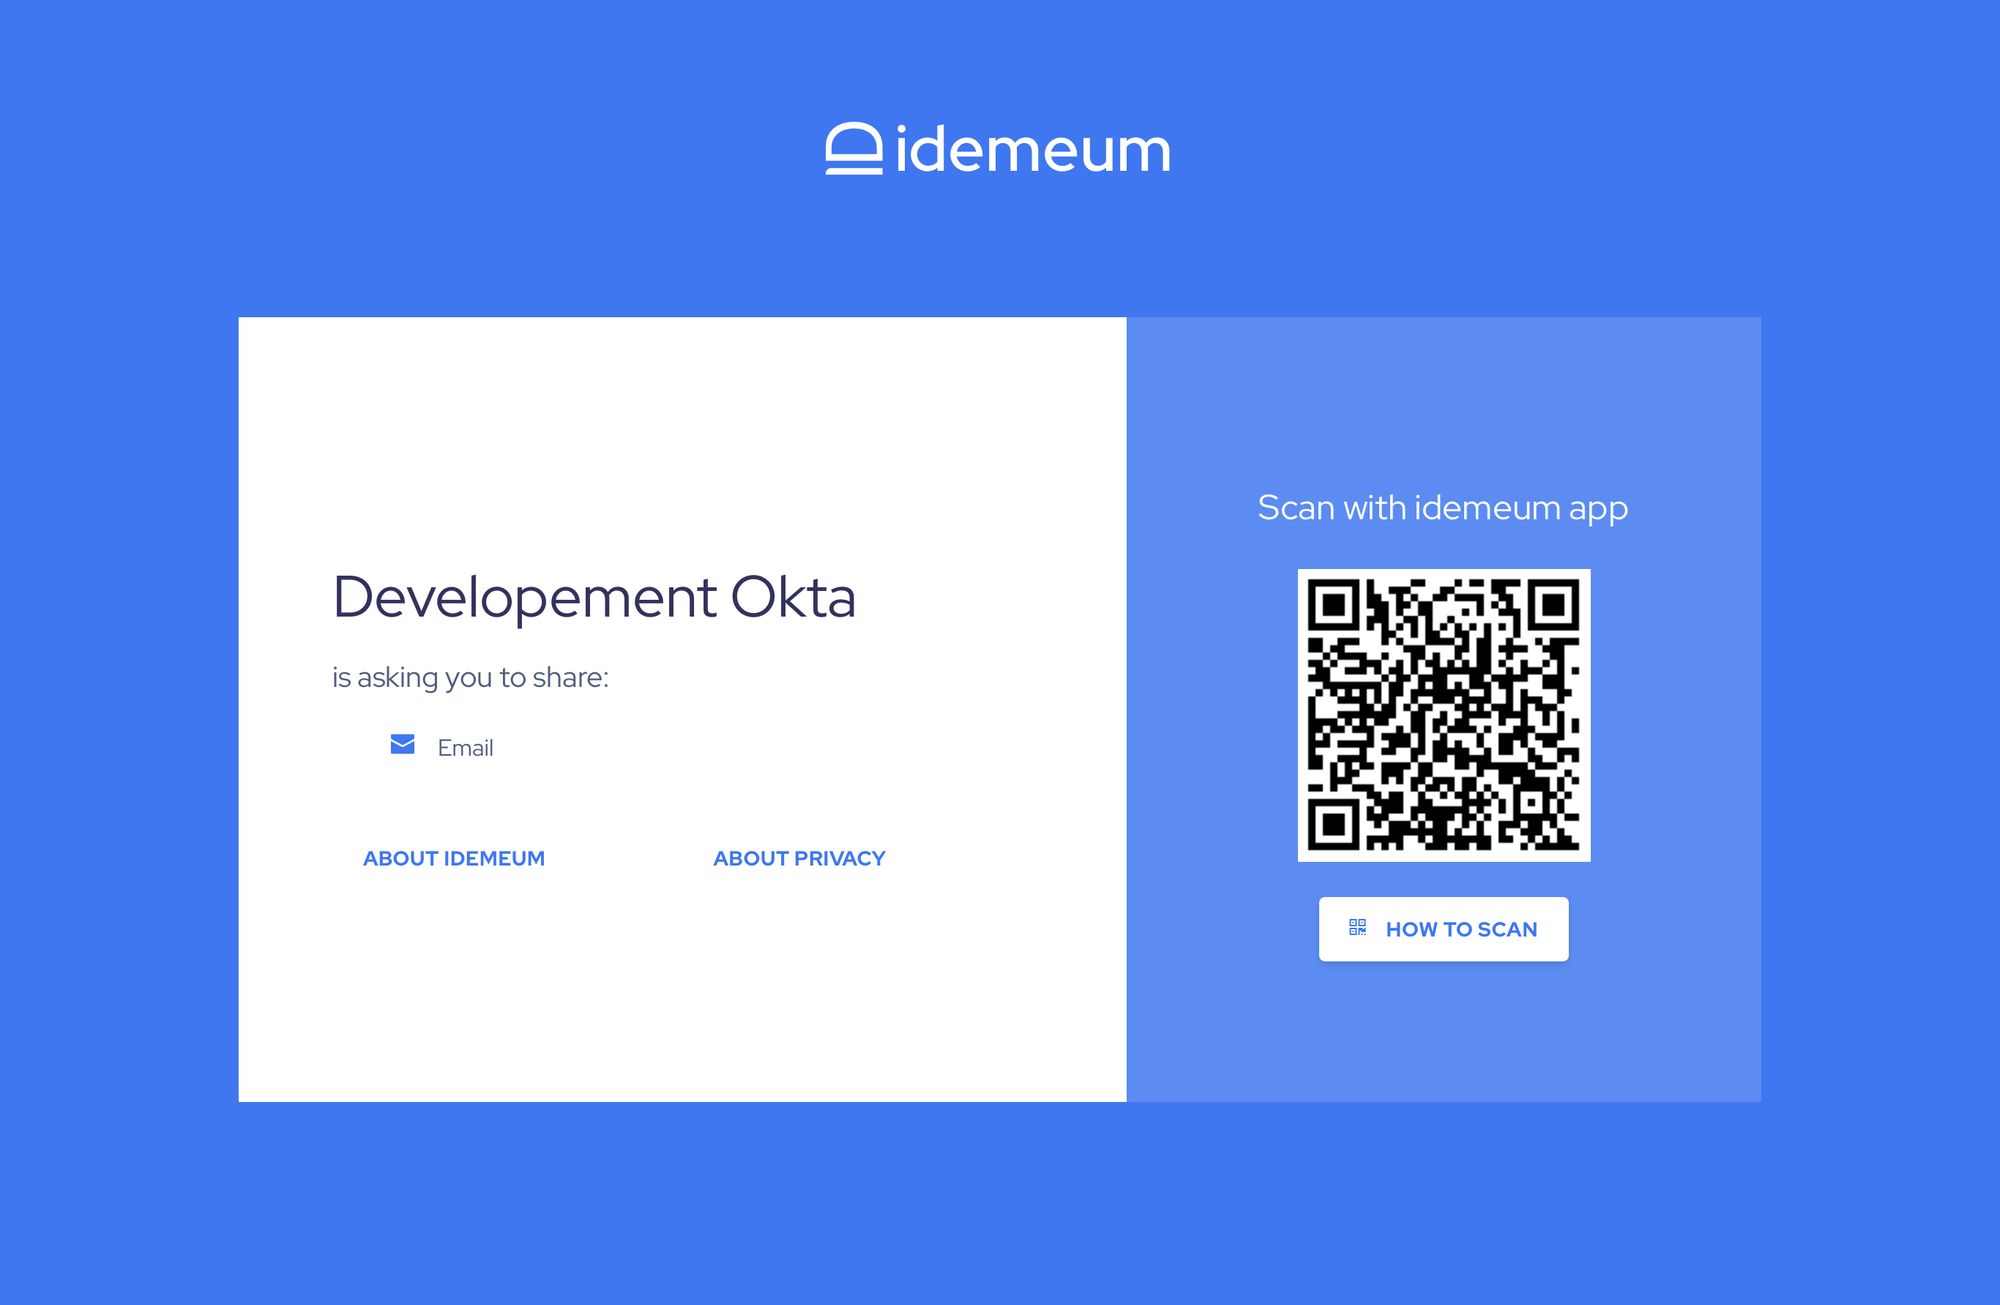
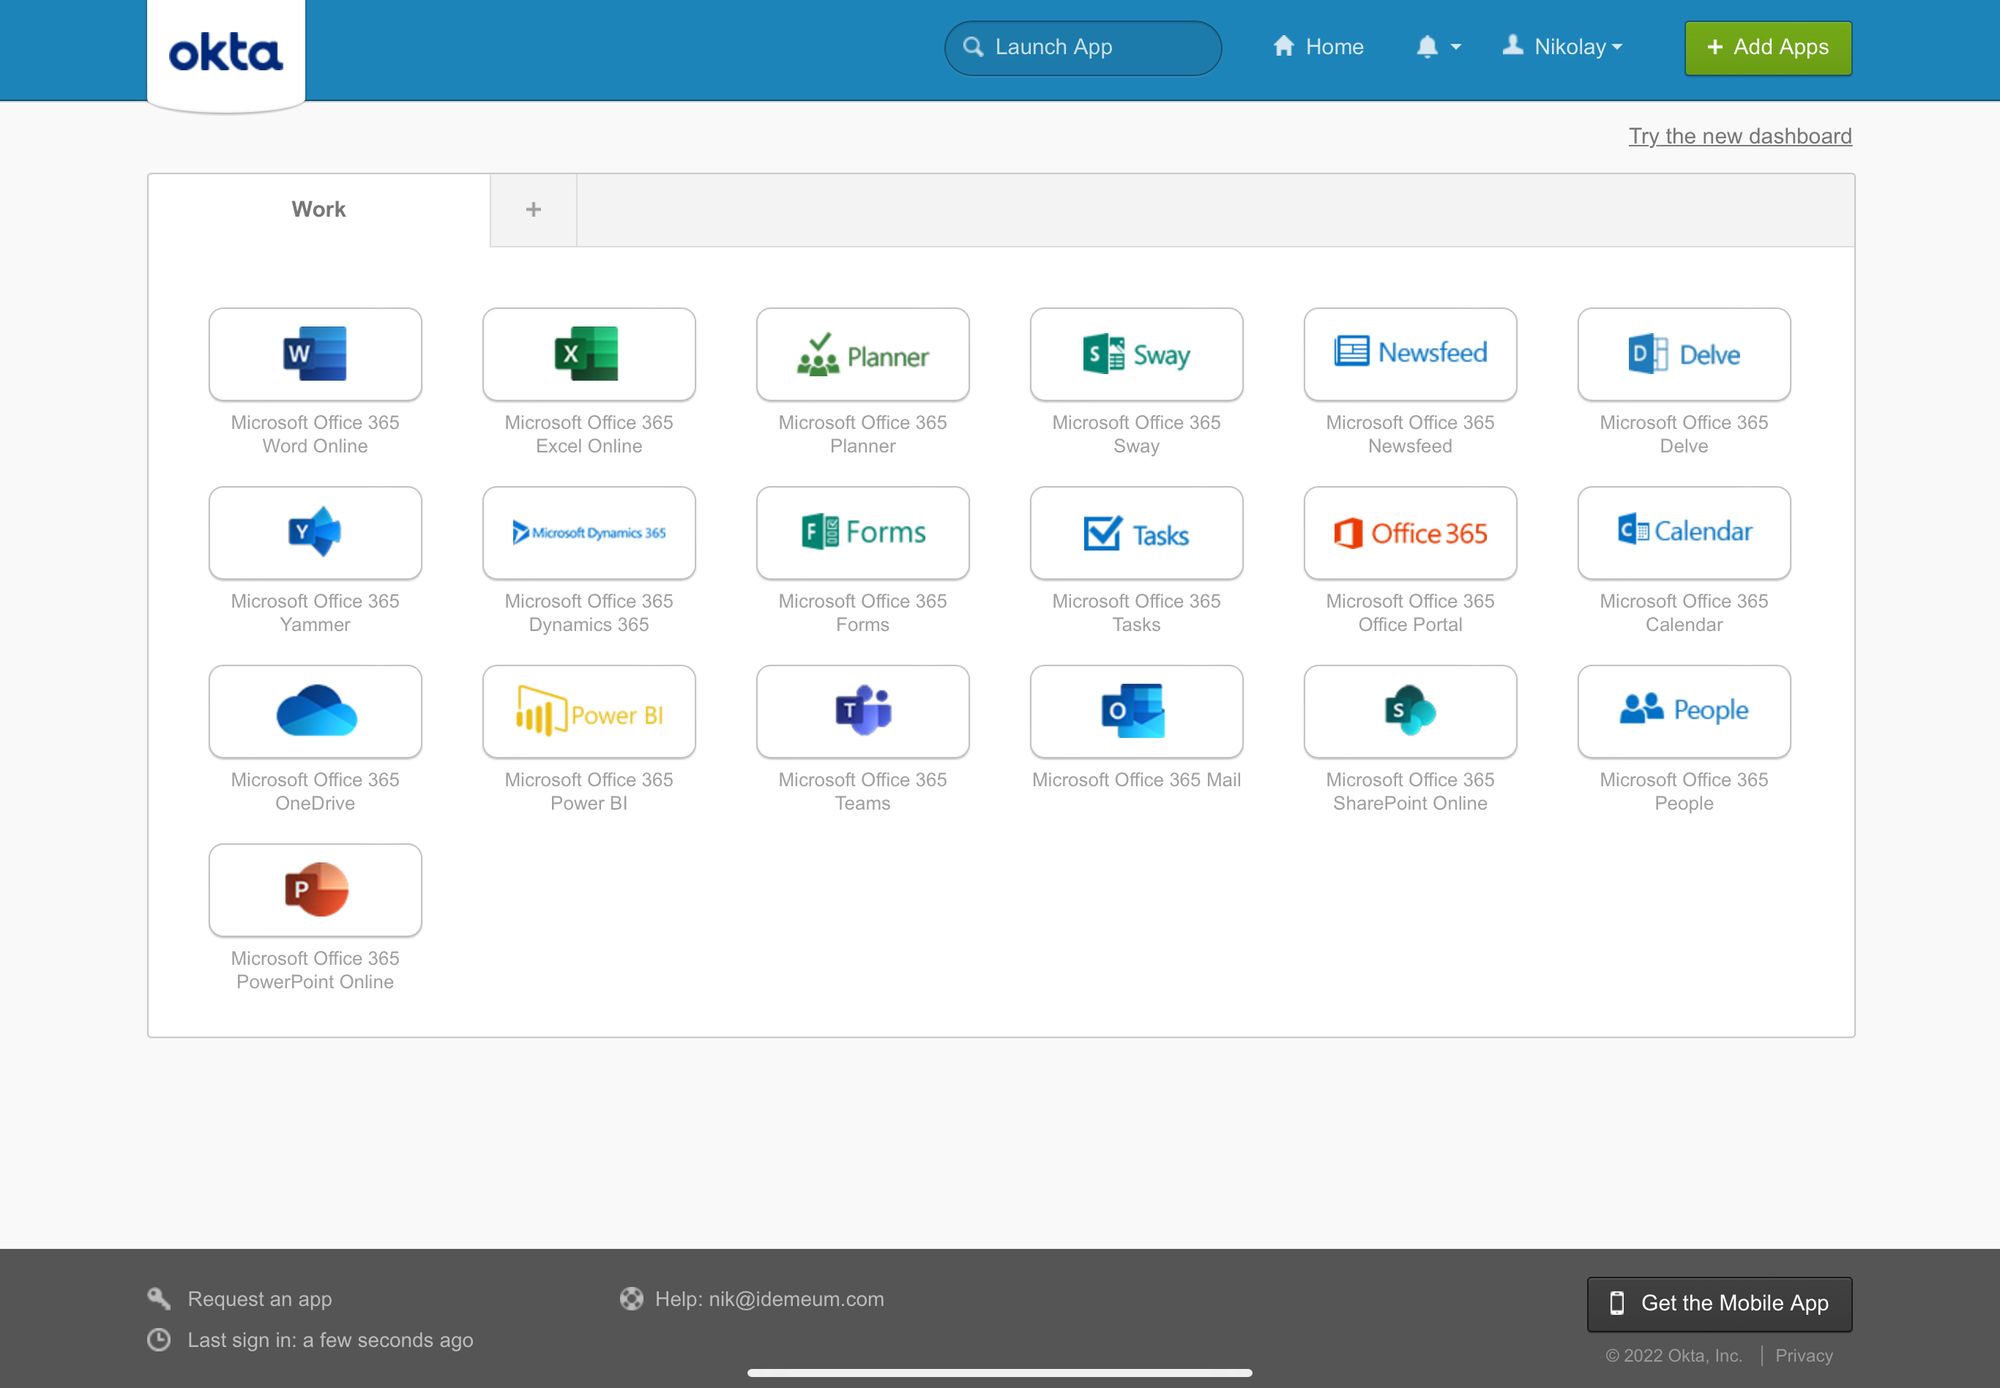
- Once you scan the QR code with idemeum application and approve the sign in, you will be redirected to Okta application catalog.