
Capabilities overview
Notion is an application that provides components such as notes, databases, kanban boards, wikis, calendars and reminders. Users can connect these components to create their own systems for knowledge management, note taking, data management, project management, among others.
| Supported capability | Required plan | Details |
|---|---|---|
| Passwordless SSO | Enterprise plan | High SSO tax |
| Automated provisioning | Enterprise plan | SCIM 2.0 (create, remove, update accounts) |
| Password manager | Any | Auto-fill / Auto-capture |
Prerequisites
Before you configure Single Sign-On and provisioning for Notion you need to contact Notion support or your rep to enable:
- Add and verify your domain so that SAML SSO can be enabled
- Generate SCIM token for your account so that you can use it for provisioning
Also you will need to collect and prepare idemeum SAML metadata URL. Instructions for how to obtain your idemeum SAML metadata parameters are below.
 Nikolay Poturnak
Single Sign-On (SAML)
Configure SSO in Notion
- Log in to your Notion account and navigate to Settings and Members in the left menu
- Choose Security and Identity and scroll to SAML Single Sign-On section
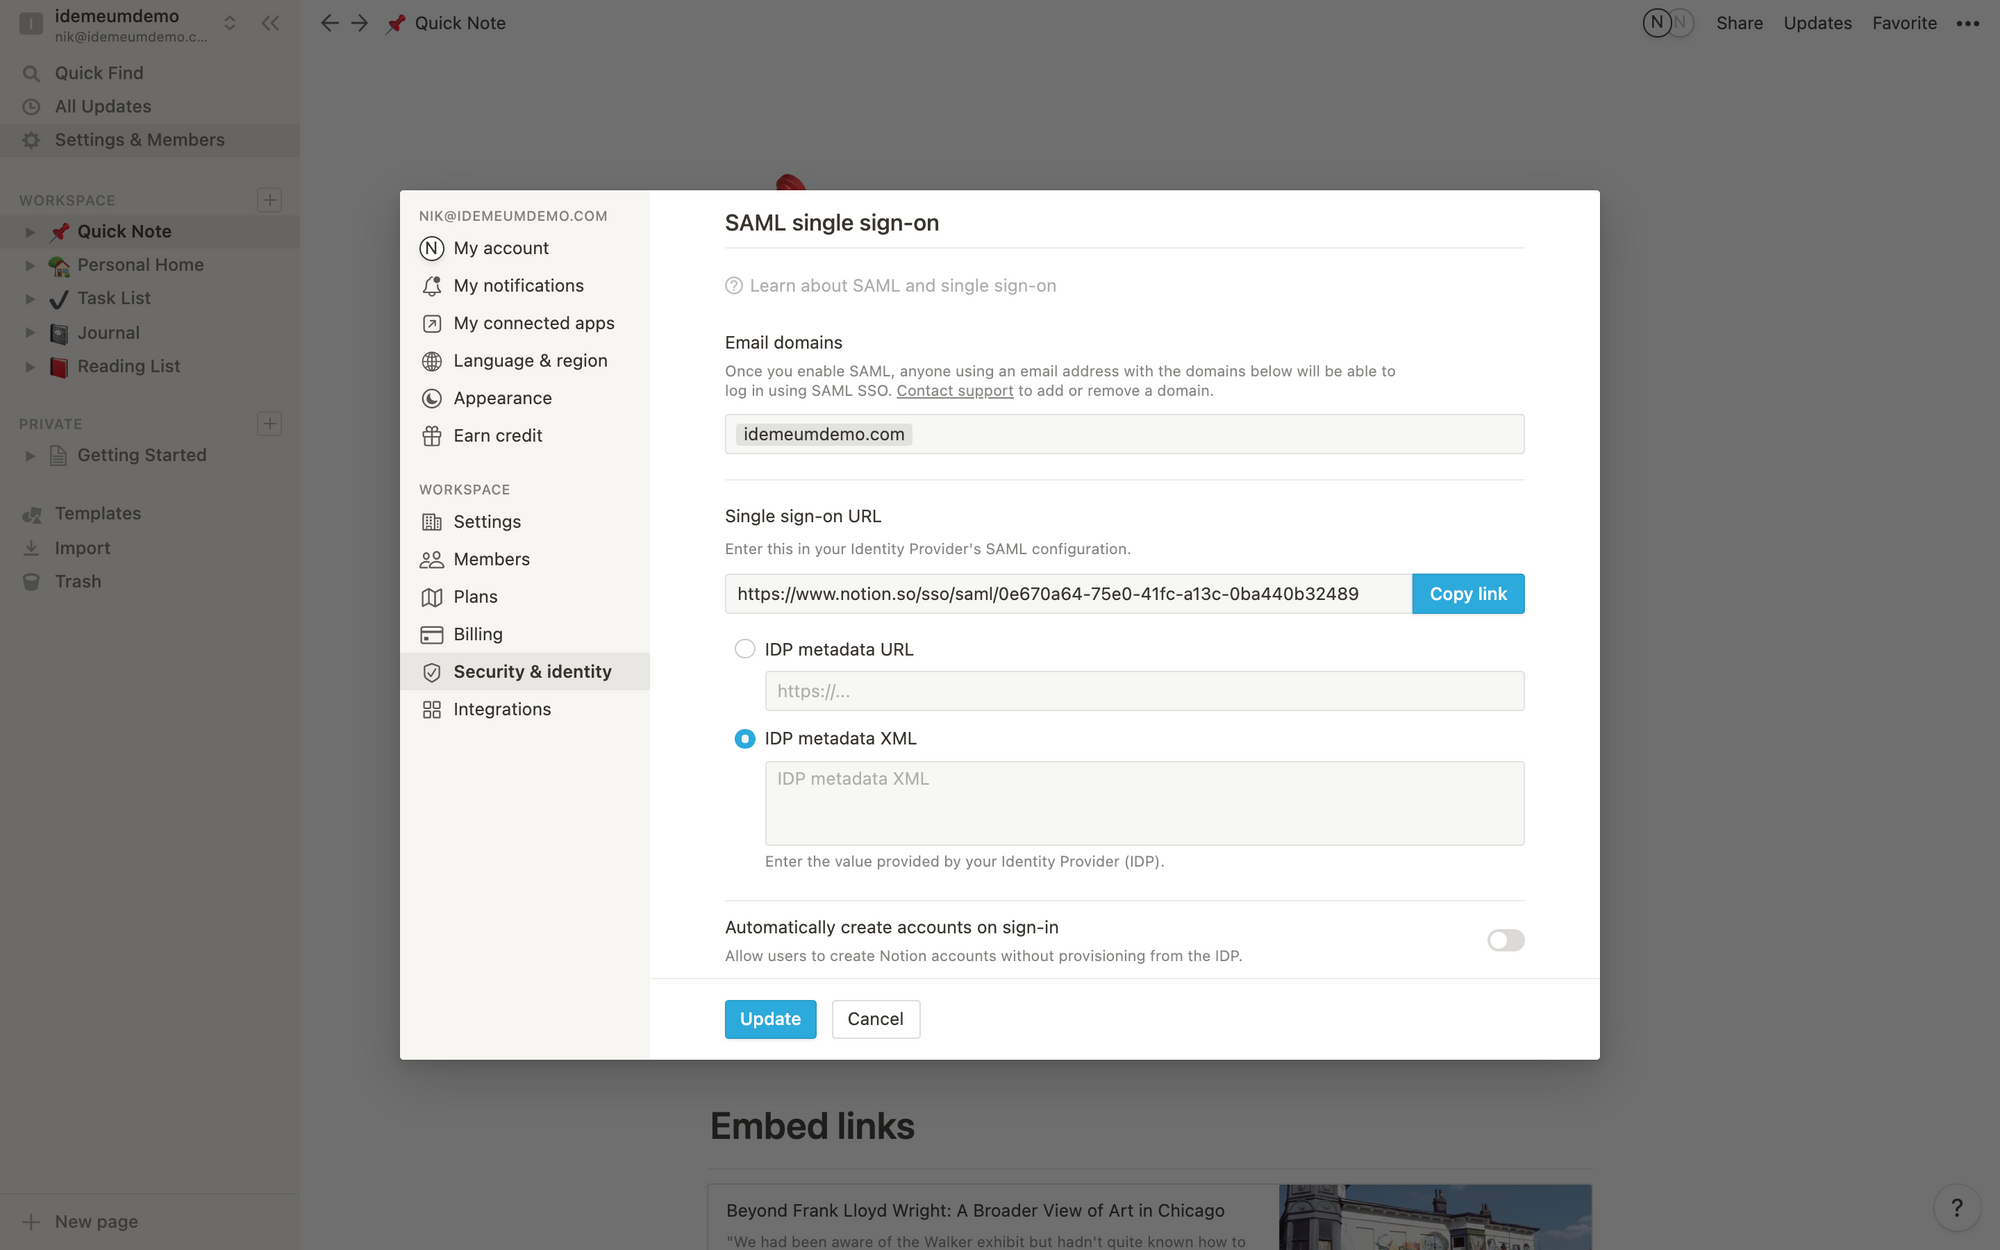
- Make a copy of Single Sign-On URL as you will use it to configure SSO in idemeum
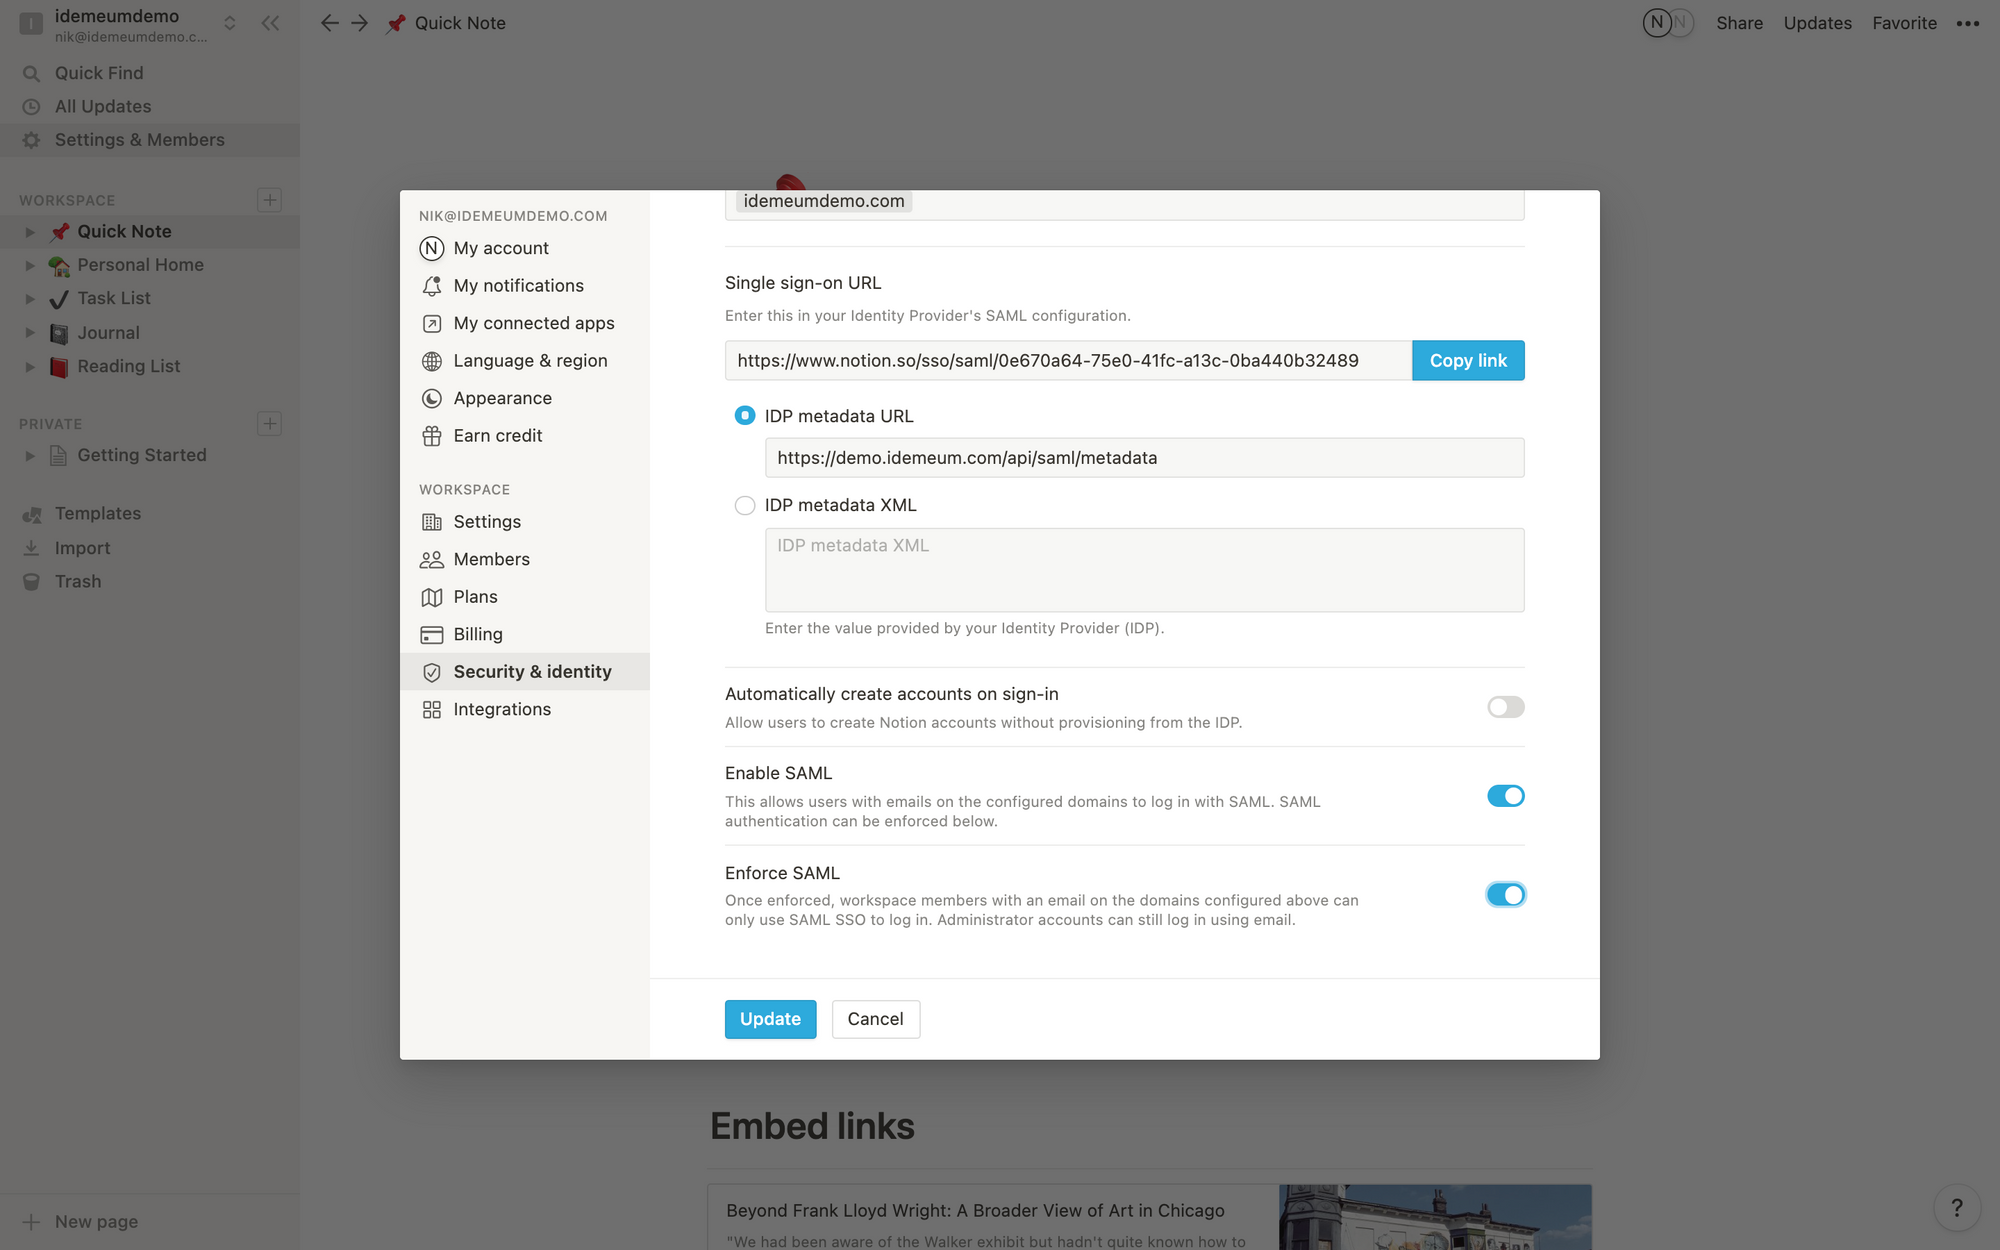
- Choose IDP metadata URL and paste the URL that you obtained in the prerequisites section
- Enable SAML and optionally enforce SAML for every login. We recommend you try SAML first before enforcement so that you do not lock yourself out.
- Scroll down to SCIM configuration, click View token and take note of the SCIM token for your Notion tenant. You will need this token to configure provisioning in idemeum.
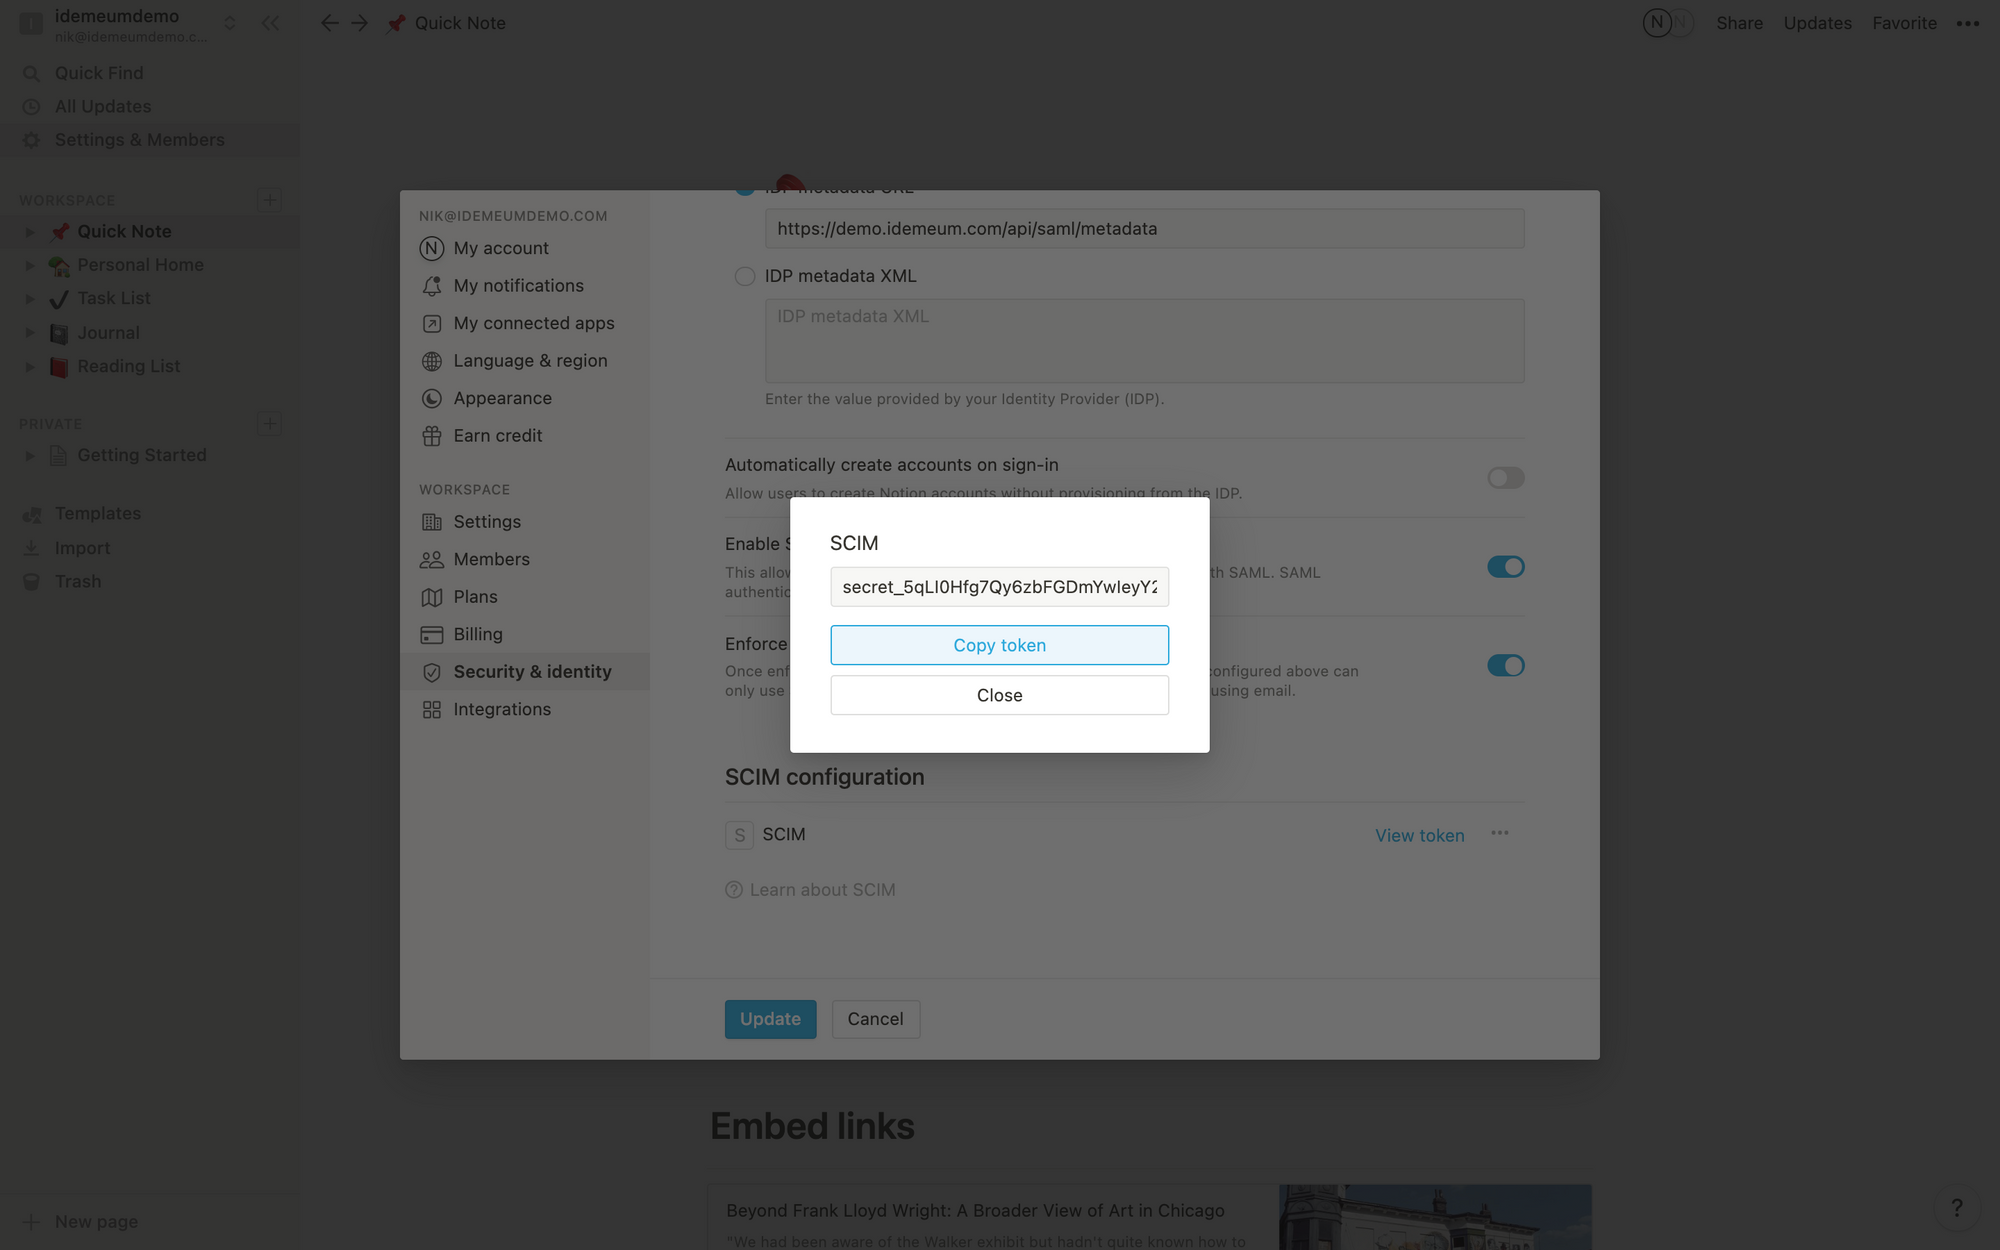
- Update configuration
Configure SSO in idemeum
- Navigate to your idemeum admin portal at https://[your domain].idemeum.com/adminportal
- Click Applications in the left menu
- Search for Notion application and click Add App
- Navigate to SAML configuration
- For Assertion Consumer Service URL enter Single Sign-On URL that you obtained from Notion configuration in the previous section
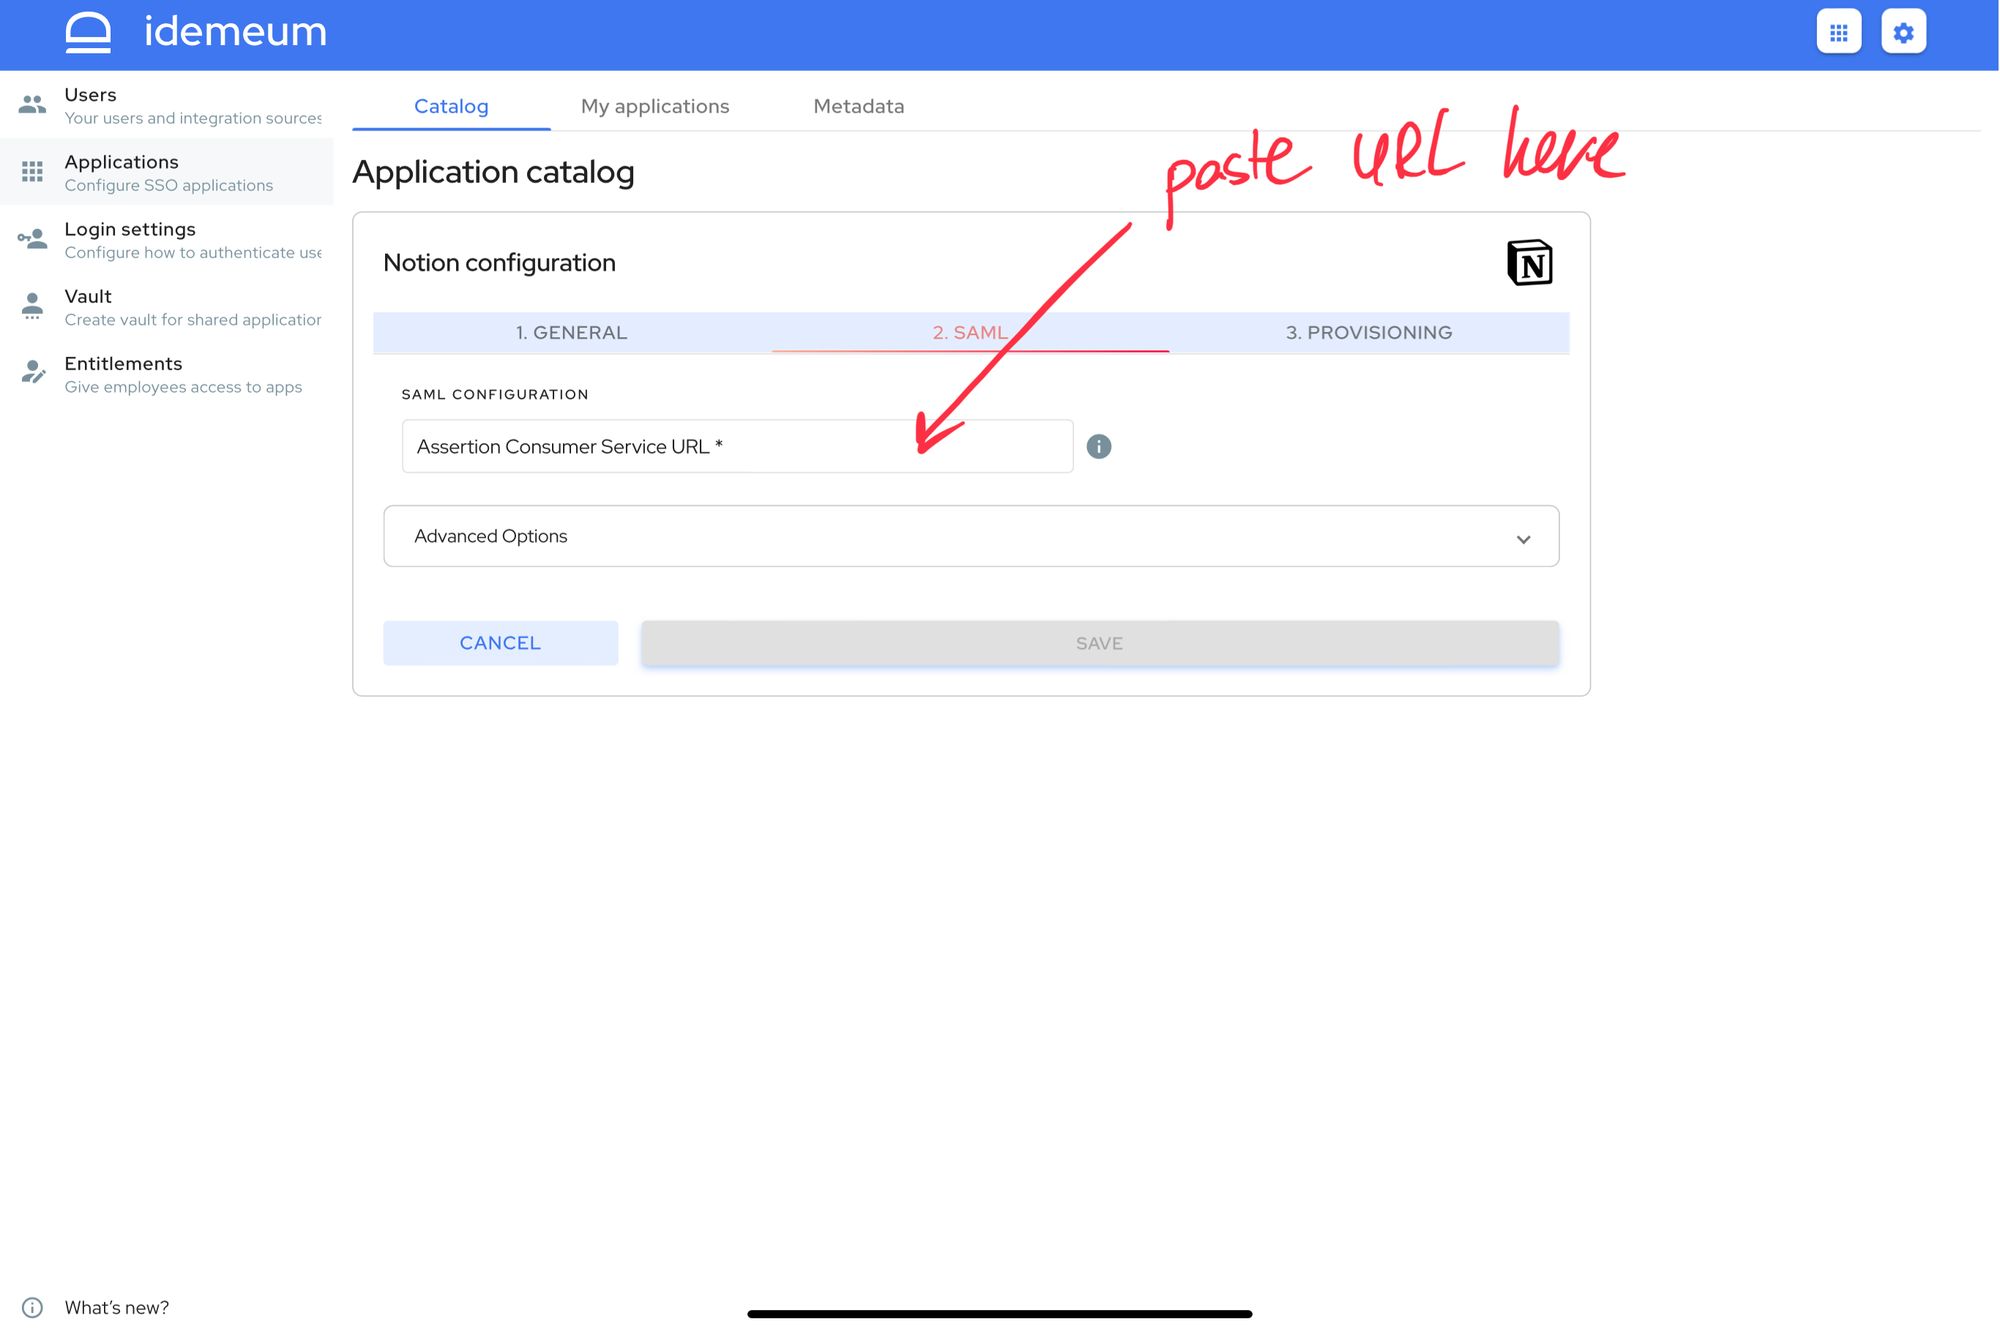
- Save SAML configuration
Automated provisioning with SCIM
Make sure you have requested Notion support team to enable SCIM token before proceeding with this section.
- Access Provisioning section for your Notion app in idemeum
- For Access Token paste the token that you obtained from Notion configuration
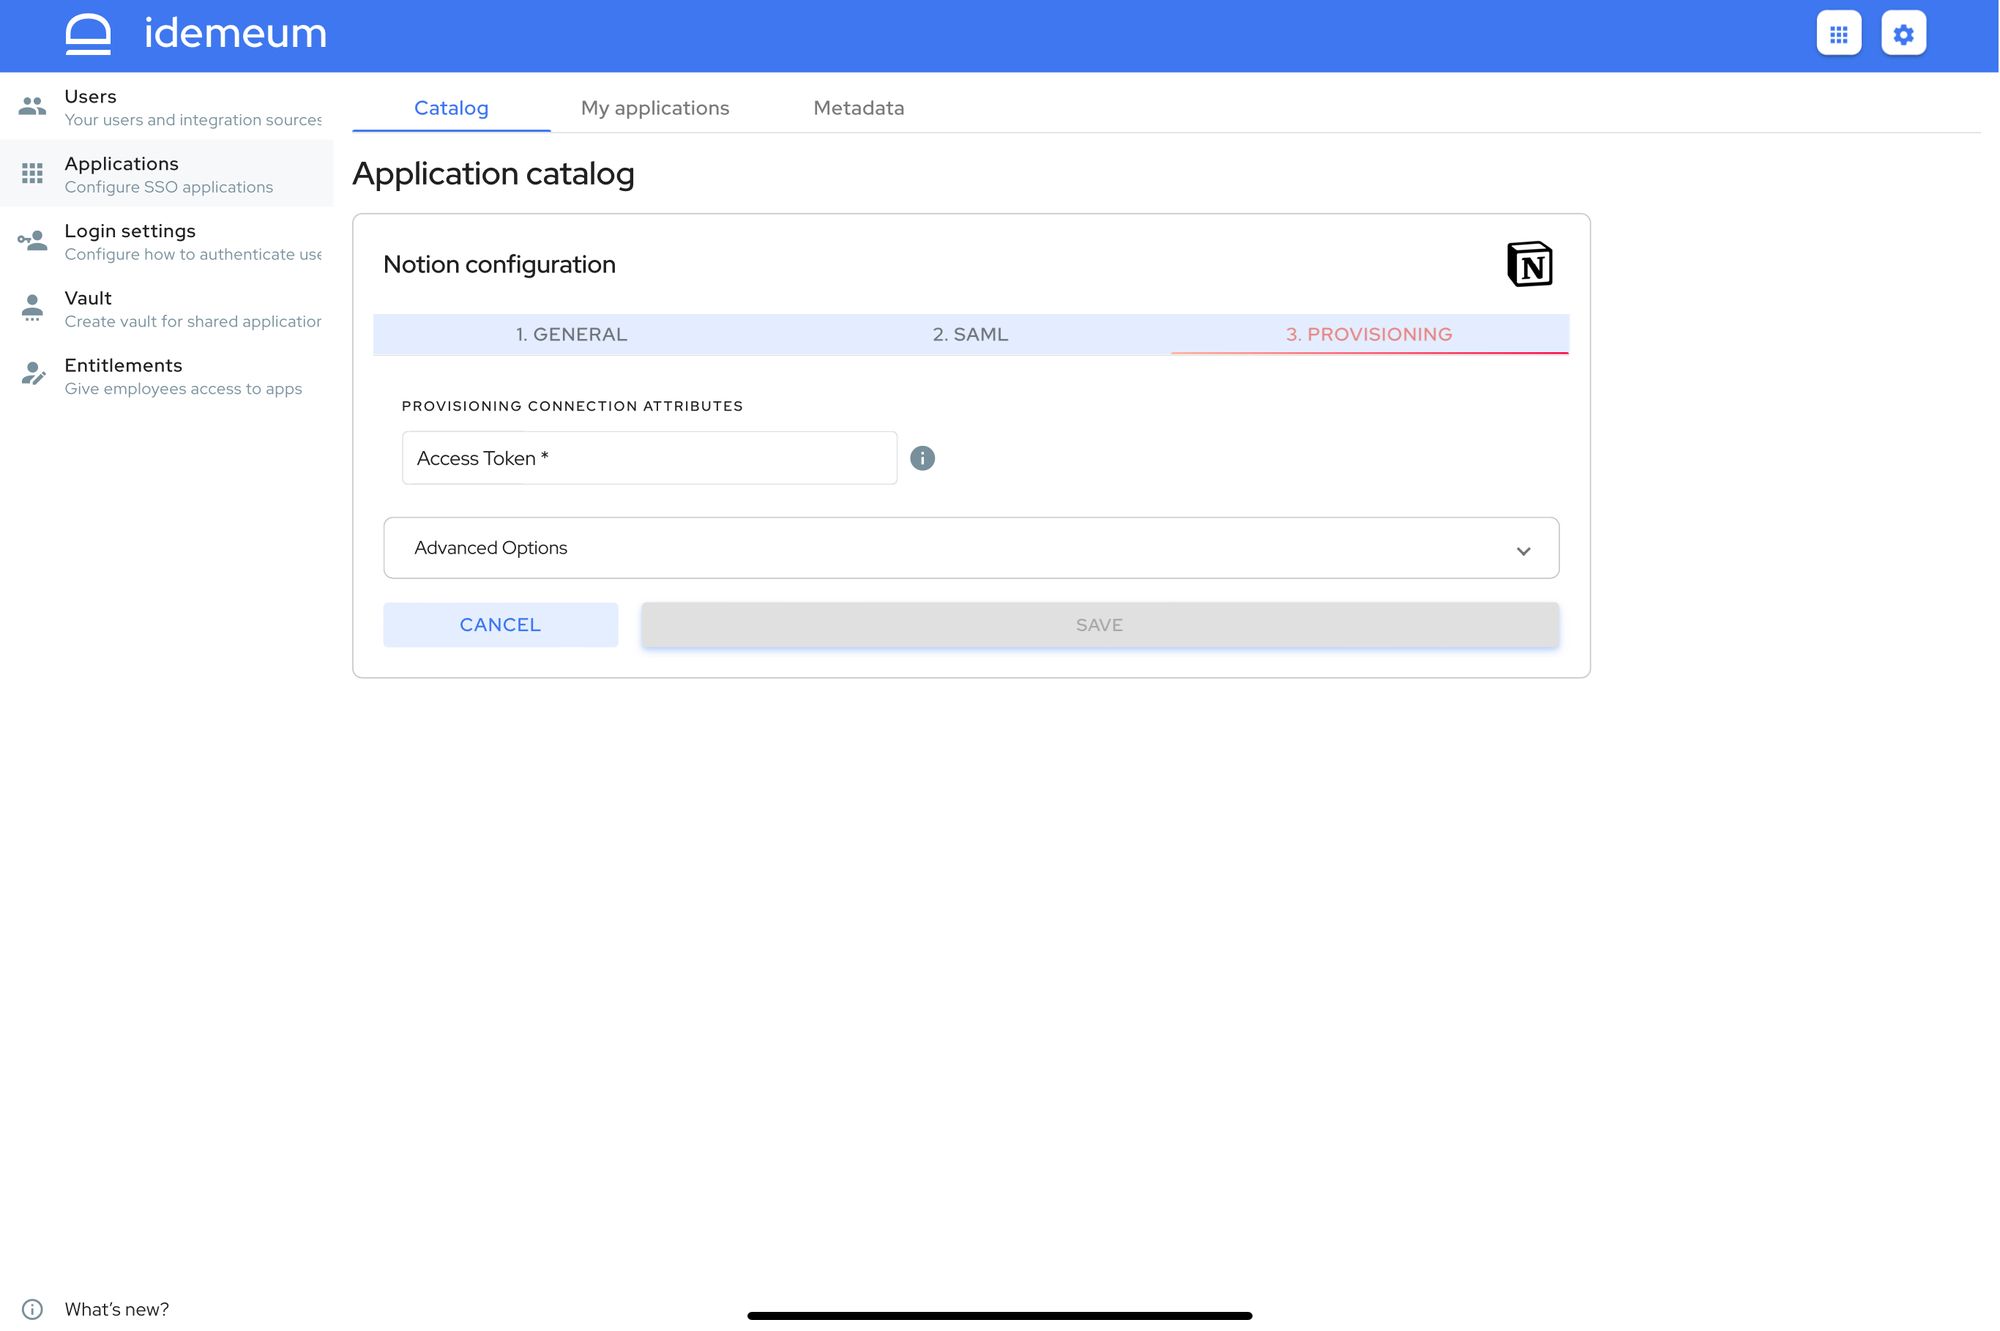
- Save configuration
Application entitlements
Before users can access applications you need to make sure you entitle applications to them. In idemeum admin portal navigate to Entitlements section to assign applications to your employees.