Capabilities overview
DocuSign helps small and medium-sized businesses collect information, automate data workflows, and sign on various devices.
| Supported capability | Required plan | Details |
|---|---|---|
| Passwordless SSO | Advanced solutions | High SSO tax |
| Automated provisioning | Advanced solutions | API (create, remove, update accounts) |
| Password manager | Any | Auto-fill / Auto-capture |
Prerequisites
Before you configure SAML SSO in Docusign make sure you have your domain verified. Follow the link below to make sure your domain is verified.
In order to integrate idemeum with Docusign you will need to obtain SAML metadata parameters for your idemeum tenant.
Specifically you will need:
- Identity Provider Entity ID
- Identity Provider SSO URL
- Identity Provider Certificate (download file)
Instructions for how to obtain these SAML metadata parameters are below.

Passwordless Single Sign-On (SAML)
Configure SSO in Docusign
- Access your Docusign account at admin.docusign.com and navigate to Settings
- Then navigate to your organization settings
- Click Add identity provider
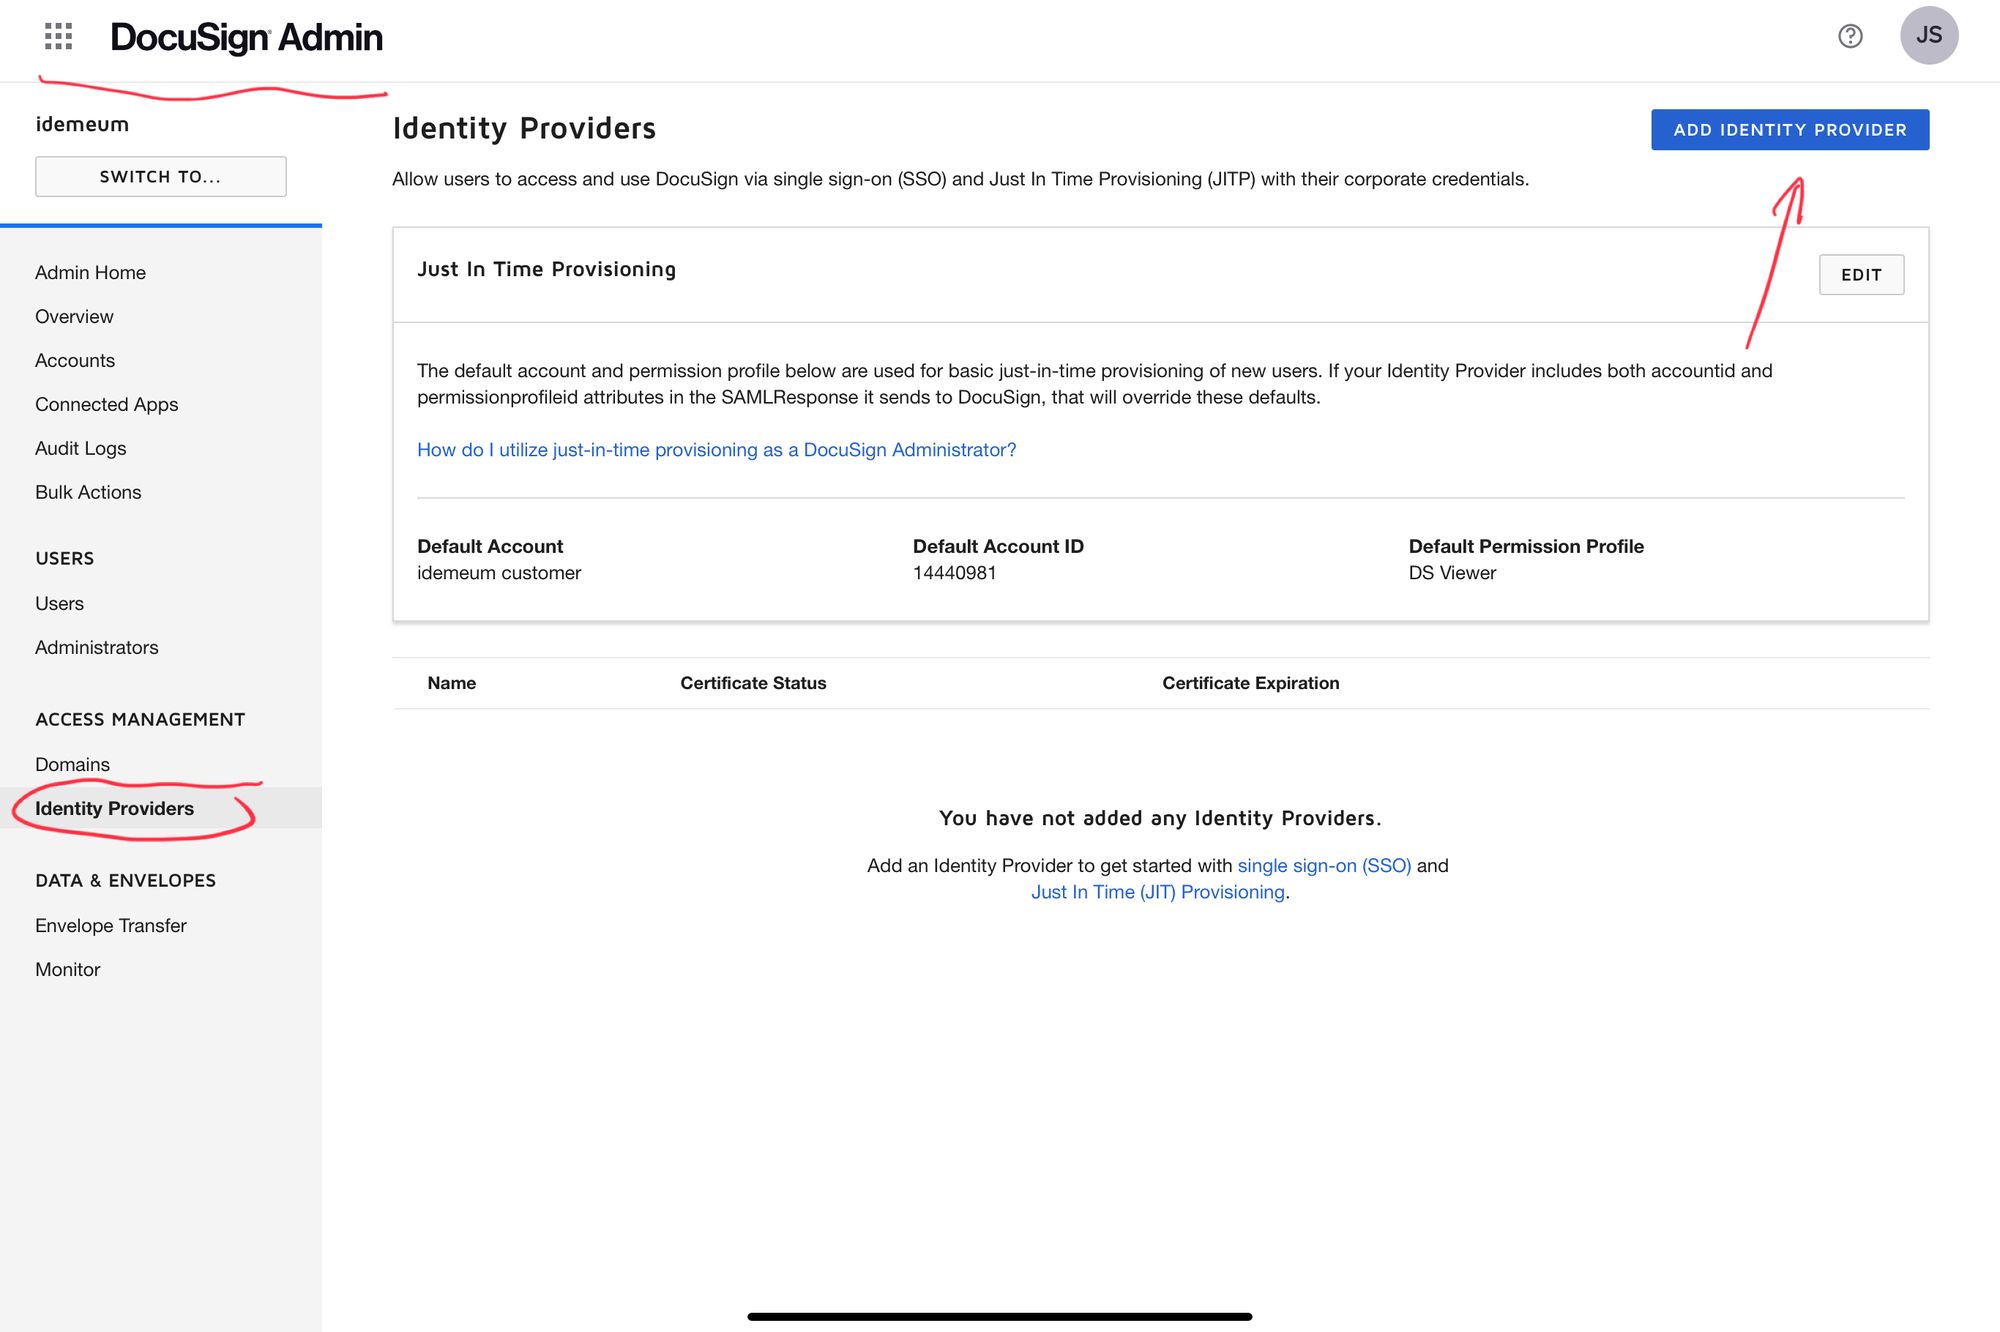
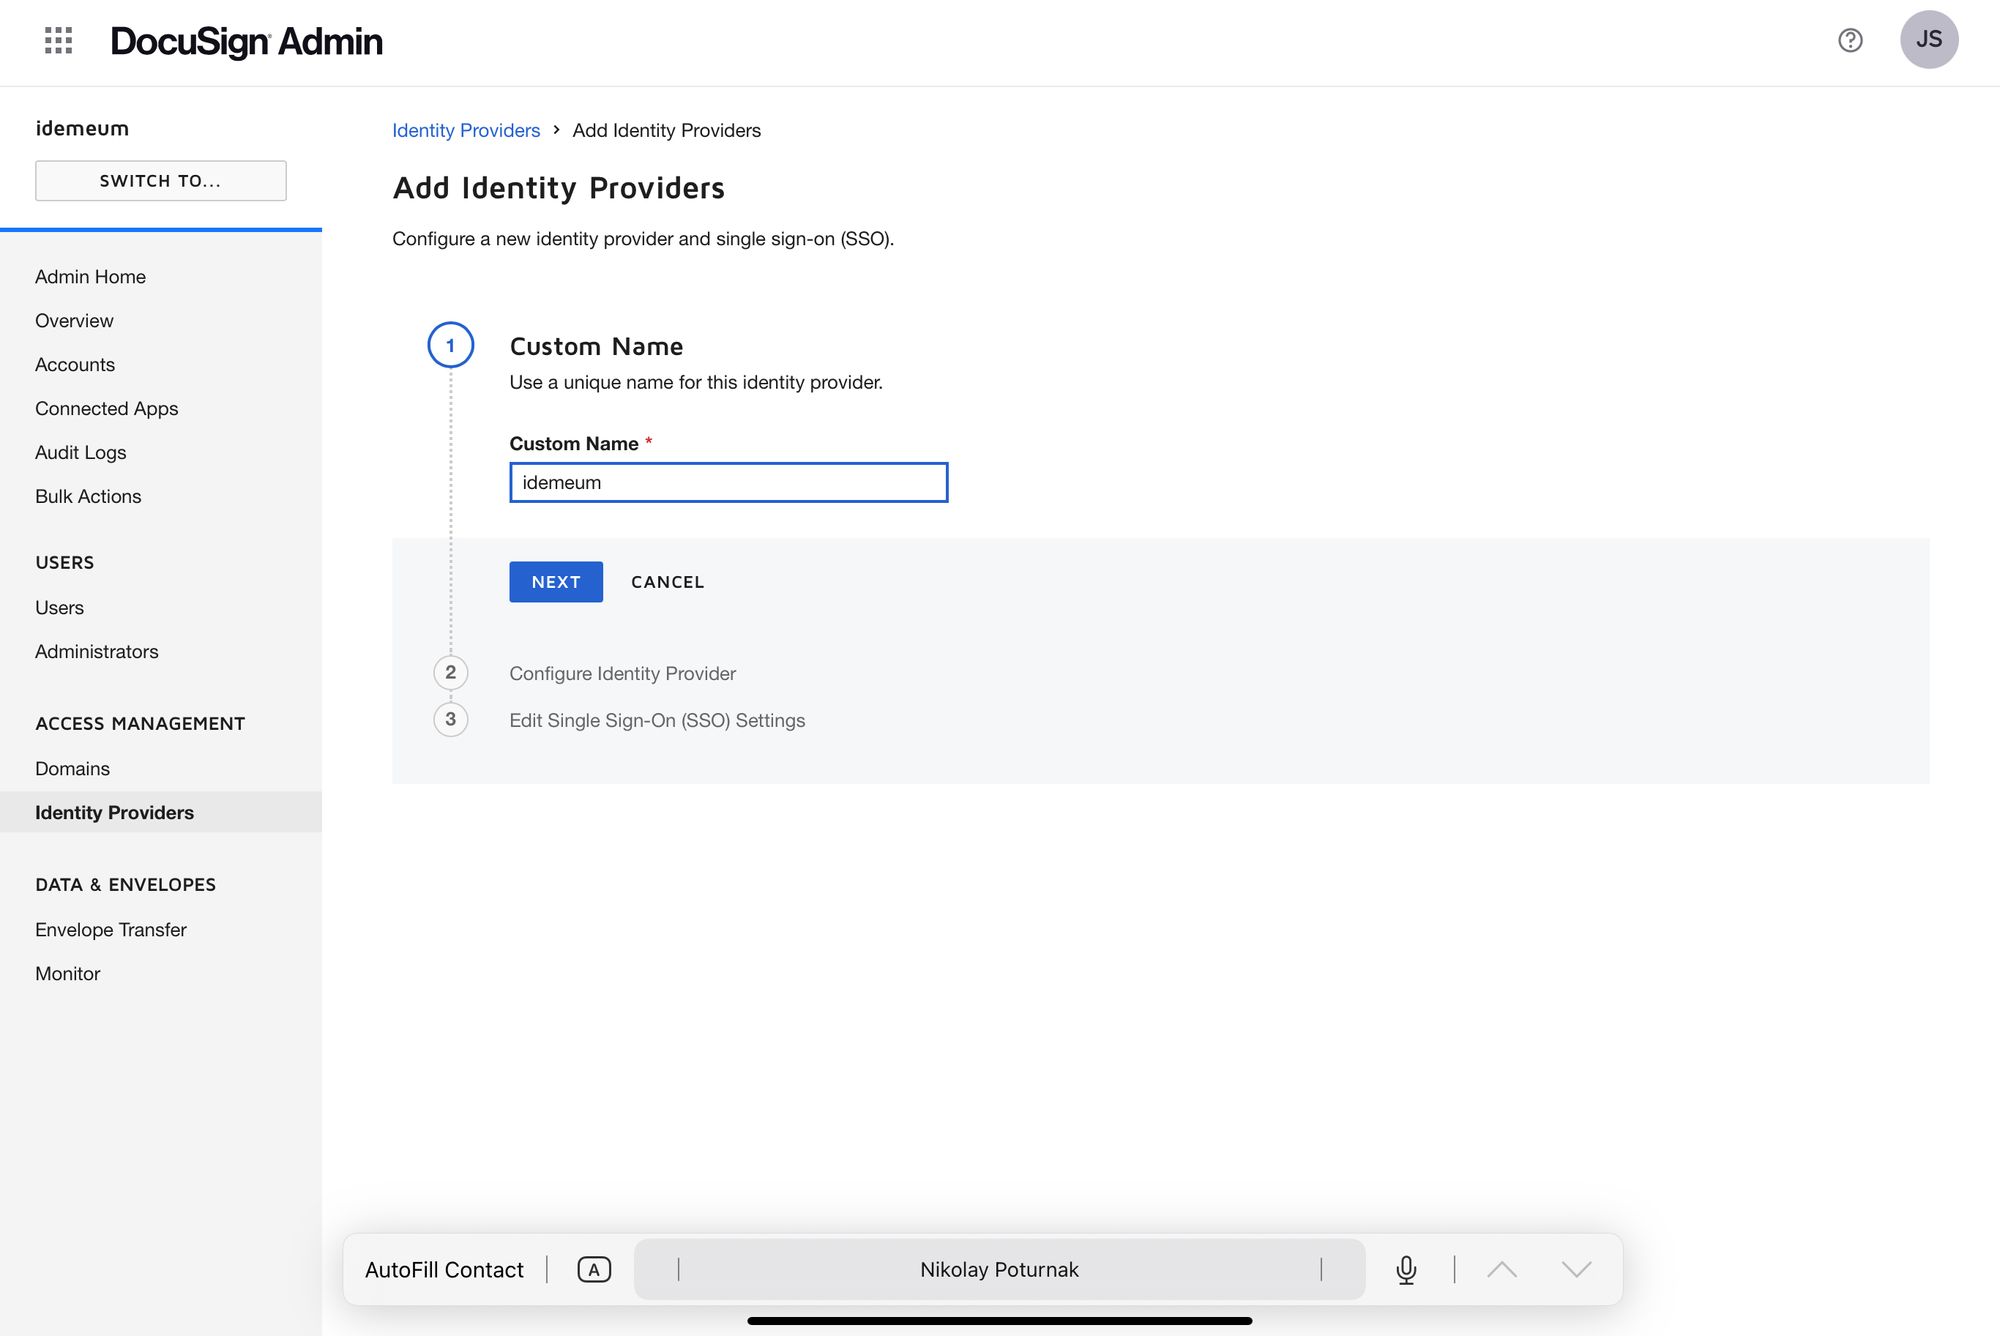
- Enter identity provider name and click Next
Now you will be using SAML metadata parameters obtained from prerequisites section
- Enter Identity Provider Entity ID into Identity Provider Issuer
- Enter Identity Provider SSO URL into Identity Provider Login URL
- Create claims mappings as shown below (emailaddress -> emailaddress, givenname -> givenname, surname -> surname)
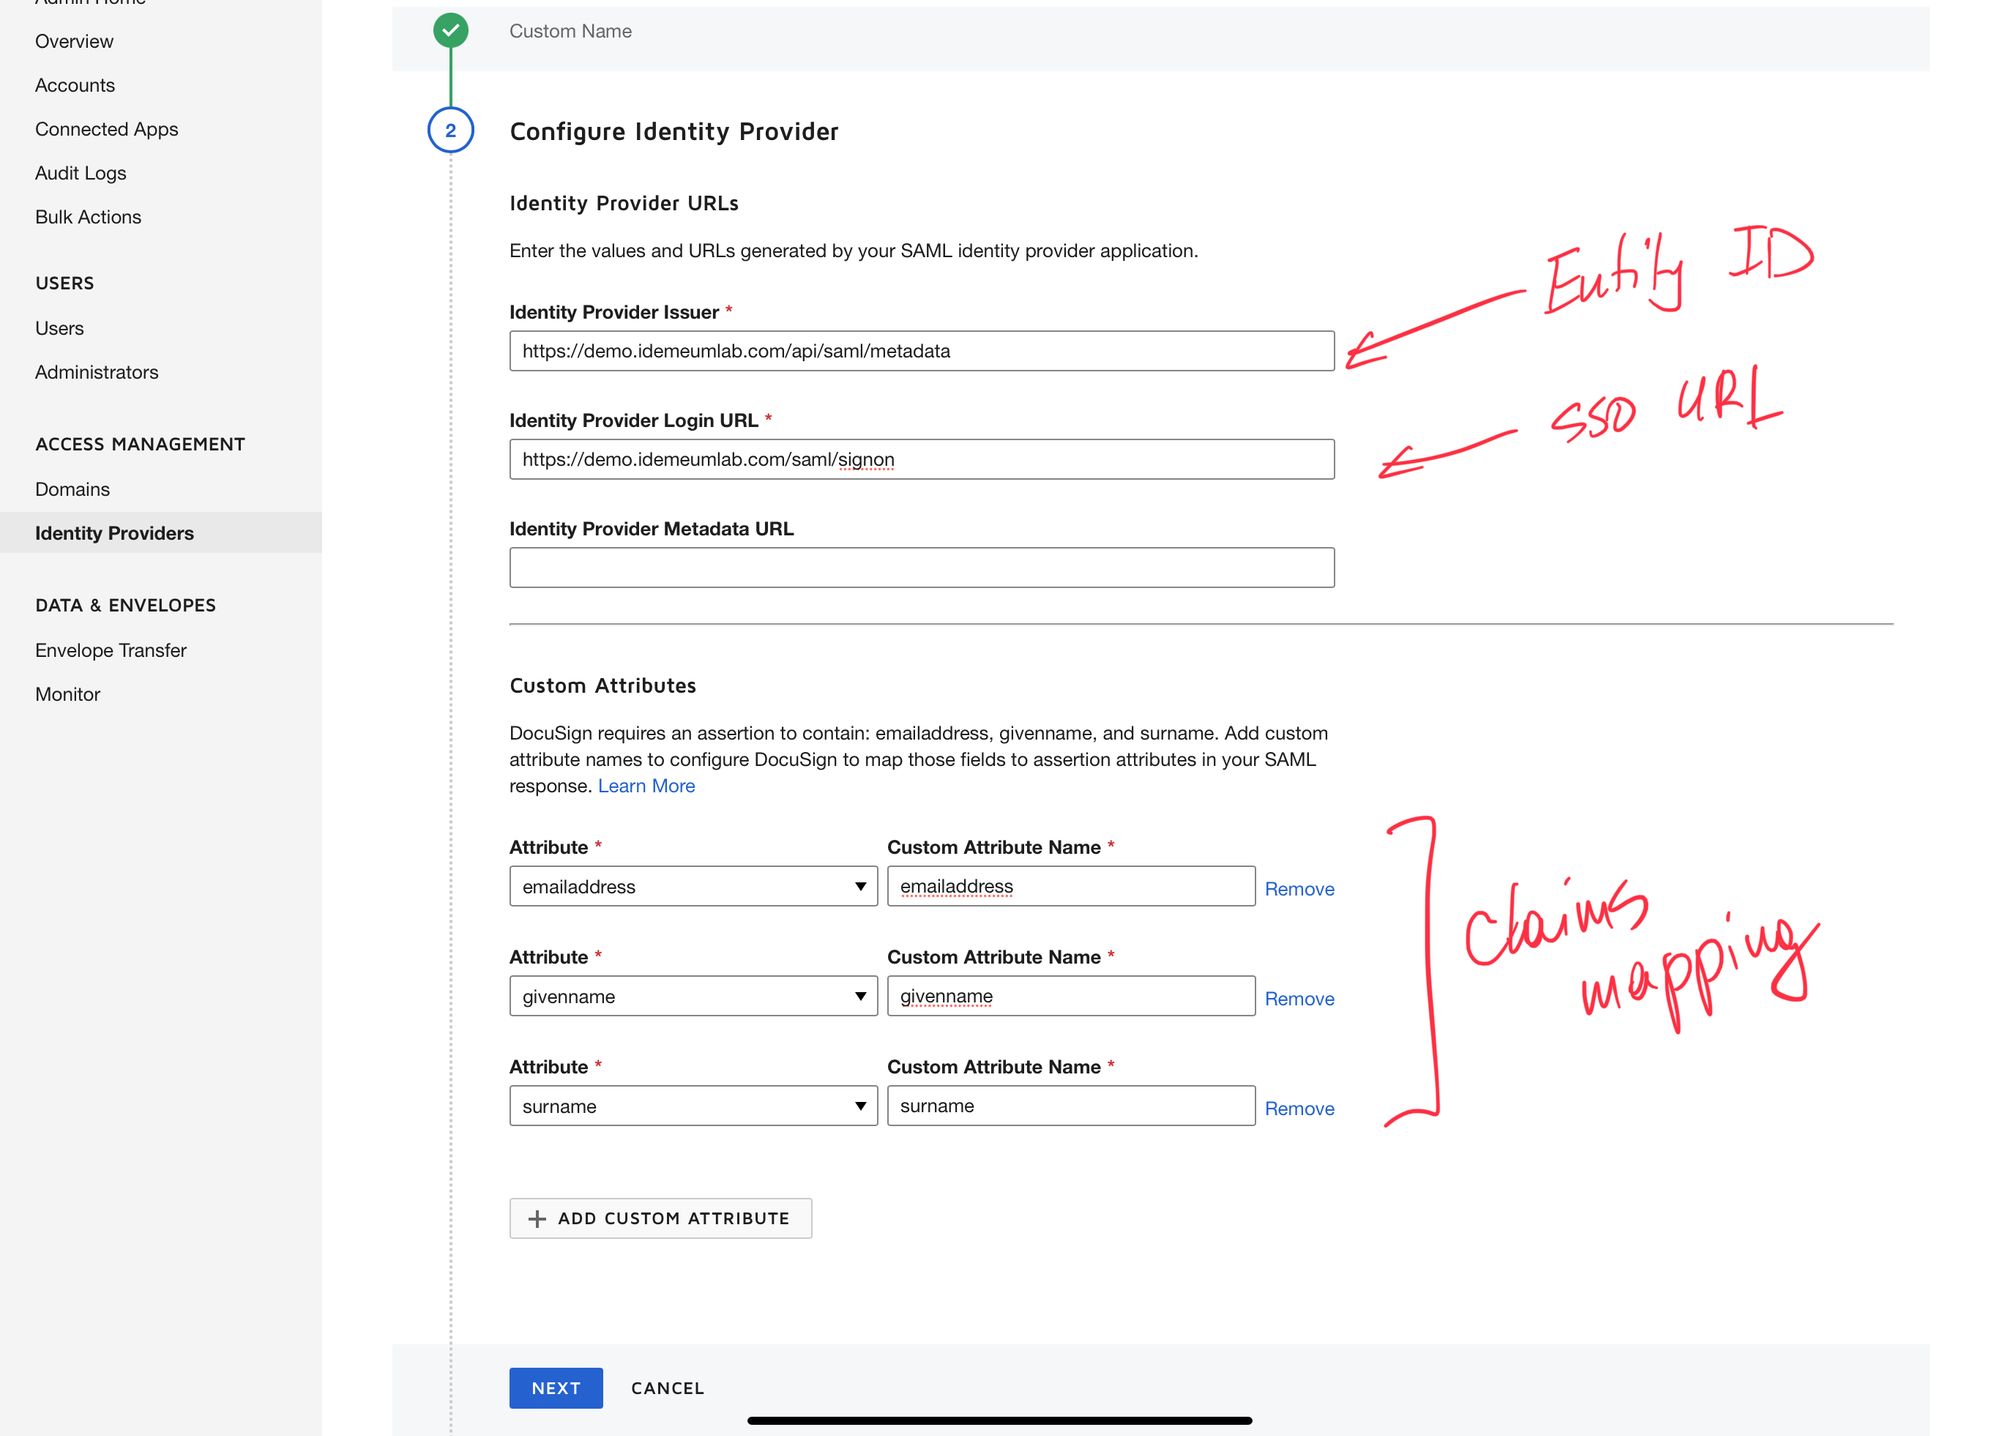
- Click Next
- Click Add Identity Provider
- Once you save the configuration you will need to add idemeum X509 public certificate. Click Actions -> Add certificate
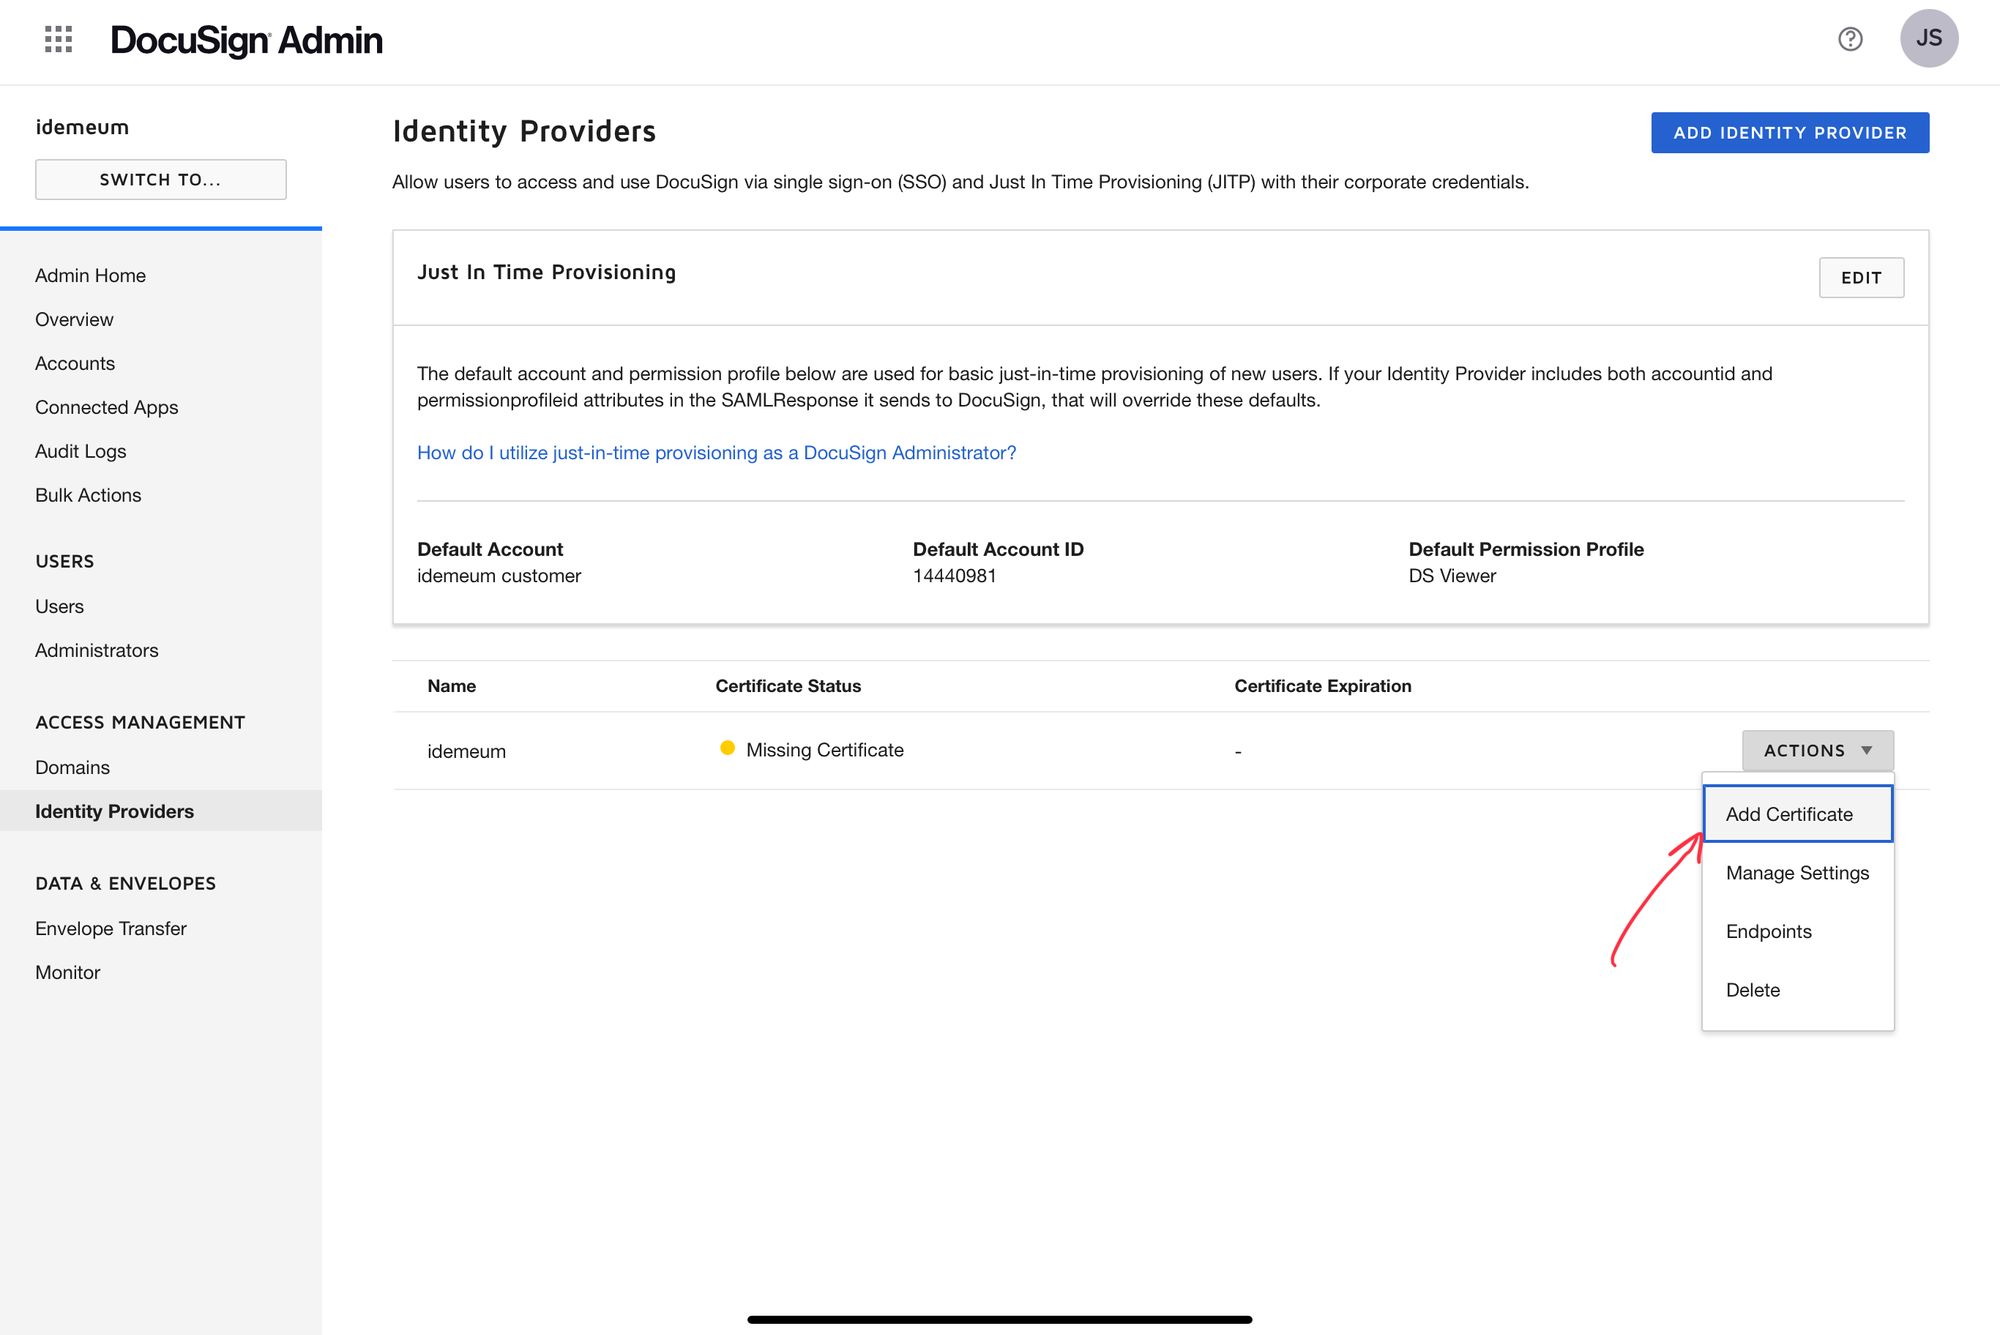
- Upload certificate that you downloaded in prerequisites section
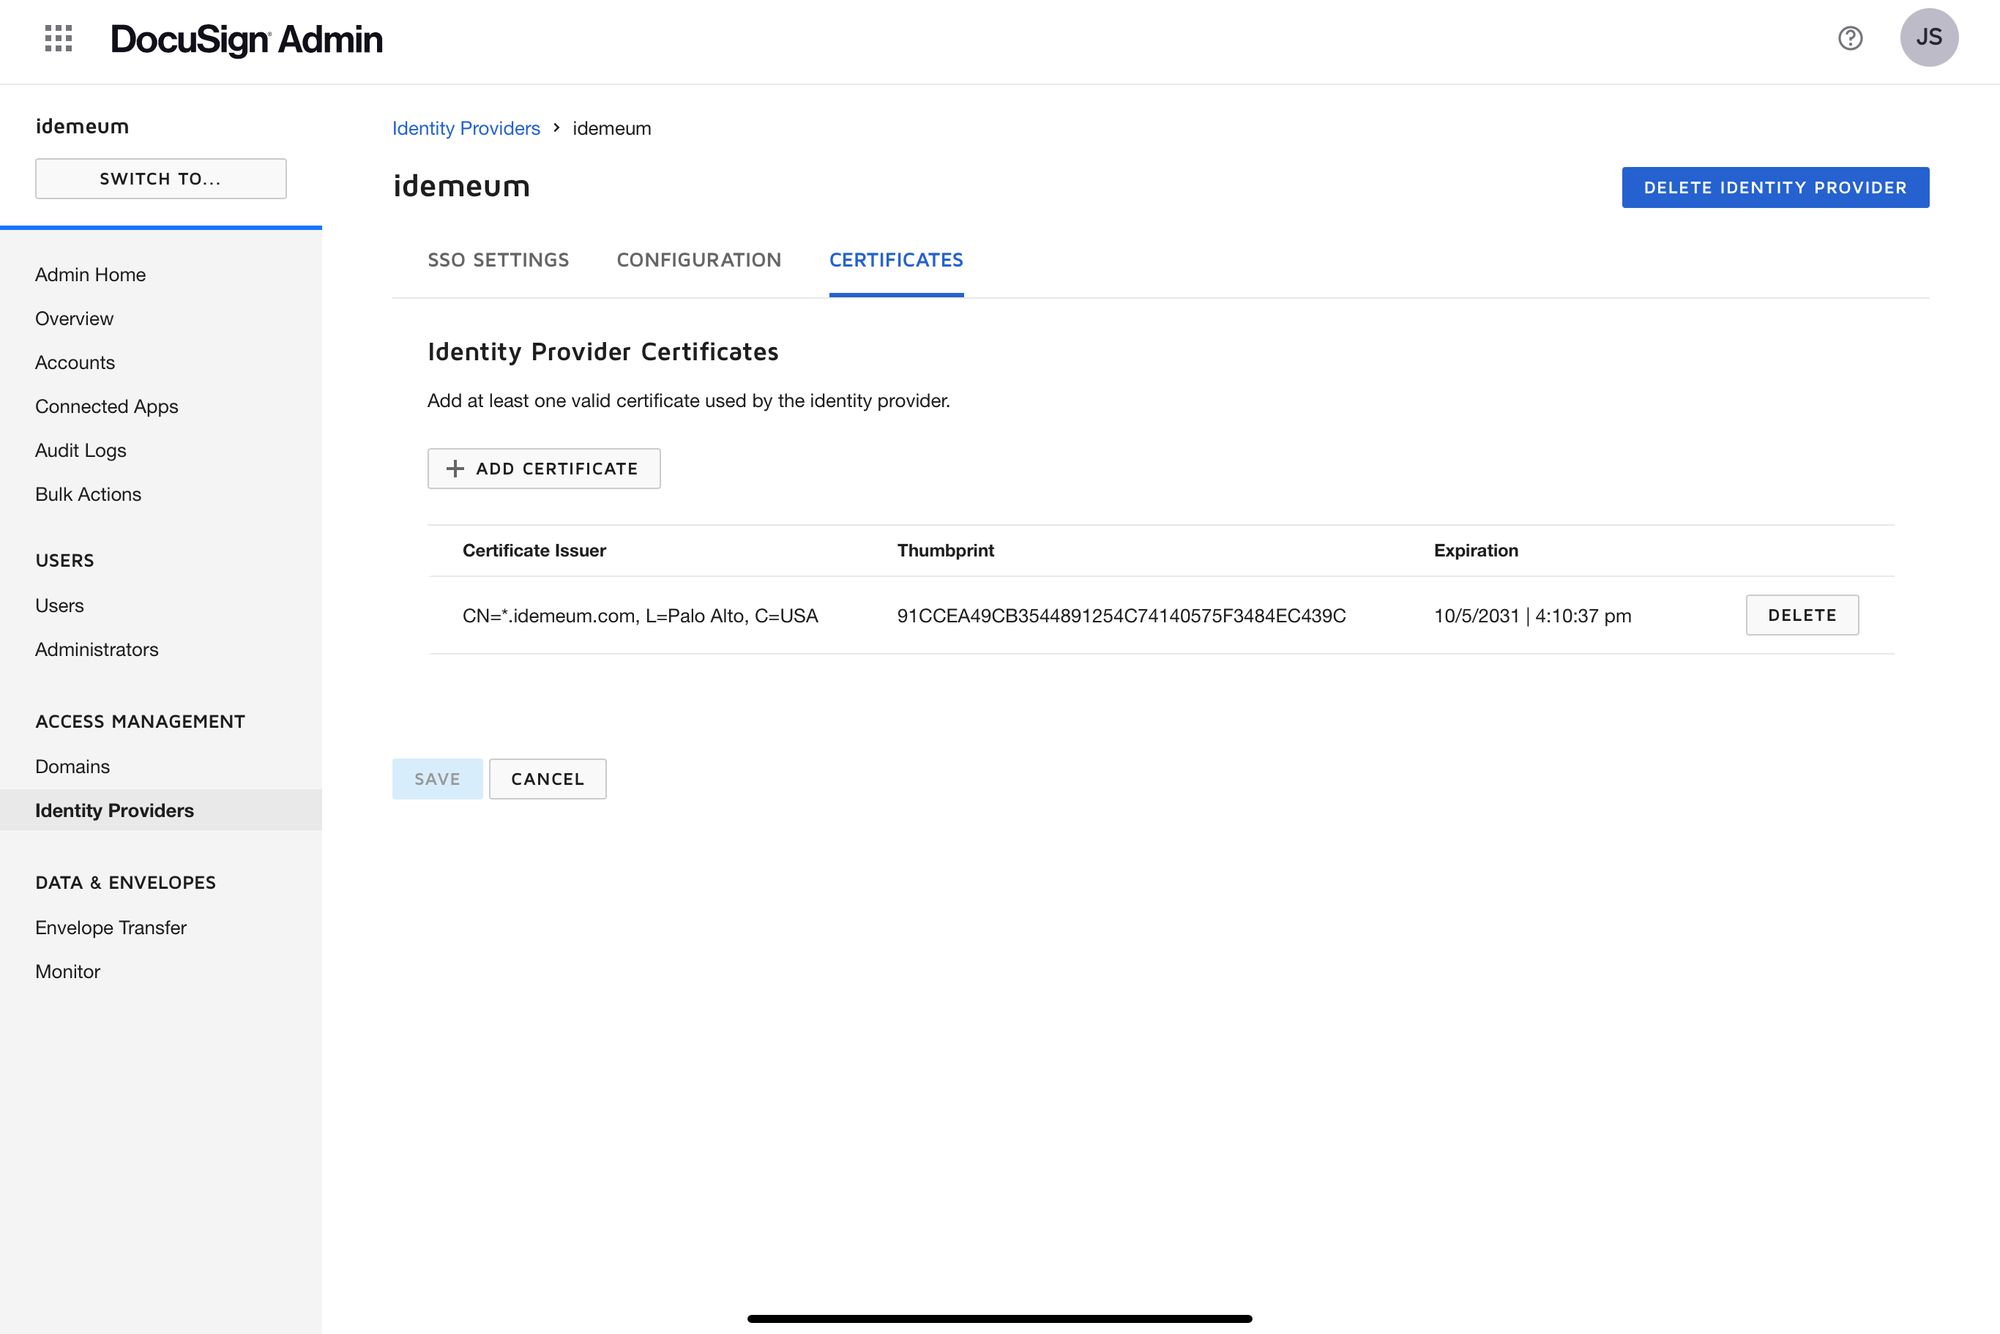
- Click on Configuration and copy Service Provider Metadata URL as you will need it for idemeum configuration
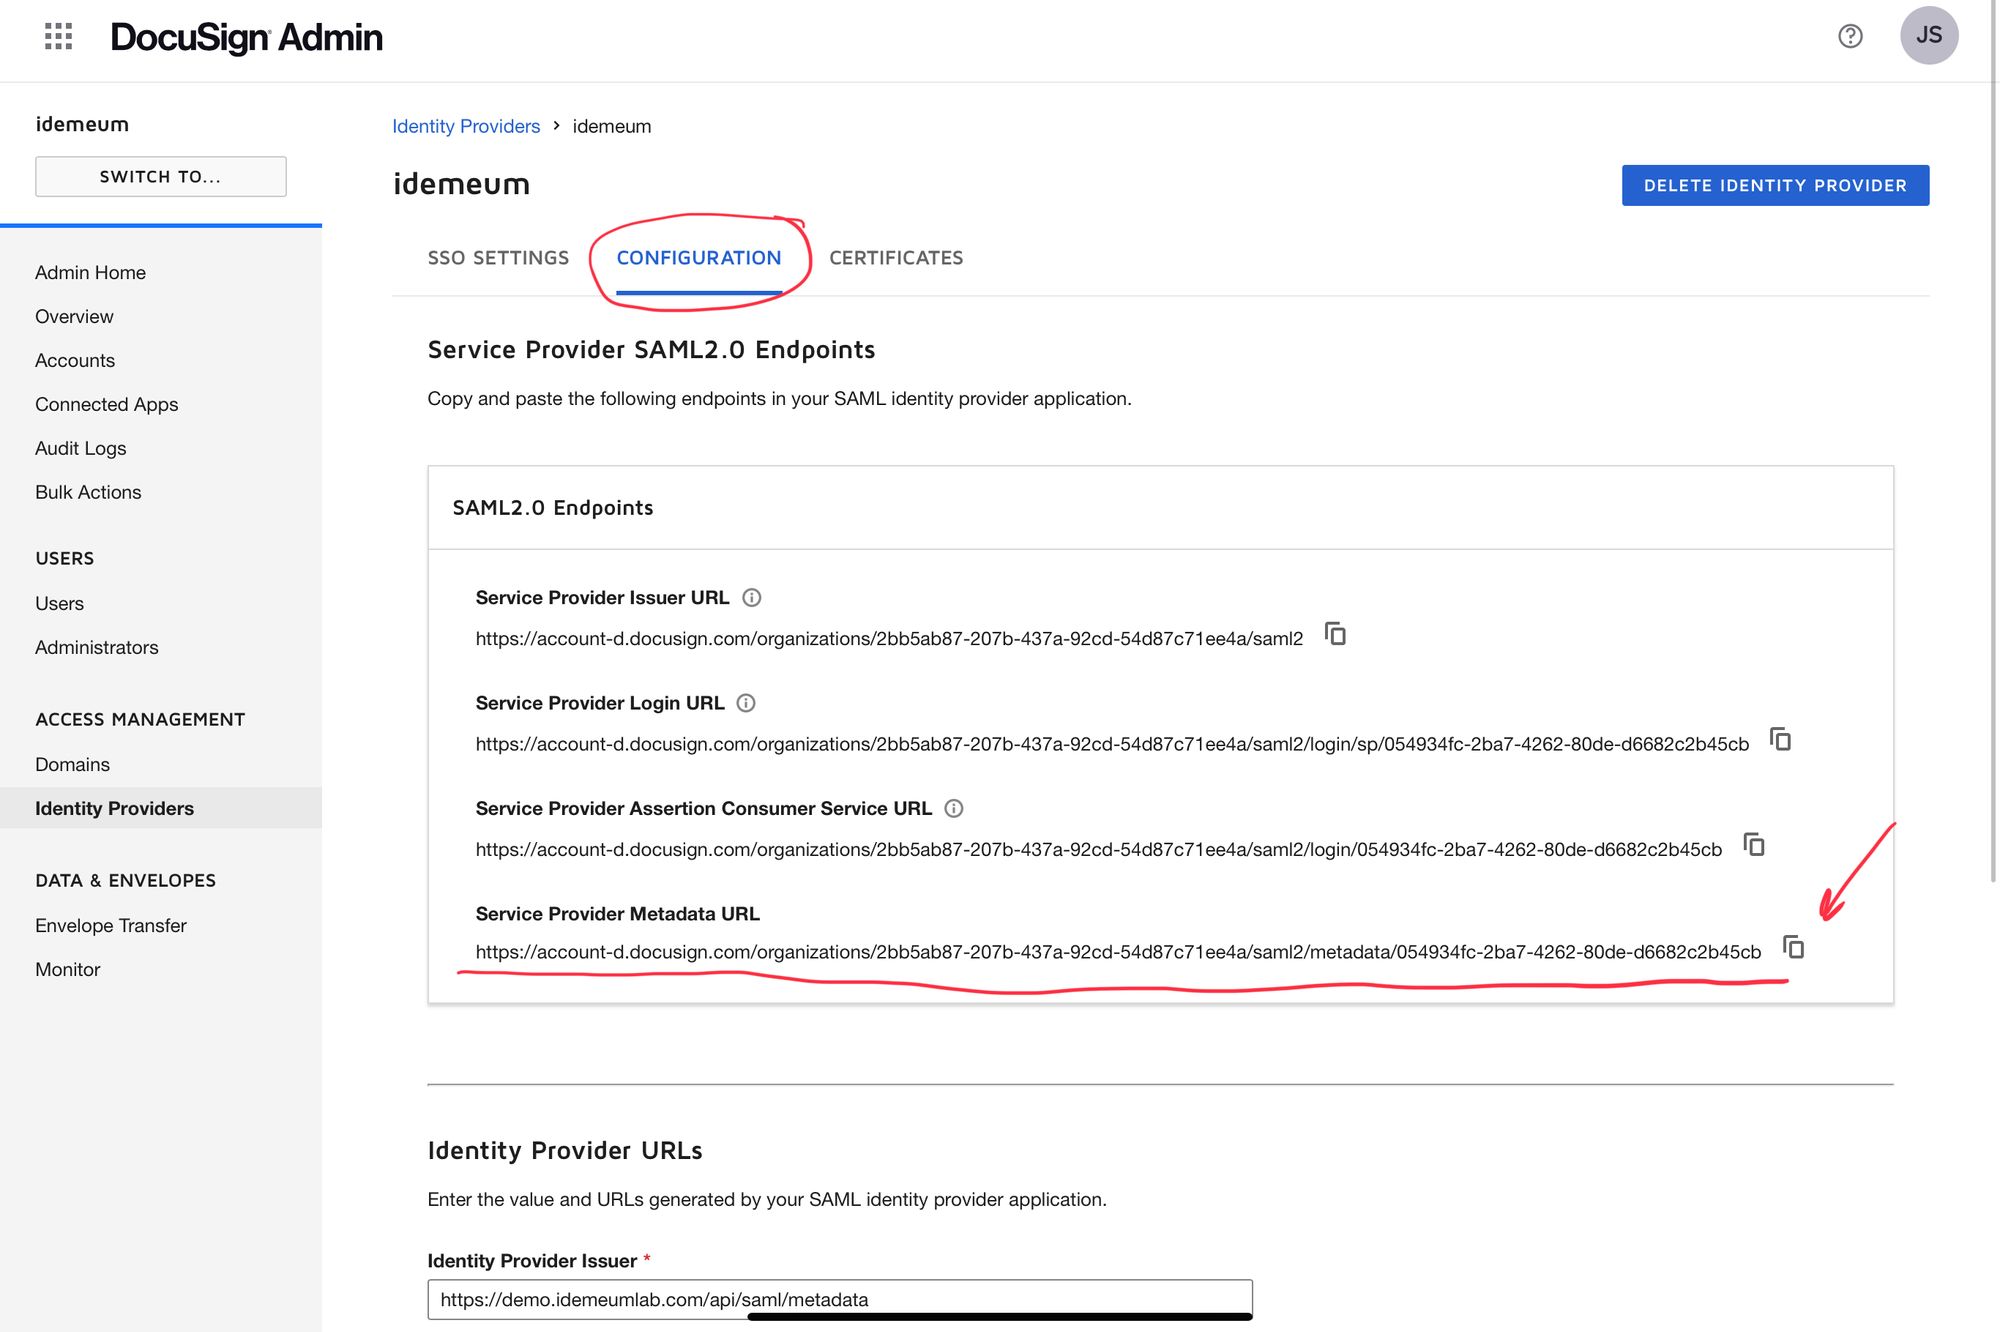
- You can exit identity provider configuration
Configure SSO in idemeum
- Navigate to
https://[your domain].idemeum.com/adminportal - Click Applications in the left menu
- Search for Docusign application and click Add App
- Click SAML at the top navigation menu
Now you will enter Service Provider Metadata URL that you obtained from Docusign
- Enter Service Provider Metadata URL and click Load config
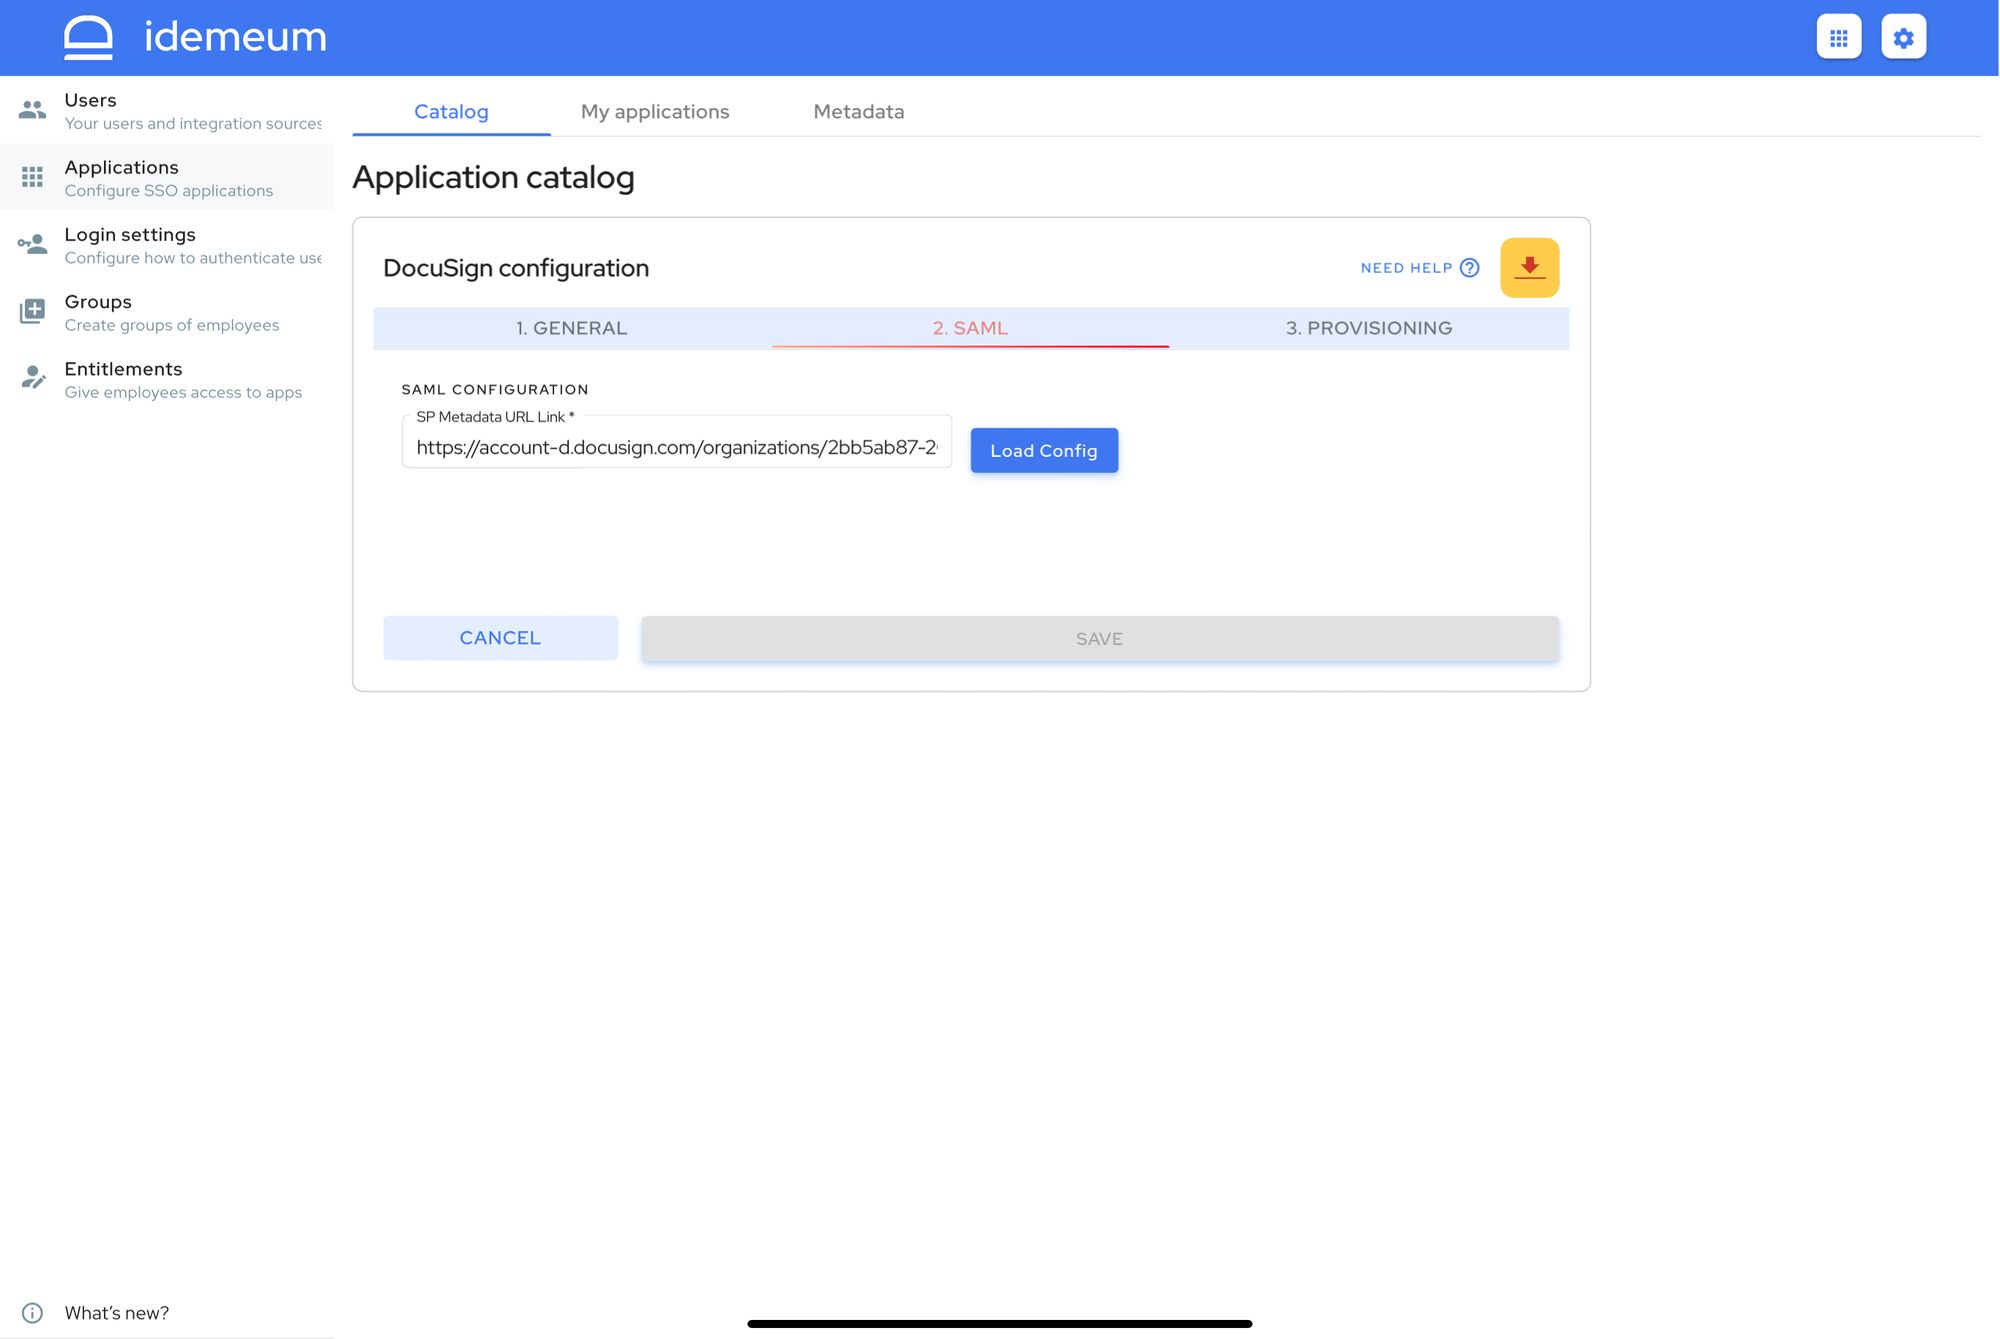
- Click Save in the new screen
Automated provisioning
- Navigate to Docusign Provisioning configuration in your idemeum admin portal
- Click Authorize and enter your credentials to authorize idemeum to access Docusign APIs
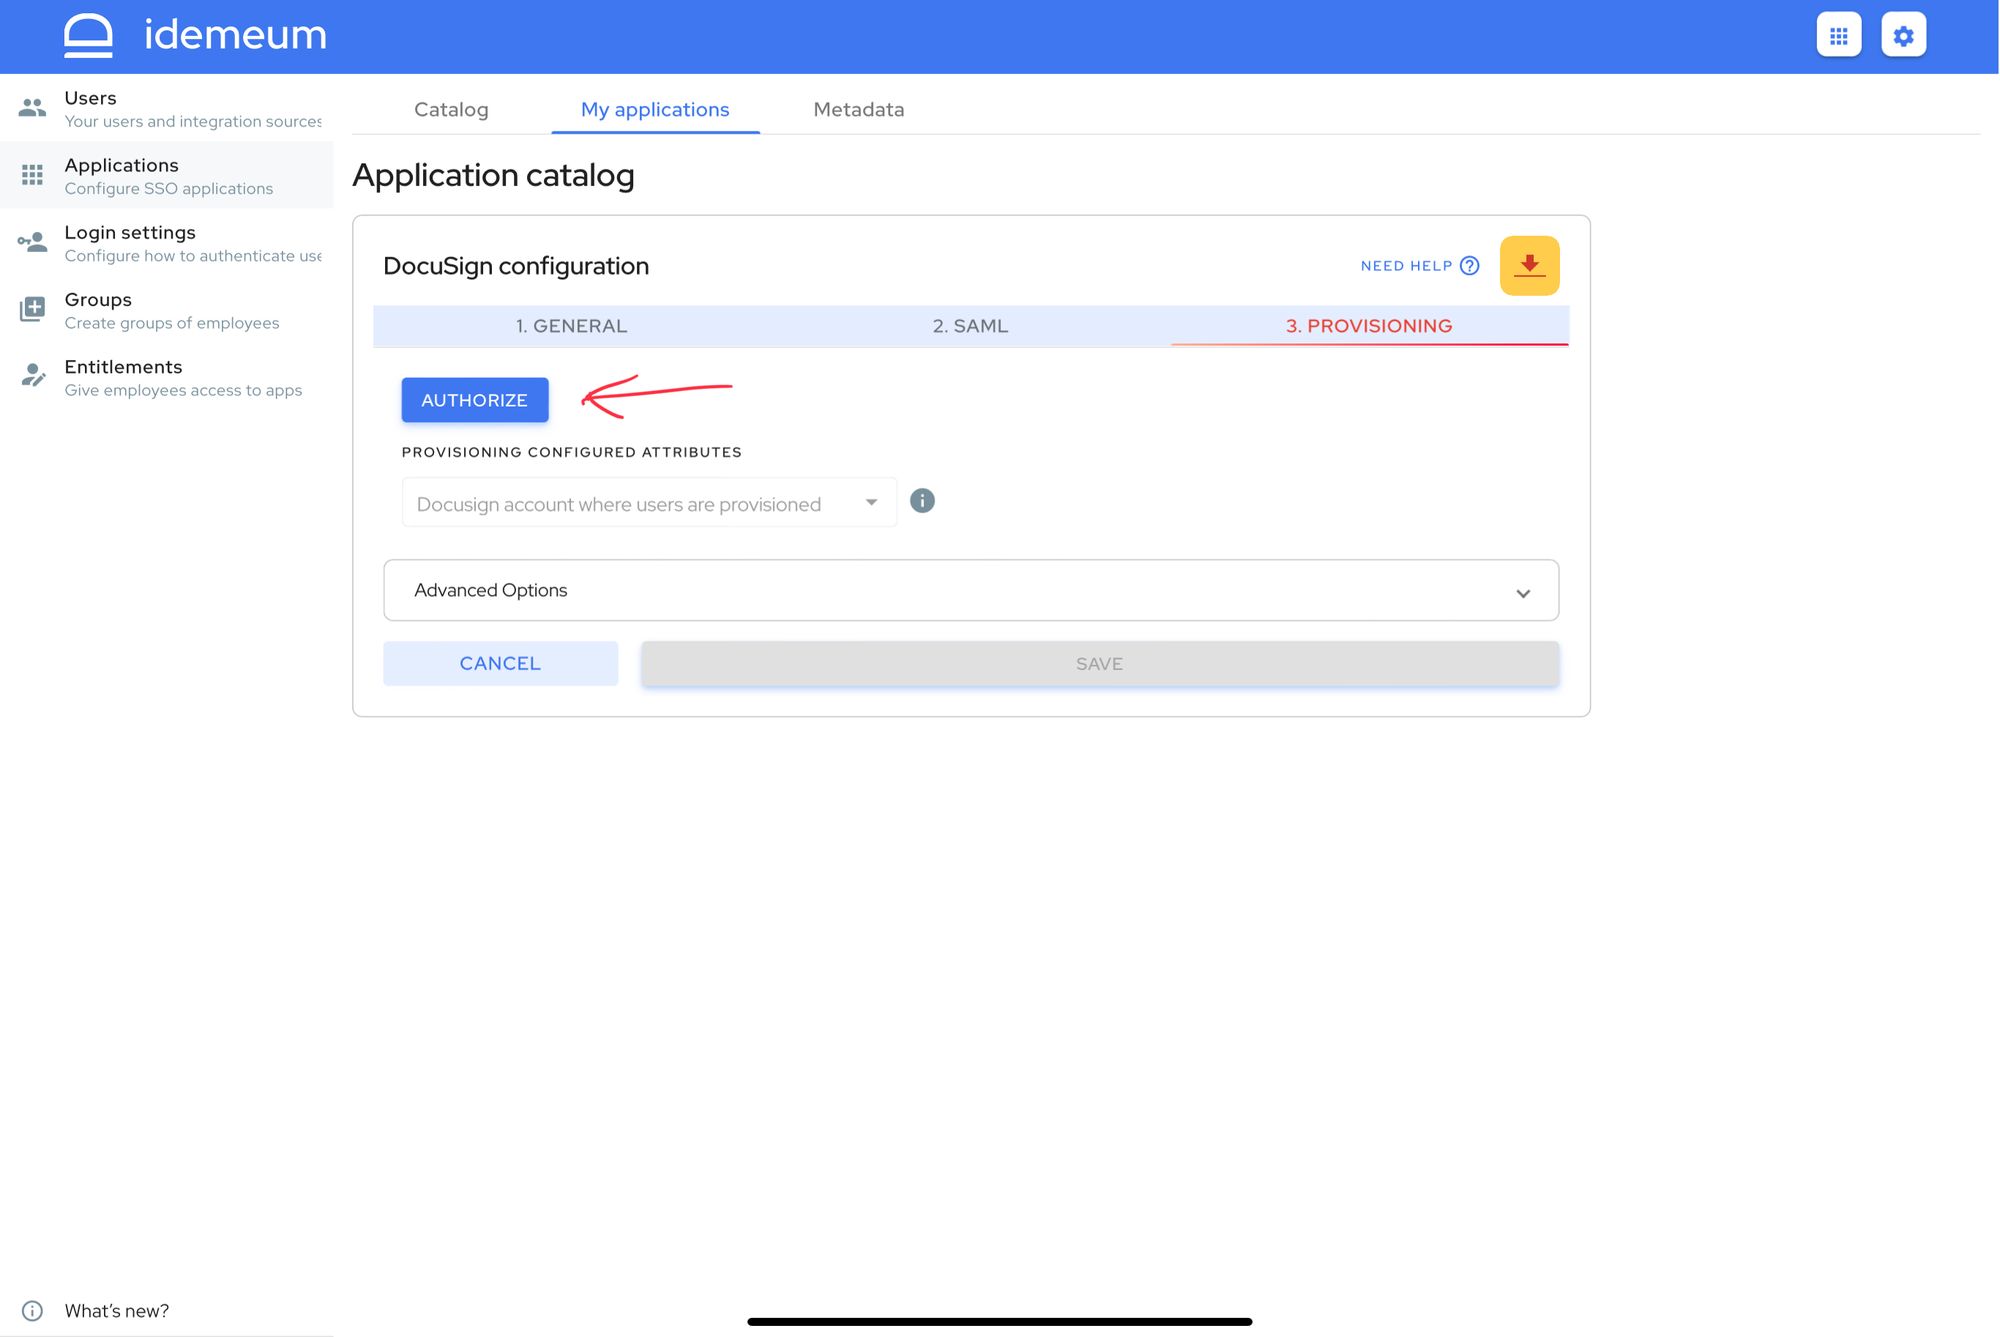
- Now from the dropdown choose account where you woudl want to povision users
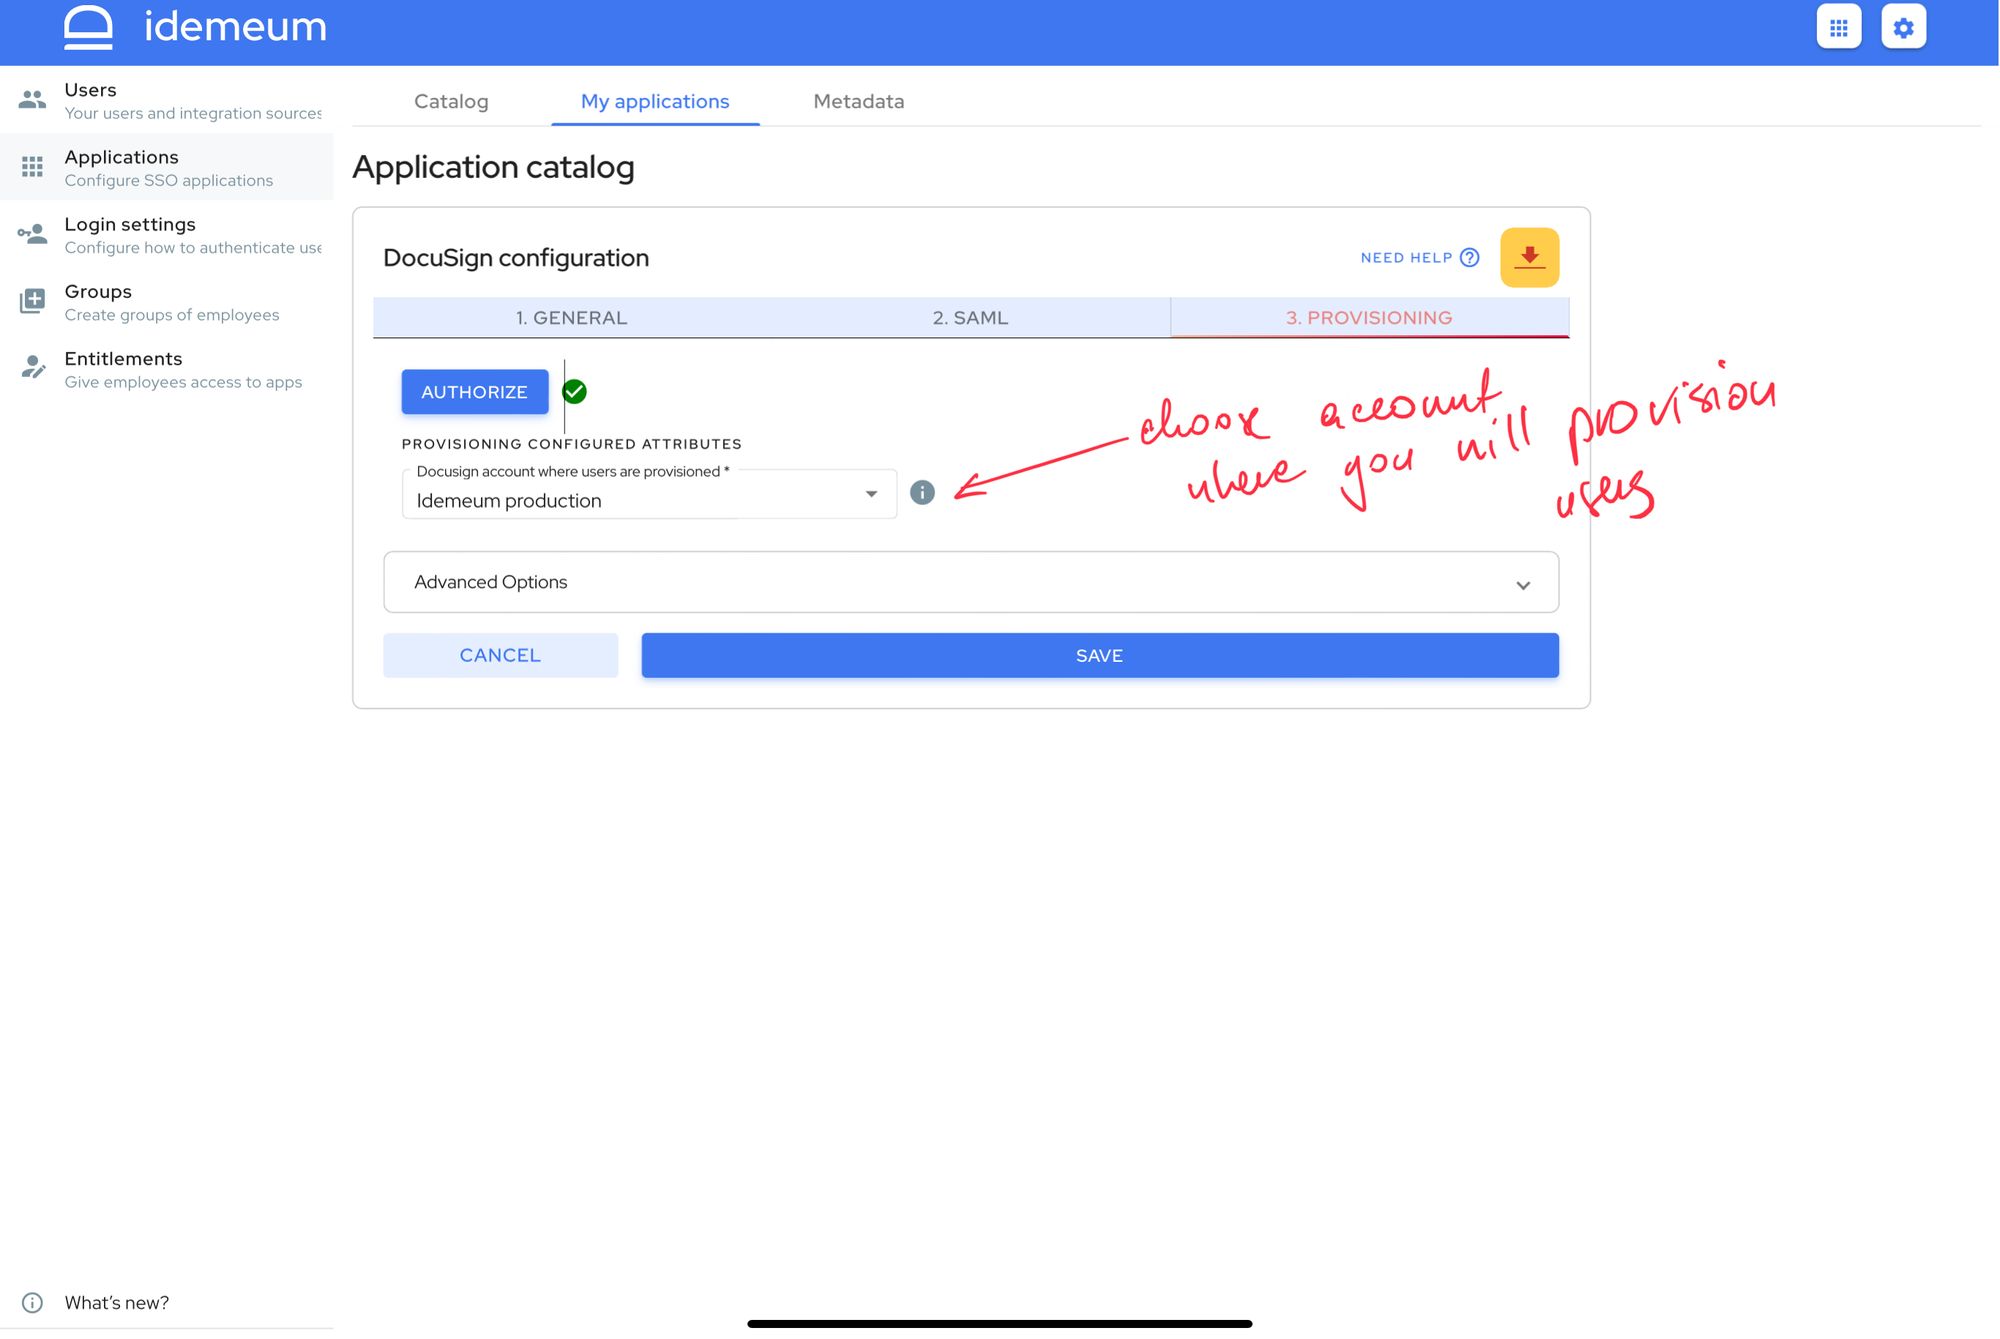
- Click Save
Application entitlements
Before users can access applications you need to make sure you entitle applications to them. In idemeum admin portal navigate to Entitlements section to assign applications to your employees.
SAML SSO login flows
Docusign supports IDP Initiated Flow for SSO.
IDP Initiated flow
With this flow users first navigate to idemeum user catalog and then click on Docusign icon to launch application.


