
Capabilities overview
ClickUp is a customizable productivity platform that replaces other workplace apps for all users and all departments in an organization.
| Supported capability | Required plan | Details |
|---|---|---|
| Passwordless SSO | Enterprise plan | High SSO tax |
| Password manager | Any | Auto-fill / Auto-capture |
Prerequisites
For ClickUp configuration you will need to obtain SAML metadata values for your idemeum tenant. Specifically you will need to obtain the following parameters:
- Identity Provider Entity ID
- Identity Provider SSO URL
- Public X509 Certificate (PEM format)
The instructions for how to obtain these parameters are available below.
How to obtain SAML metadata for idemeum
SAML metadata is the data that describes the information needed to communicate with a SAML endpoint. For example, if Identity Provider (IDP) X wanted to allow Service Provider (SP) Y to request SAML responses, IdP X would share its metadata with SP Y and vice-versa. Each idemeum tenant has associate…
 Nikolay Poturnak
Passwordless Single Sign-On (SAML)
Configure SSO in ClickUp
- Access your ClickUp portal
- Navigate to Settings -> Security & Permissions
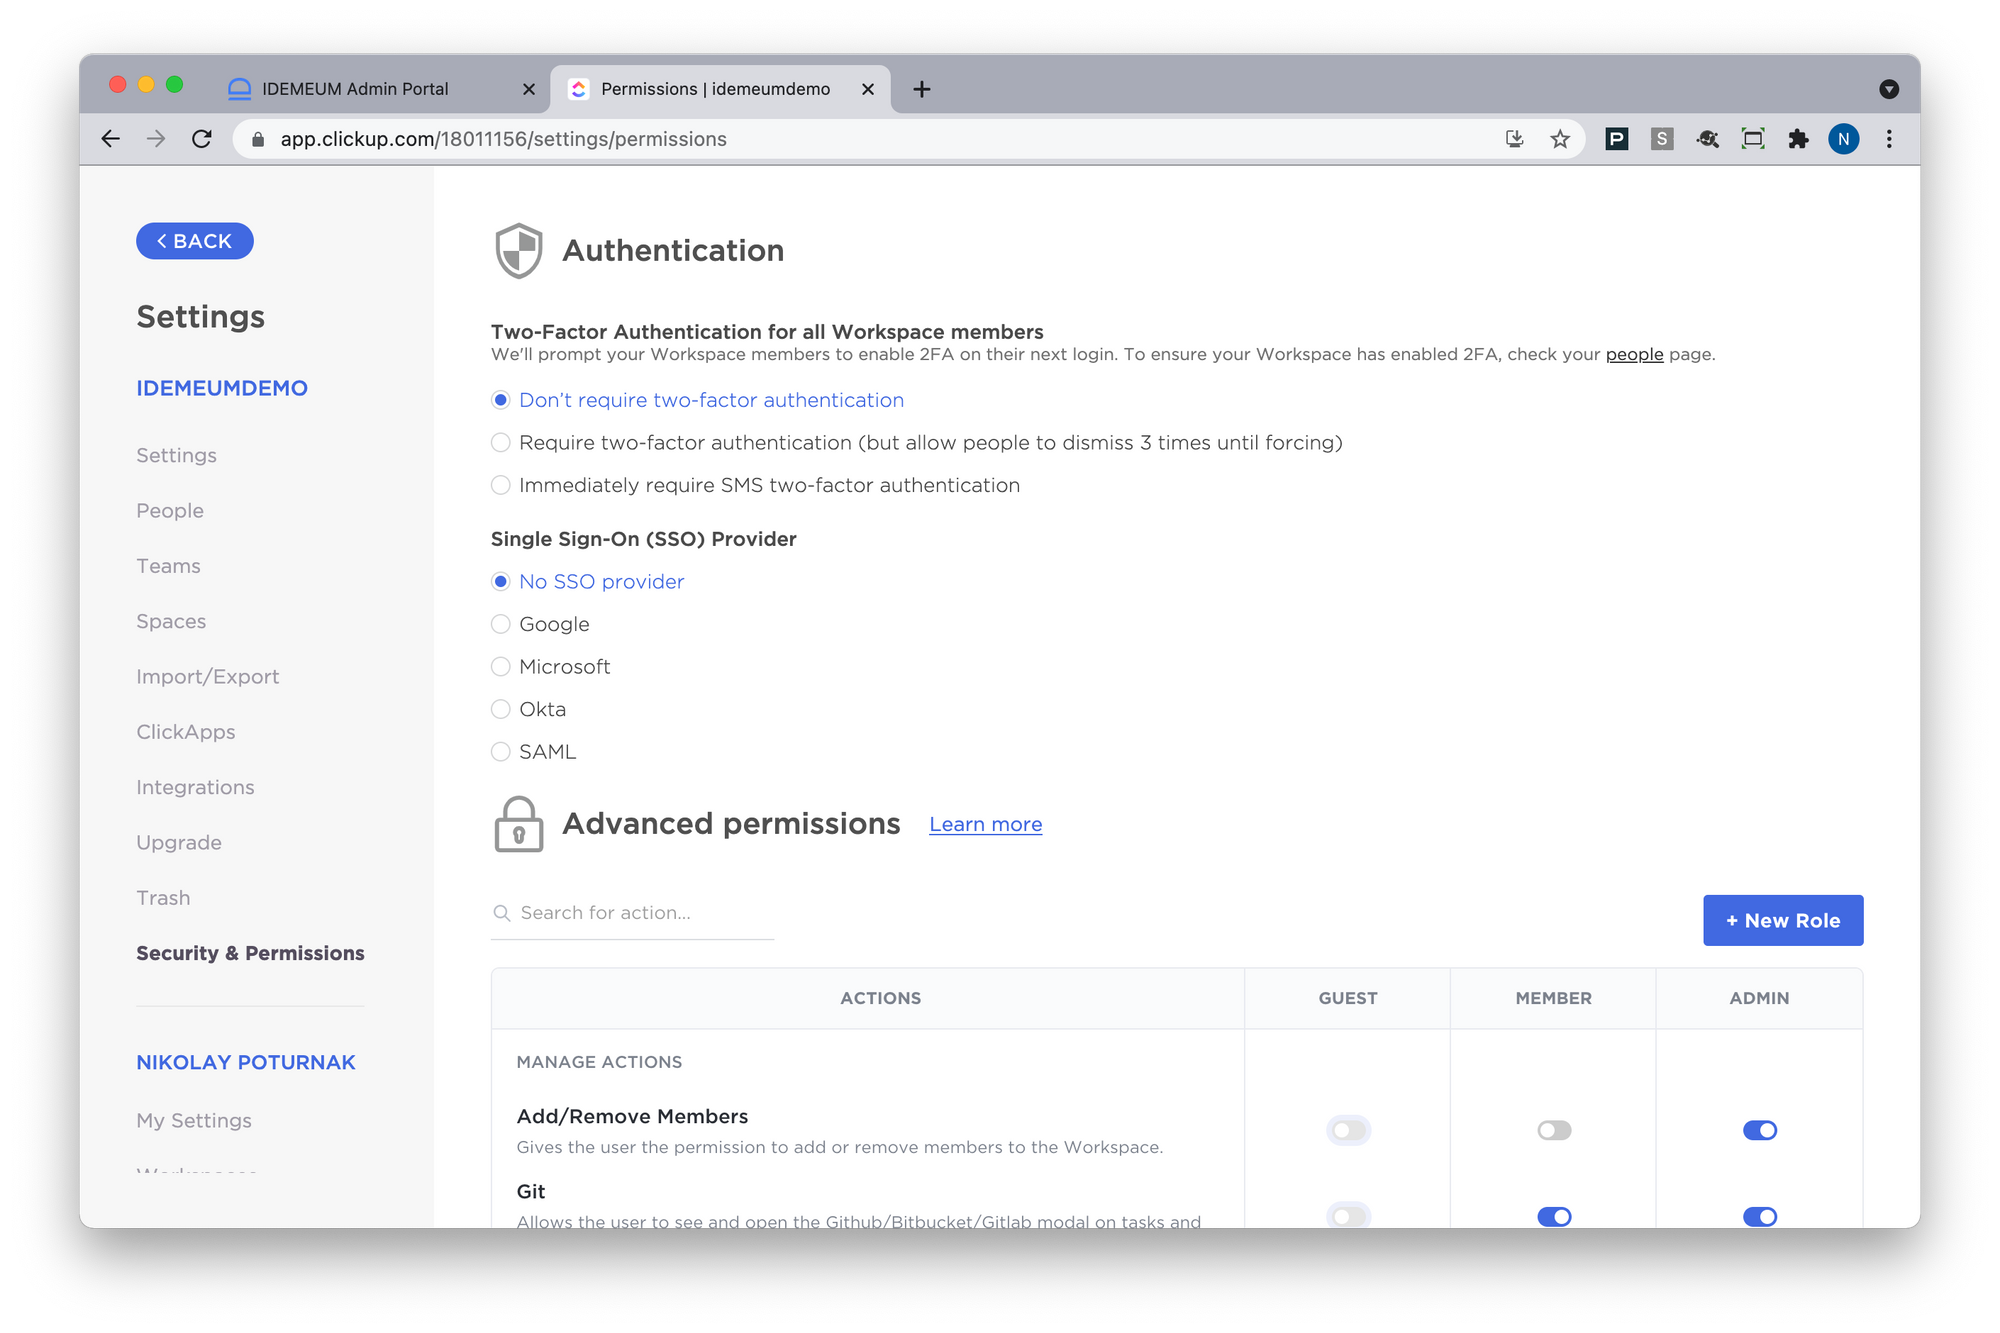
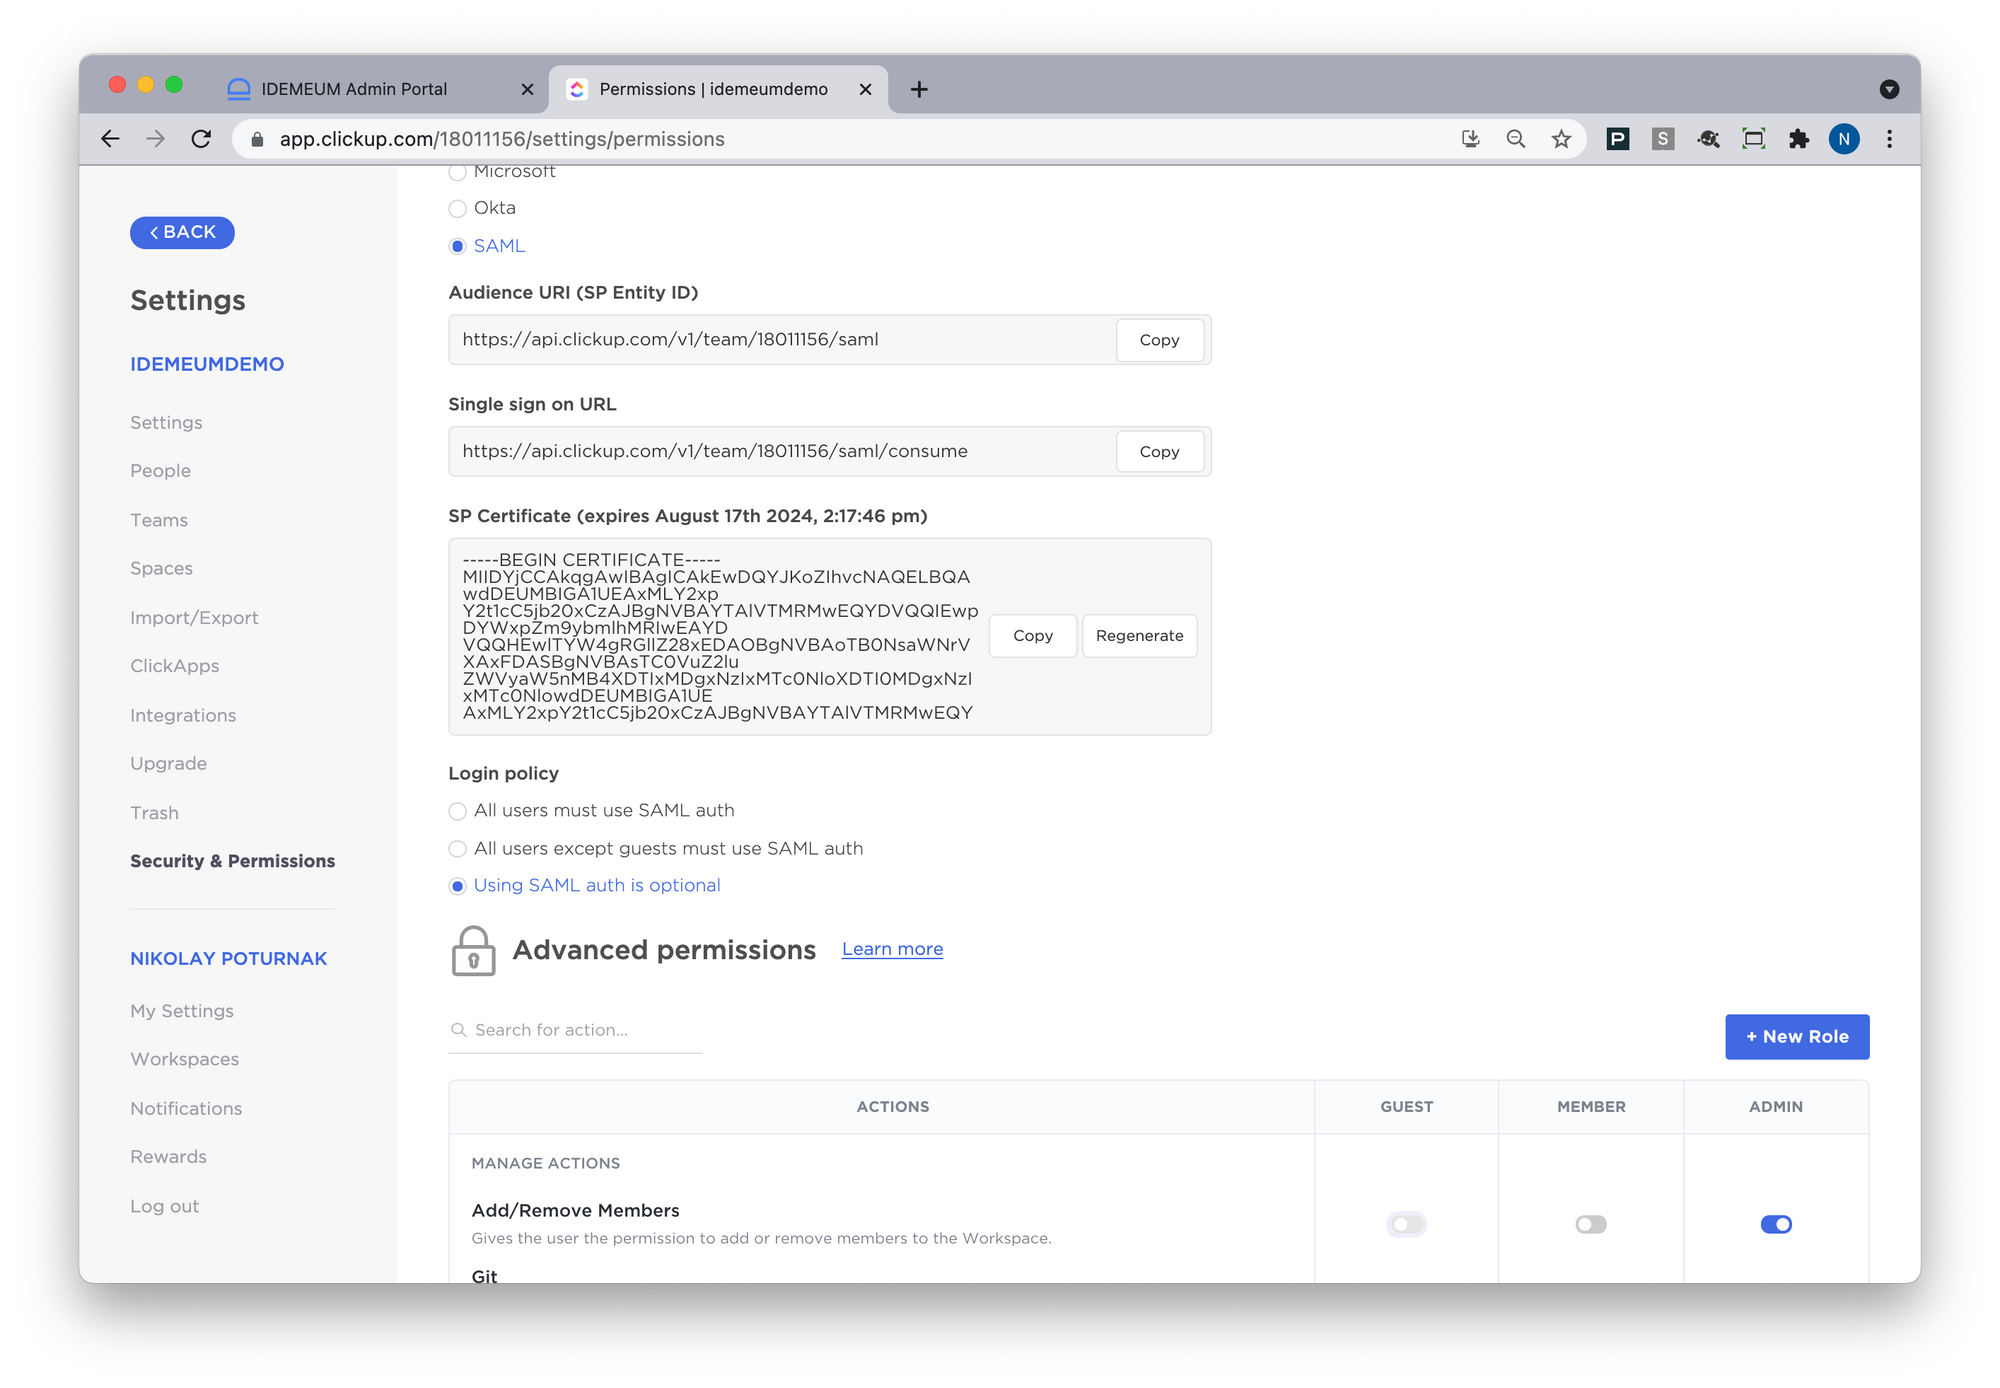
- In the Single Sign-On (SSO) Provider configuration section click SAML
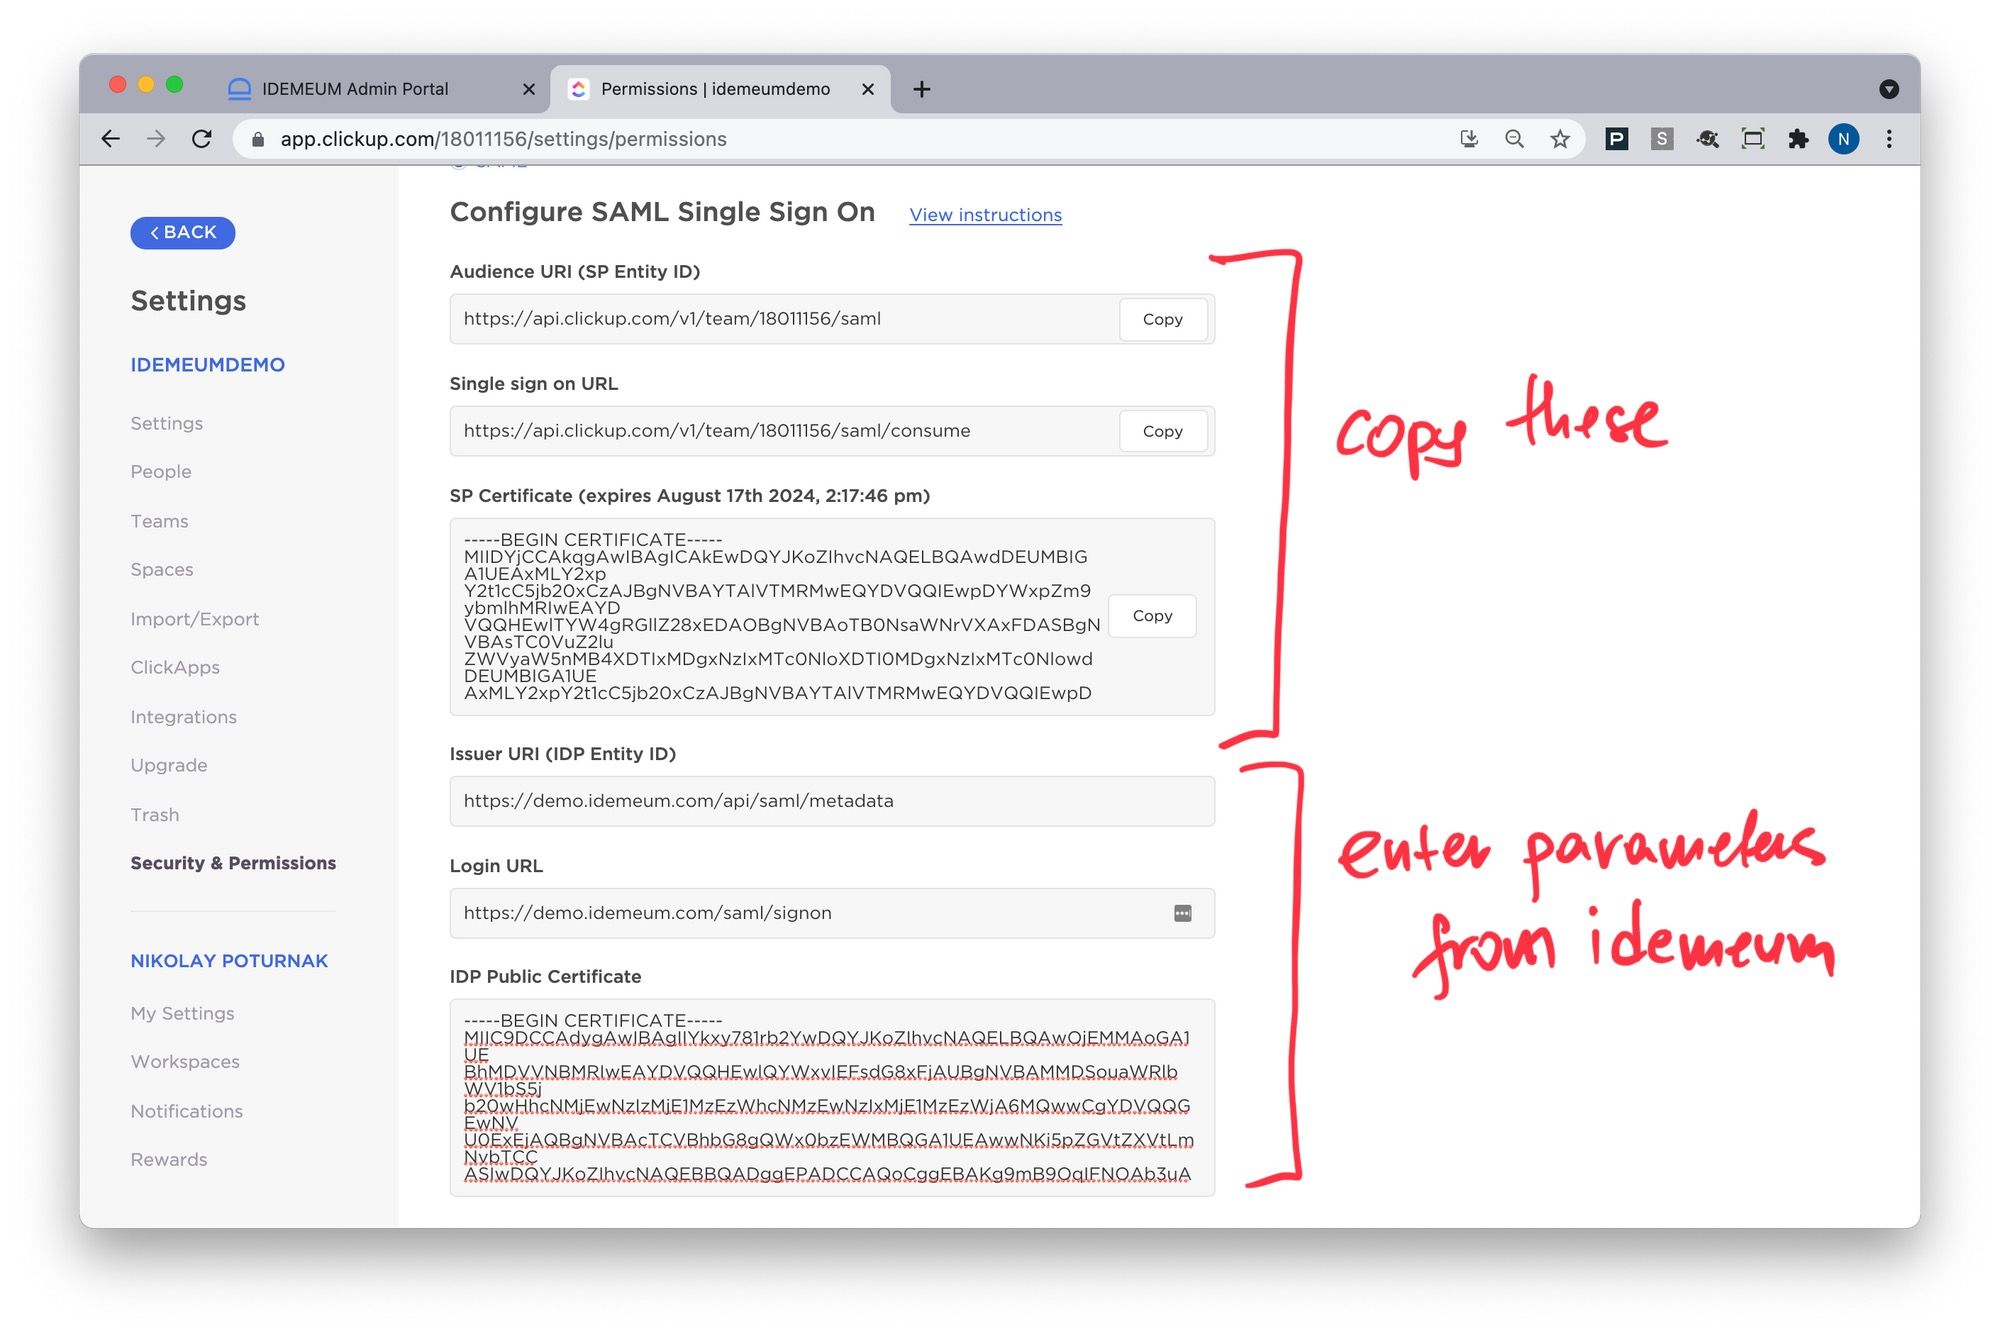
- Copy the following parameters as you will need them for idemeum configuration:
- Audience URI (SP Entity ID)
- Single sign on URL
- SP Certificate
- Now you will enter the metadata values that you obtained from prerequisites section:
- Paste Identity Provider Entity ID into Issuer URI (IDP Entity ID)
- Paste Identity Provider SSO URL into Login URL
- Paste Public X509 Certificate (PEM format) into IDP Public Certificate
- Now we will access idemeum and configure SAML integration for ClickUp there
Configure SSO in idemeum
- Navigate to your idemeum admin portal at https://[your domain].idemeum.com/adminportal
- Click Applications in the left menu
- Search for ClickUp application and click Add App
- Click SAML at the top navigation menu
Now we will enter SAML configuration values from ClickUp (obtained from ClickUp admin configuration portal)
- For Assertion Consumer Service URL paste Single Sign On URL
- For Audience URI paste Audience URI (SP Entity ID)
- For Service Provider Certificate paste SP certificate
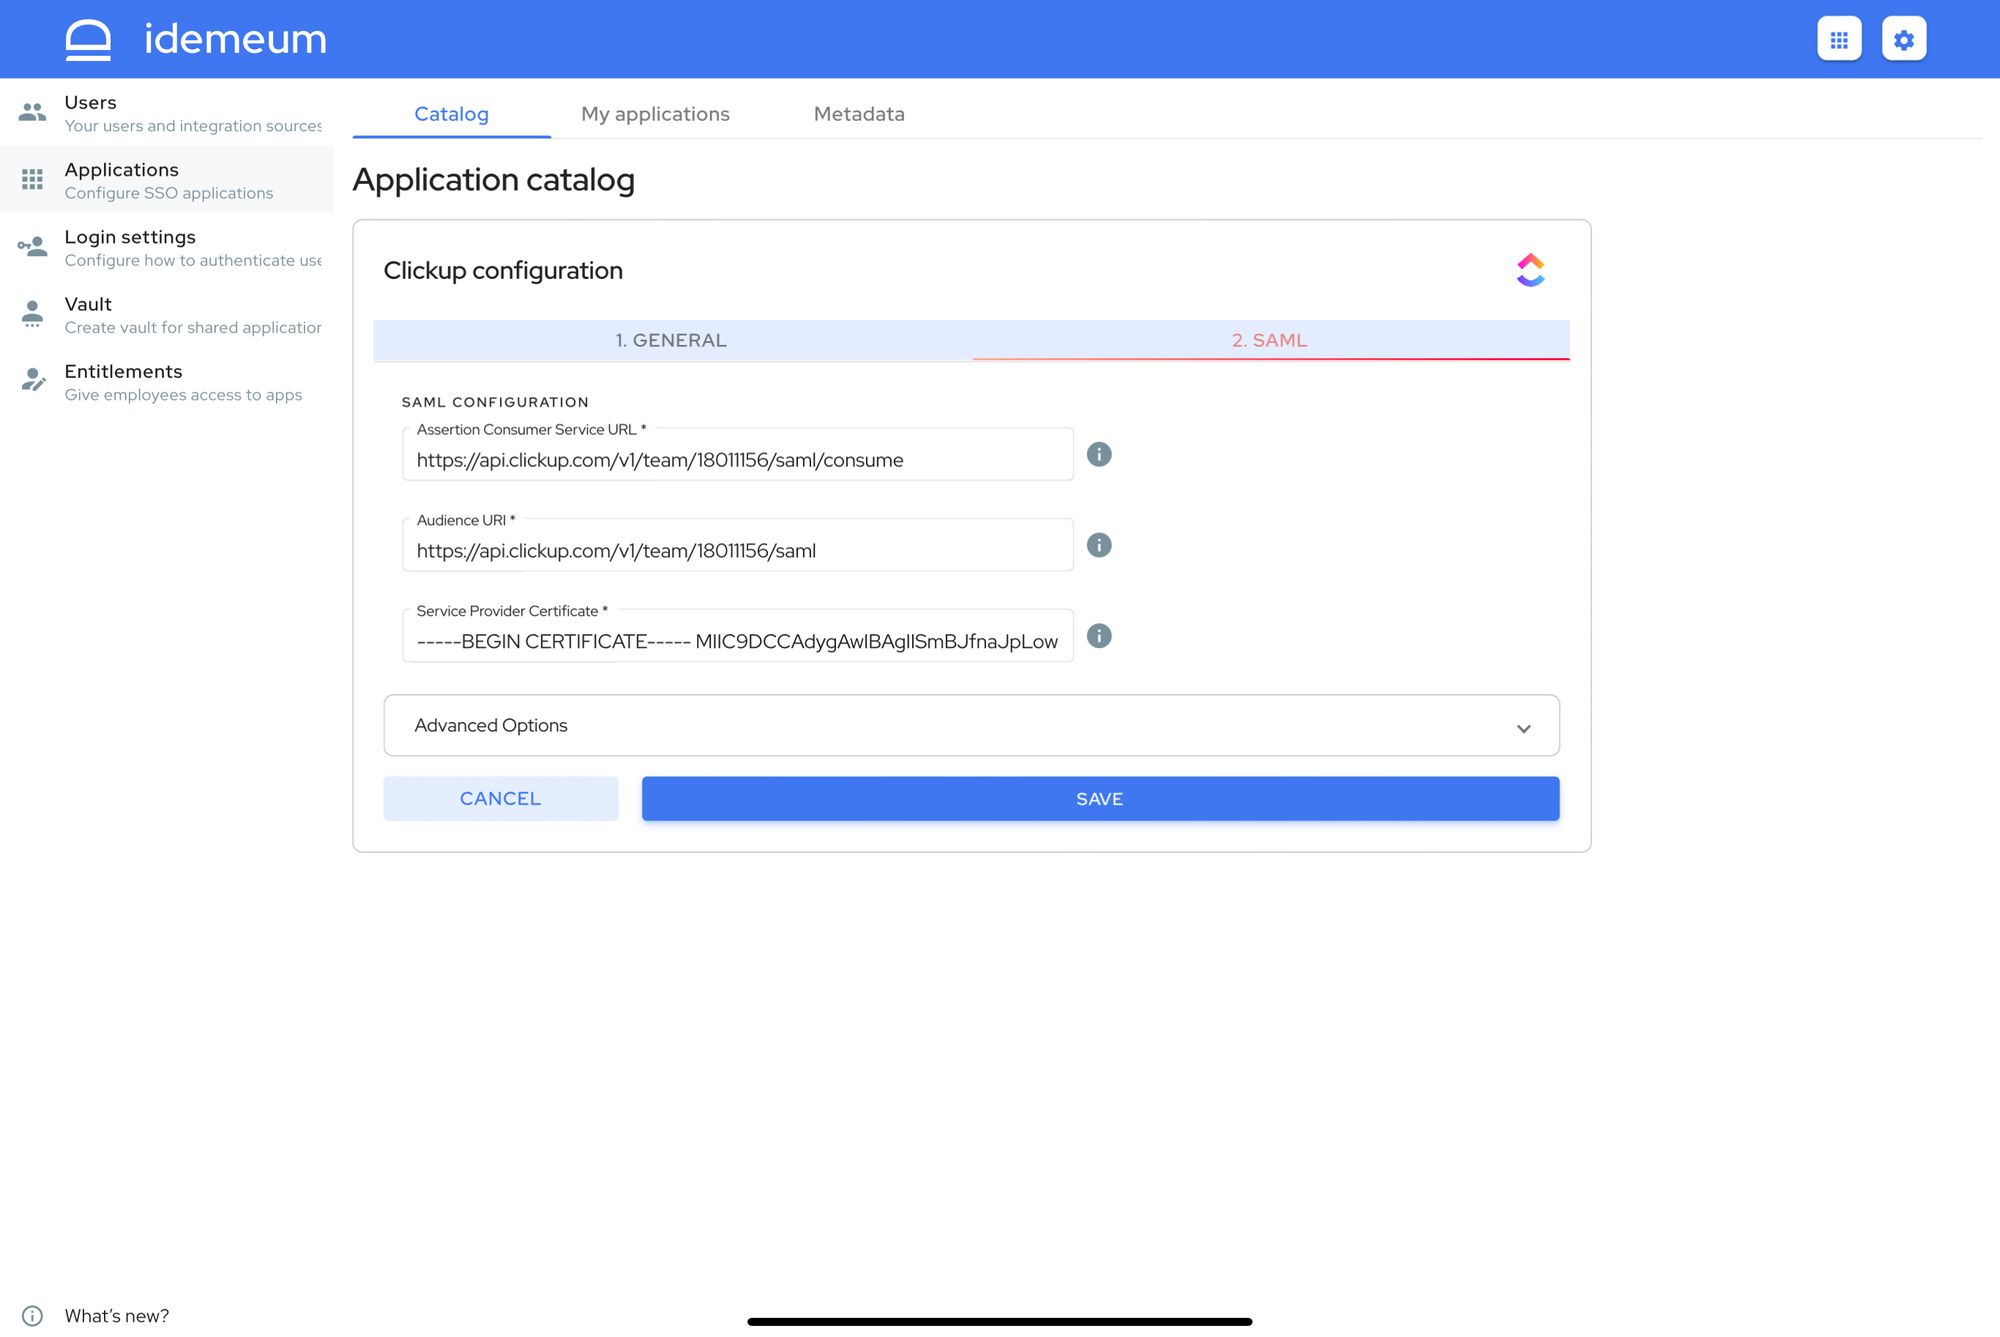
- Click Save
Testing SSO
- Navigate back to ClickUp and click Authenticate with SAML to complete setup
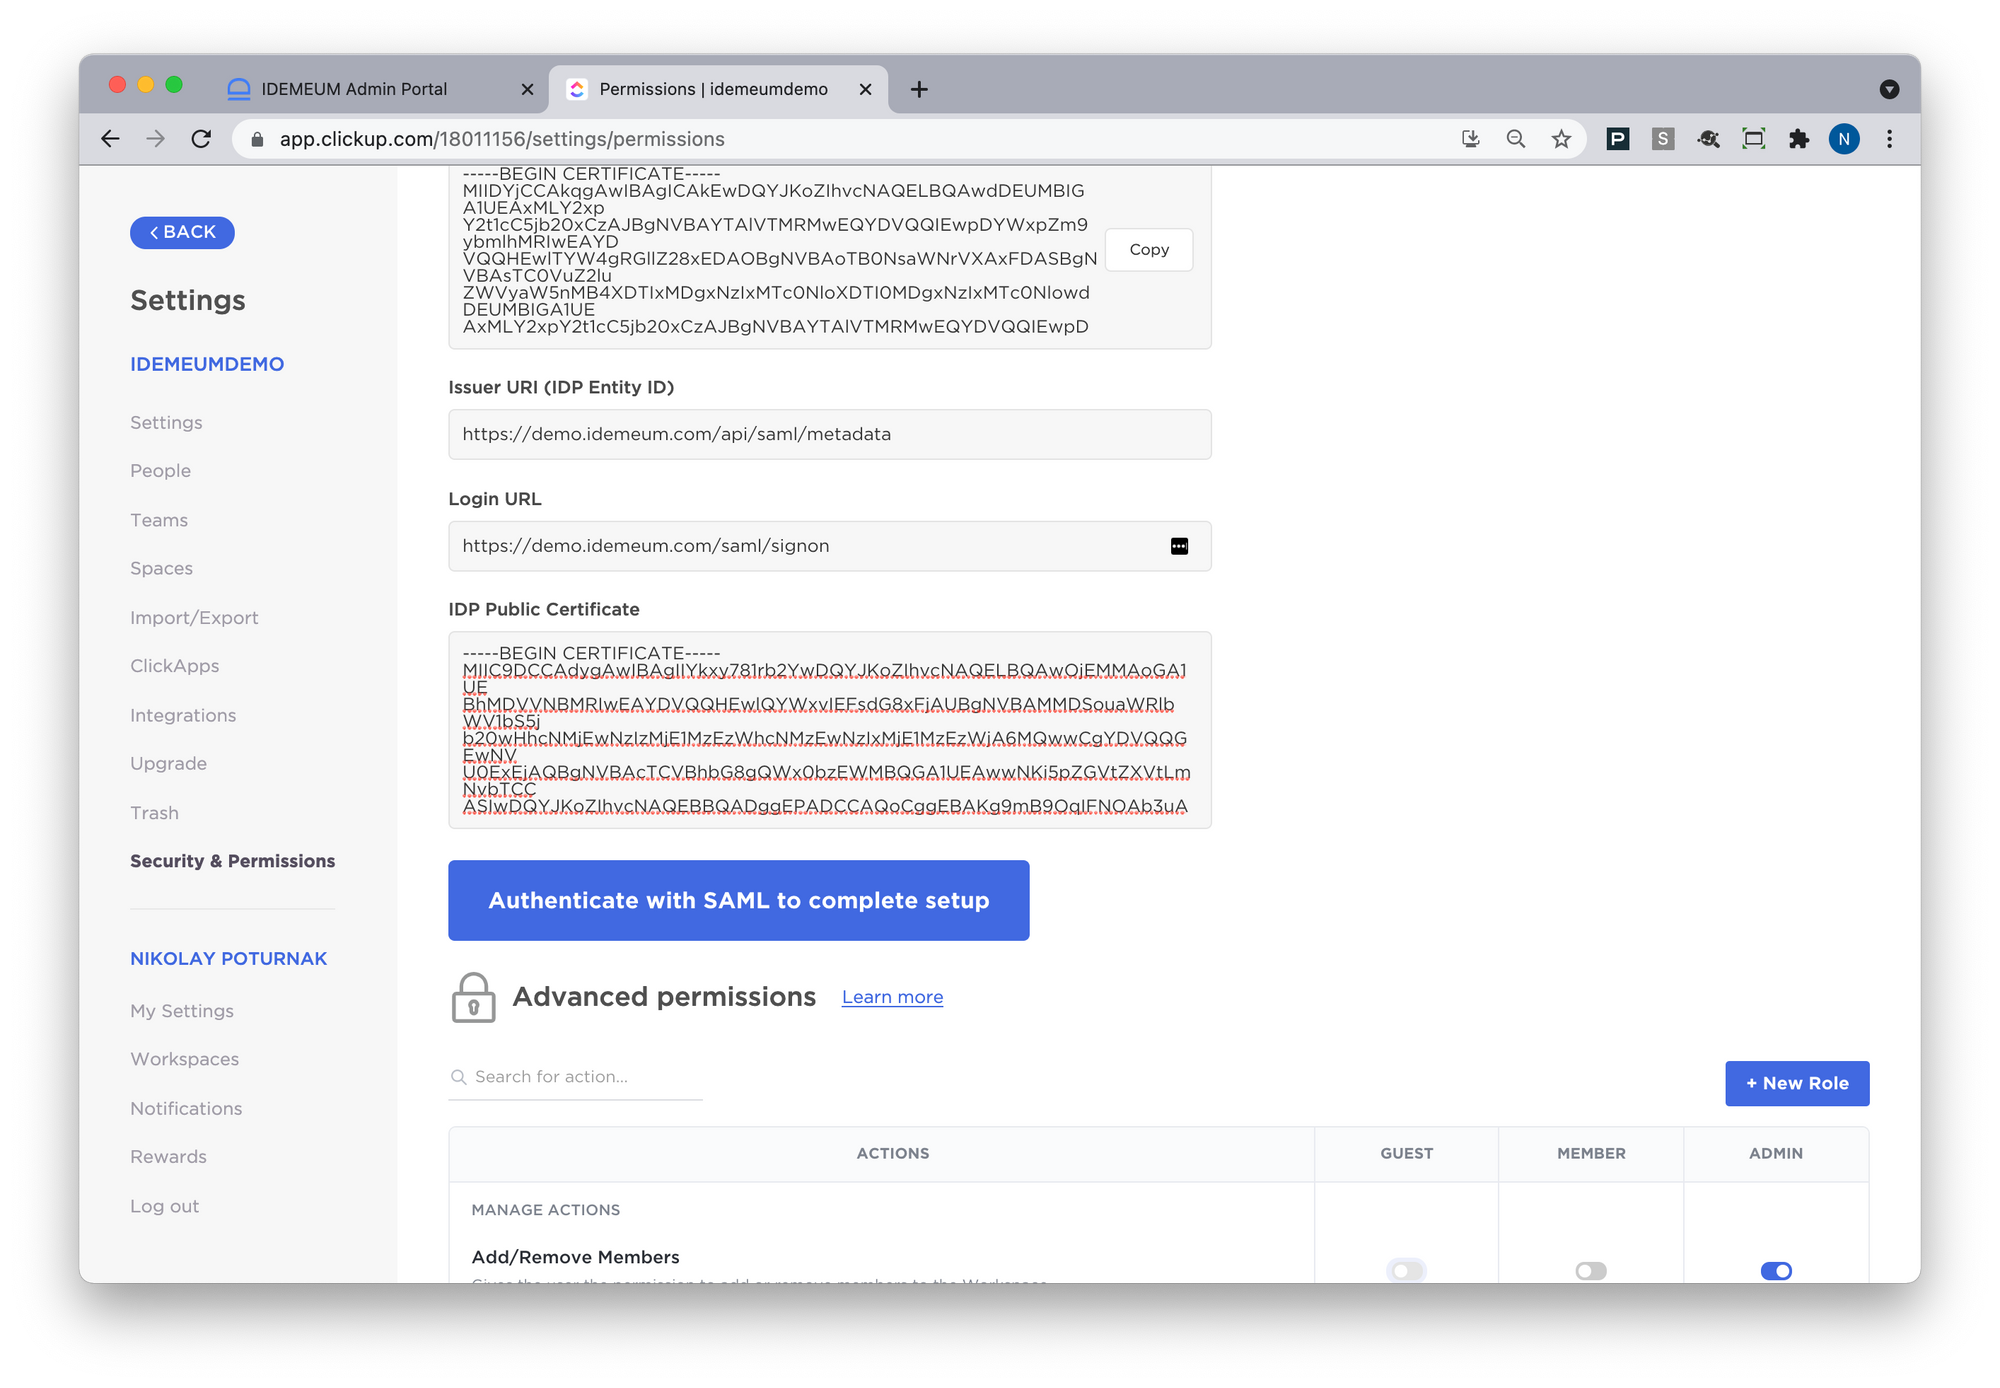
- The pop up will open to authenticate with idemeum and if successful your configuration will be saved.
- You can also configure Login Policy for SAML to be optional or required to authenticate your employees to ClickUp.
Application entitlements
Before users can access applications you need to make sure you entitle applications to them. In idemeum admin portal navigate to Entitlements section to assign applications to your employees.