Capabilities overview
Atlassian Cloud products help businesses to innovate faster through better collaboration, automation, and intelligent workflows. Teams across your organization can organize, collaborate, and deliver faster.
| Supported capability | Required plan | Details |
|---|---|---|
| Passwordless SSO | Free plan | Low SSO tax |
| Automated provisioning | Free plan | SCIM 2.0 (create, remove, update accounts) |
| Group management | Free plan | Push groups and manage user group assignment in Atlassian |
| Password manager | Any | Auto-fill / Auto-capture |
Prerequisites
Before you enable SSO for Atlassian you need to take care of small things:
- Verify domain
- Add Atlassian Access subscription
- Collect idemeum SAML metadata values
- Make sure your admin account is from different domain than then one you will use for SSO. For instance if you enable SSO for coke.com make sure your admin account belongs to different domain, otherwise if SAML is misconfigured you will lock yourself out.
Instructions on how to verify domain are below.

You will also need to obtain your idemeum tenant SAML metadata parameters. Here is what you will need:
- Identity Provider Entity ID
- Identity Provider SSO URL
- Identity Provider Public X509 certificate (PEM format)
Instructions for how to obtain your idemeum SAML metadata parameters are below.
 Nikolay Poturnak
Single Sign-On (SAML)
Configure SSO in Atlassian Cloud
- Navigate to Atlassian Cloud and access Administration menu
- Choose Security section at the top menu and then click SAML Single Sign-On on the left side
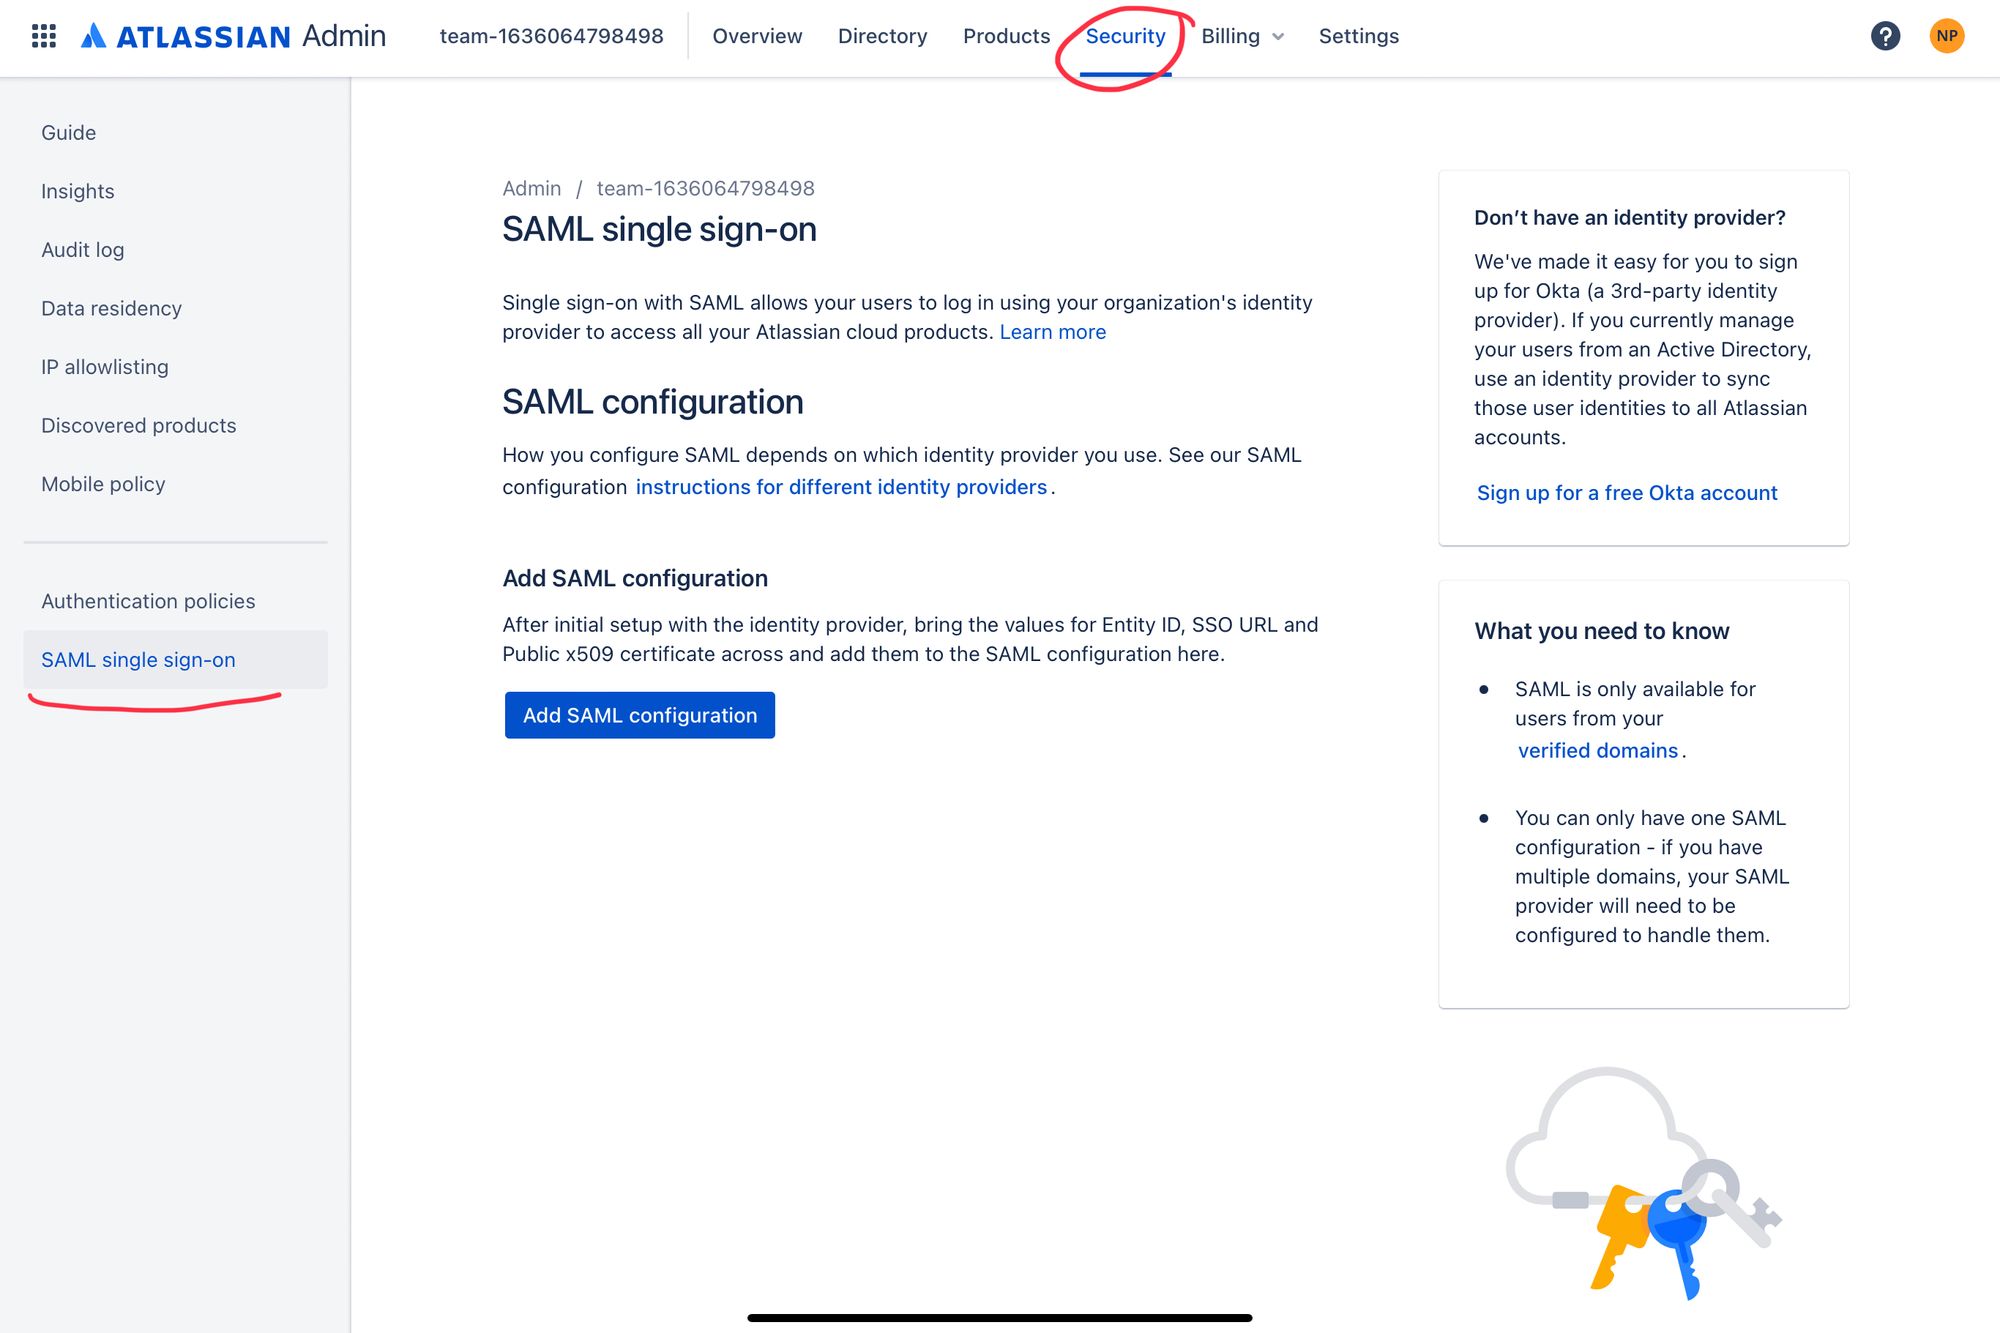
- Click Add SAML configuration
Now you will be using idemeum SAML metadata values obtained in the prerequisites section
- Paste Identity Provider Entity ID, Identity Provider SSO URL, and Identity Provider Public X509 certificate (PEM format)
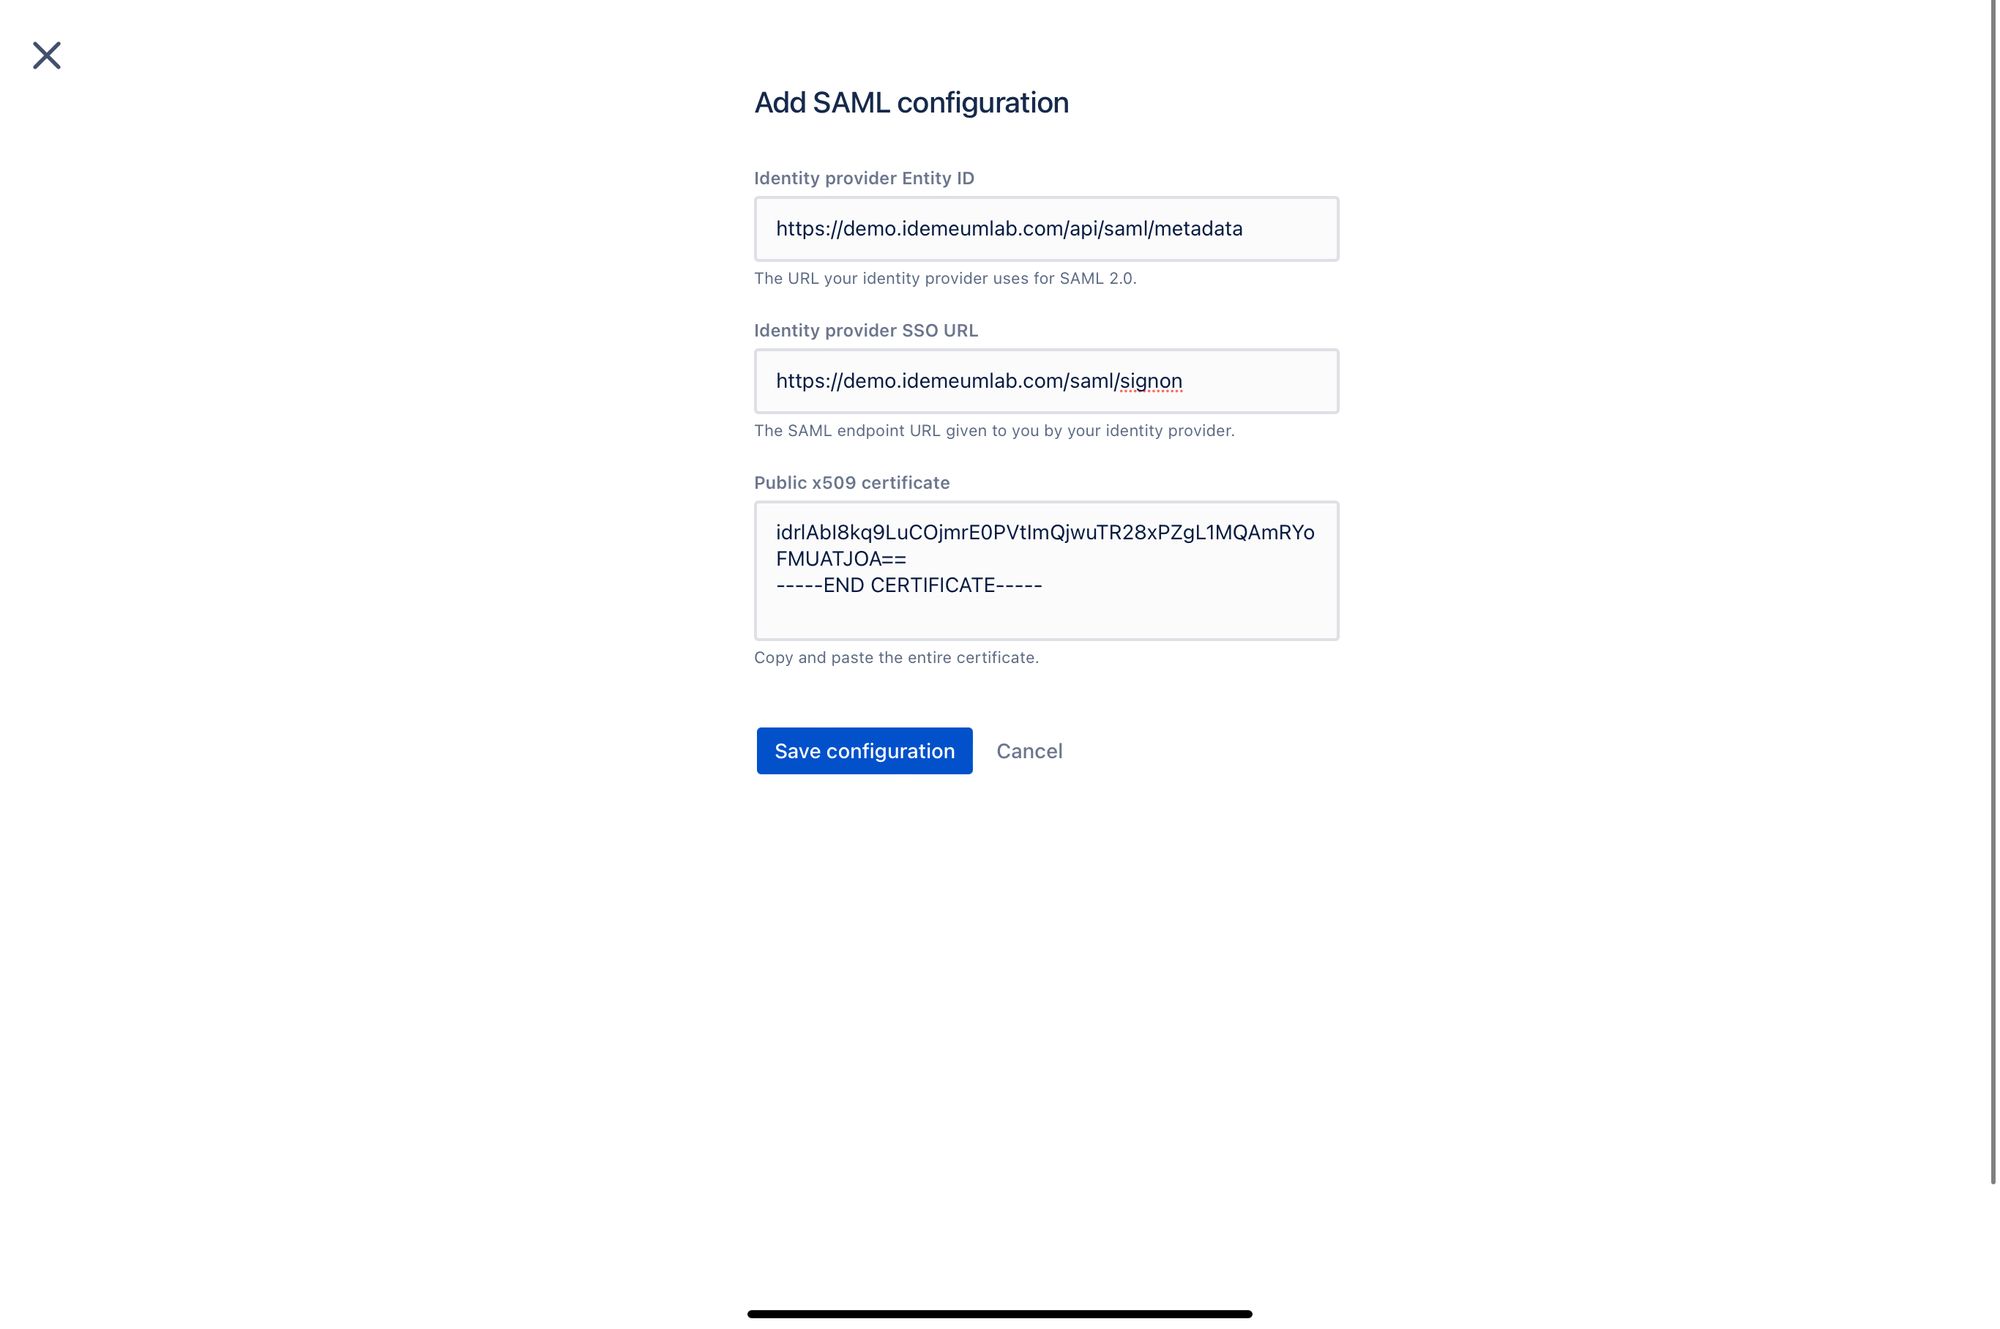
- Click Save configuration
- Copy SP Entity ID and SP Assertion Consumer Service URL as you will need these parameters to configure idemeum

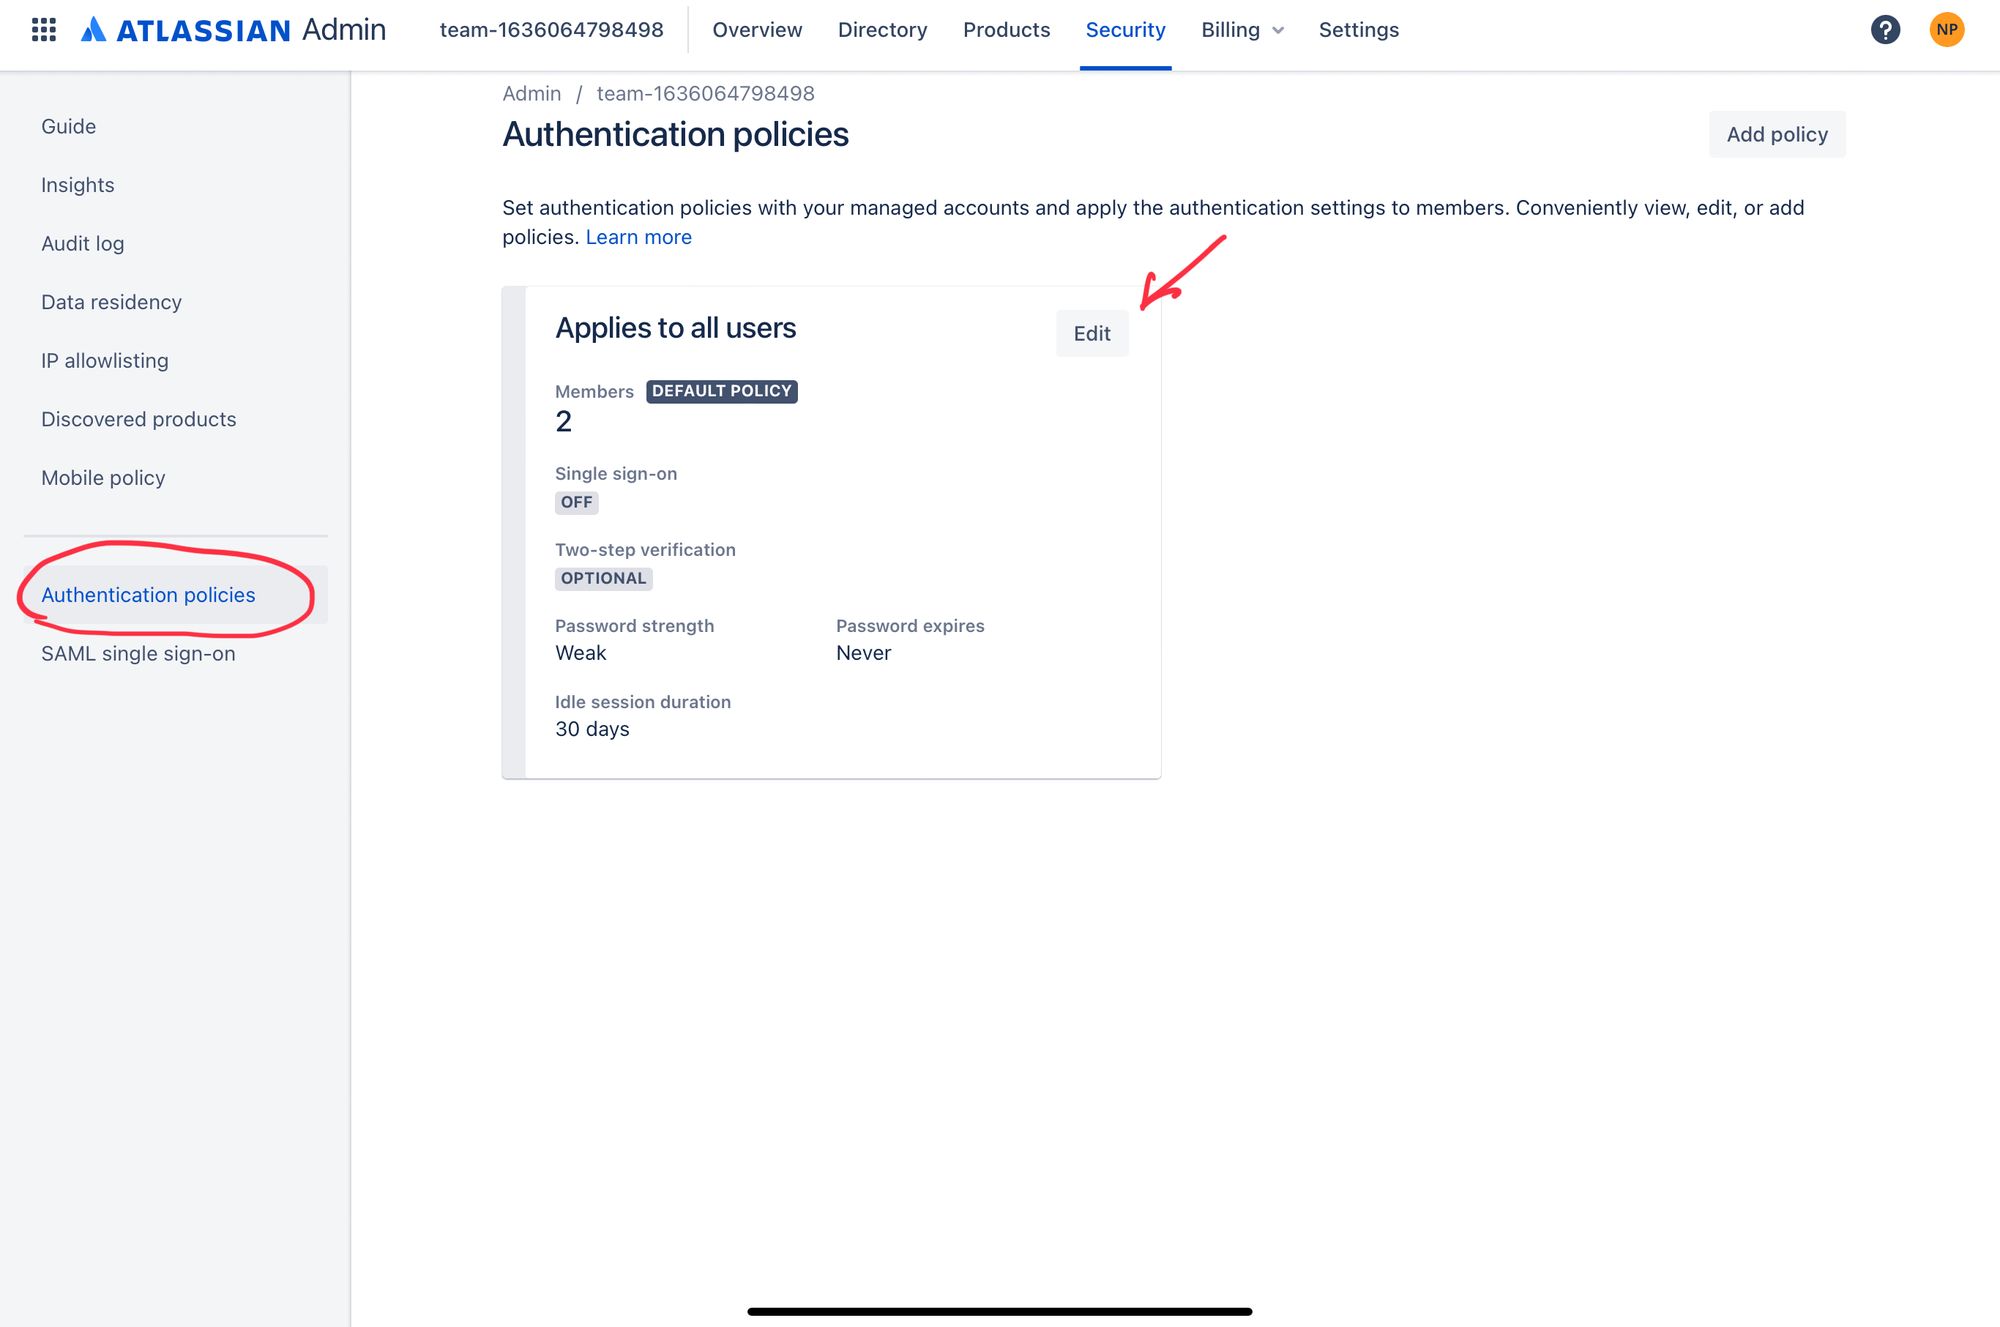
- The last thing you need to do is to enforce Single Sign-On on your default policy for Atlassian access. In the left menu click on Authentication policies.
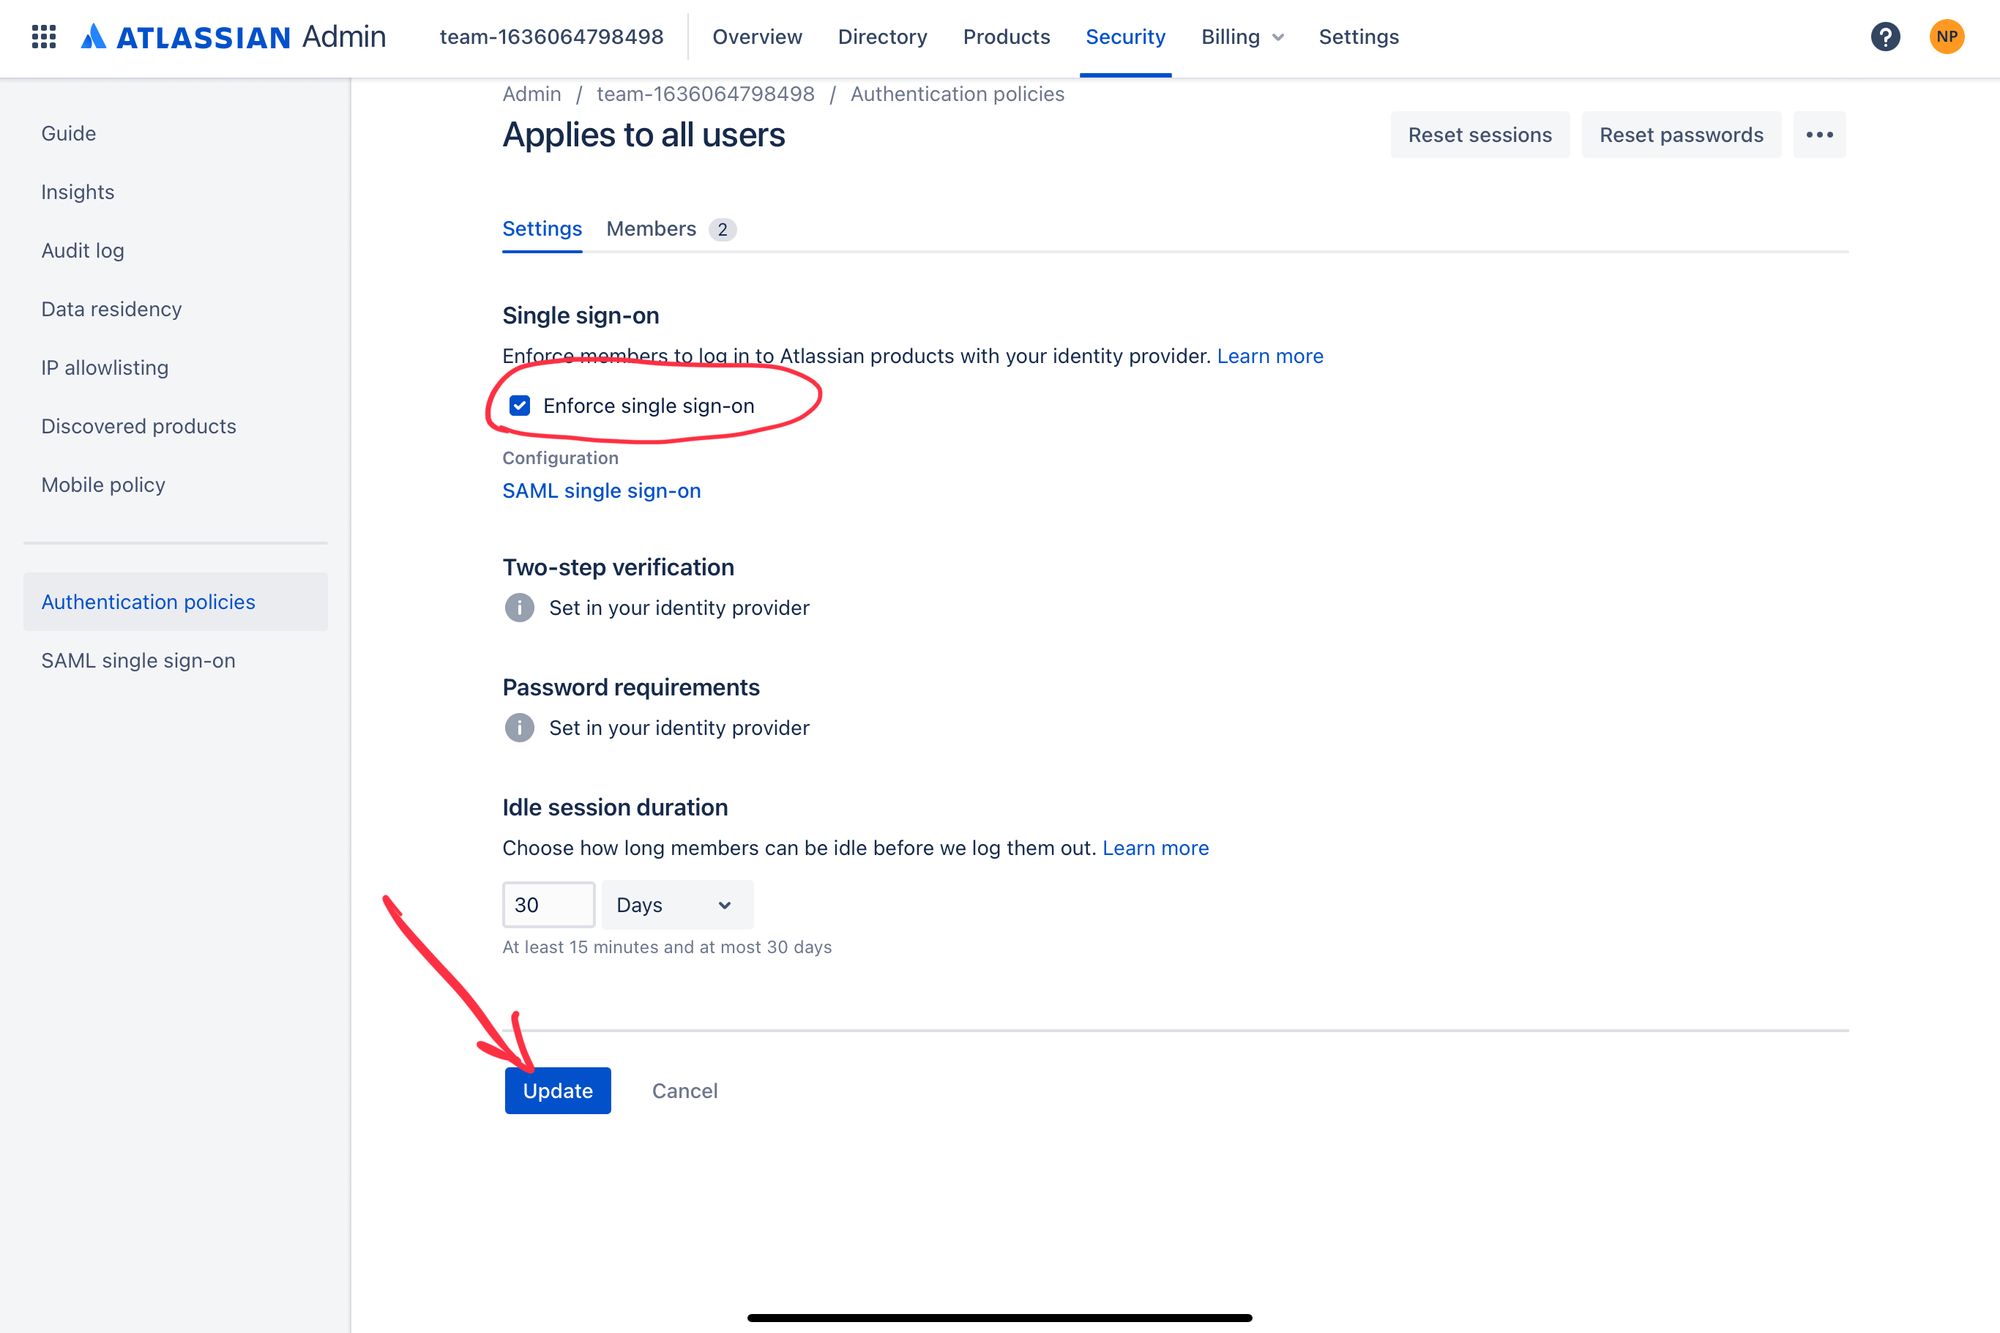
- Click Edit for default policy (or any policy that you have configured) and enforce SSO.
- Update the configuration and make sure policy is updated
Configure SSO in idemeum
- Navigate to
https://[your domain].idemeum.com/adminportal - Click Applications in the left menu
- Search for Atlassian Cloud application and click Add App
- Click SAML at the top navigation menu
Now you will be using SAML metadata values obtained from Atlassian administration portal
- Type in your organization name (https://[org name]atlassian.net/)
- Paste SP Entity ID and Assertion Consumer Service URL
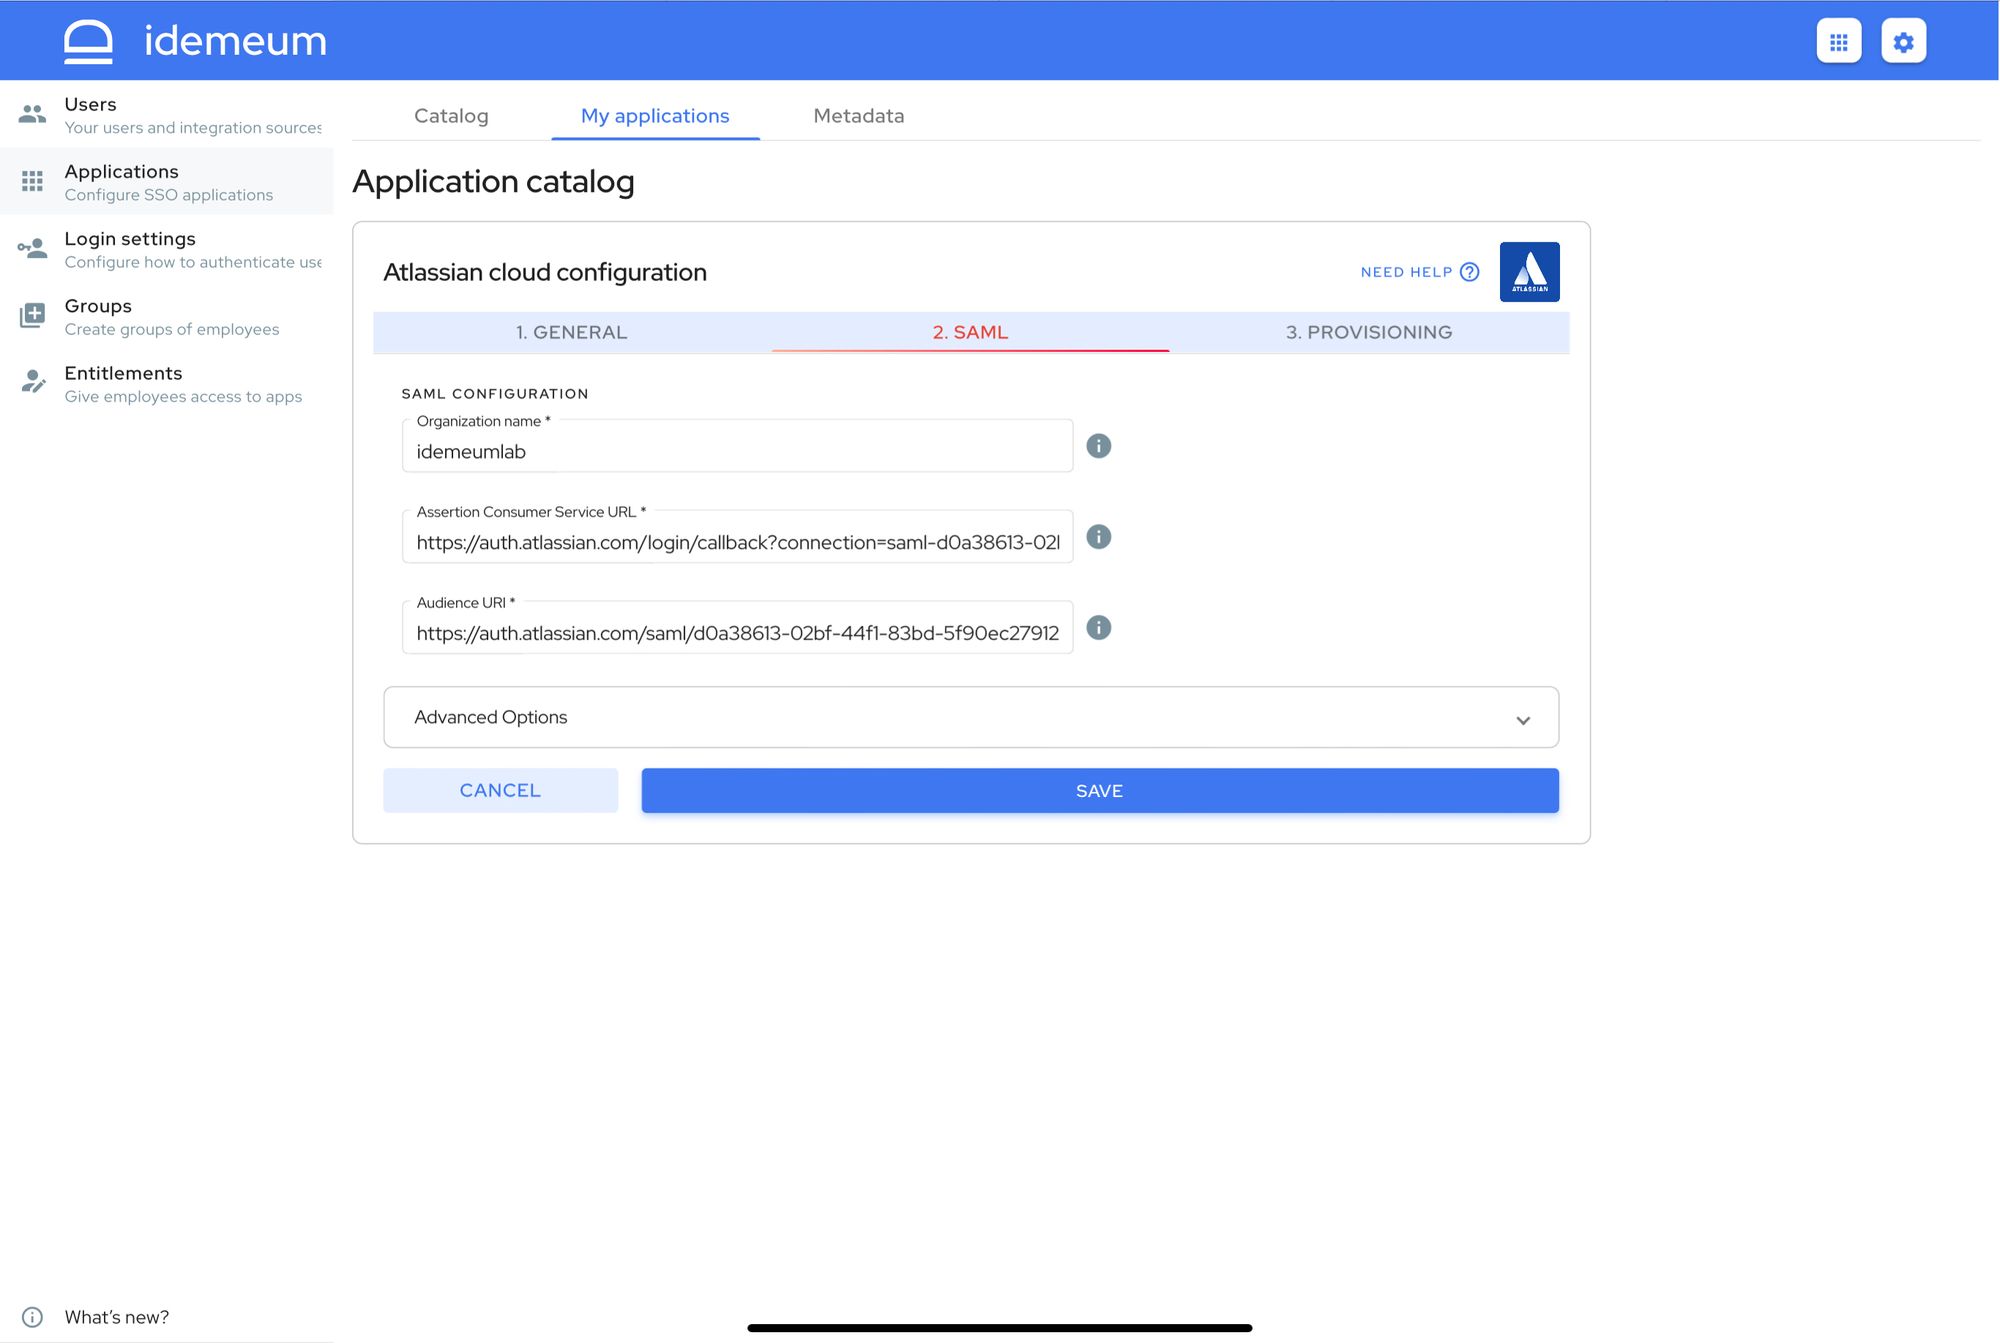
- Click Save
Automated provisioning with SCIM
Set up automated provisioning
- Access Settings -> User provisioning
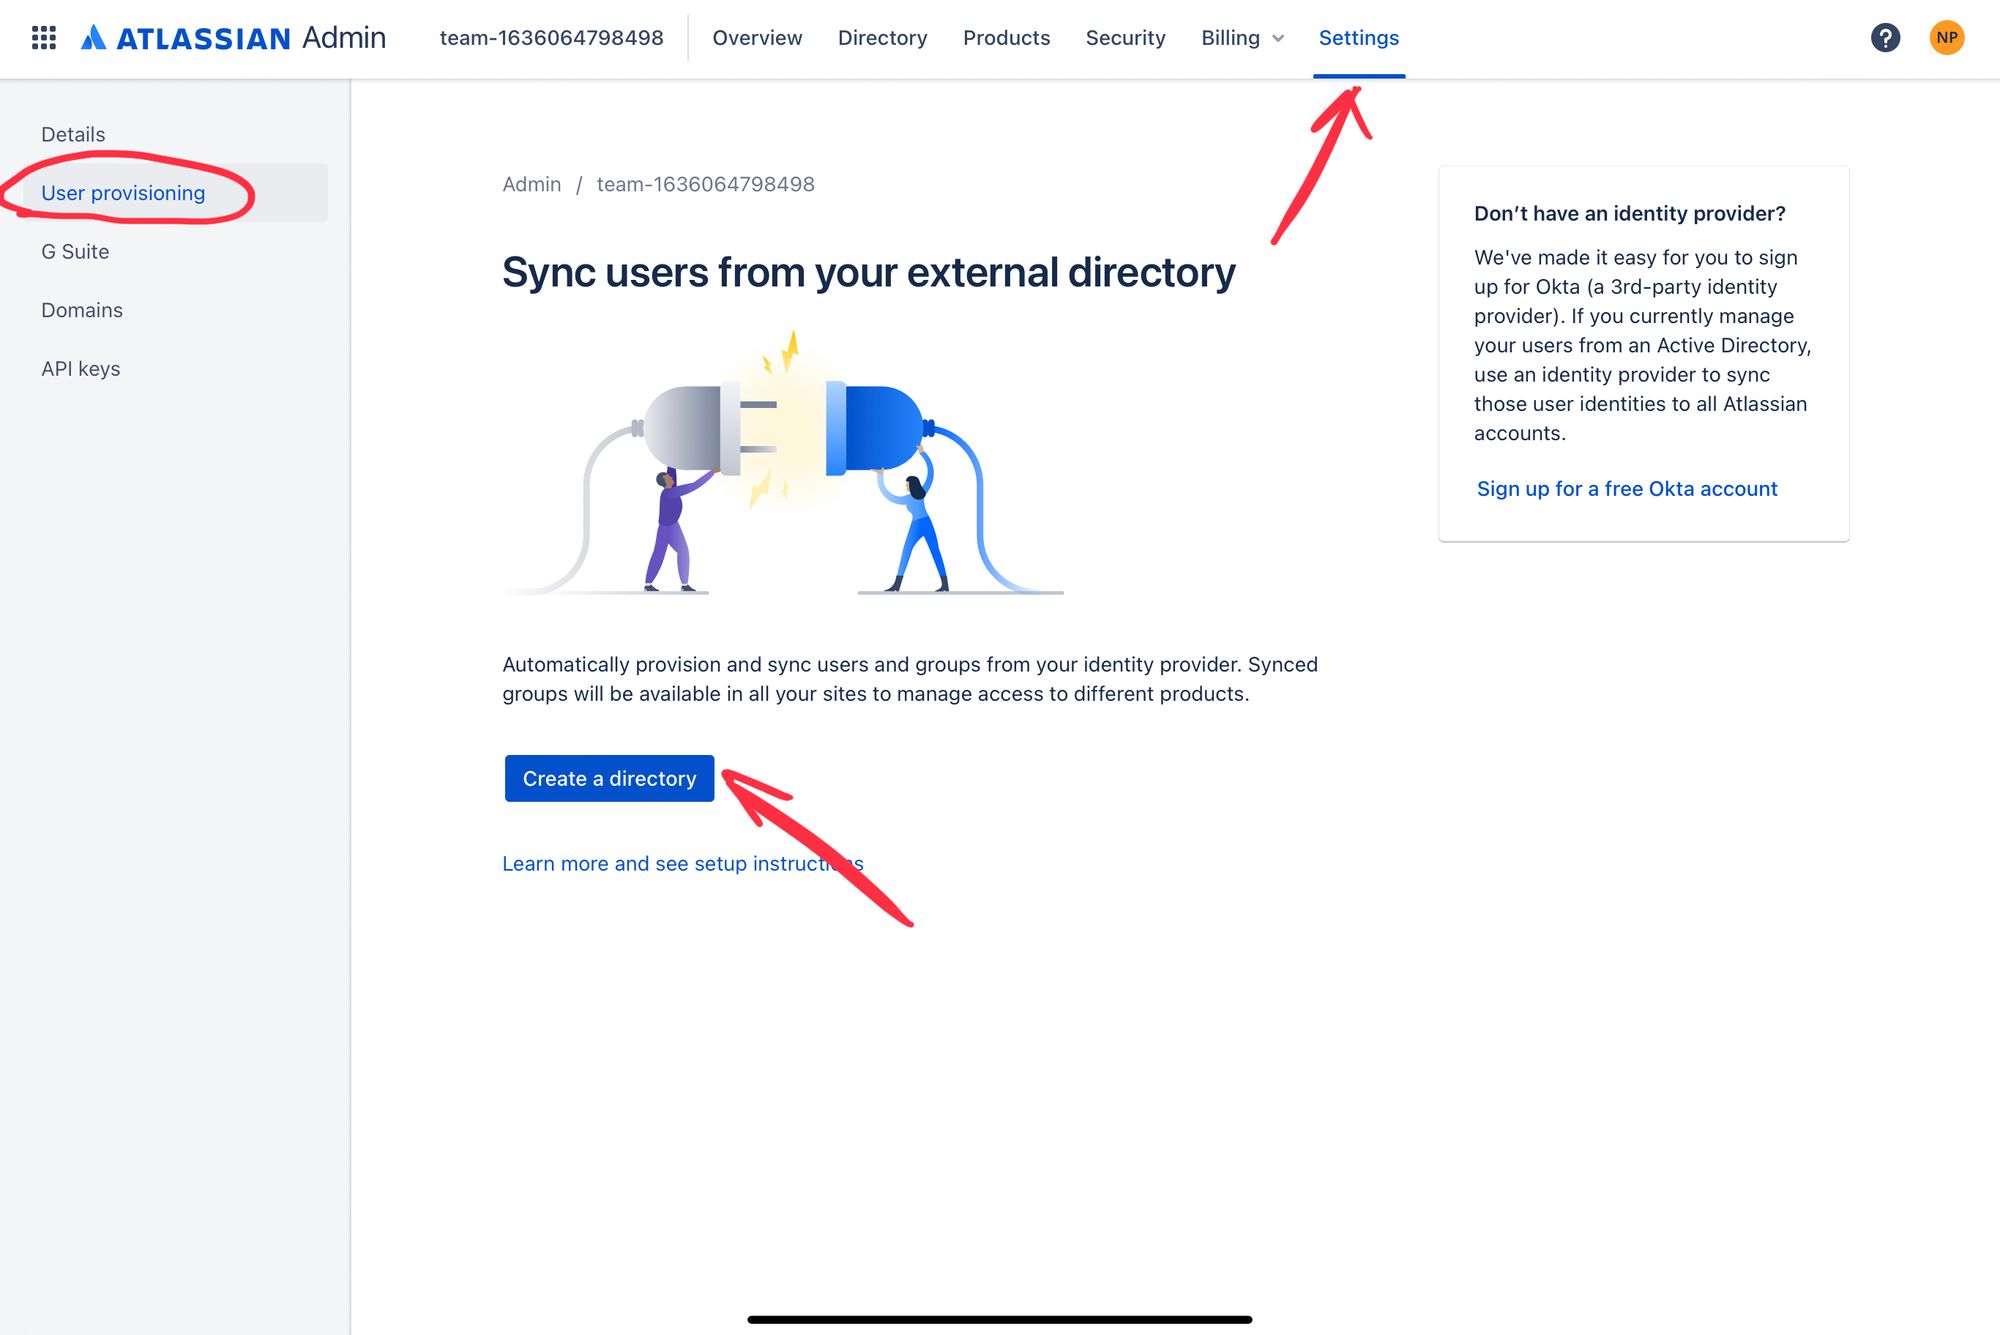
- Click Create a directory, give it a name, and copy Directory Base URL and API key
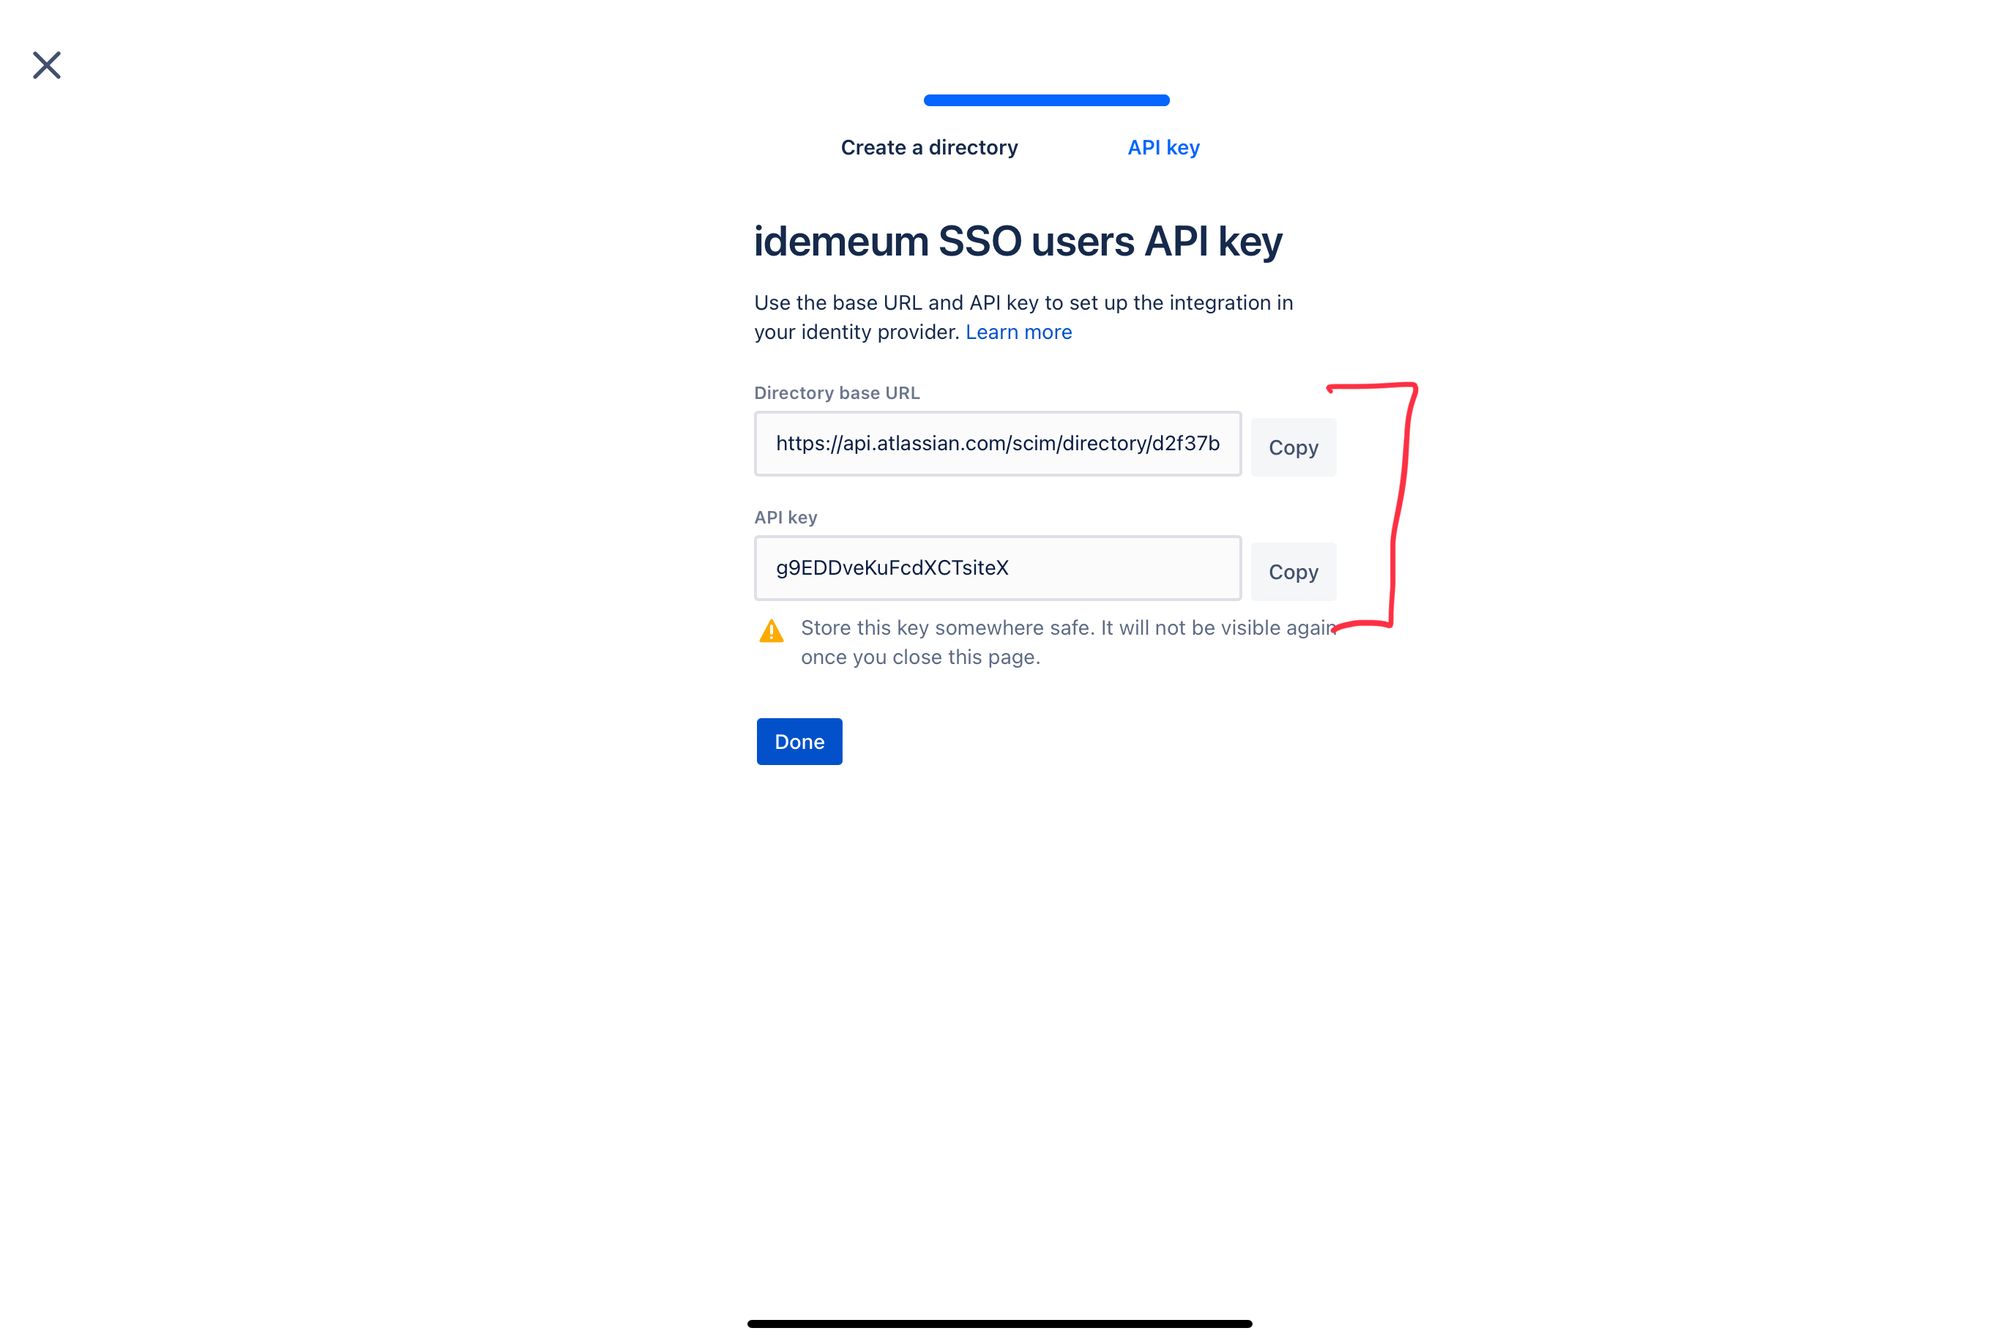
- Return to idemeum configuration, and add these parameters to Provisioning section in the Atlassian Cloud app. You will paste Directory Base URL and API key into the form.
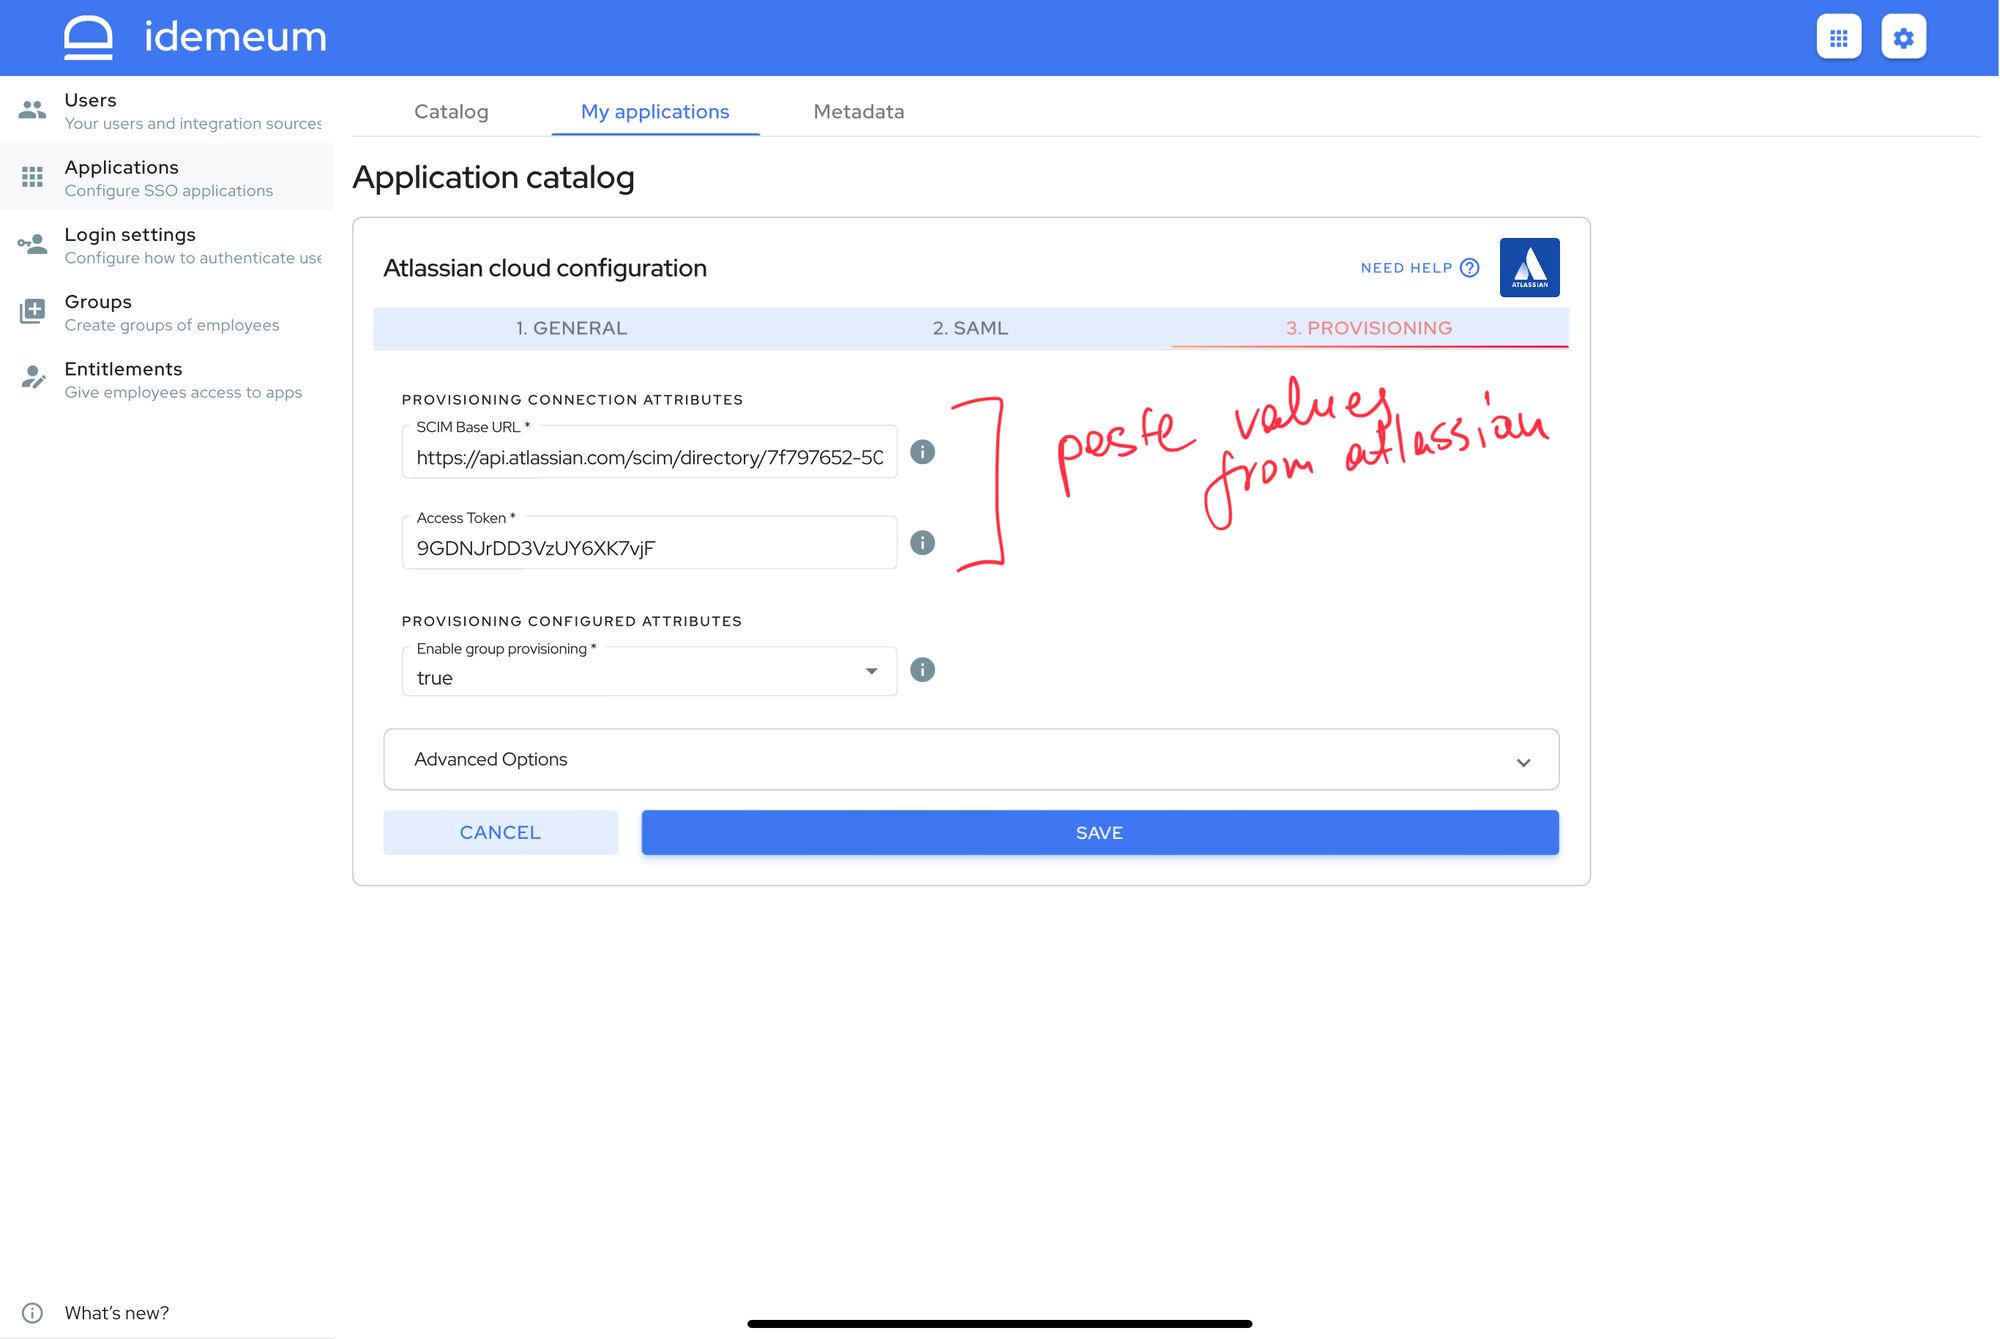
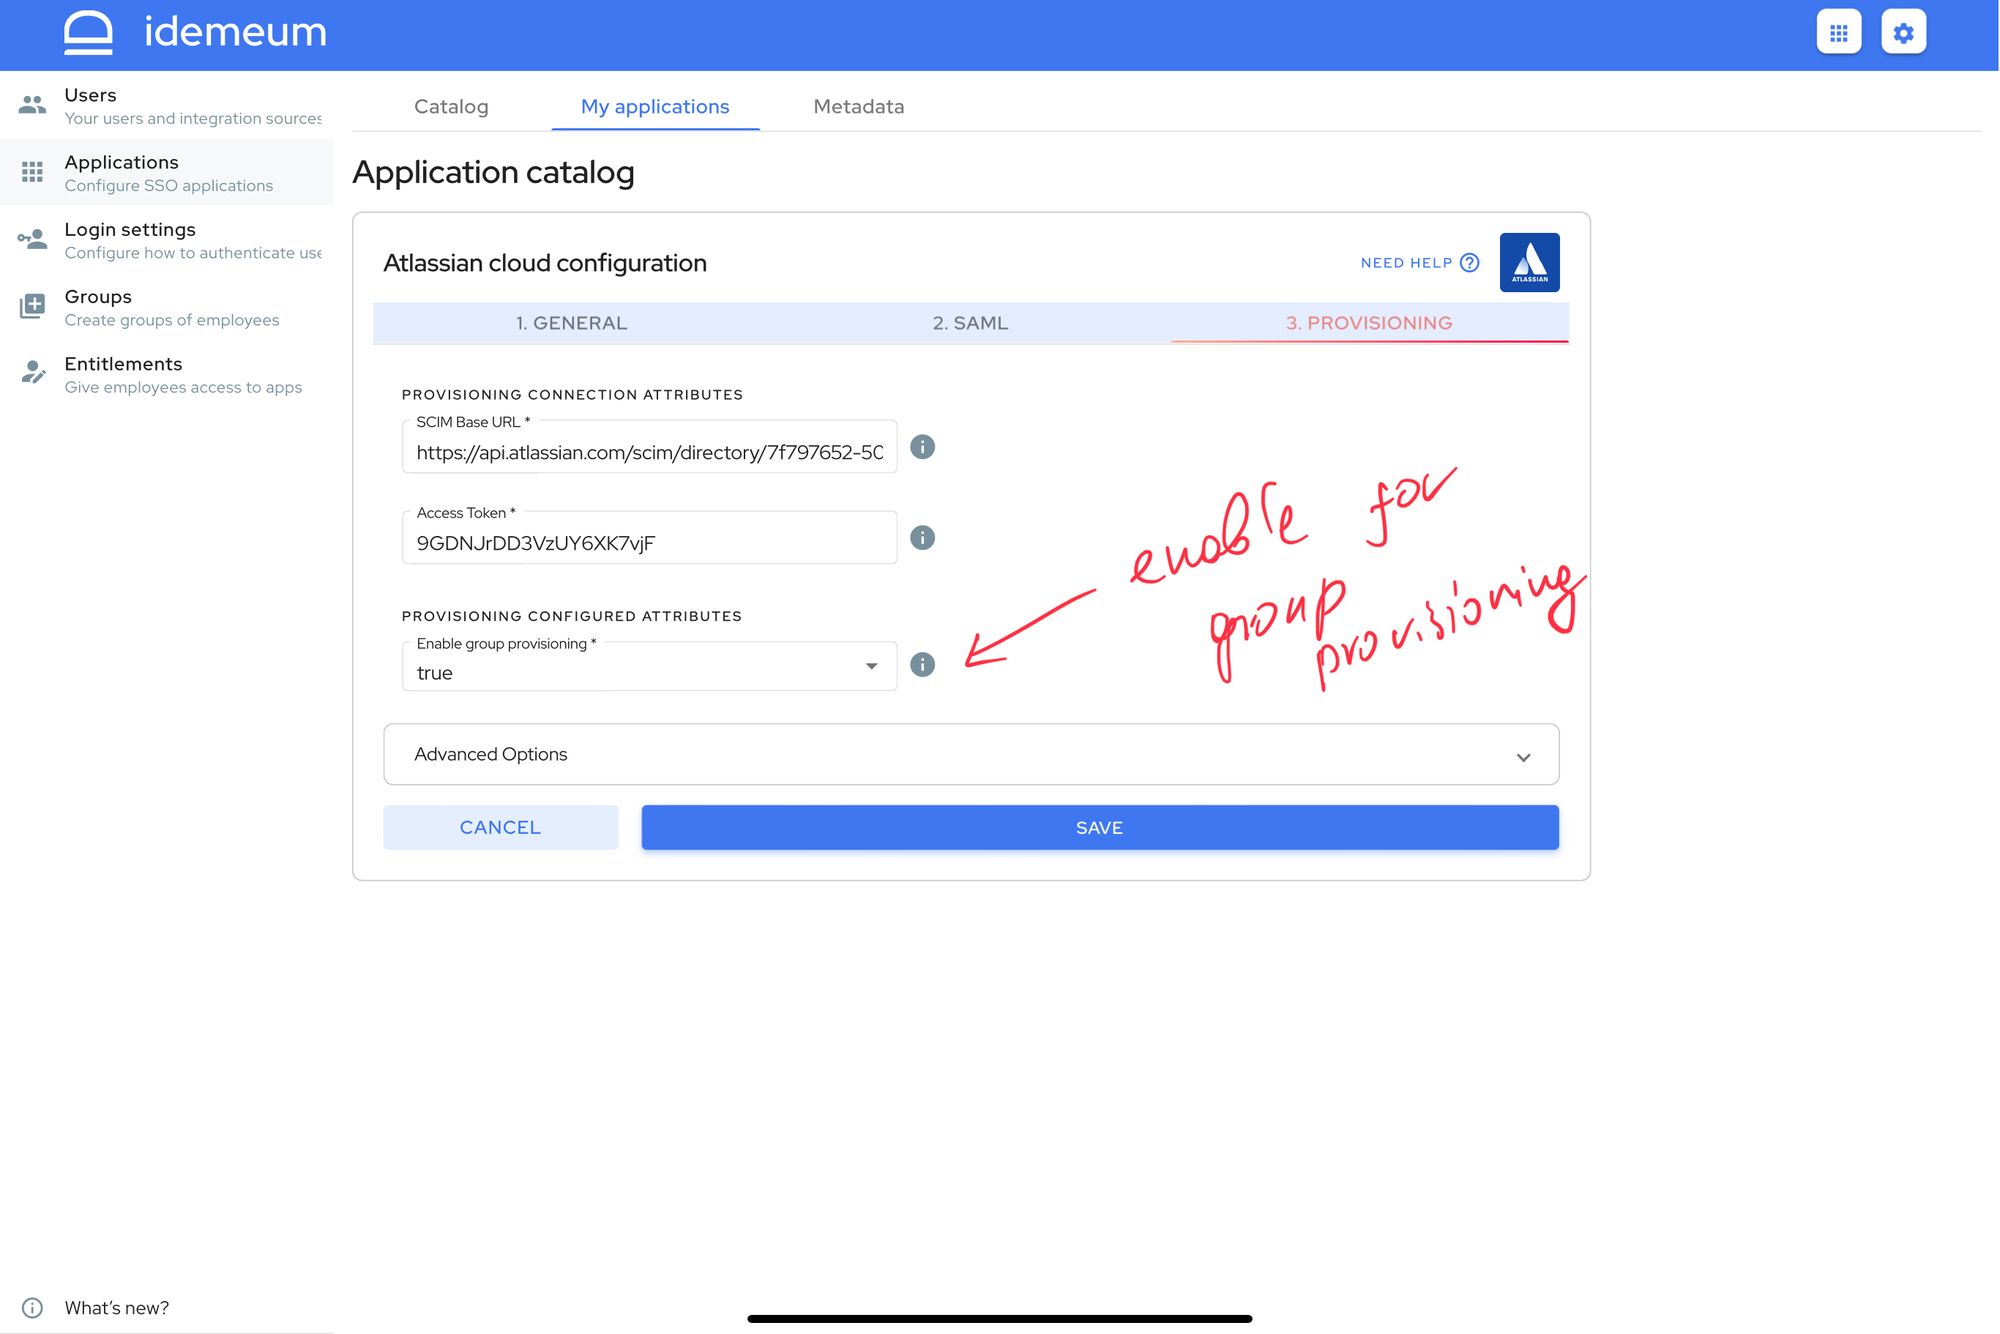
- The best way to provision users into Atlassian is with group provisioning enabled. idemeum will push your idemeum groups into Atlassian and assign users into appropriate groups so that they have access to necessary resources. Make sure you have group provisioning set to true.
- Click Save
You can learn more about how idemeum handles group provisioning below.
 Nikolay Poturnak
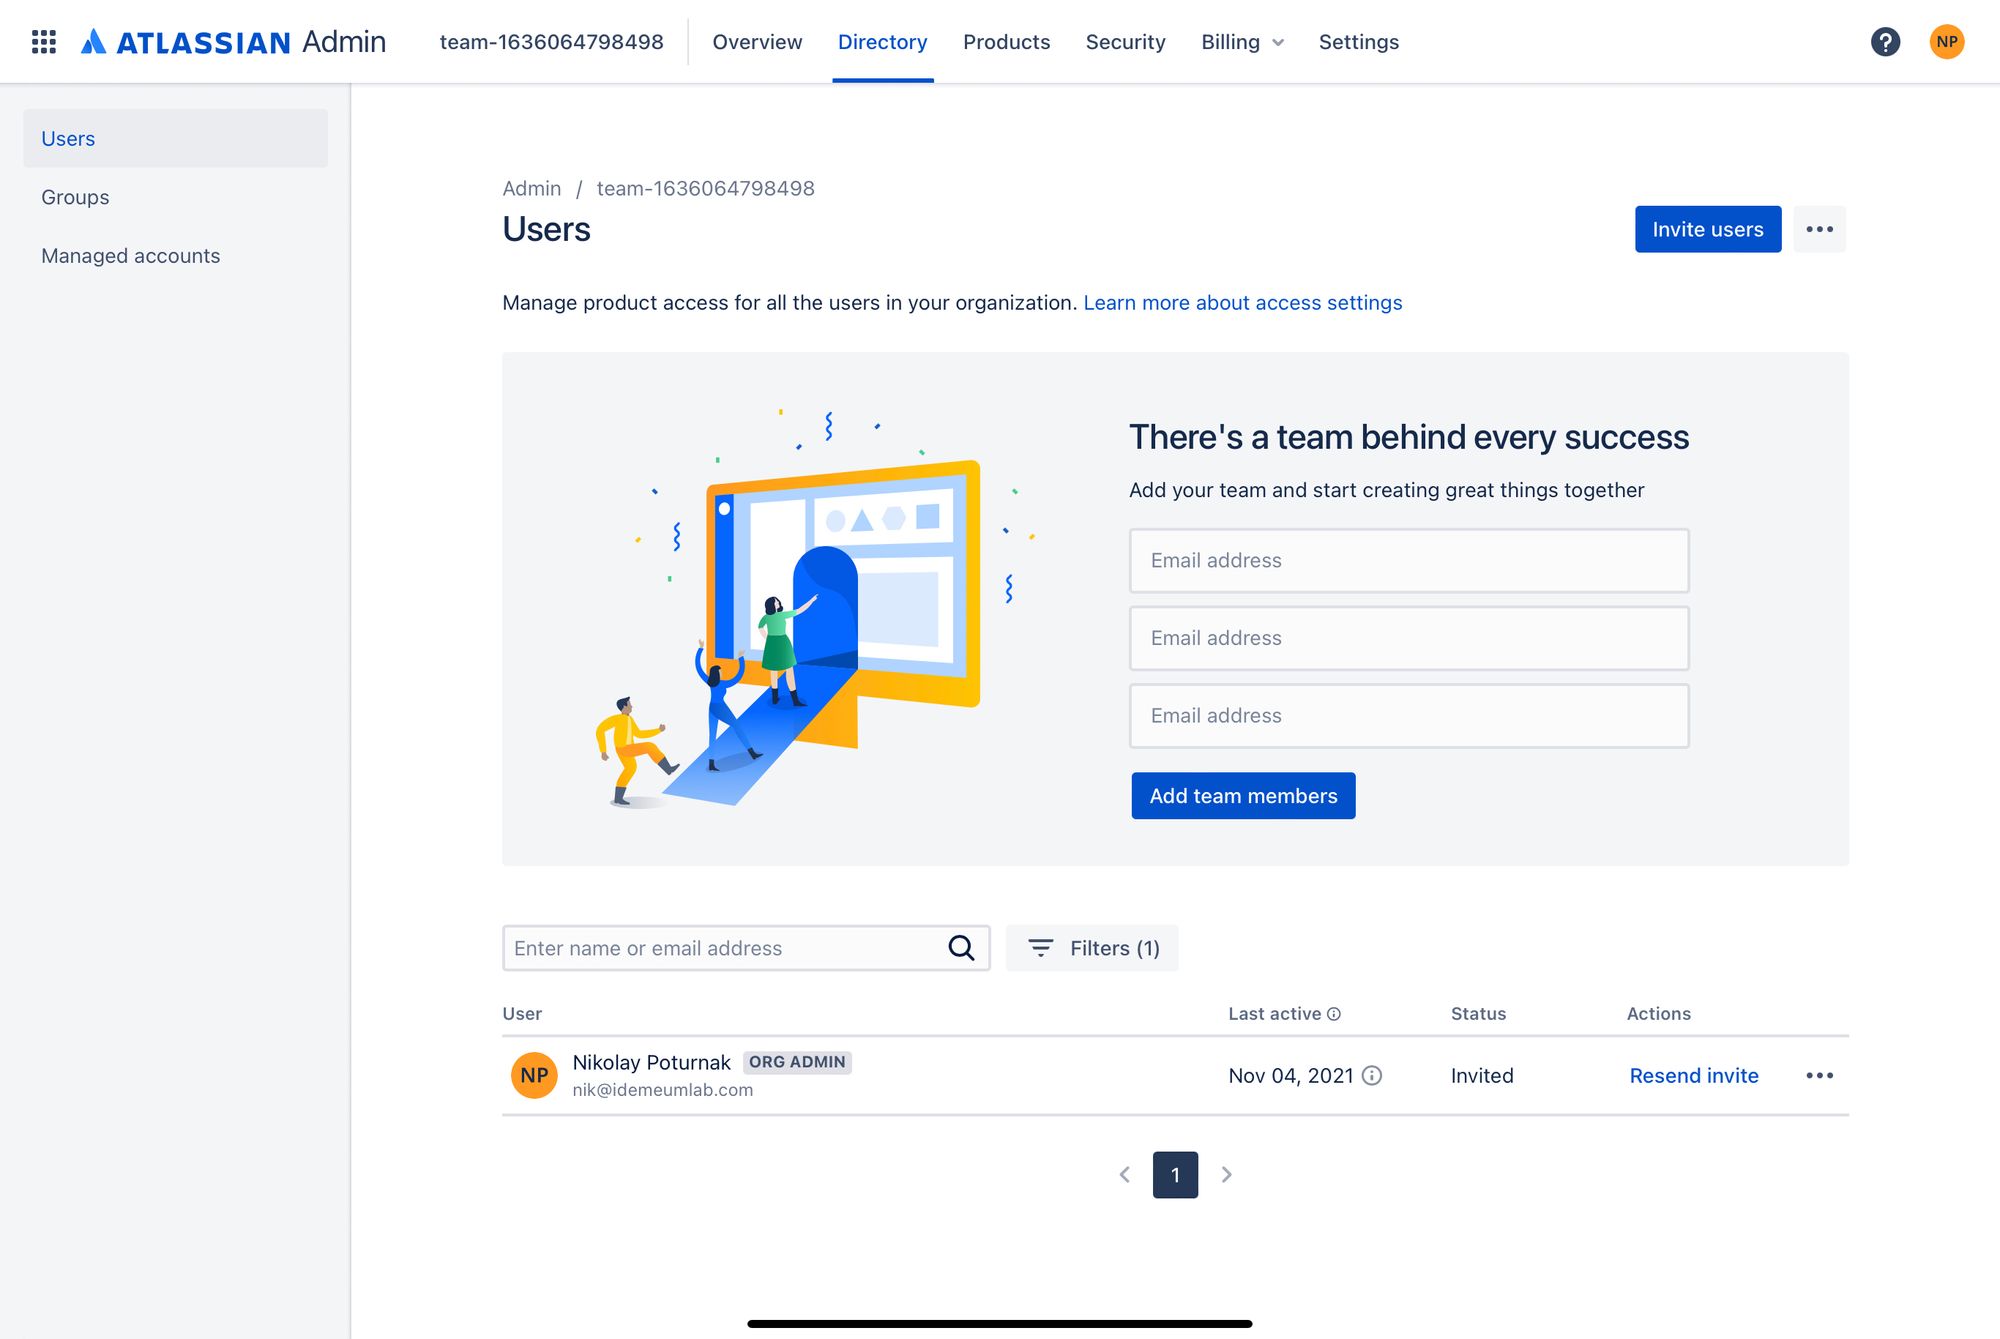
Set up groups in Atlassian
Once idemeum pushes groups into Atlassian, it will start provisioning users into those specific groups. Groups become very convenient way to manage what resources and products each of your users will have access to inside Atlassian.
- Navigate to Directory -> Groups
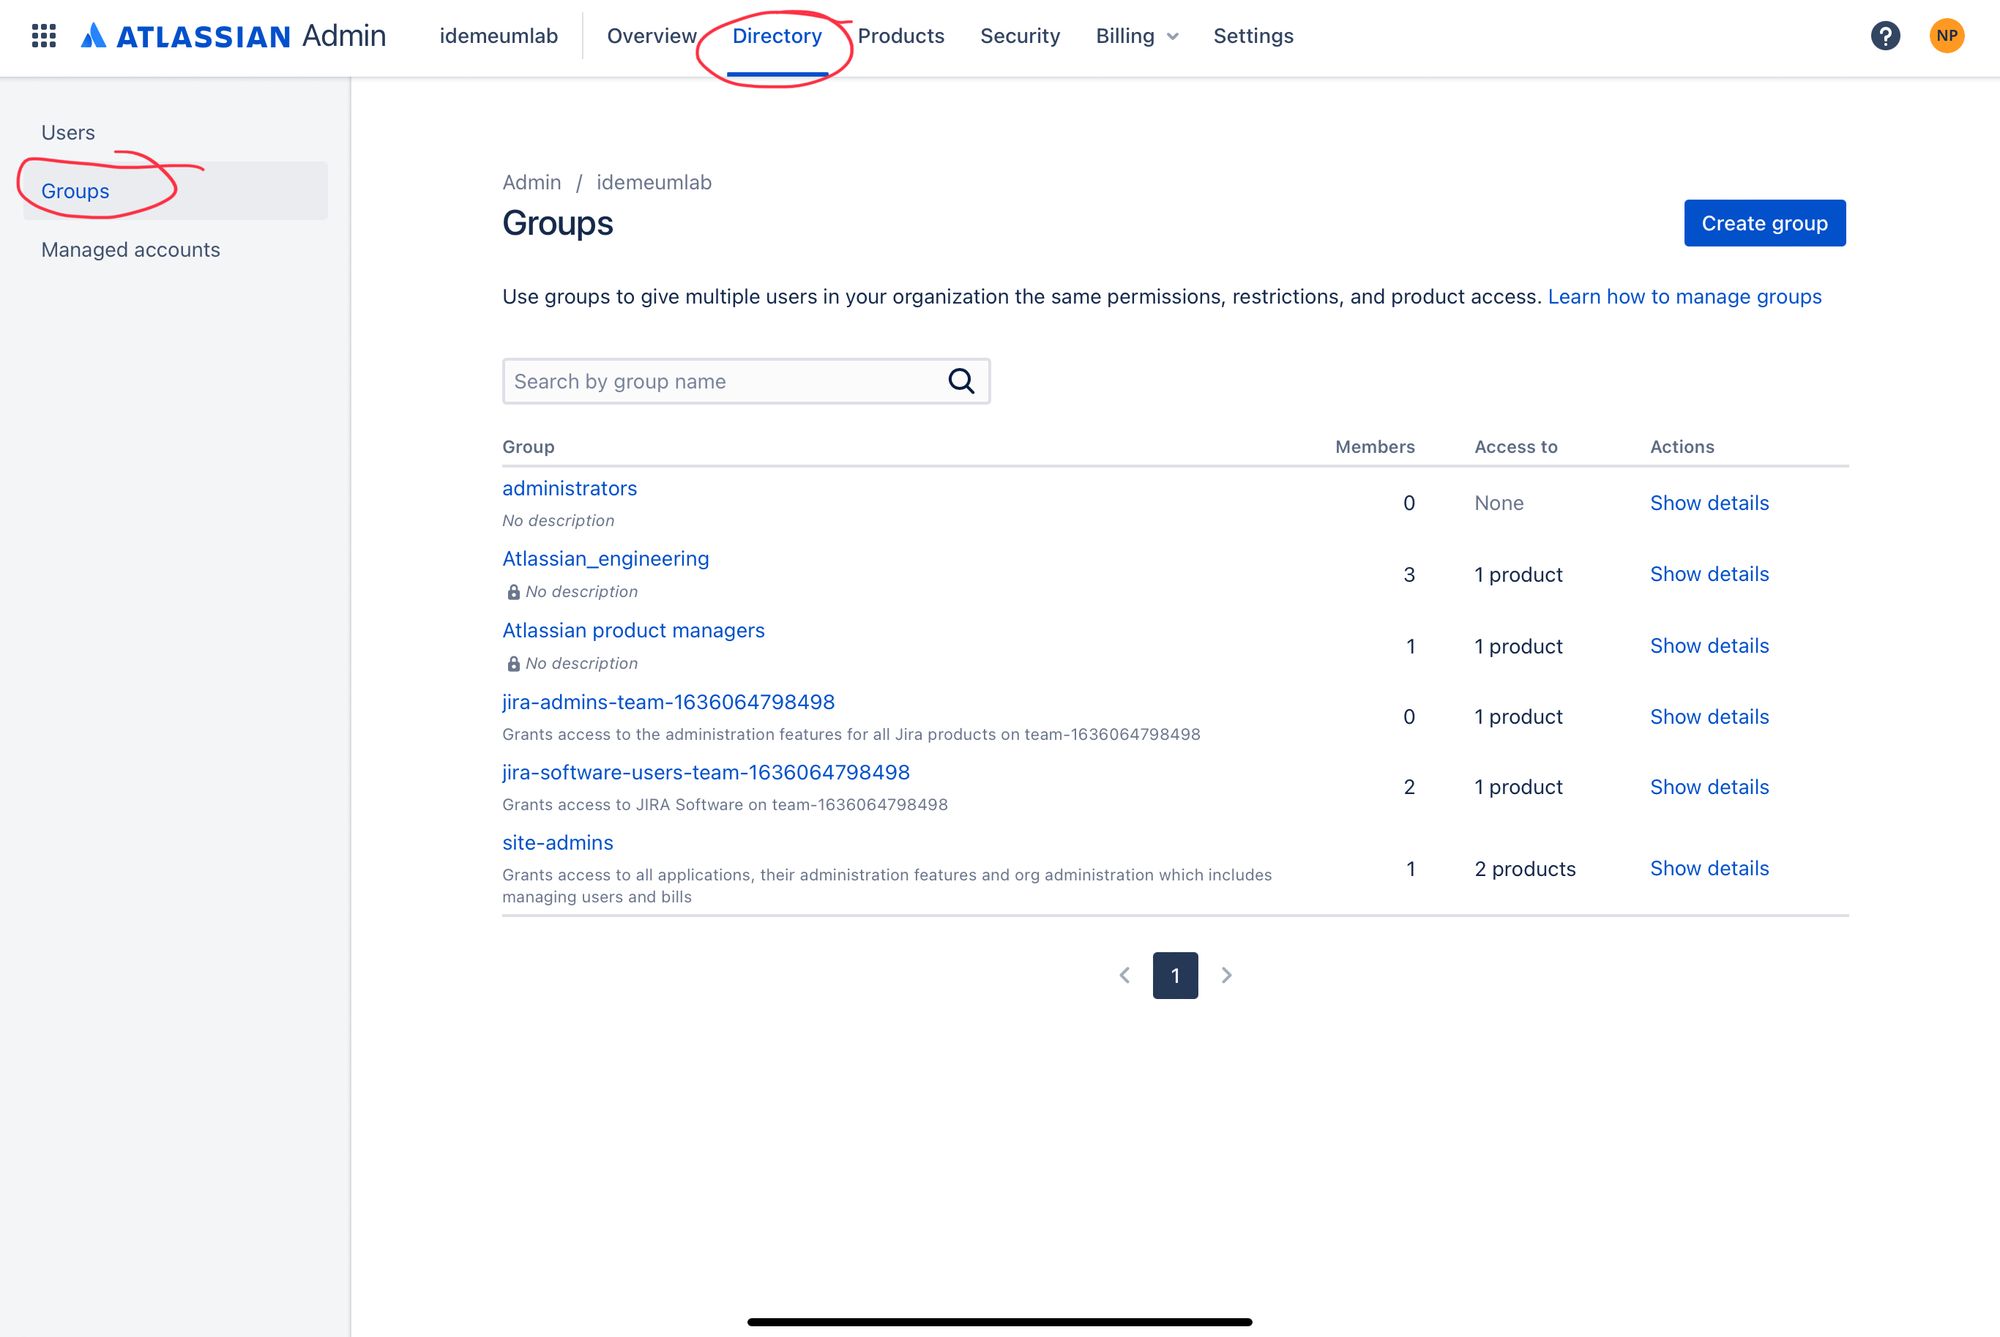
- Choose the group that you want to configure with product access
- Click on Add product and choose what product the members of the group will have access to

- Once product access is configured all newly provisioned users will automatically have access to selected products
SAML login flows
Atlassian Cloud supports both IDP Initiated Flow and SP Initiated FlowSP Initiated Flow for SSO.
IDP Initiated flow
With this flow users first navigate to idemeum user catalog and then click on Atlassian icon to launch application.
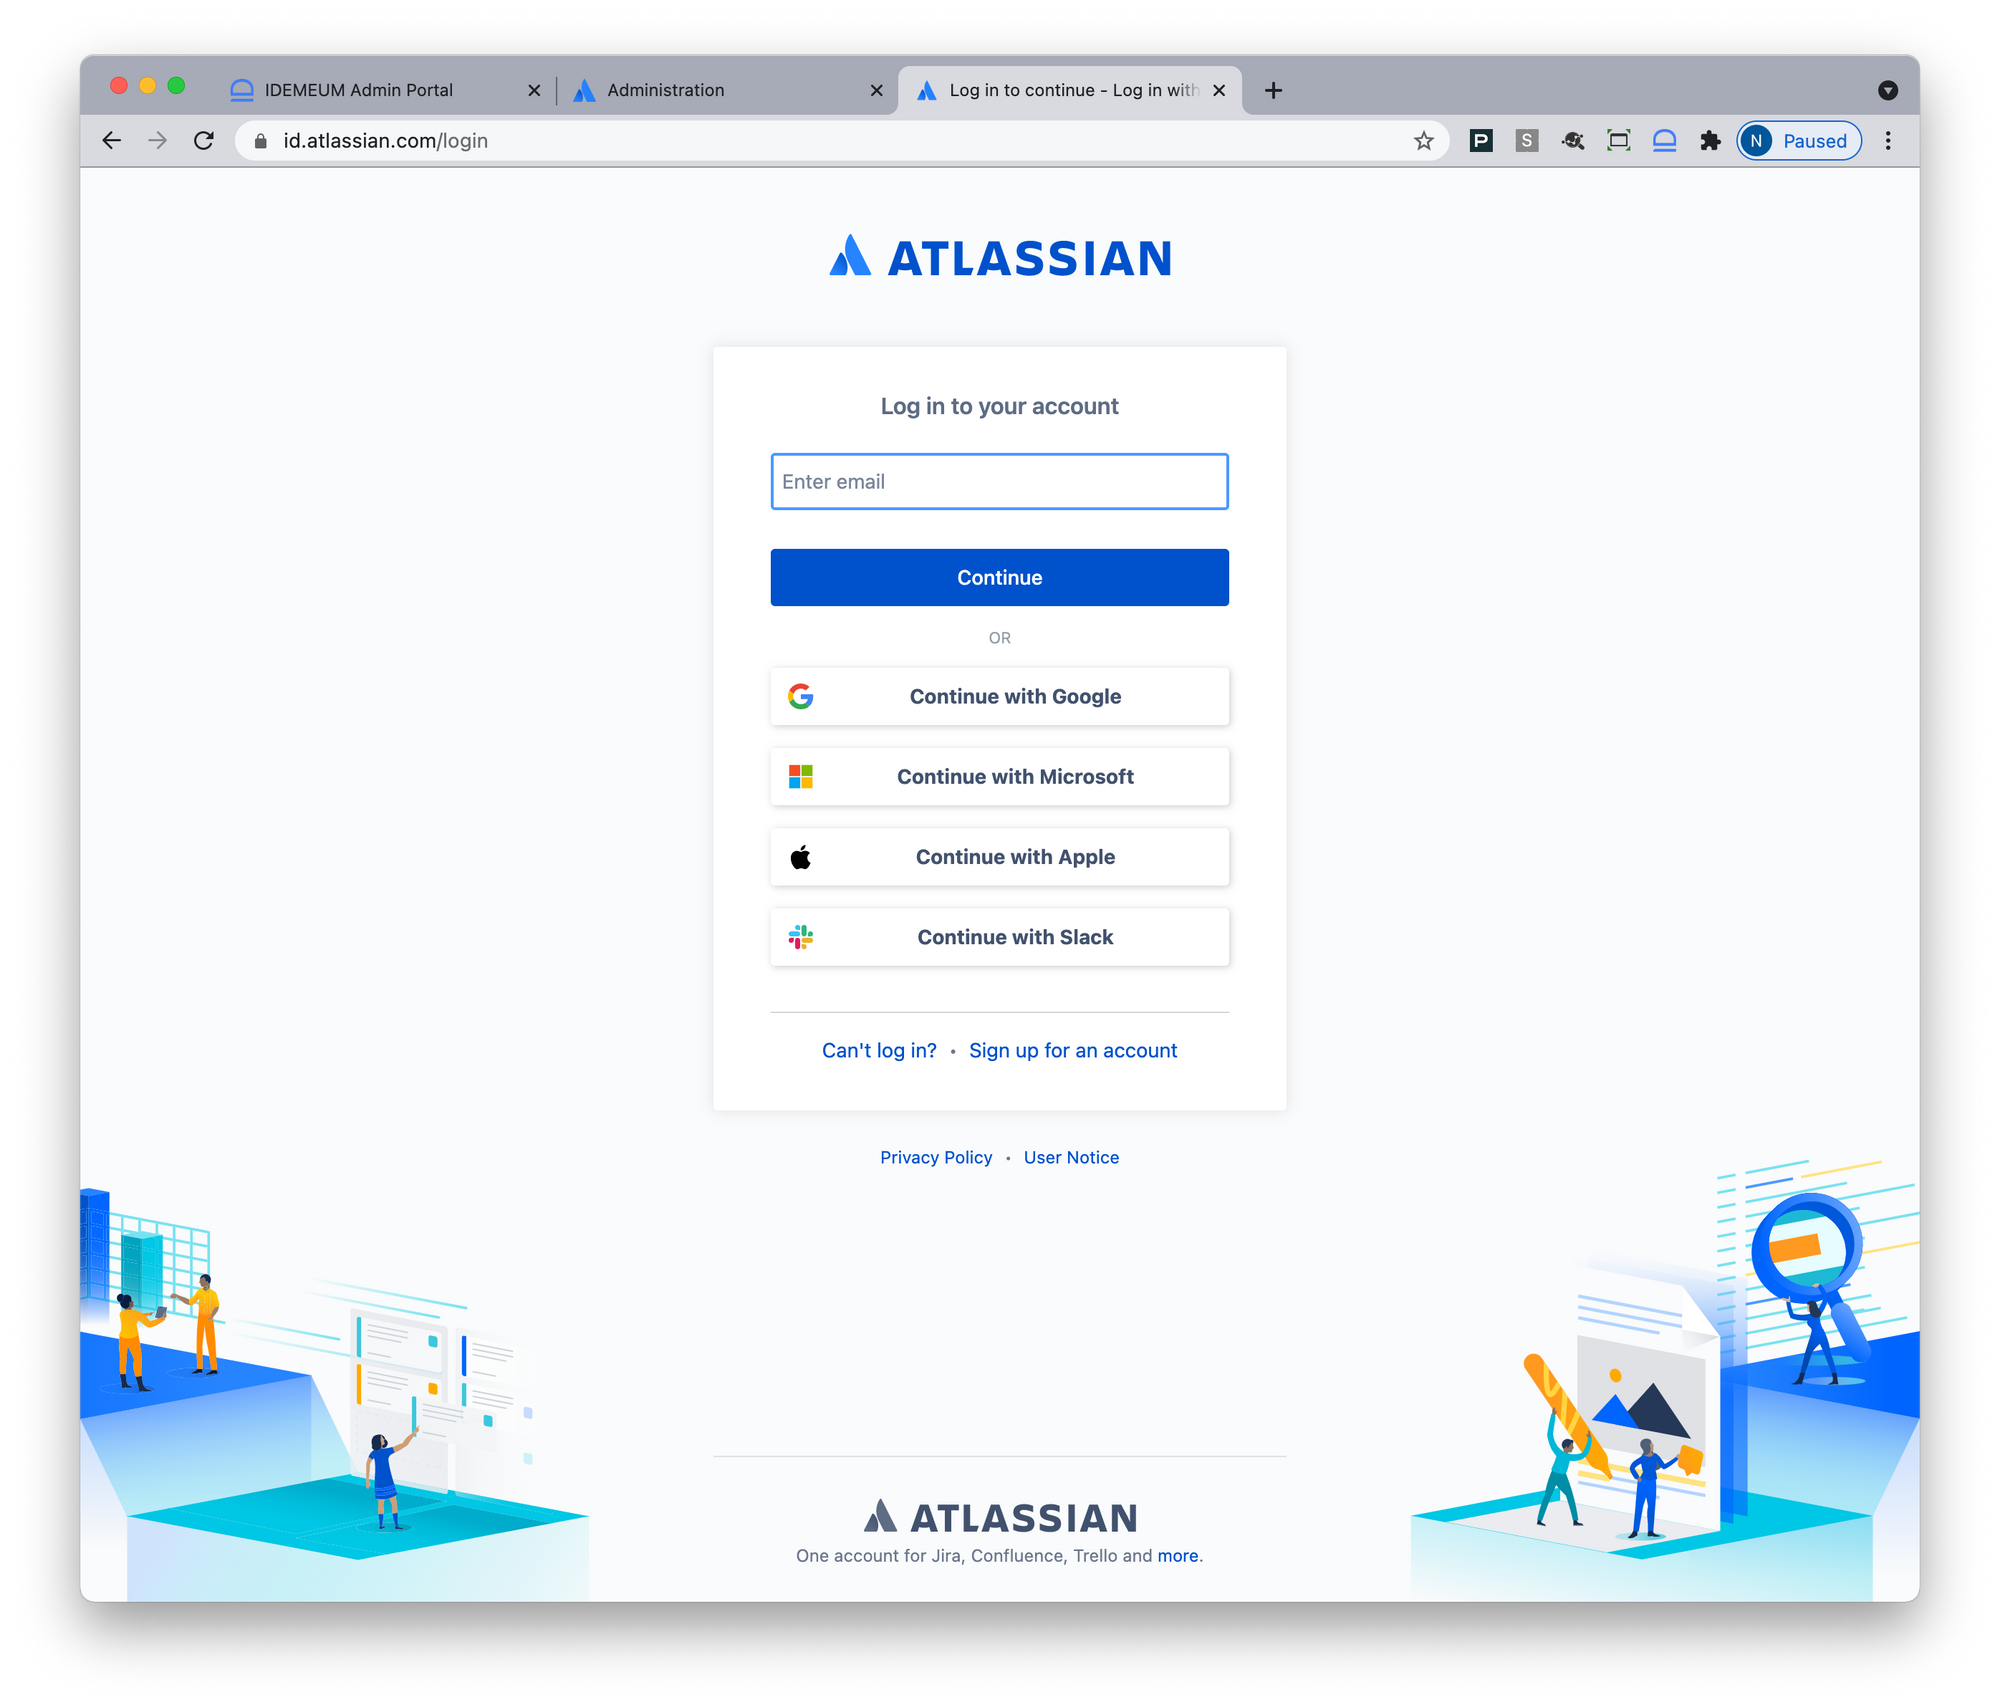
SP Initiated flow
With this flow users can directly go to https://id.atlassian.com/login, type in your email address and you will be able to login with passwordless SSO.