
Capabilities overview
idemeum integrates with AWS SSO in order to let your employees access AWS dashboard and integrated applications with a single click. Your employees will enjoy the same centralized passwordless experience with idemeum.
| Supported capability | Required plan | Details |
|---|---|---|
| Passwordless SSO | Free plan | Low SSO tax |
| Automated provisioning | Free plan | SCIM 2.0 (create, remove, update accounts) |
| Group management | Free plan | Push groups and manage user group assignment in AWS |
| Password manager | Any | Auto-fill / Auto-capture |
Prerequisites
In order to integrate idemeum with AWS SSO you will first need to obtain SAML metadata parameters for your idemeum tenant. Specifically you will need:
- idemeum SAML metadata file
Instructions for how to obtain these SAML metadata parameters are below.
 idemeum team
Single Sign-On (SAML)
Configure AWS for SSO
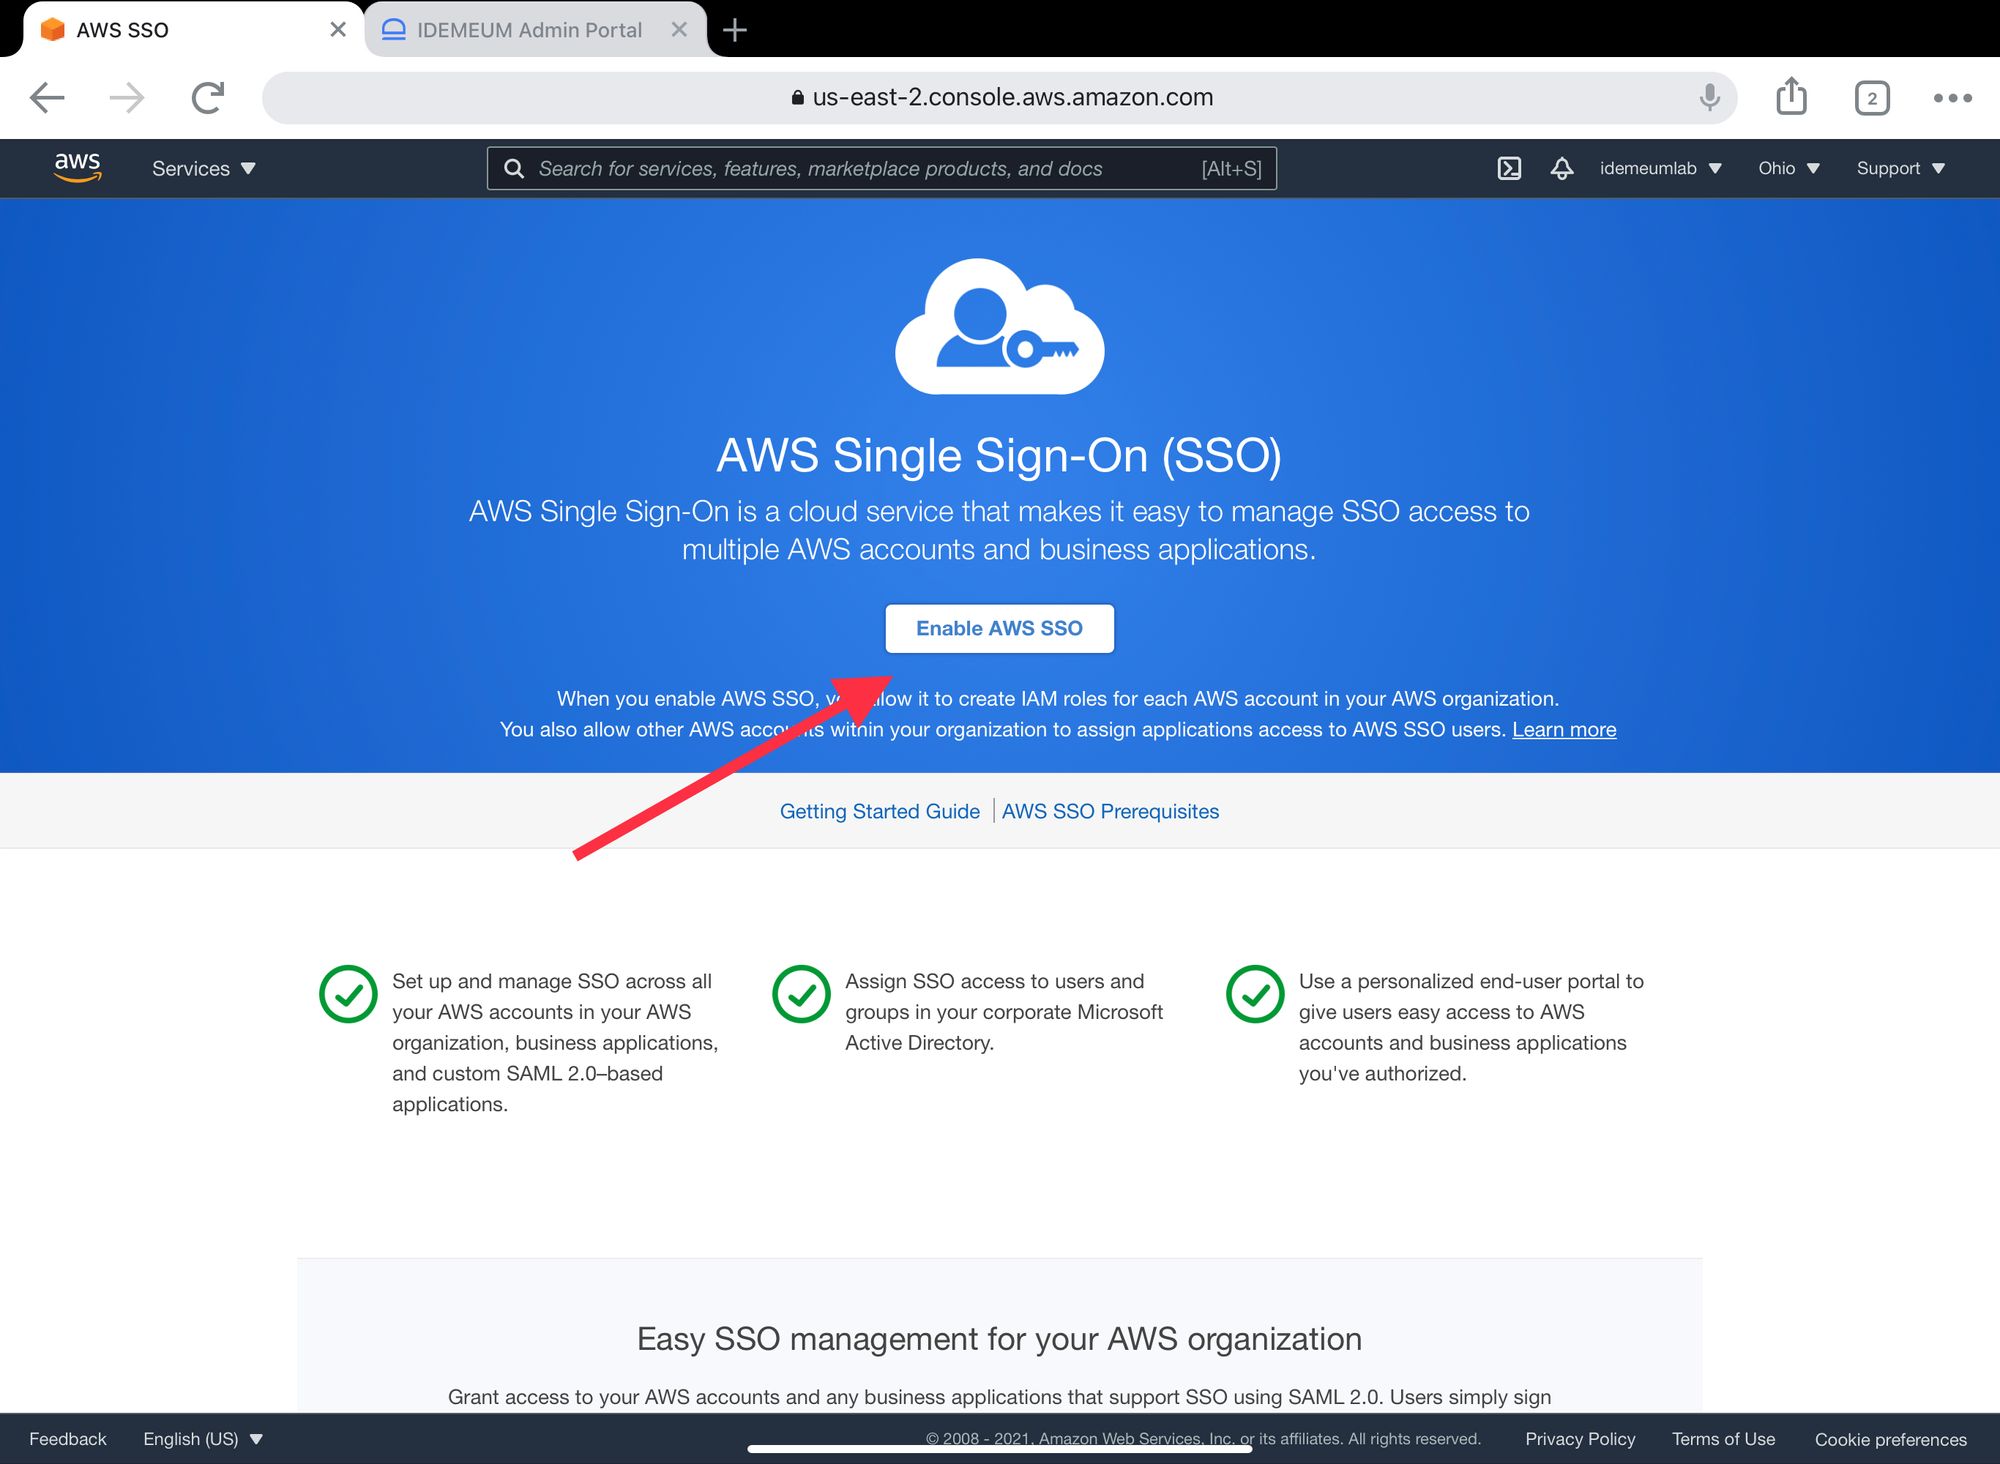
- Navigate to your AWS Management Console
- Search for and access AWS Single Sign-On (AWS) AWS service
- Enable AWS SSO service if you have not done it already
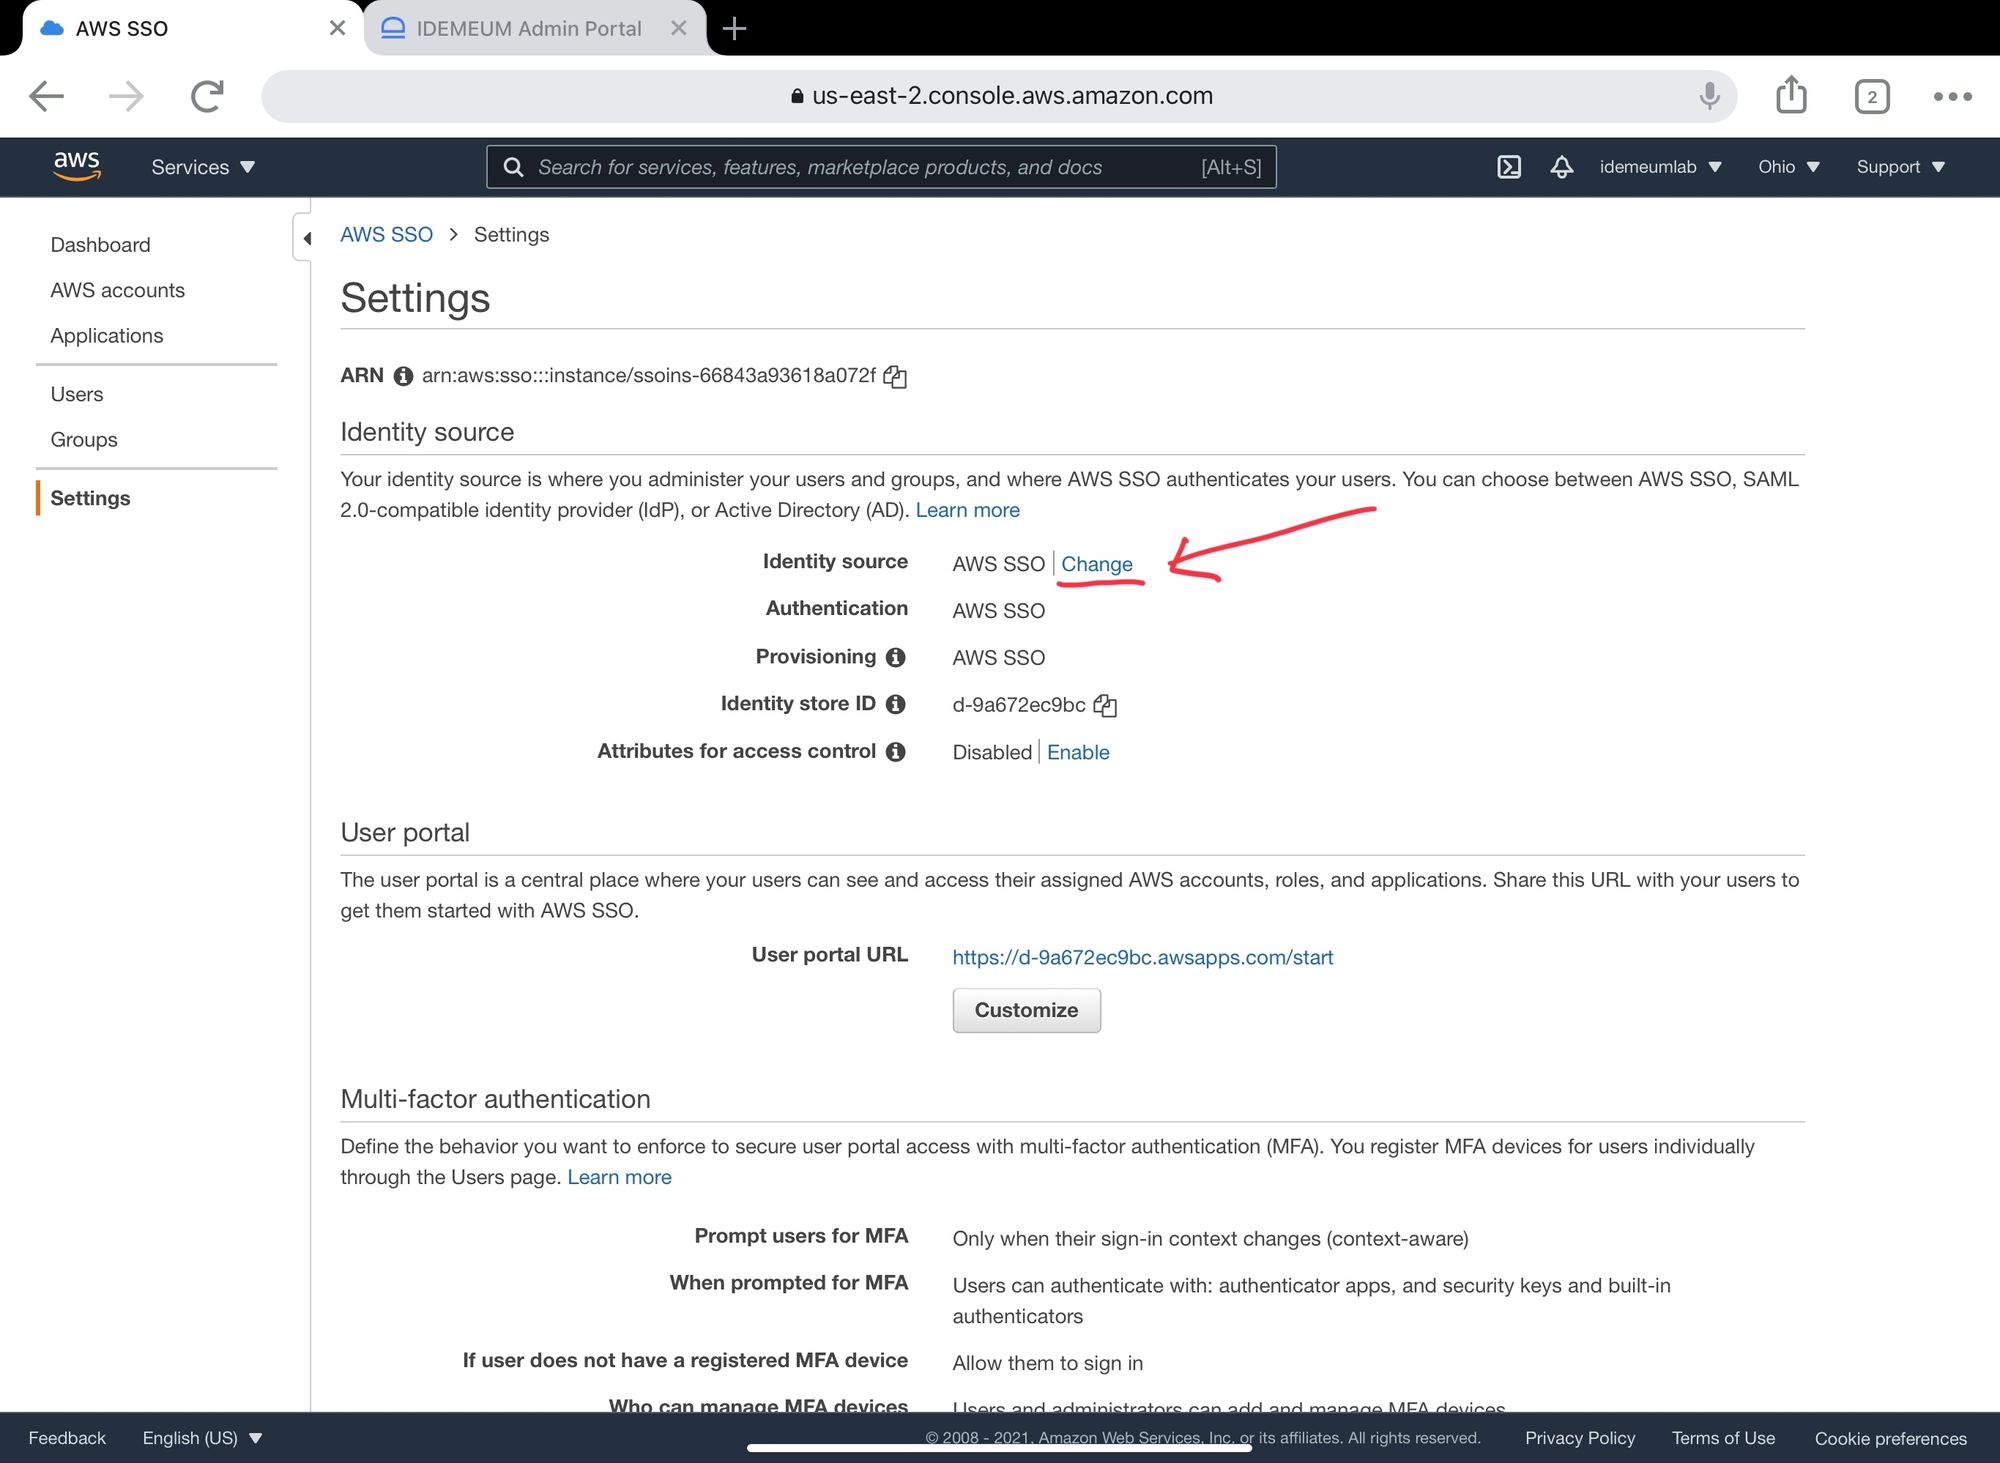
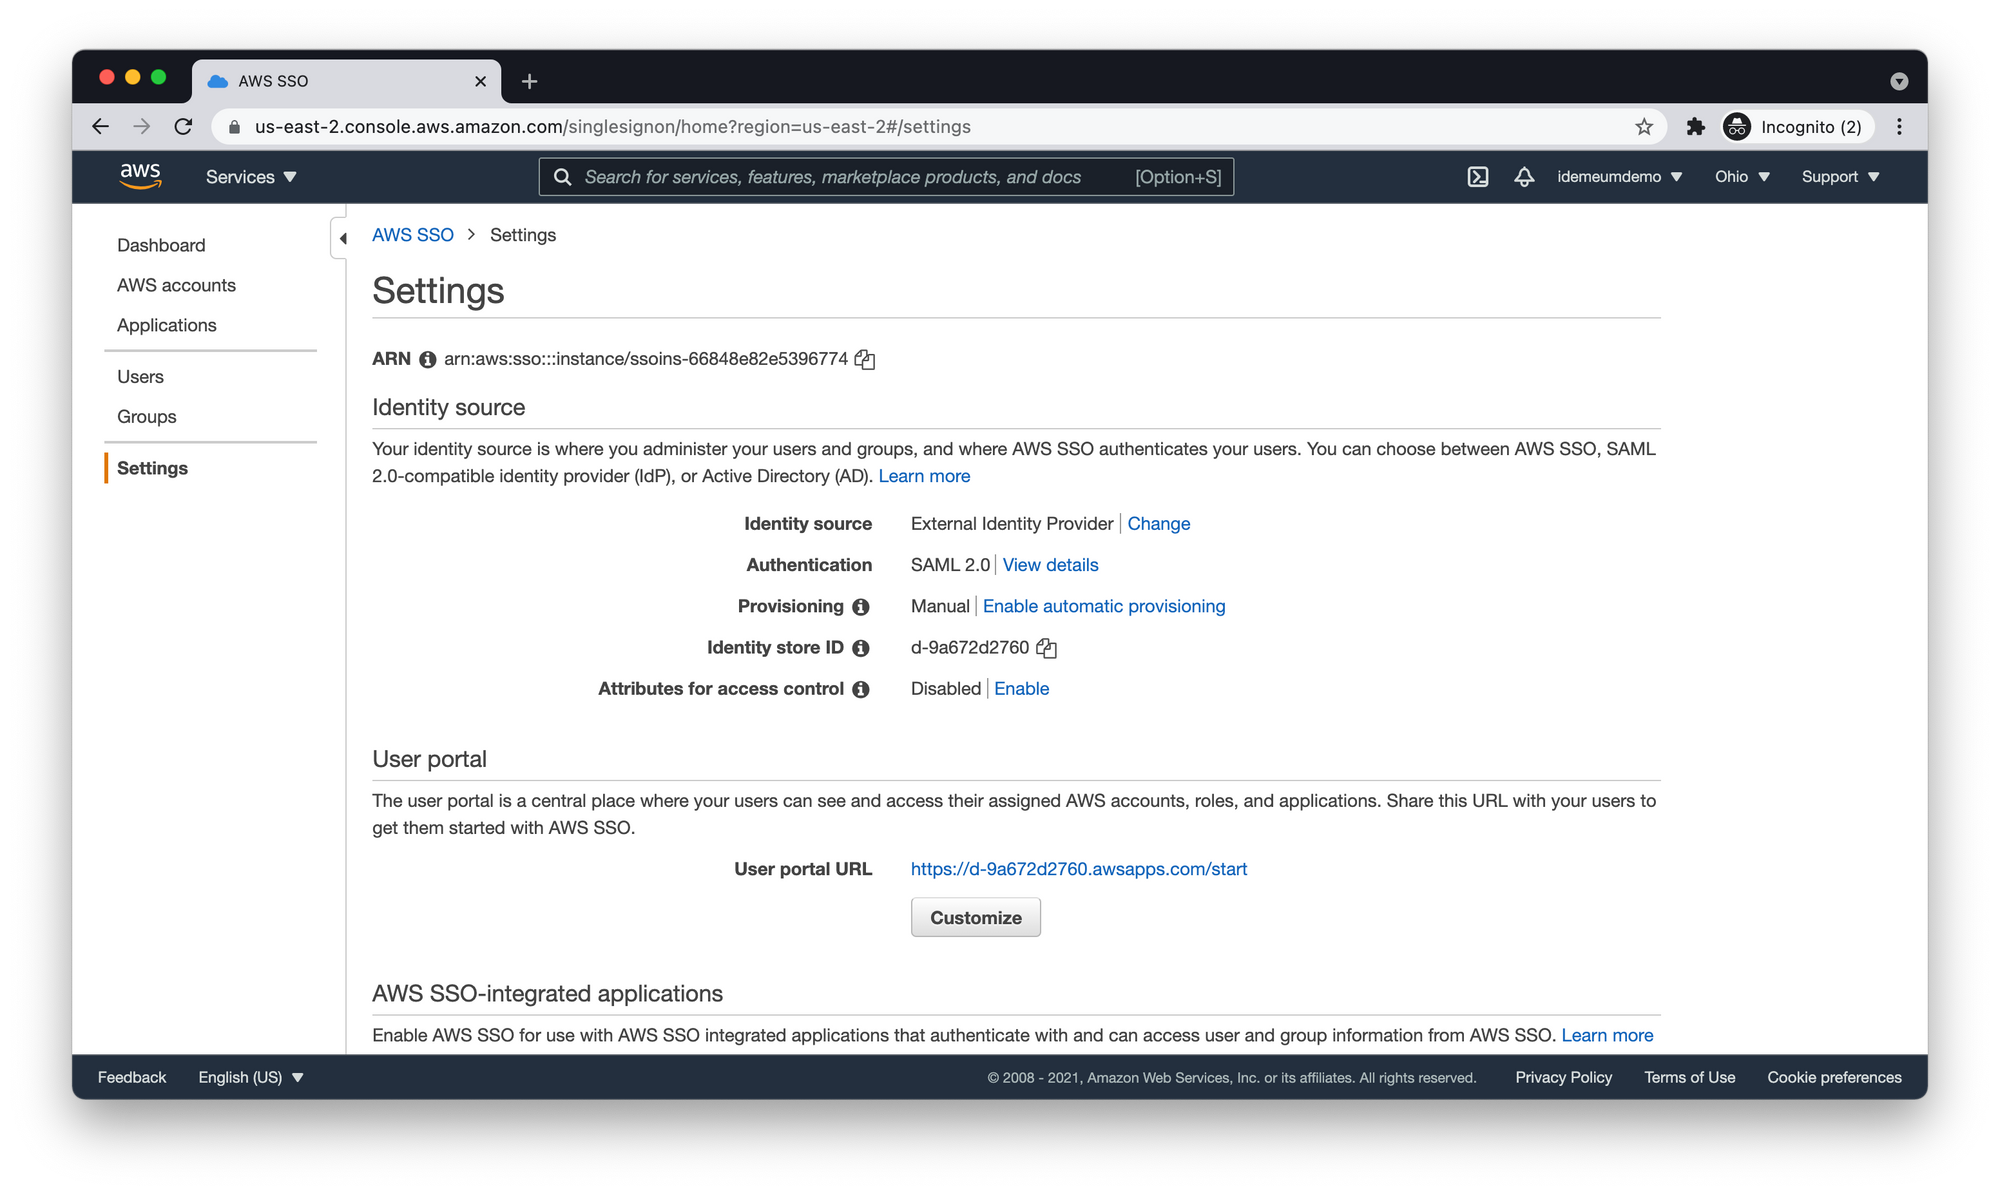
- Click Settings on the left menu
- Under Identity Source choose Change
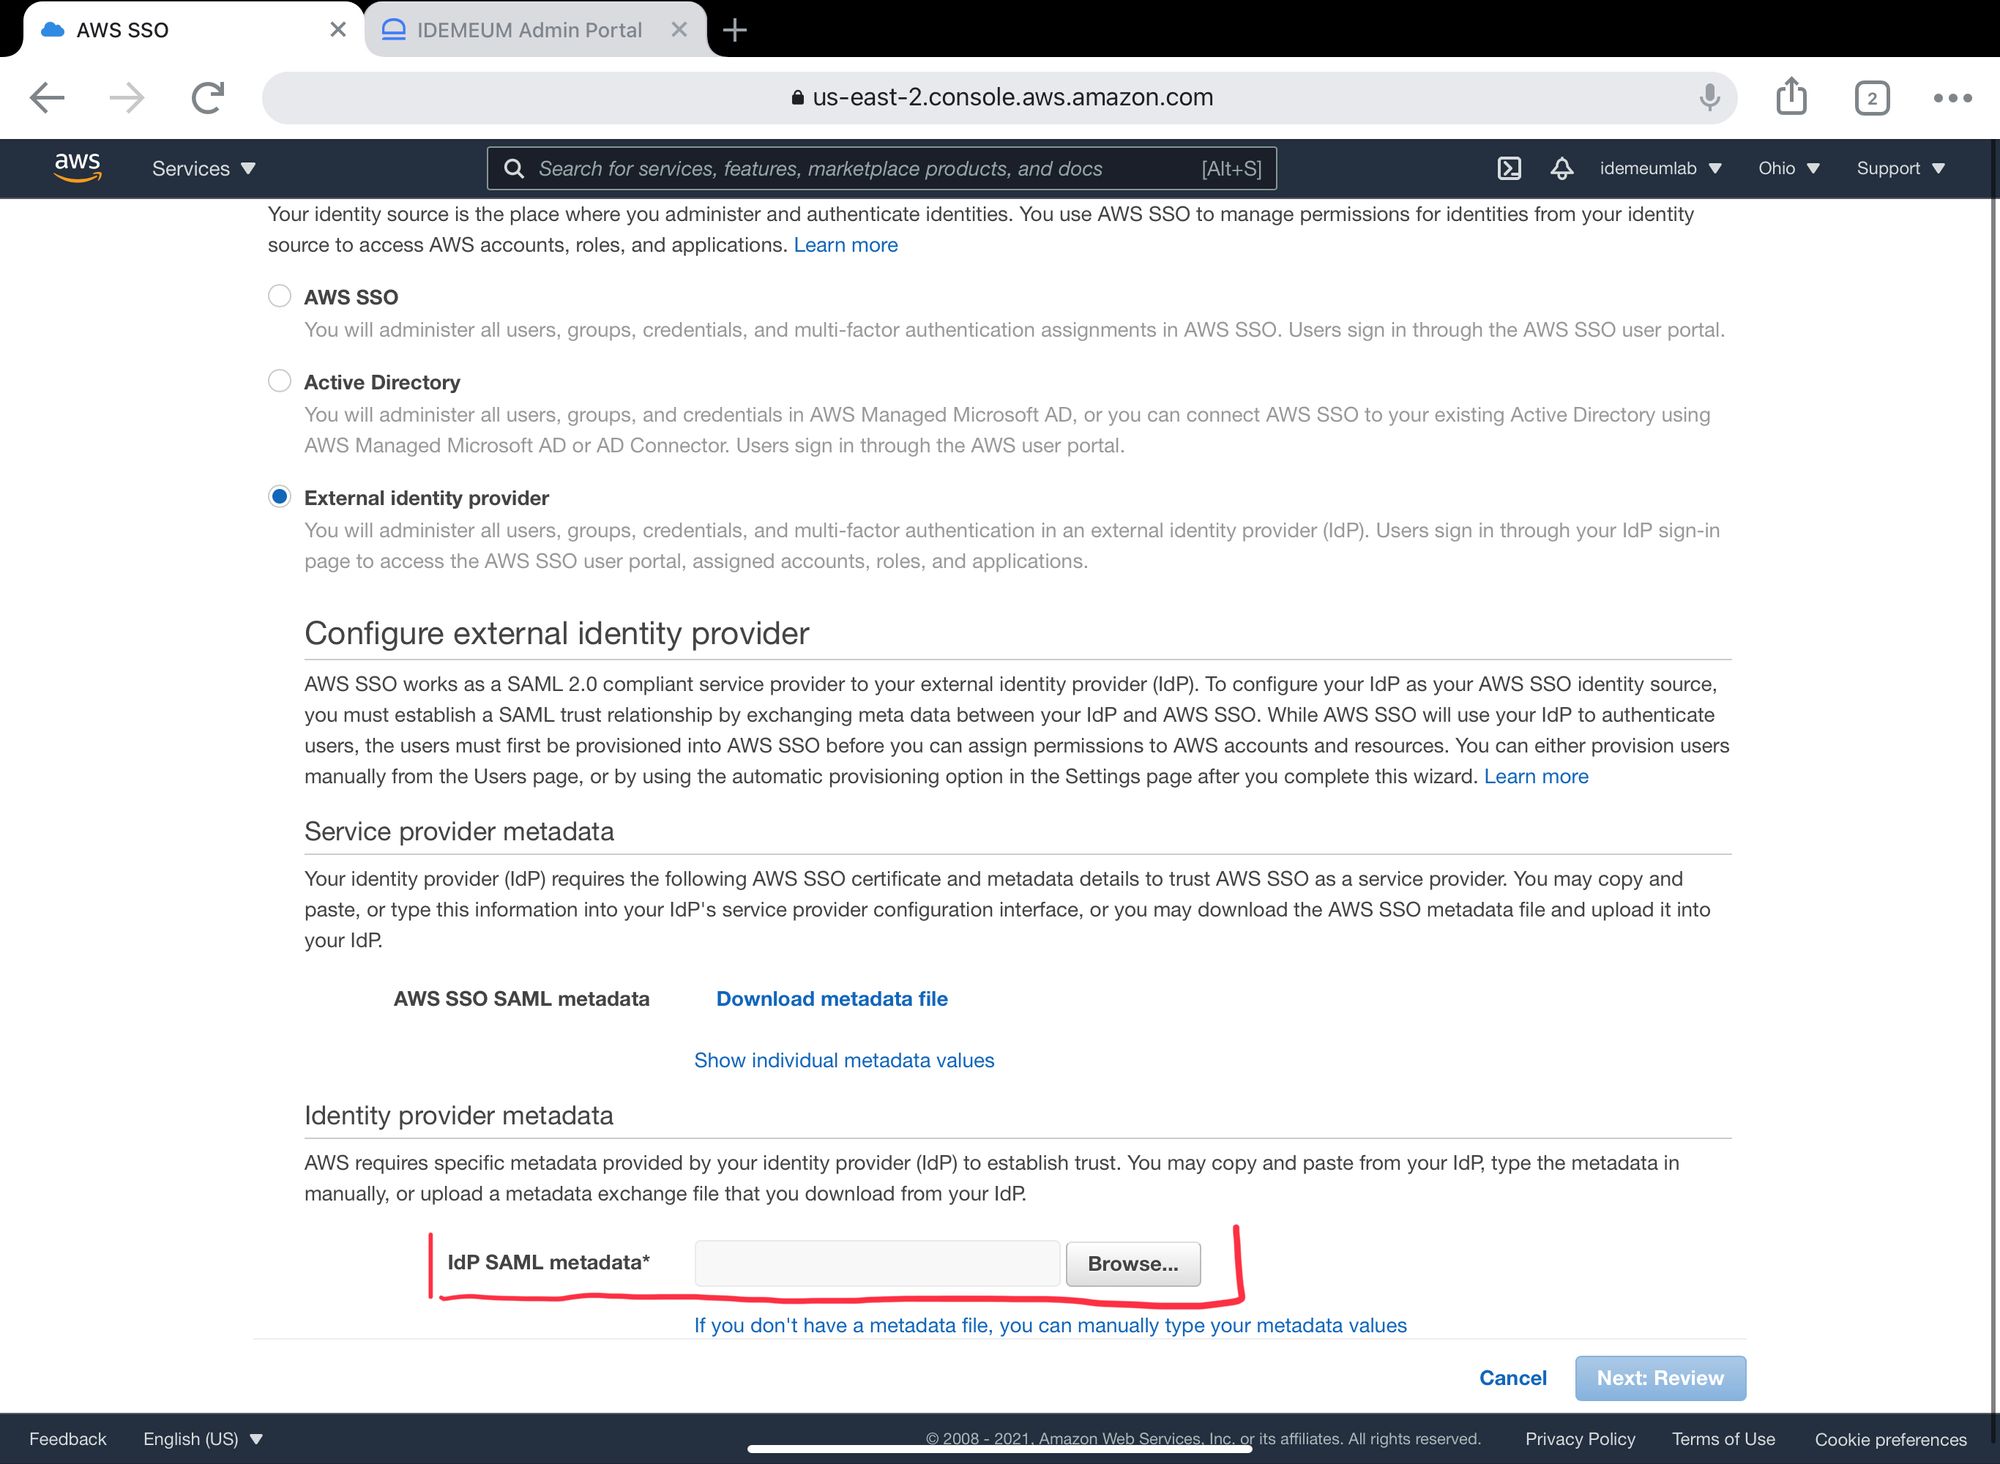
- Select External Identity Provider
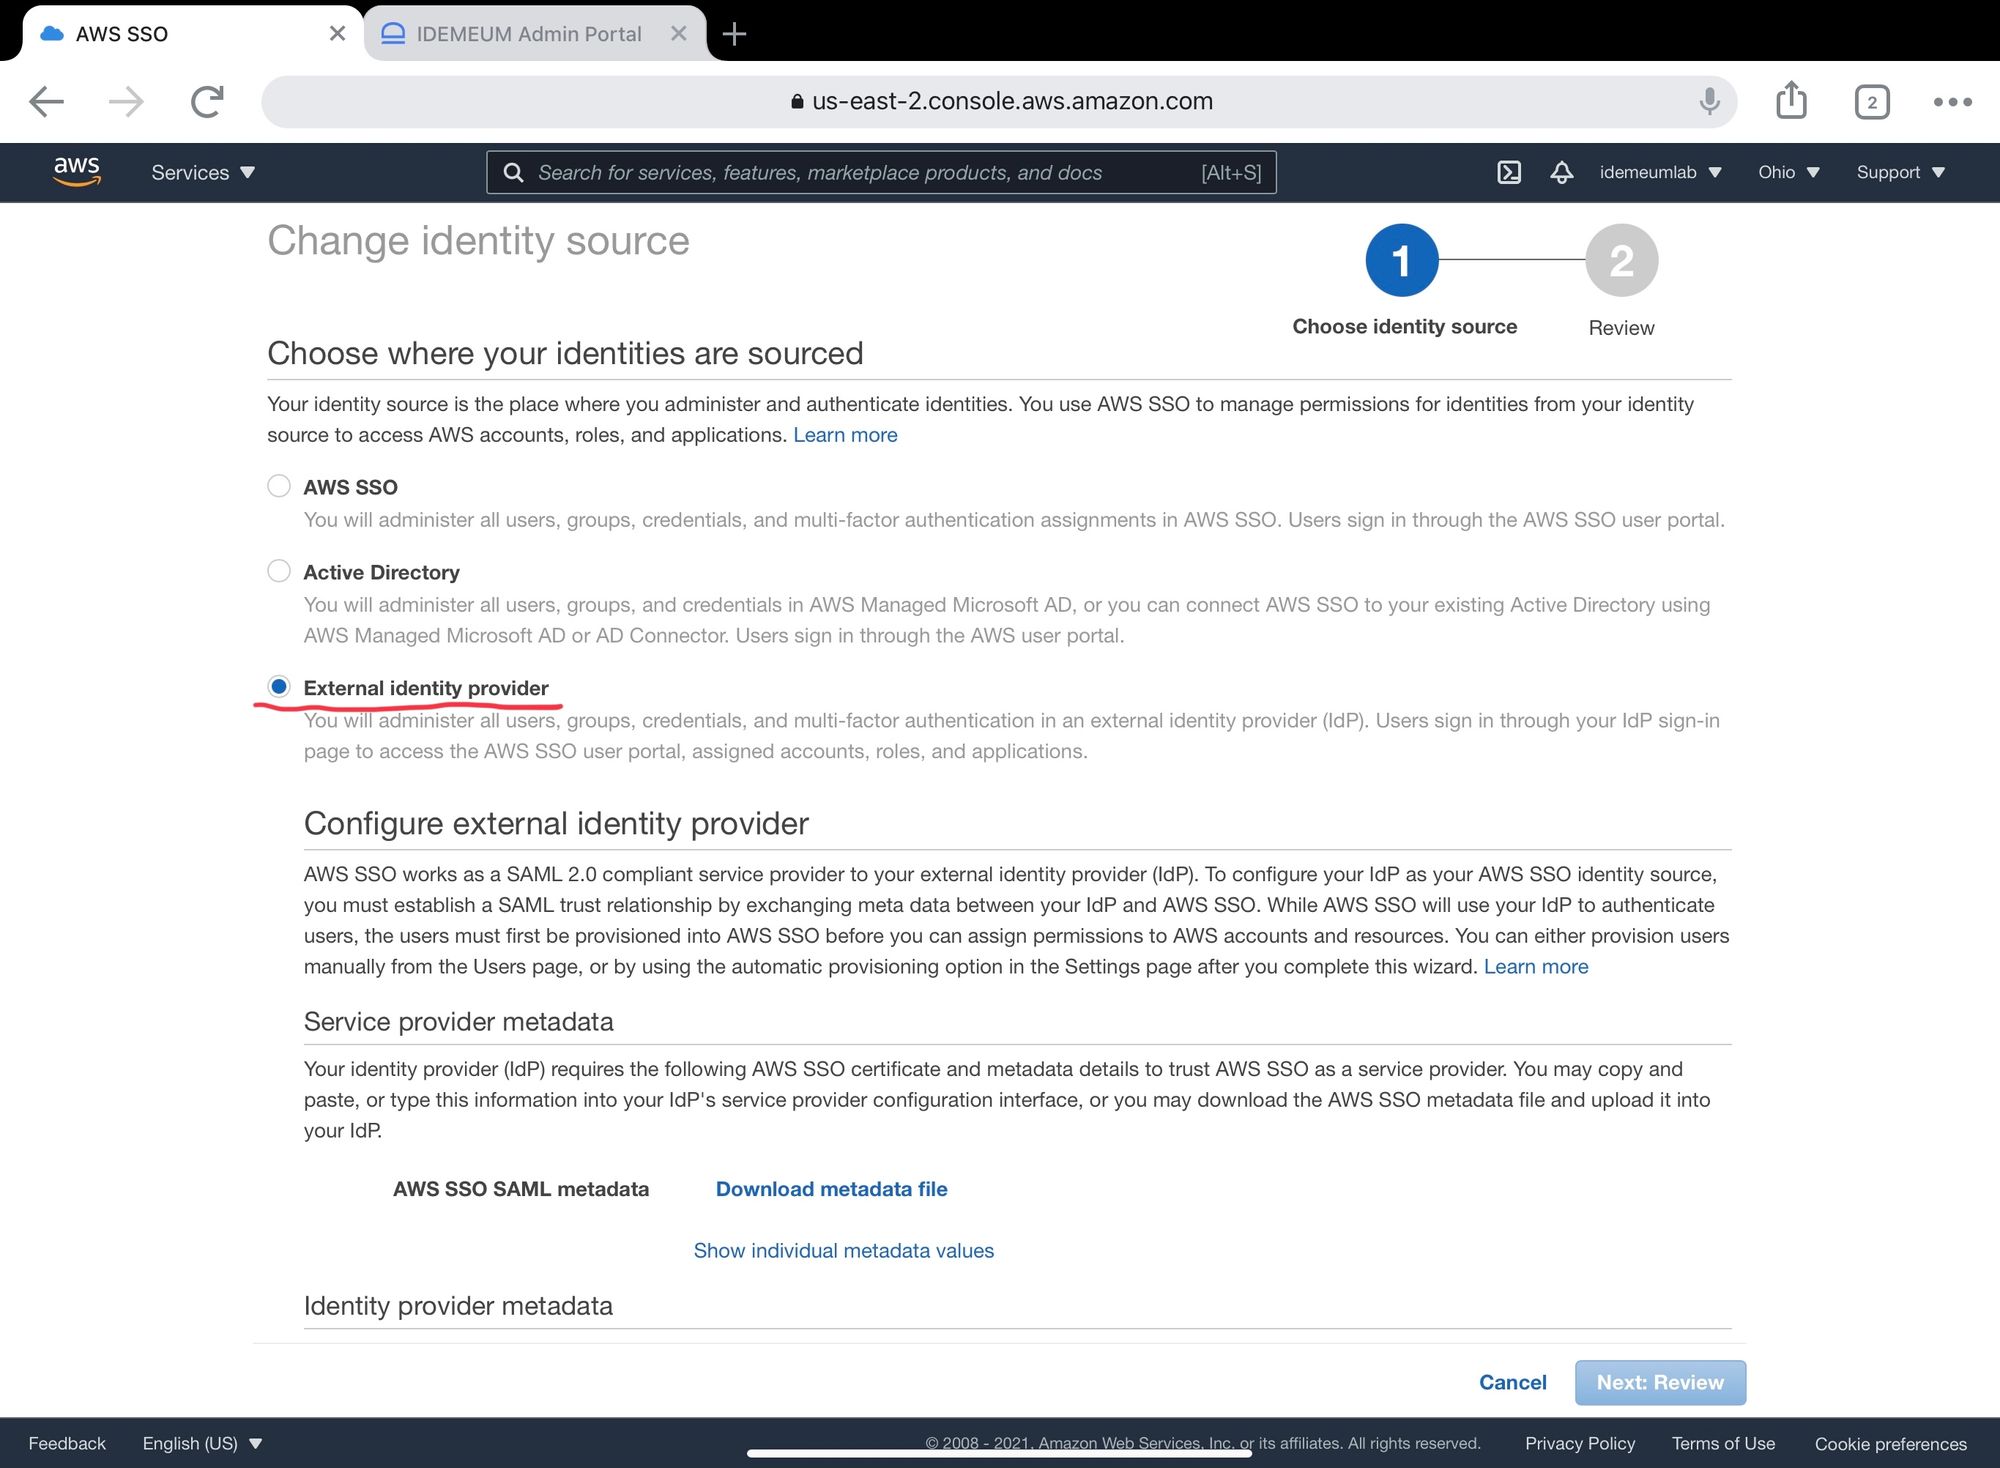
- Scroll down and click Download metadata file. You will need that later on for configuring AWS in idemeum.
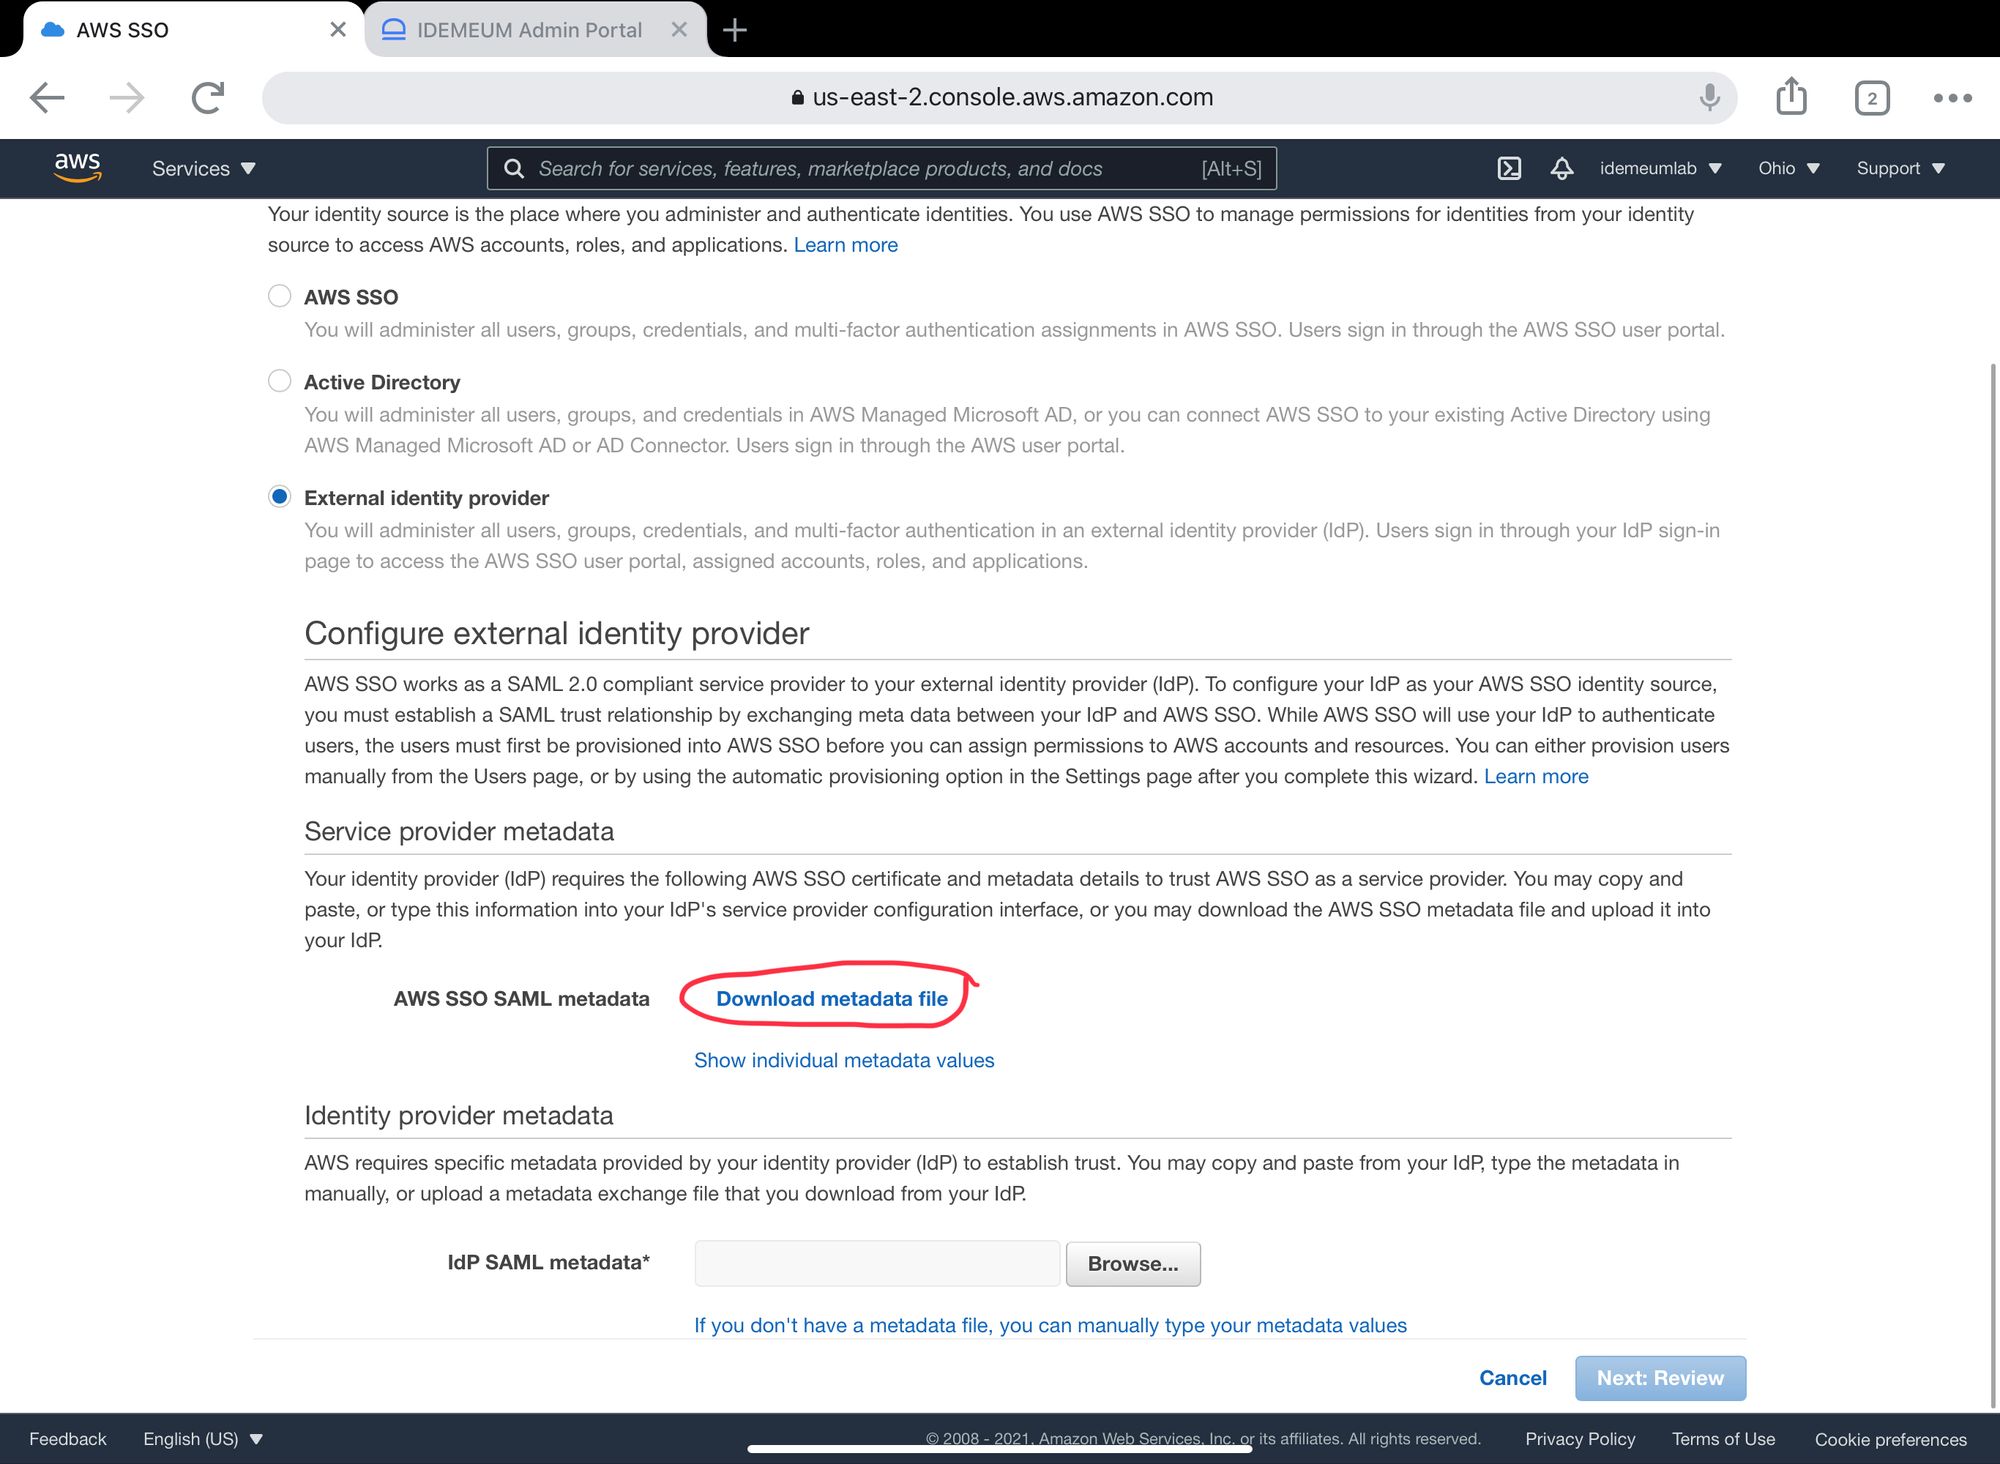
- Upload idemeum metadata file that you obtained in the prerequisites. You will need to upload it to IdP SAML metadata form.
- Click Next: Review
- Type ACCEPT and click Change identity source
Configure idemeum for SSO
- Navigate to
https://[your domain].idemeum.com/adminportal - Click Applications in the left menu
- Search for Amazon Web Services application and click Add App
- Click SAML at the top navigation menu
- Paste the AWS metadata file that you downloaded in the previous section.
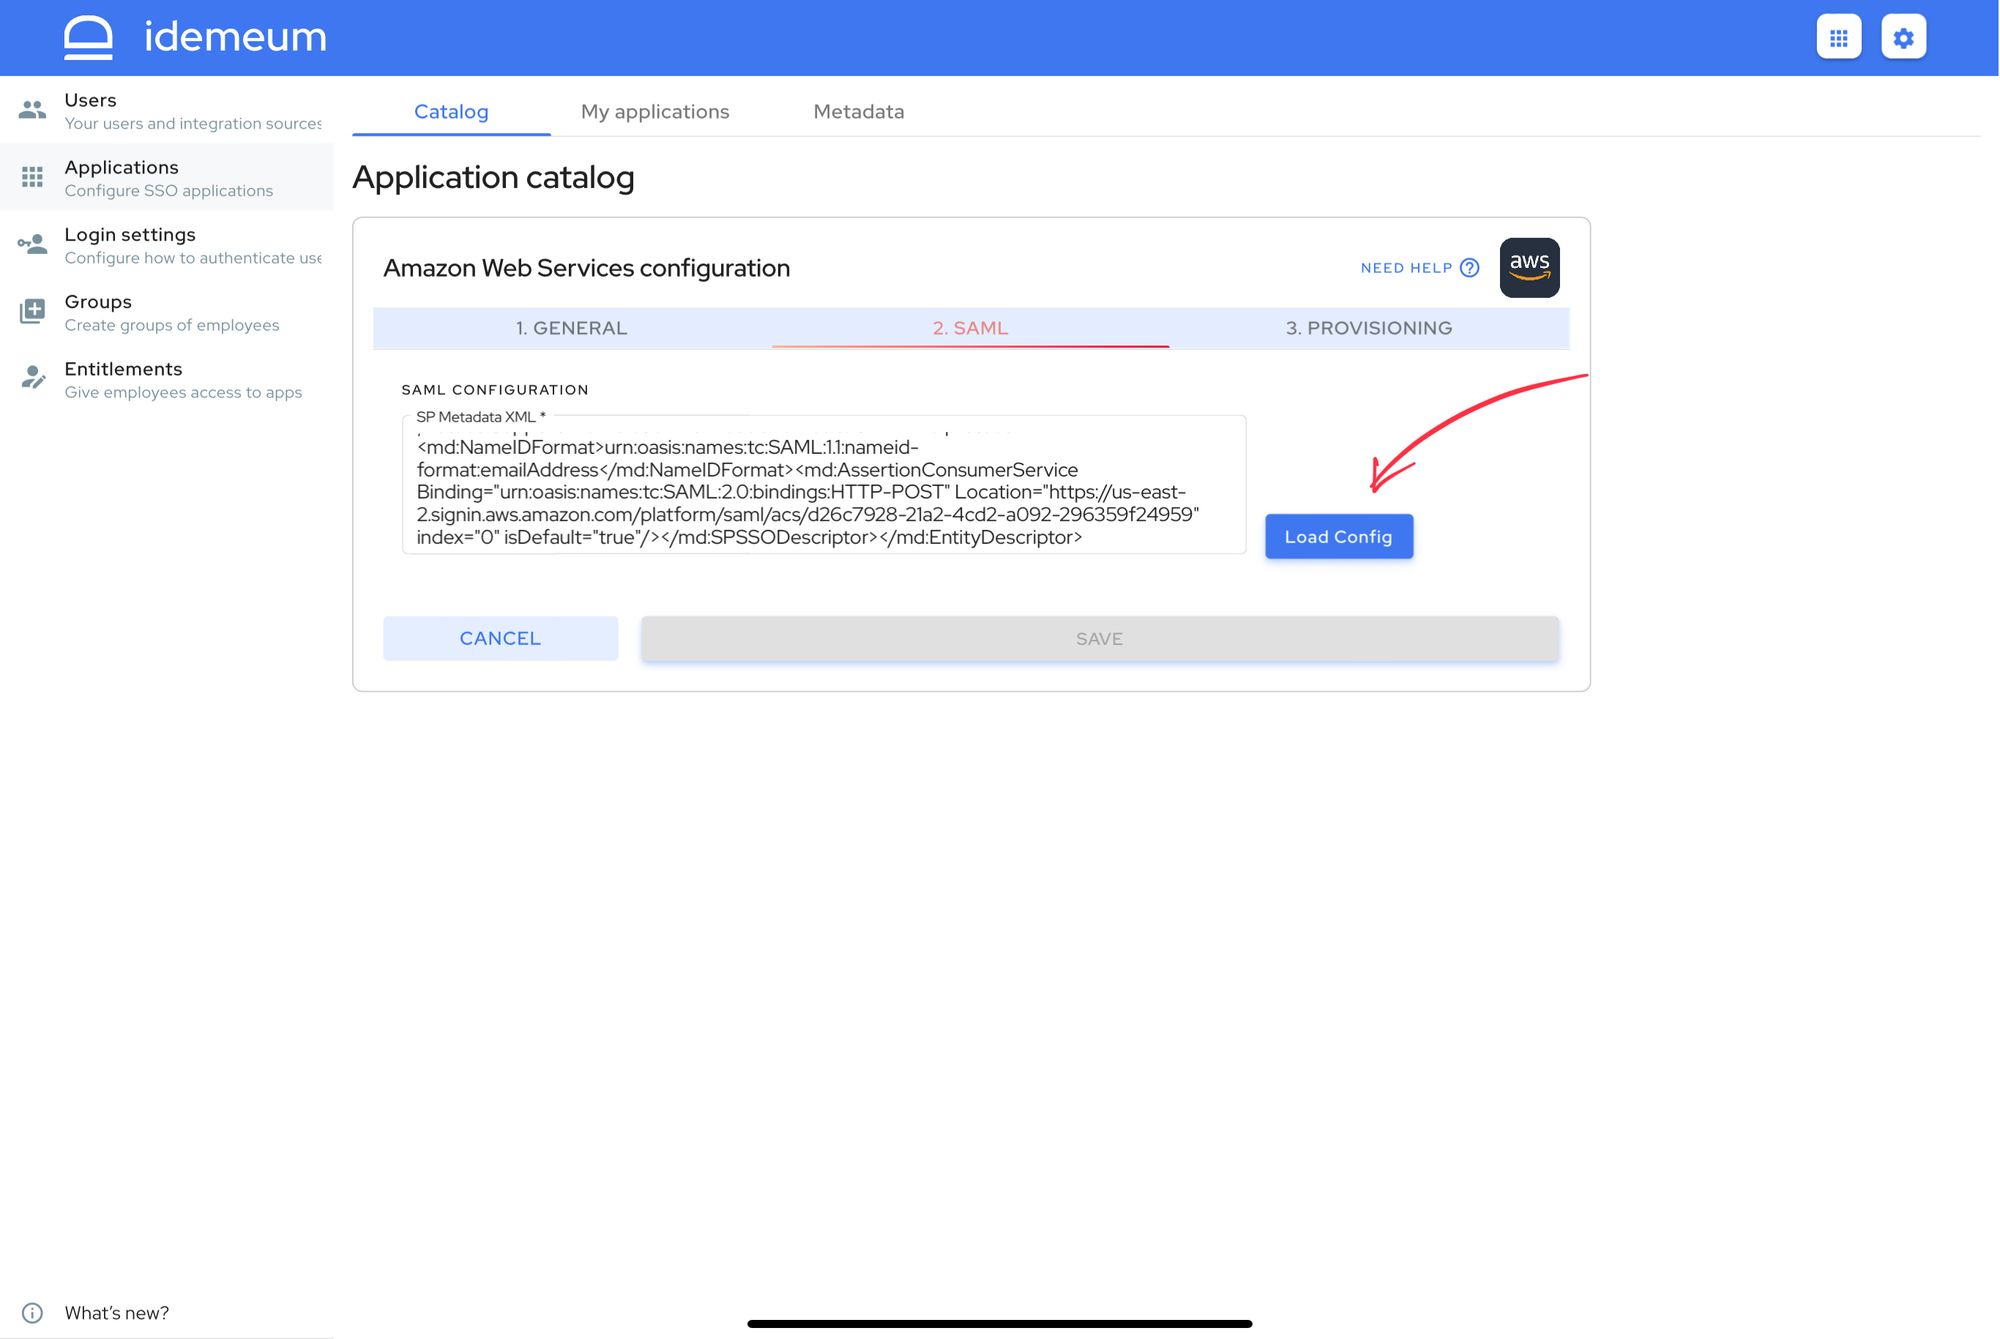
- Click Load Config. Once you do, you will be redirected to SAML configuration screen and all required values will be populated.
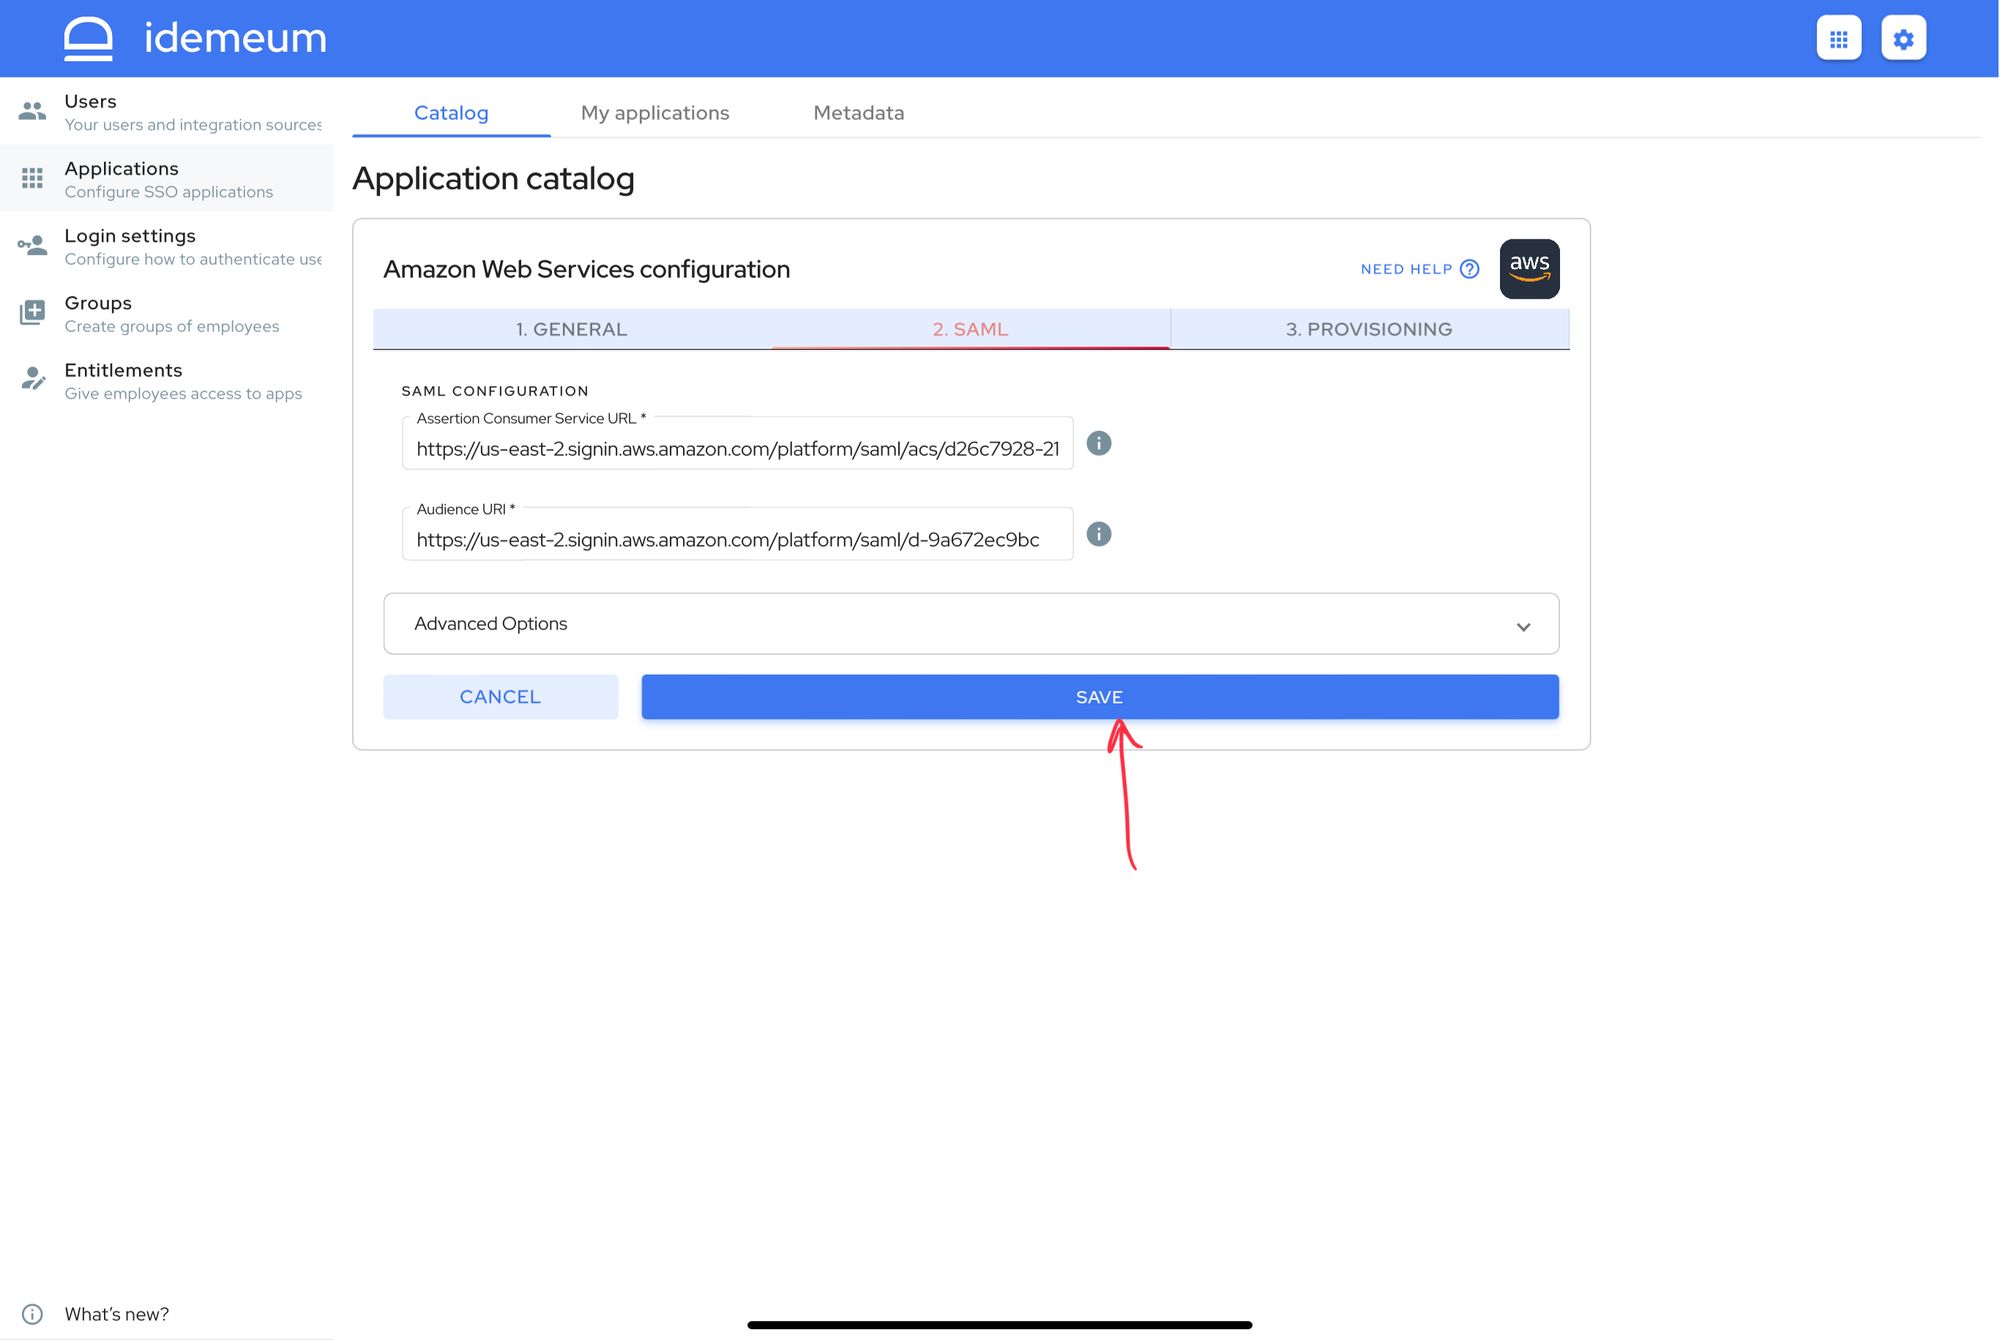
- Click SAVE to save SAML SSO configuration
Automated provisioning with SCIM
Enable SCIM provisioning in AWS
Make sure you configured SAML SSO before proceeding with SCIM configuration.
- Navigate to your AWS Management Console
- Search and access AWS Single Sign-On (AWS) AWS service
- Click Settings
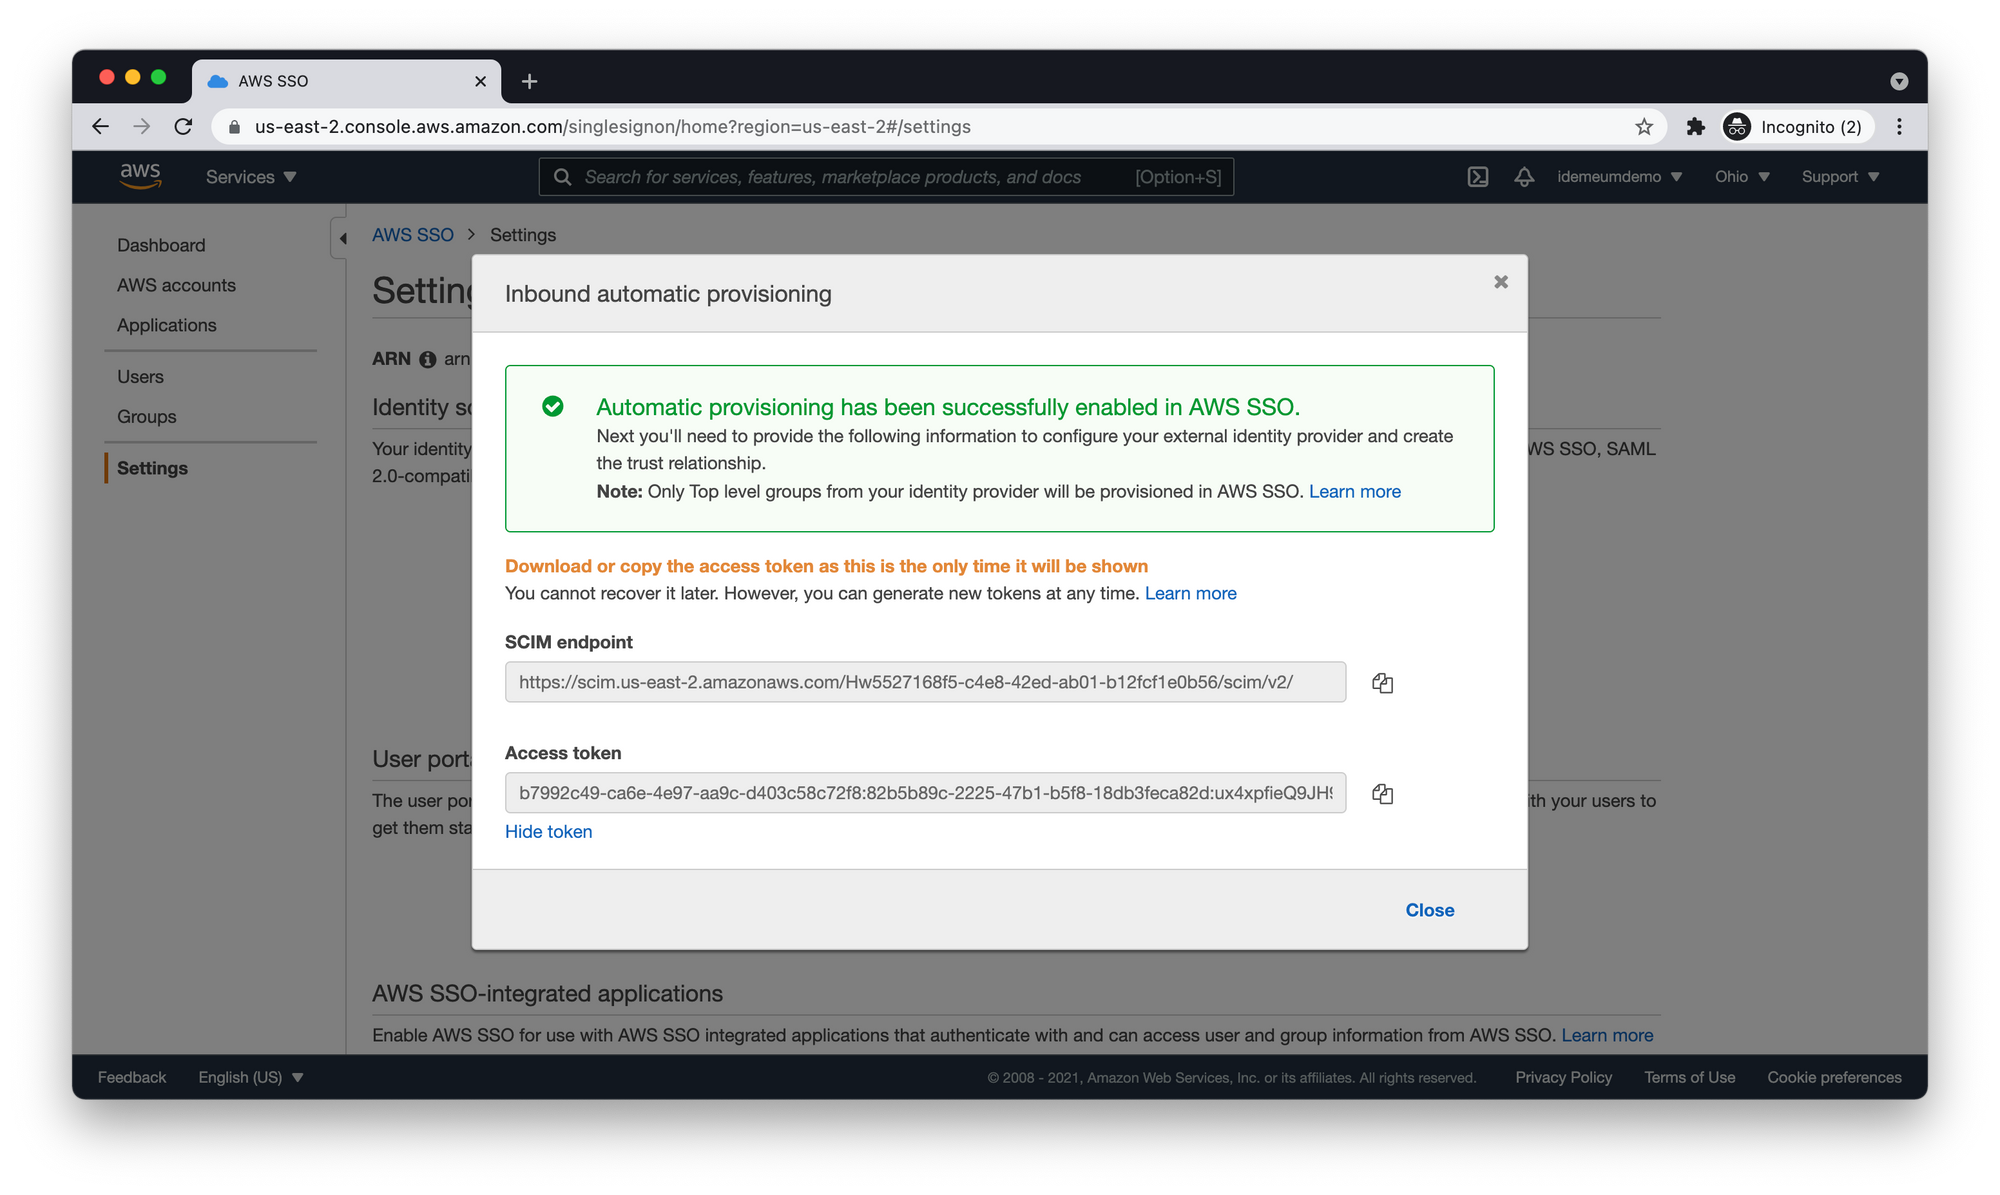
- Click Enable automatic provisioning in the provisioning section
- Take note of SCIM endpoint and Access token. You will need those parameters when configuring automated provisioning in idemeum.
Enable SCIM provisioning in idemeum
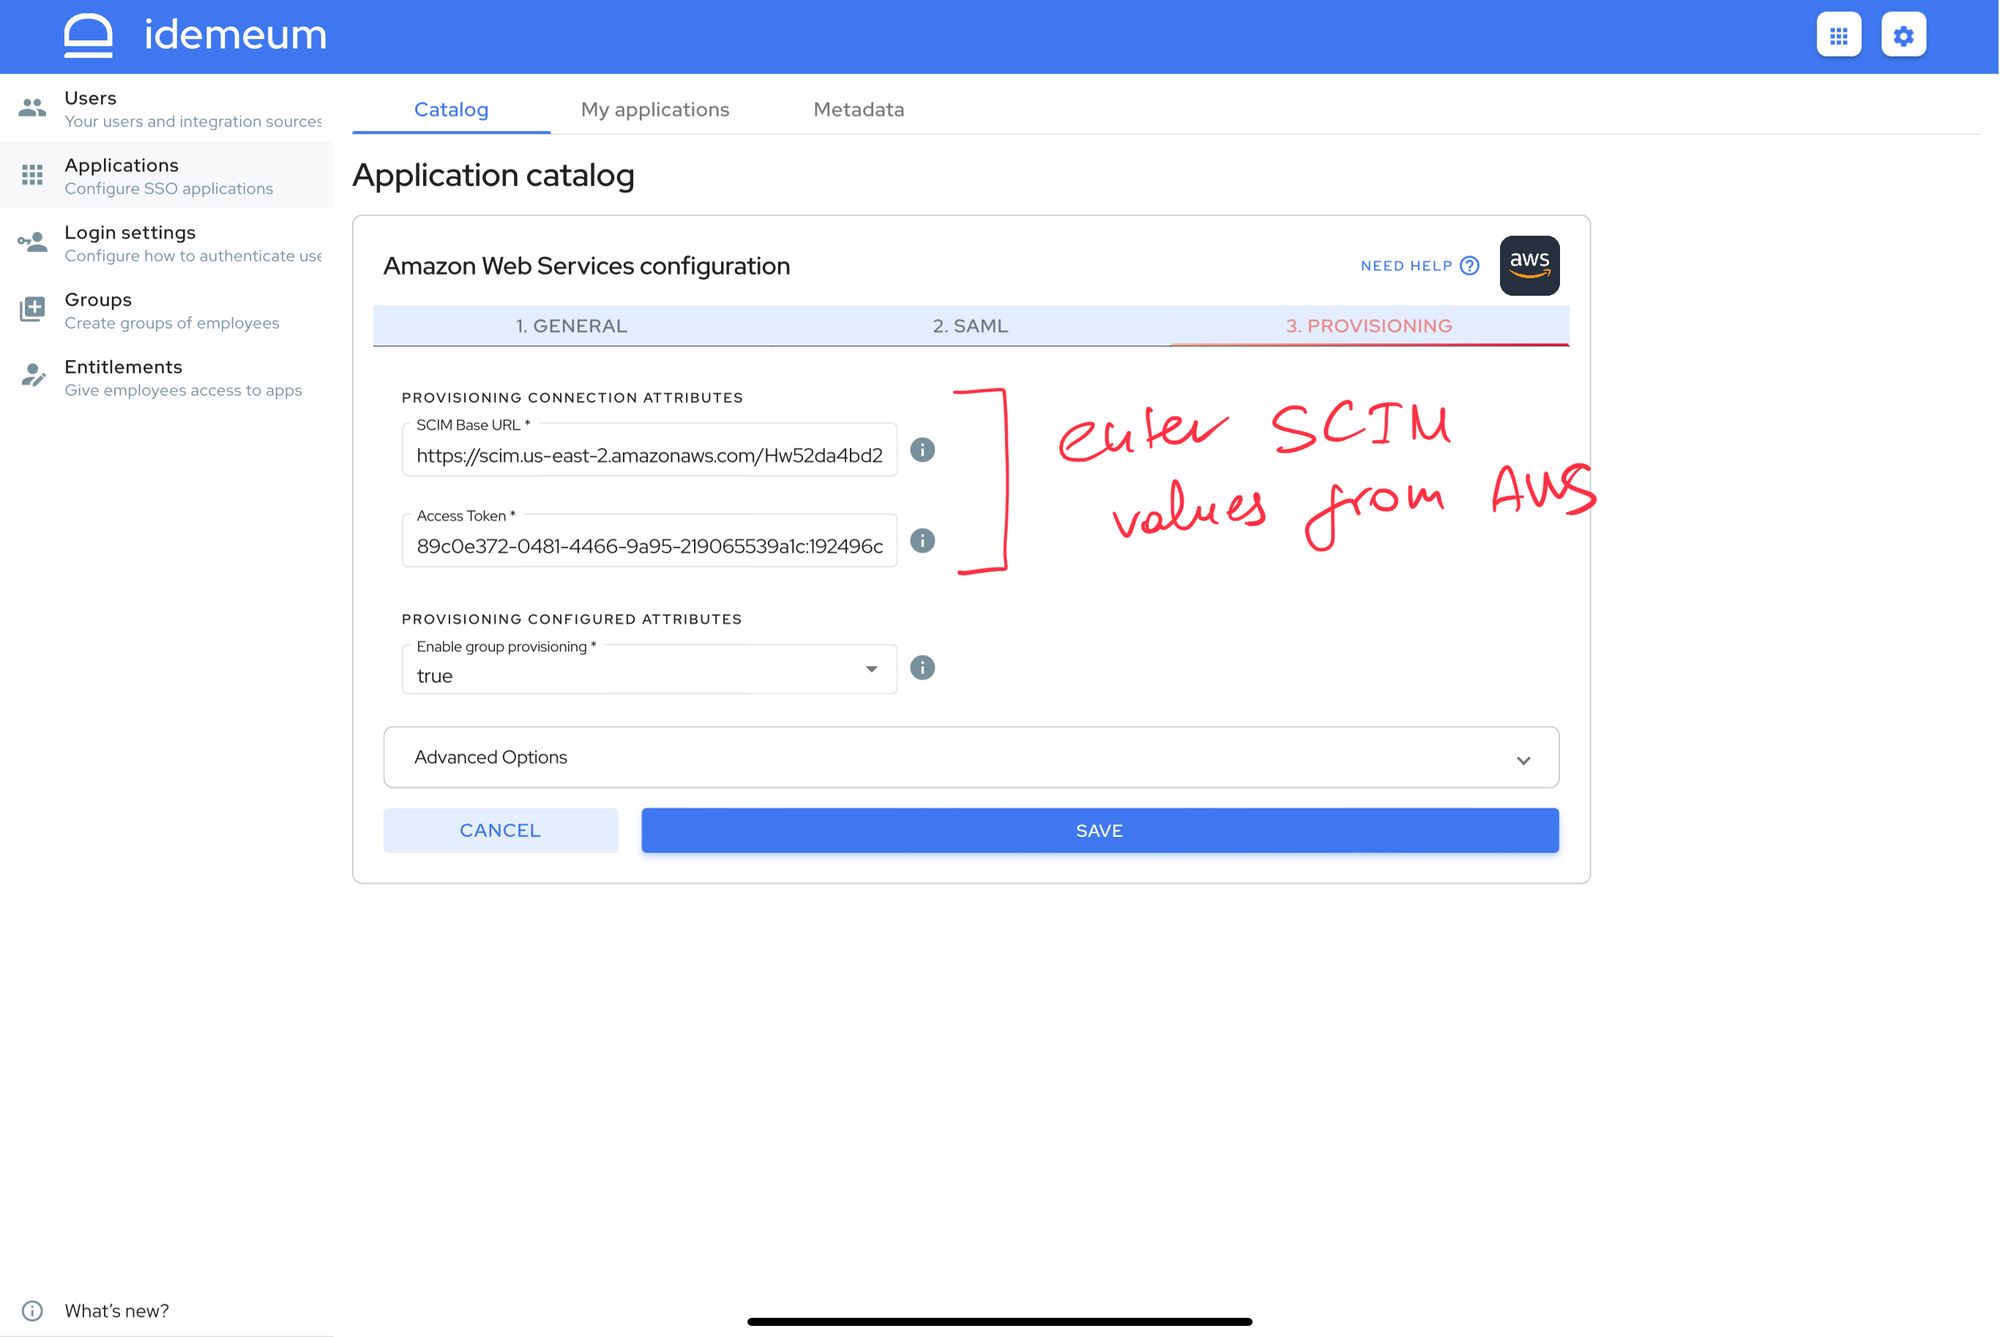
- Return to AWS application configuration in idemeum admin portal
- Click Provisioning section to configure SCIM provisioning with AWS. Populate SCIM Base URL and Access Token with the values you obtained in the previous section when enabling provisioning in AWS.
- The best way to provision users into AWS is with group provisioning enabled. idemeum will push your idemeum groups into AWS and assign users into appropriate groups so that they have access to necessary resources. Make sure you have group provisioning set to true.
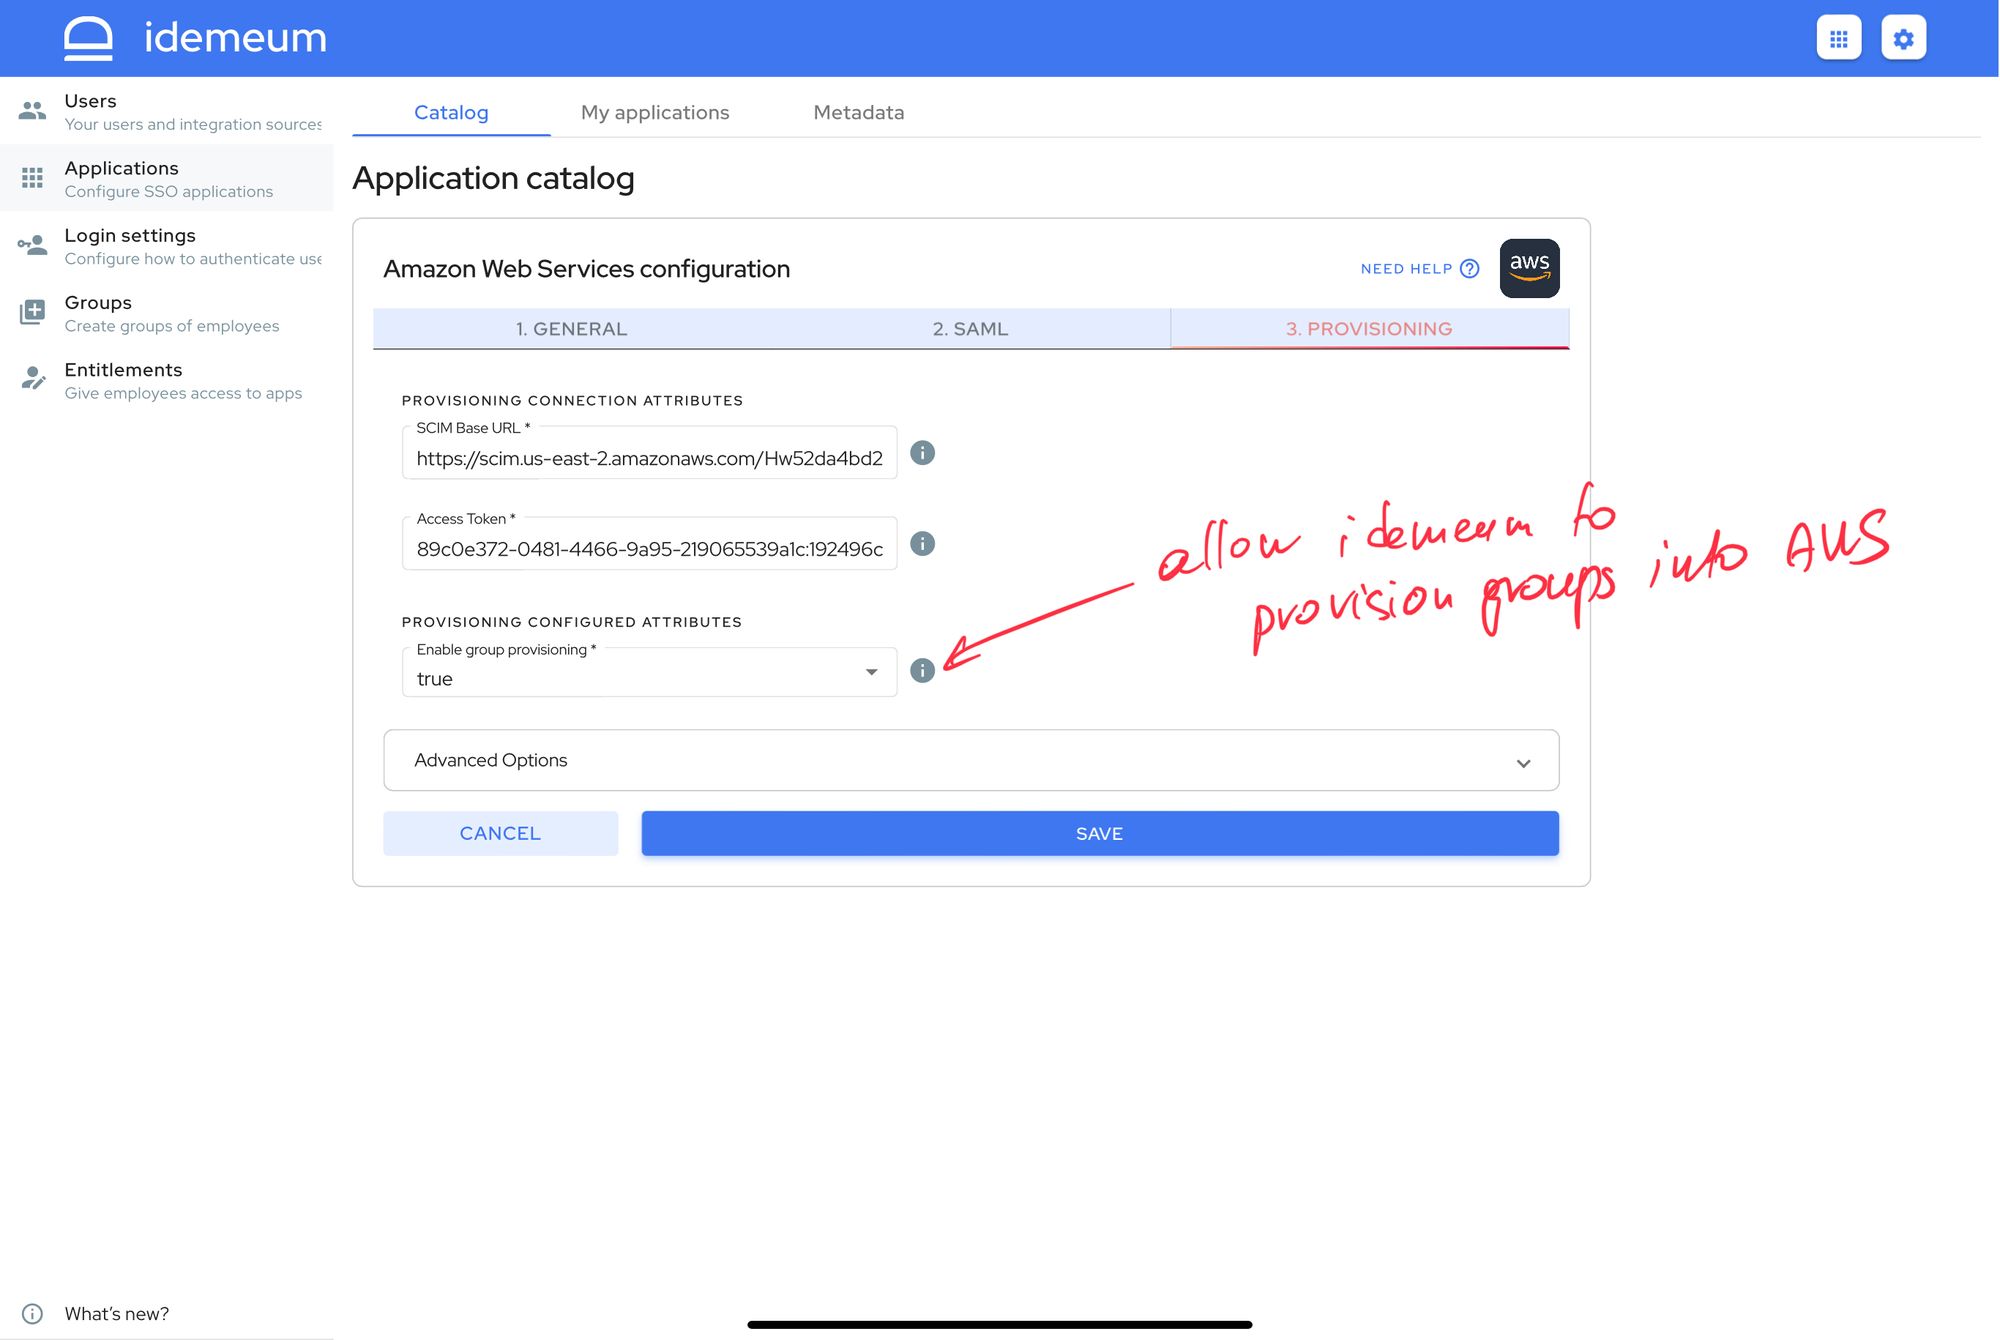
- Click Save to save provisioning configuration and complete setup
You can learn more about how idemeum handles group provisioning below.
 Nikolay Poturnak
Set up groups in AWS
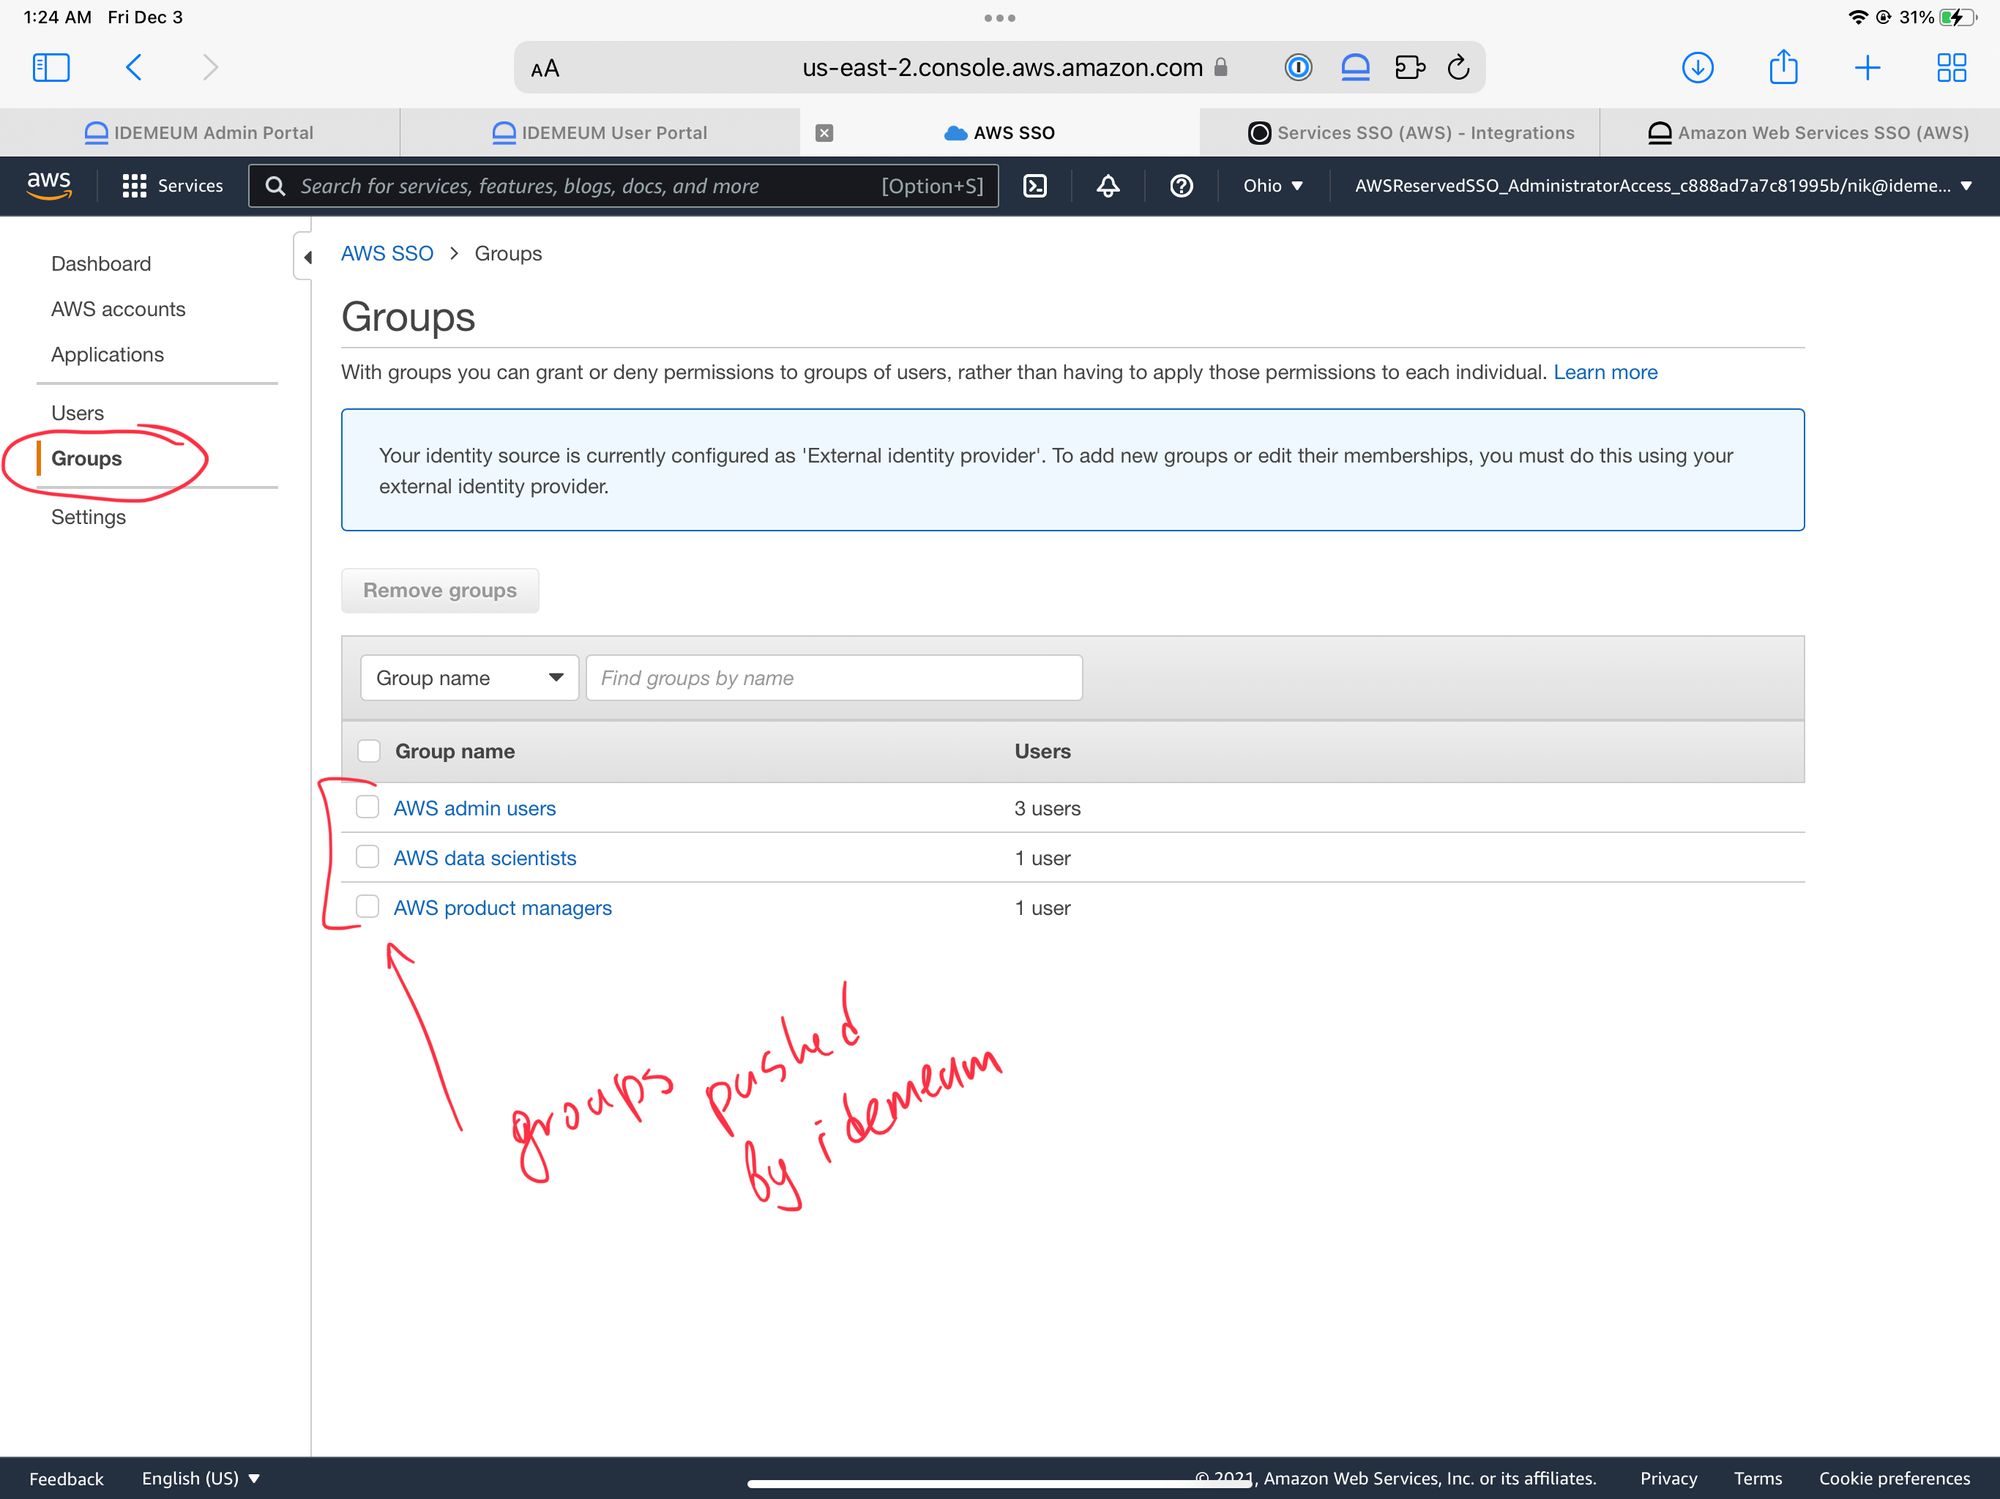
Once idemeum pushes groups into AWS, it will start provisioning users into those specific groups. Groups become very convenient way to manage what resources each of your users will have access to inside AWS.
For this purpose we will create permission sets in AWS and assign those permision sets to groups provisioined by idemeum.
- Once idemeum pushed groups into AWS they will appear in your Groups section for AWS SSO configuration
- Now you will need to assign Permission sets to these groups
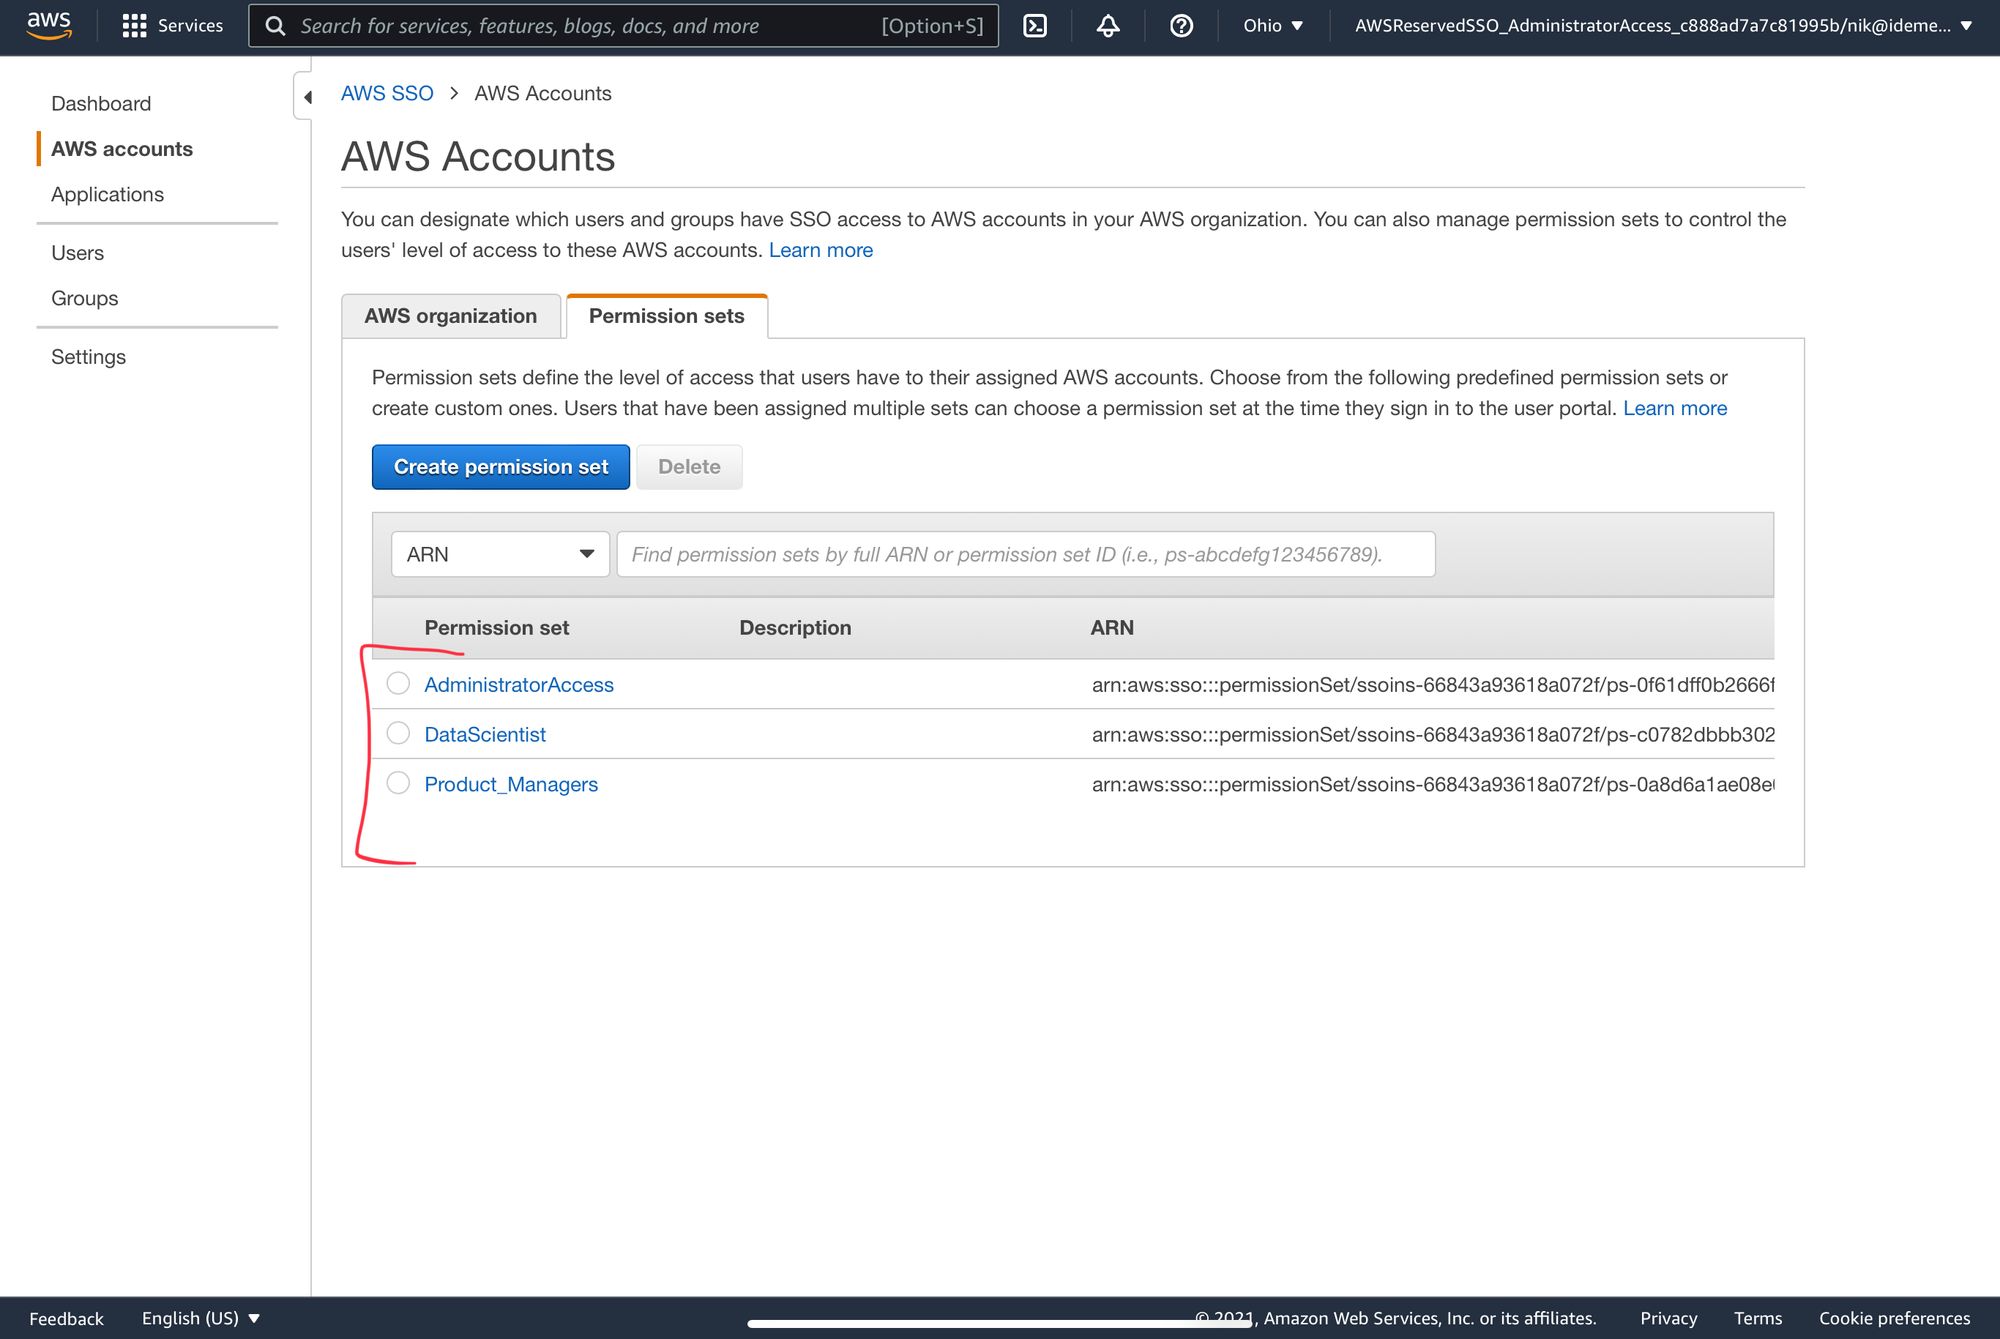
- Navigate to AWS accounts -> Pemission sets
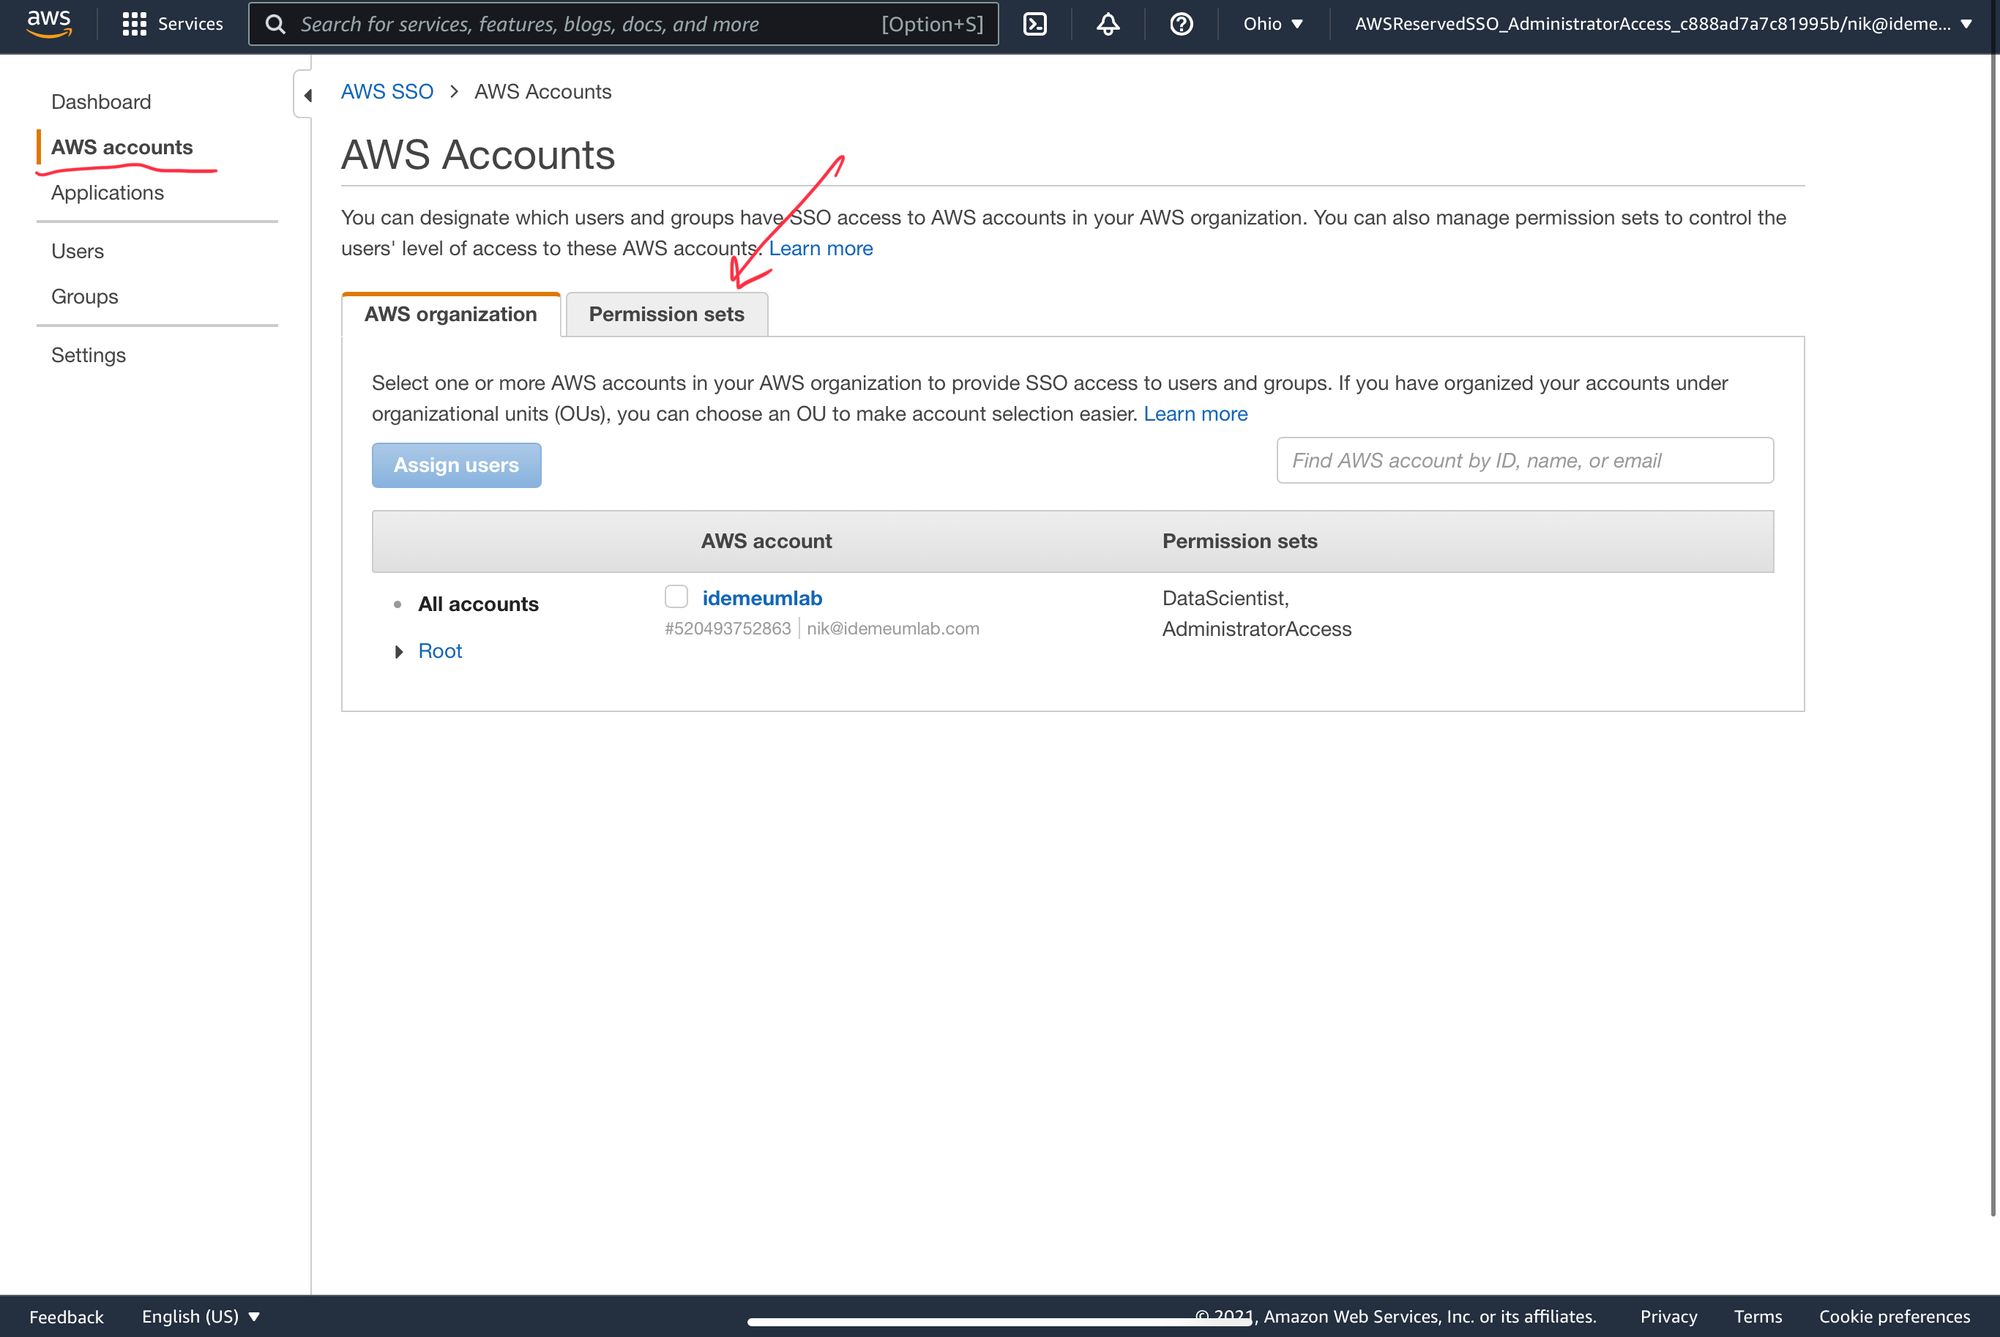
- Now you can create permission sets based on user roles. You can choose from preconfigured permission sets or create custom ones.
- Now you will need to assign these permission sets to your groups. Navigate to AWS accounts -> AWS organization and click on your accout name
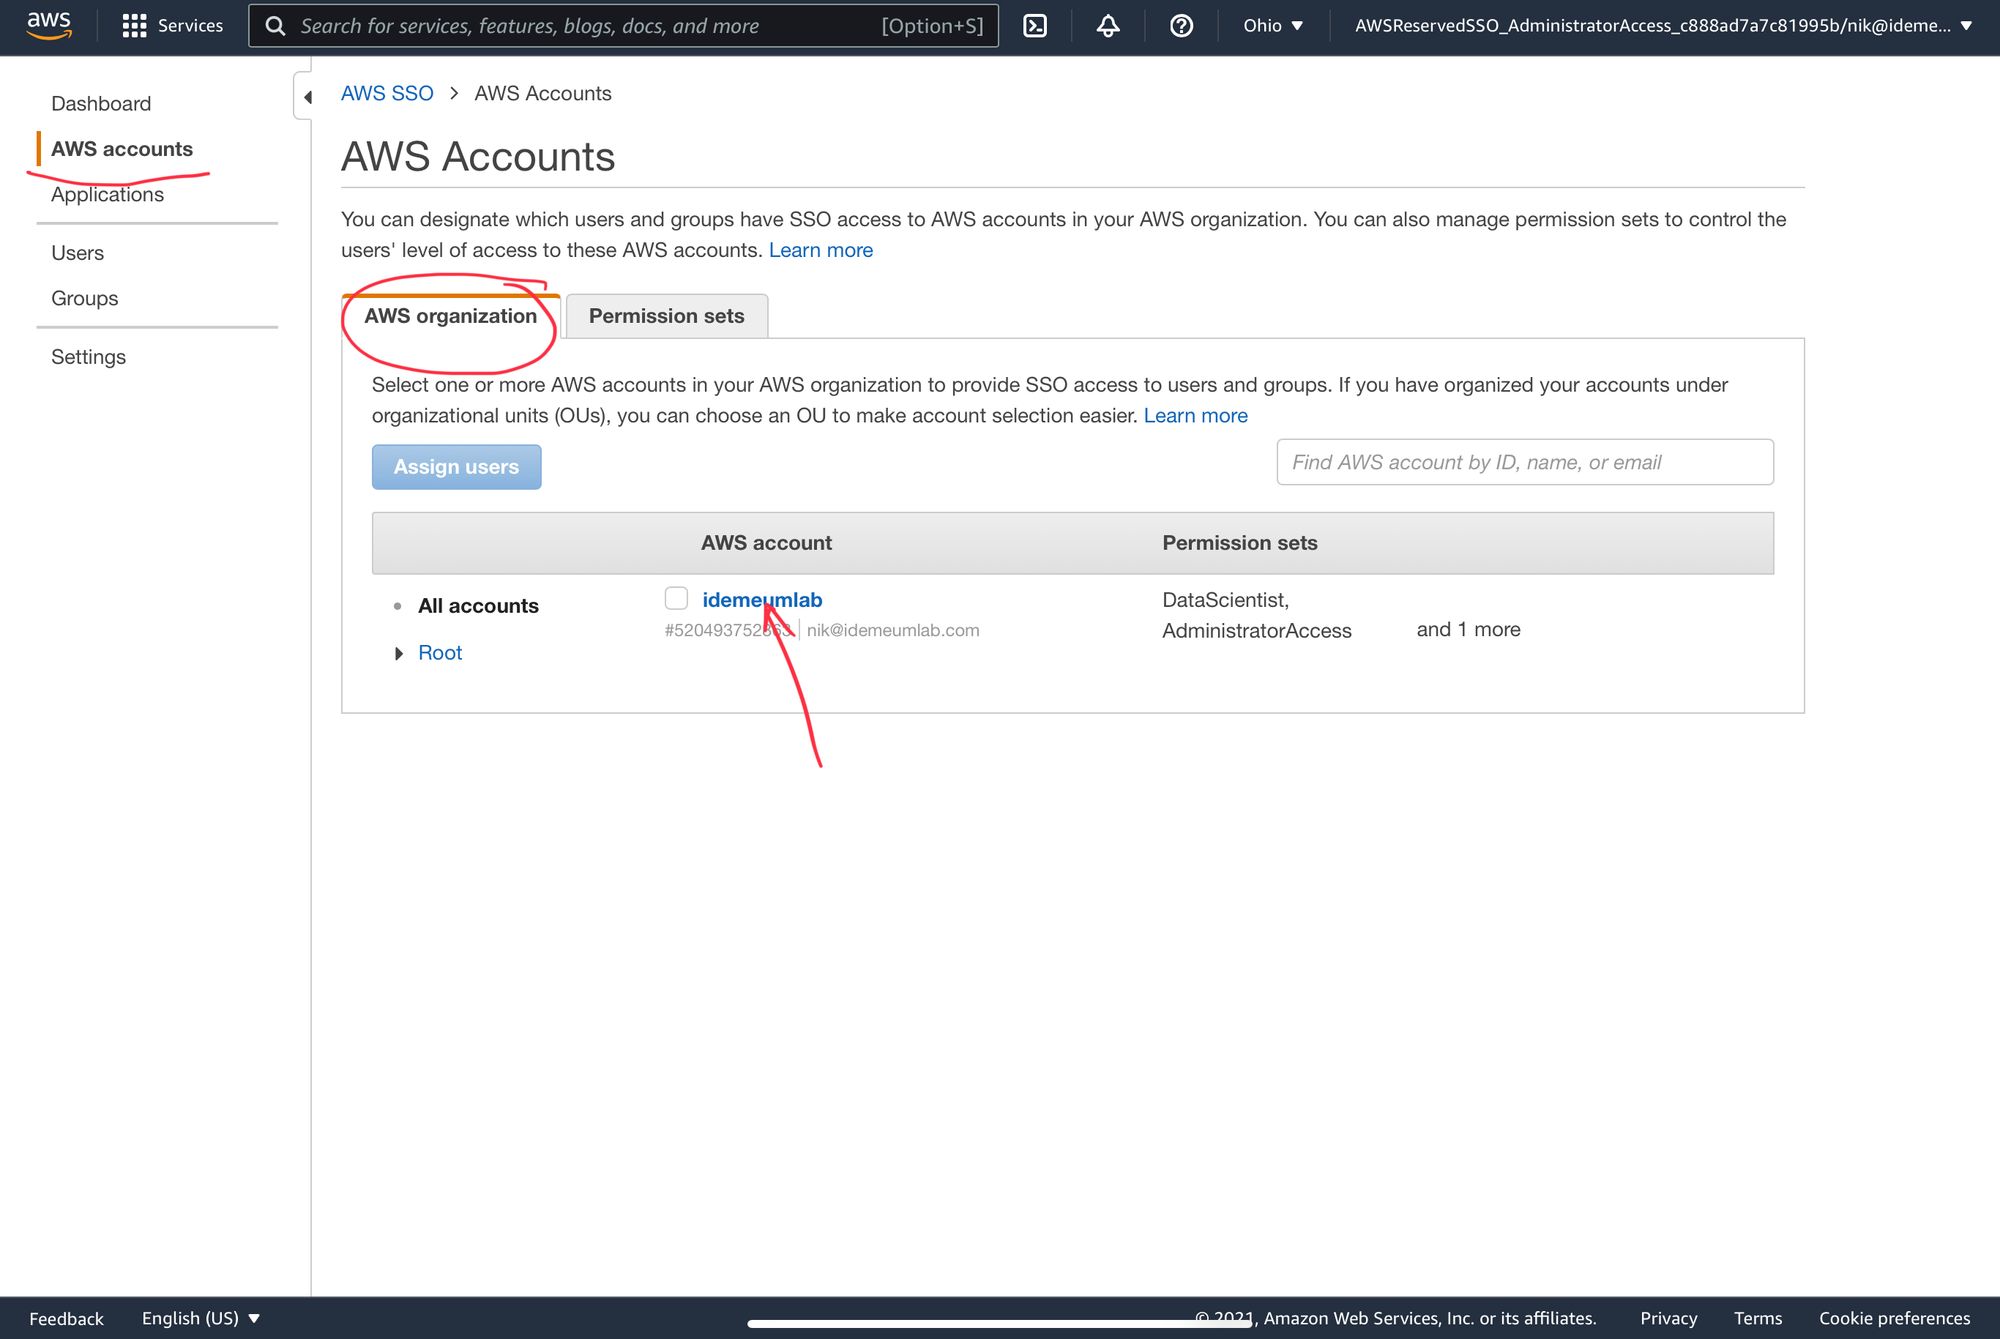
- Now you can click Assign users then choose Groups and assign persmission sets to your groups
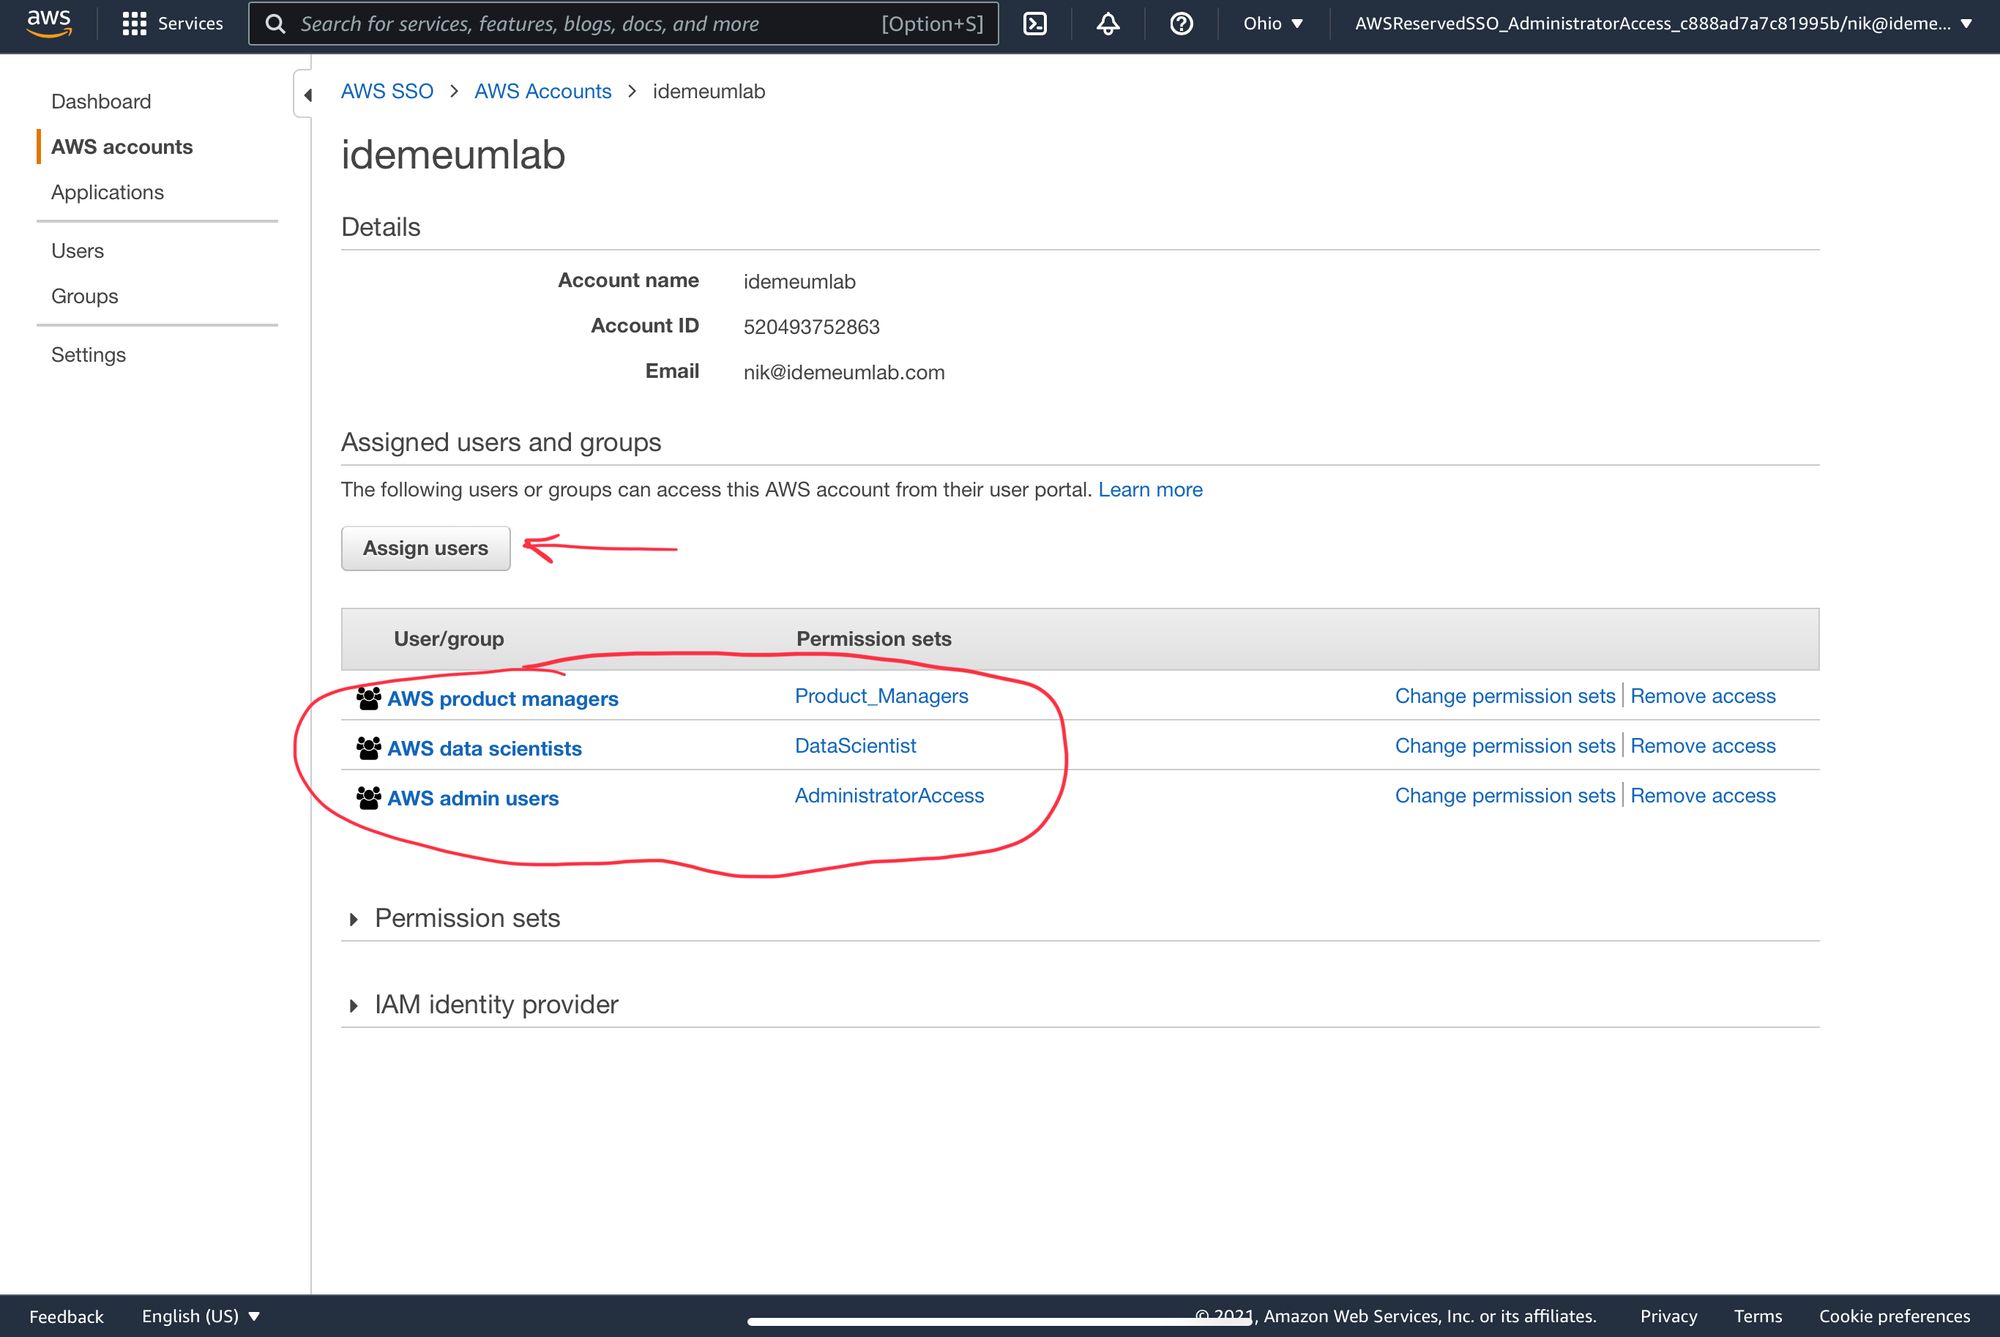
- Once you are done every user provisioned by idemeum will be assigned a permission set automatically based on your configuration.
Application entitlements
Before users can access applications you need to make sure you entitle applications to them. In idemeum admin portal navigate to Entitlements section to assign applications to your employees.
You can learn more about idemeum entitlements below.
Nikolay Poturnak
SSO login flows
AWS supports only IDP Initiated Flow for SSO.
IDP Initiated flow
With this flow users first navigate to idemeum user catalog and then click on AWS icon to launch application.