
Capabilities overview
We can integrate Meraki Wi-Fi with idemeum Cloud Radius infrastructure. When users connect to company Wi-Fi, they can login with Passwordless MFA instead of typing username and password.
In this integration guide, we will be setting up idemeum Cloud Radius and connecting it with Meraki Wi-Fi deployment. You can learn more about idemeum Cloud Radius service here.
Set up idemeum integration
Create a Meraki Wi-Fi application
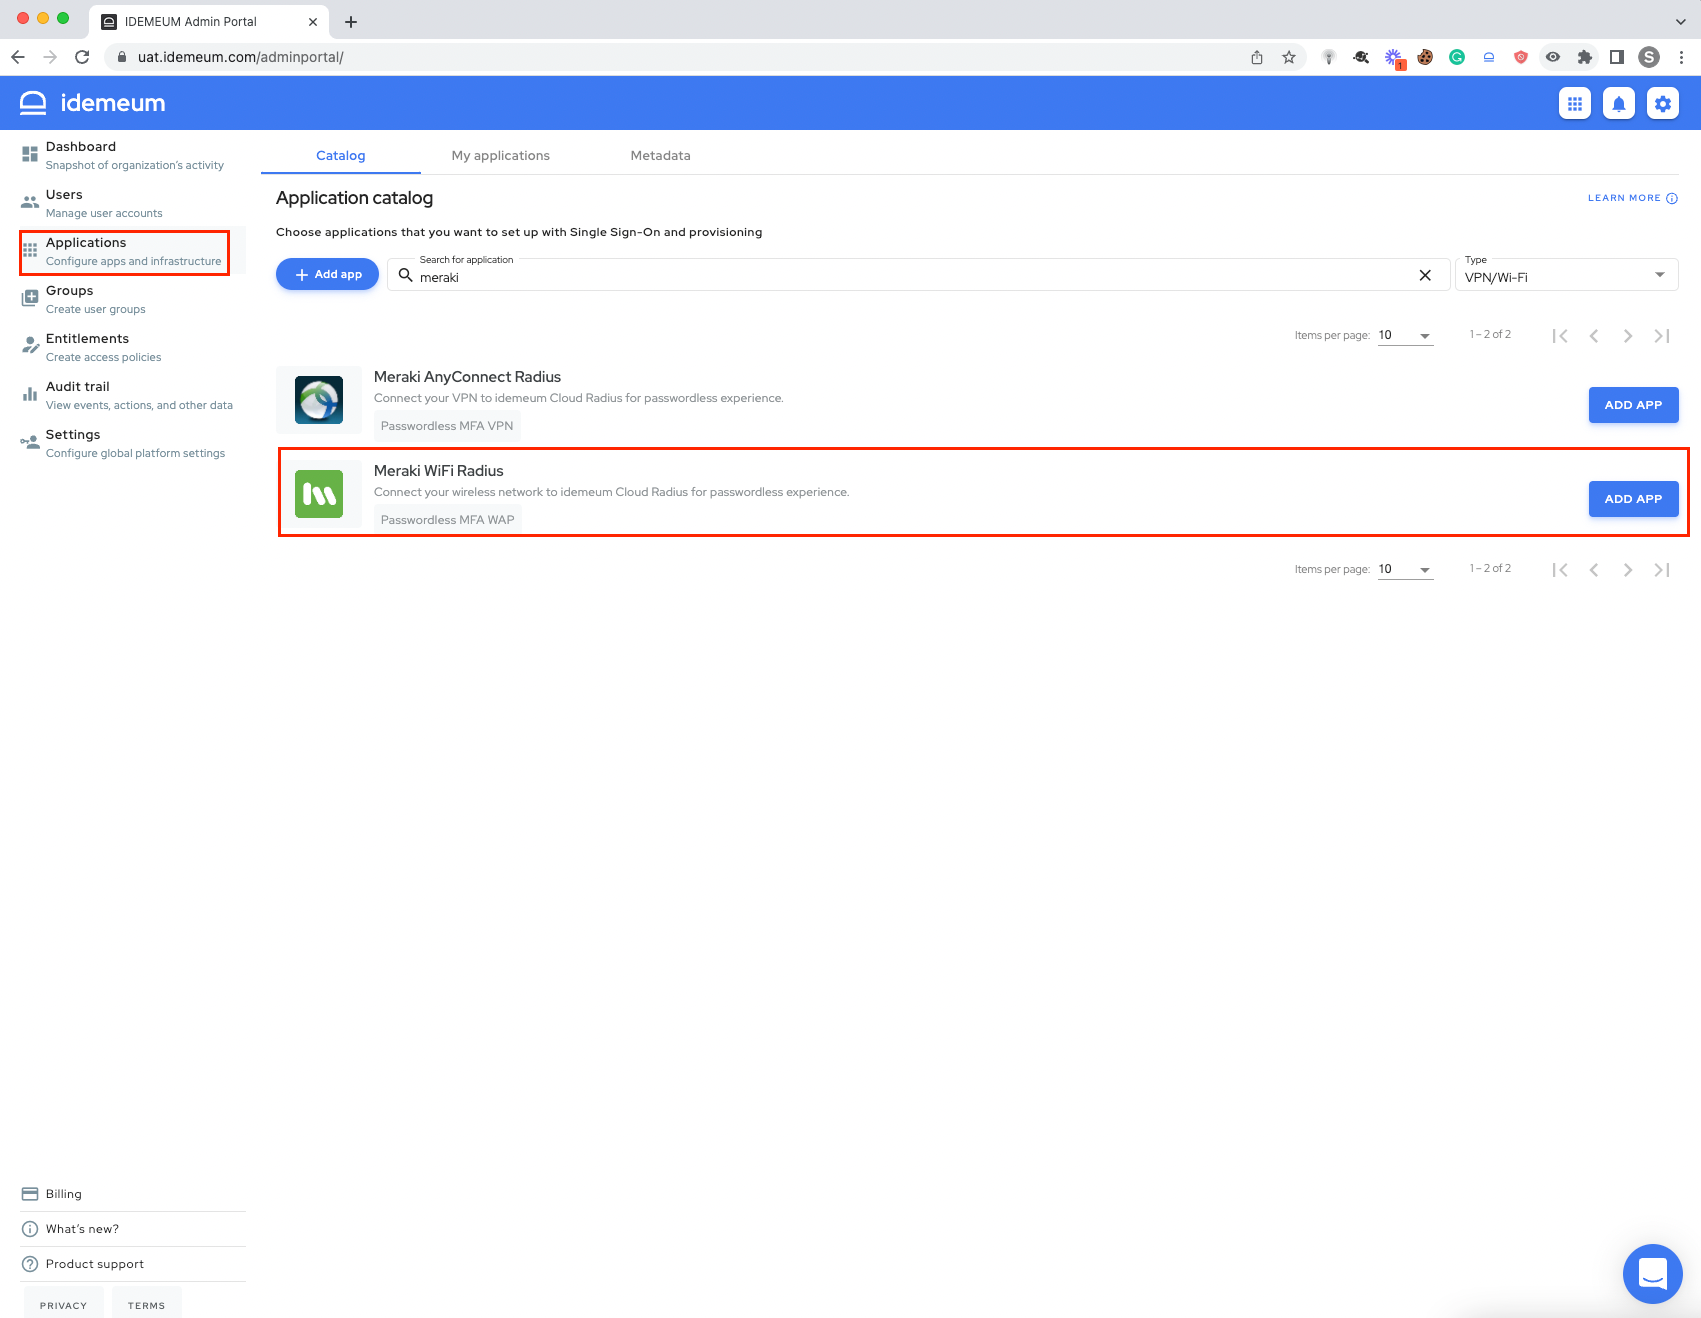
- Navigate to idemeum admin portal
- Access
Applicationsand then search forMeraki WiFi Radiusapplication - Click
Add app
- Enter the following information:
- Client IP - this is the IP address from which Radius requests will be originating. Typically this is the external IP address of your WAN interface.
- Advance Options - only applicable when you have multiple Radius applications configured for the same network. The public IP address for these Radius applications will be the same. Hence to differentiate between requests, you need to specify NAS IP addresses for each client.
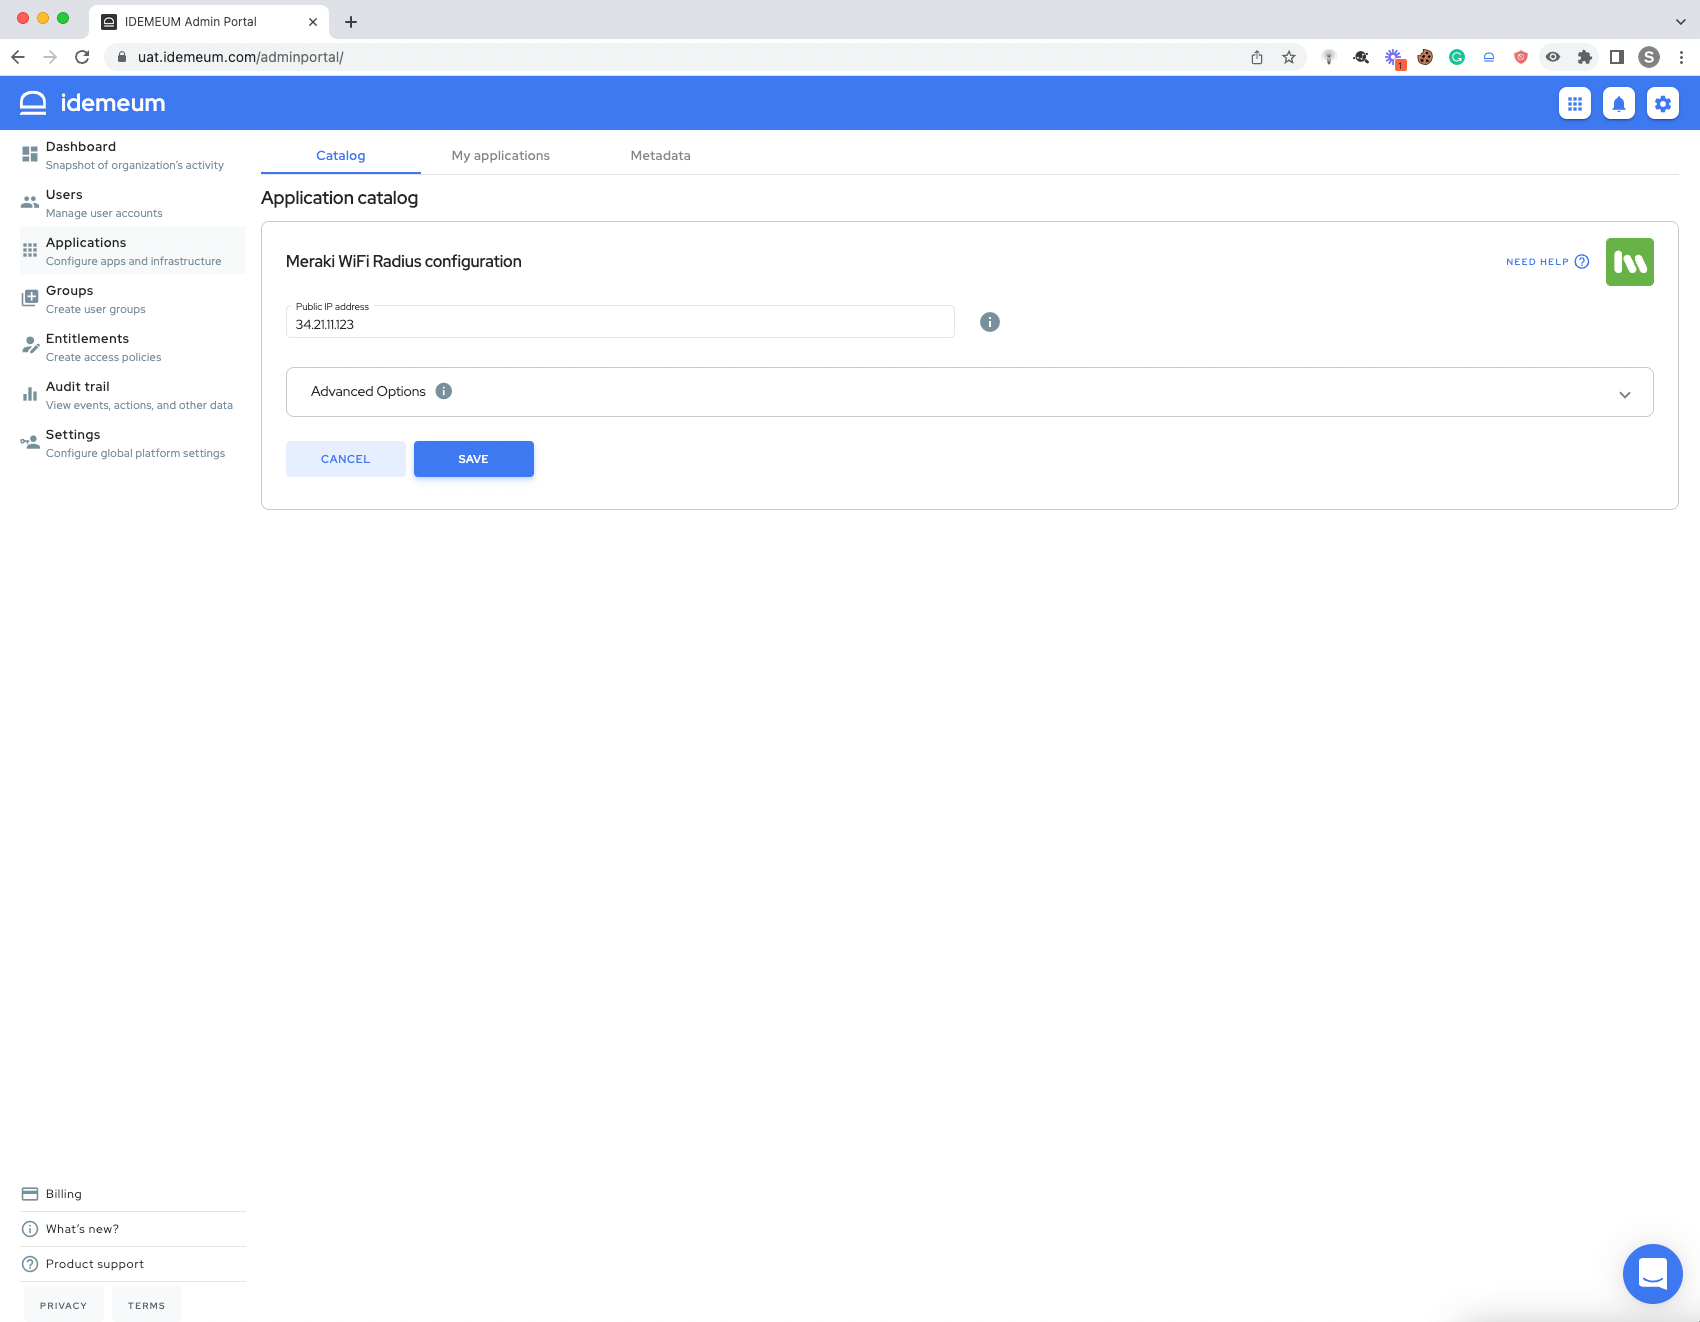
- Click
Saveto save the Meraki WiFi Radius application
Entitle Meraki Wi-Fi application
Before users can access applications you need to make sure you entitle applications to them. In idemeum admin portal navigate to the Entitlements section to assign applications to your employees.
Set up Meraki integration
- Navigate to the Meraki admin dashboard
- Choose
Wireless->Access control - For SSID choose the one that you want to integrate with idemeum Cloud Radius
- Scroll down to
Securityand chooseEnterprise with my Radius server
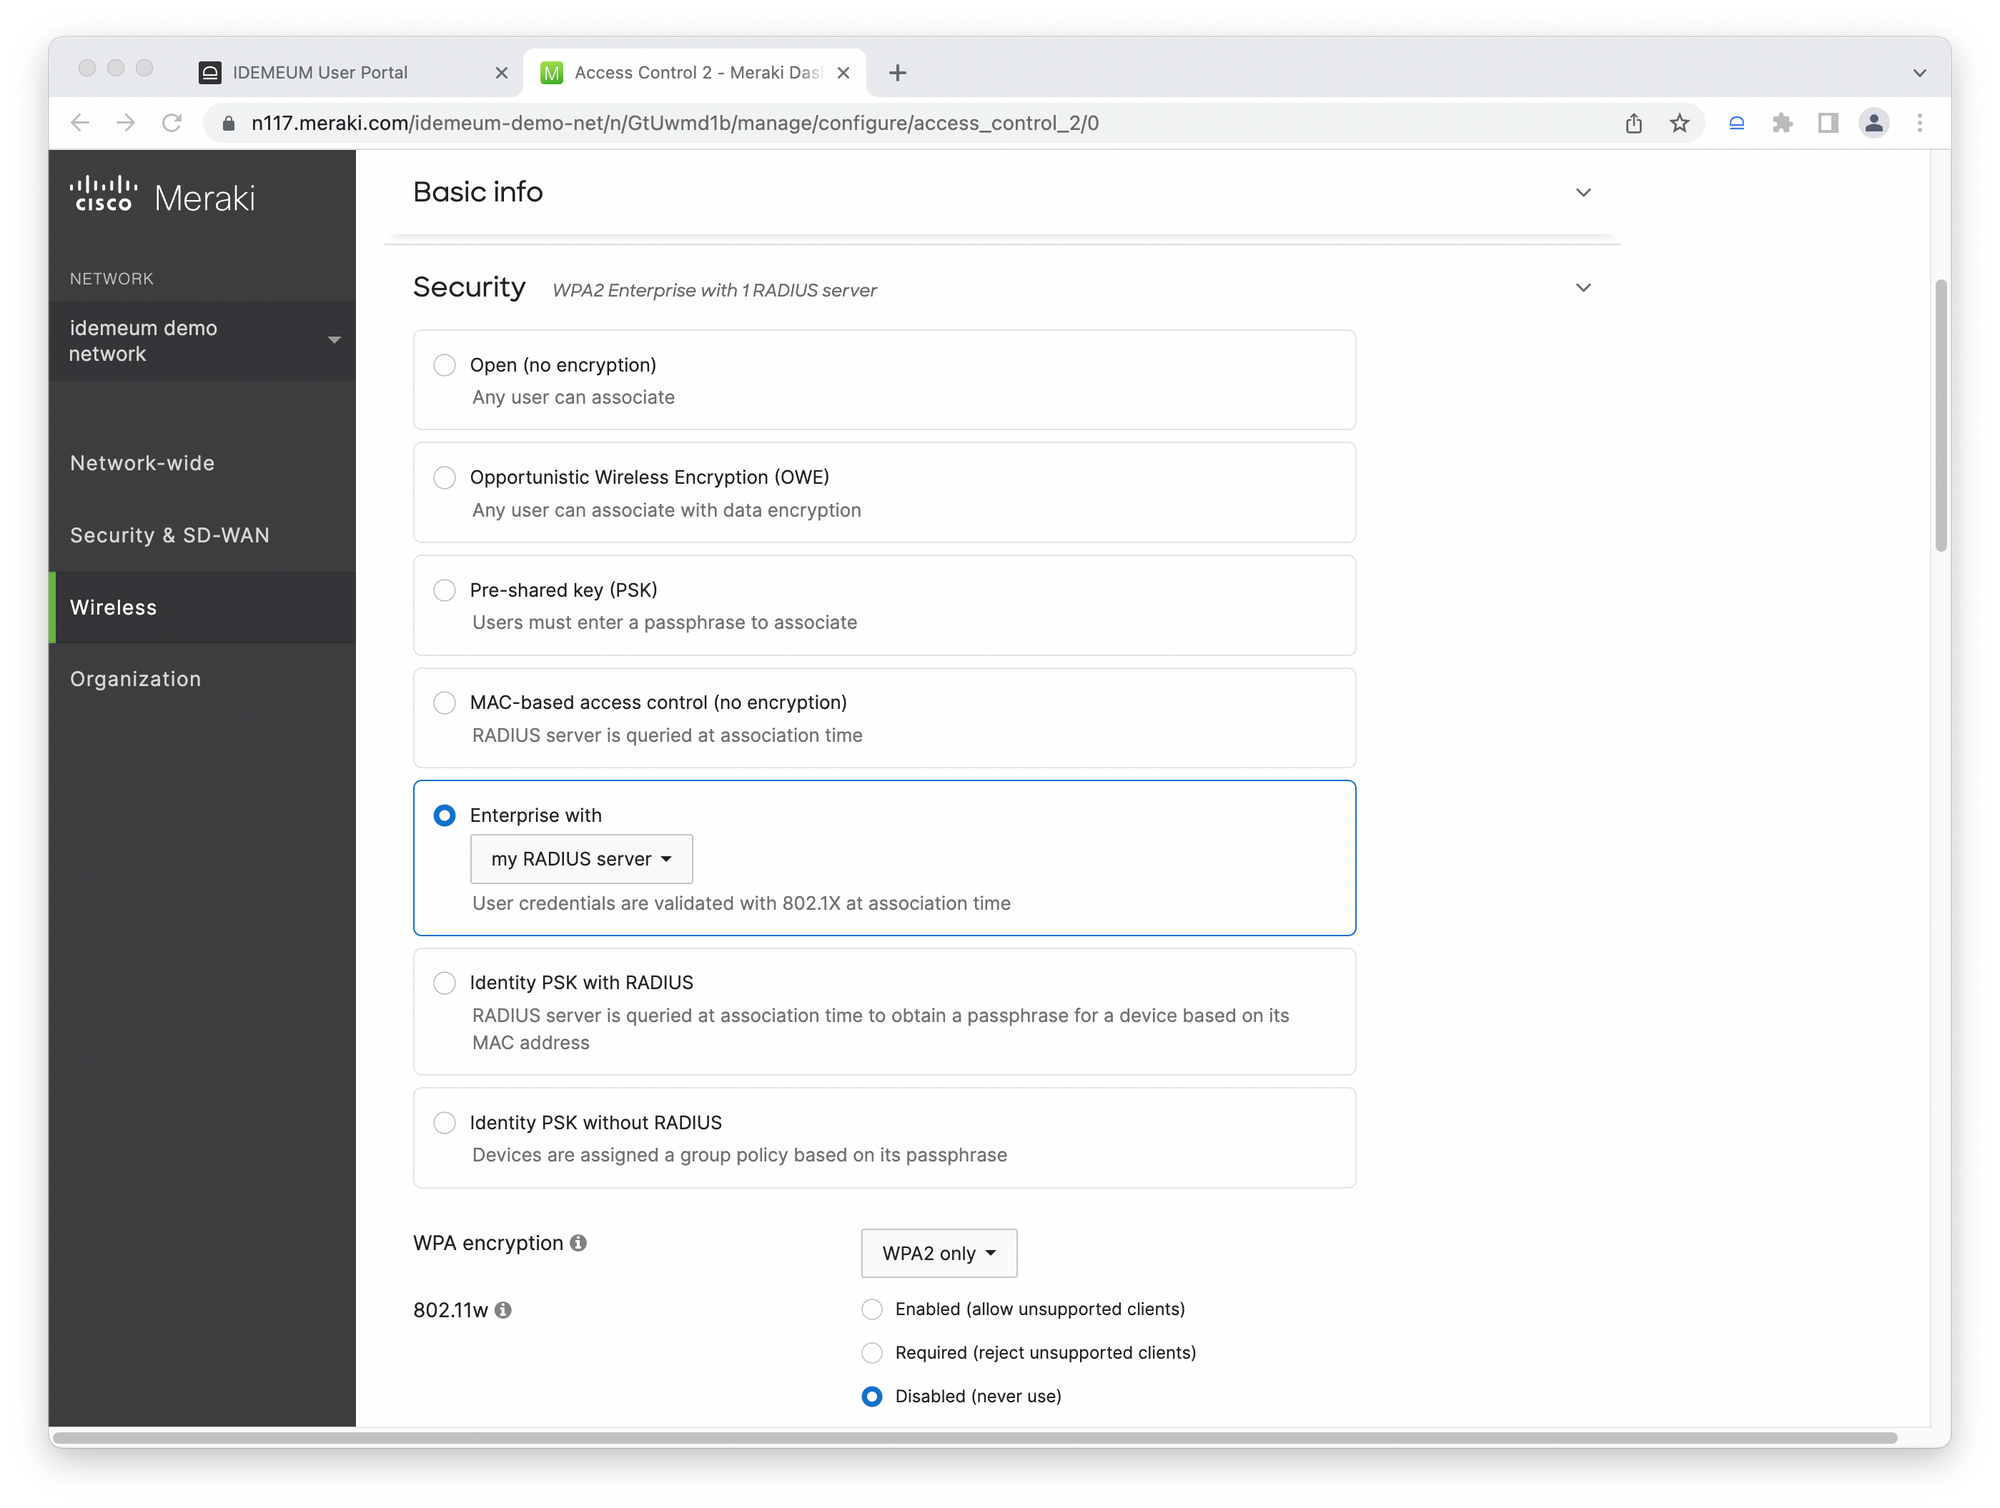
- For WPA choose
WPA2 only - For Splash Page choose
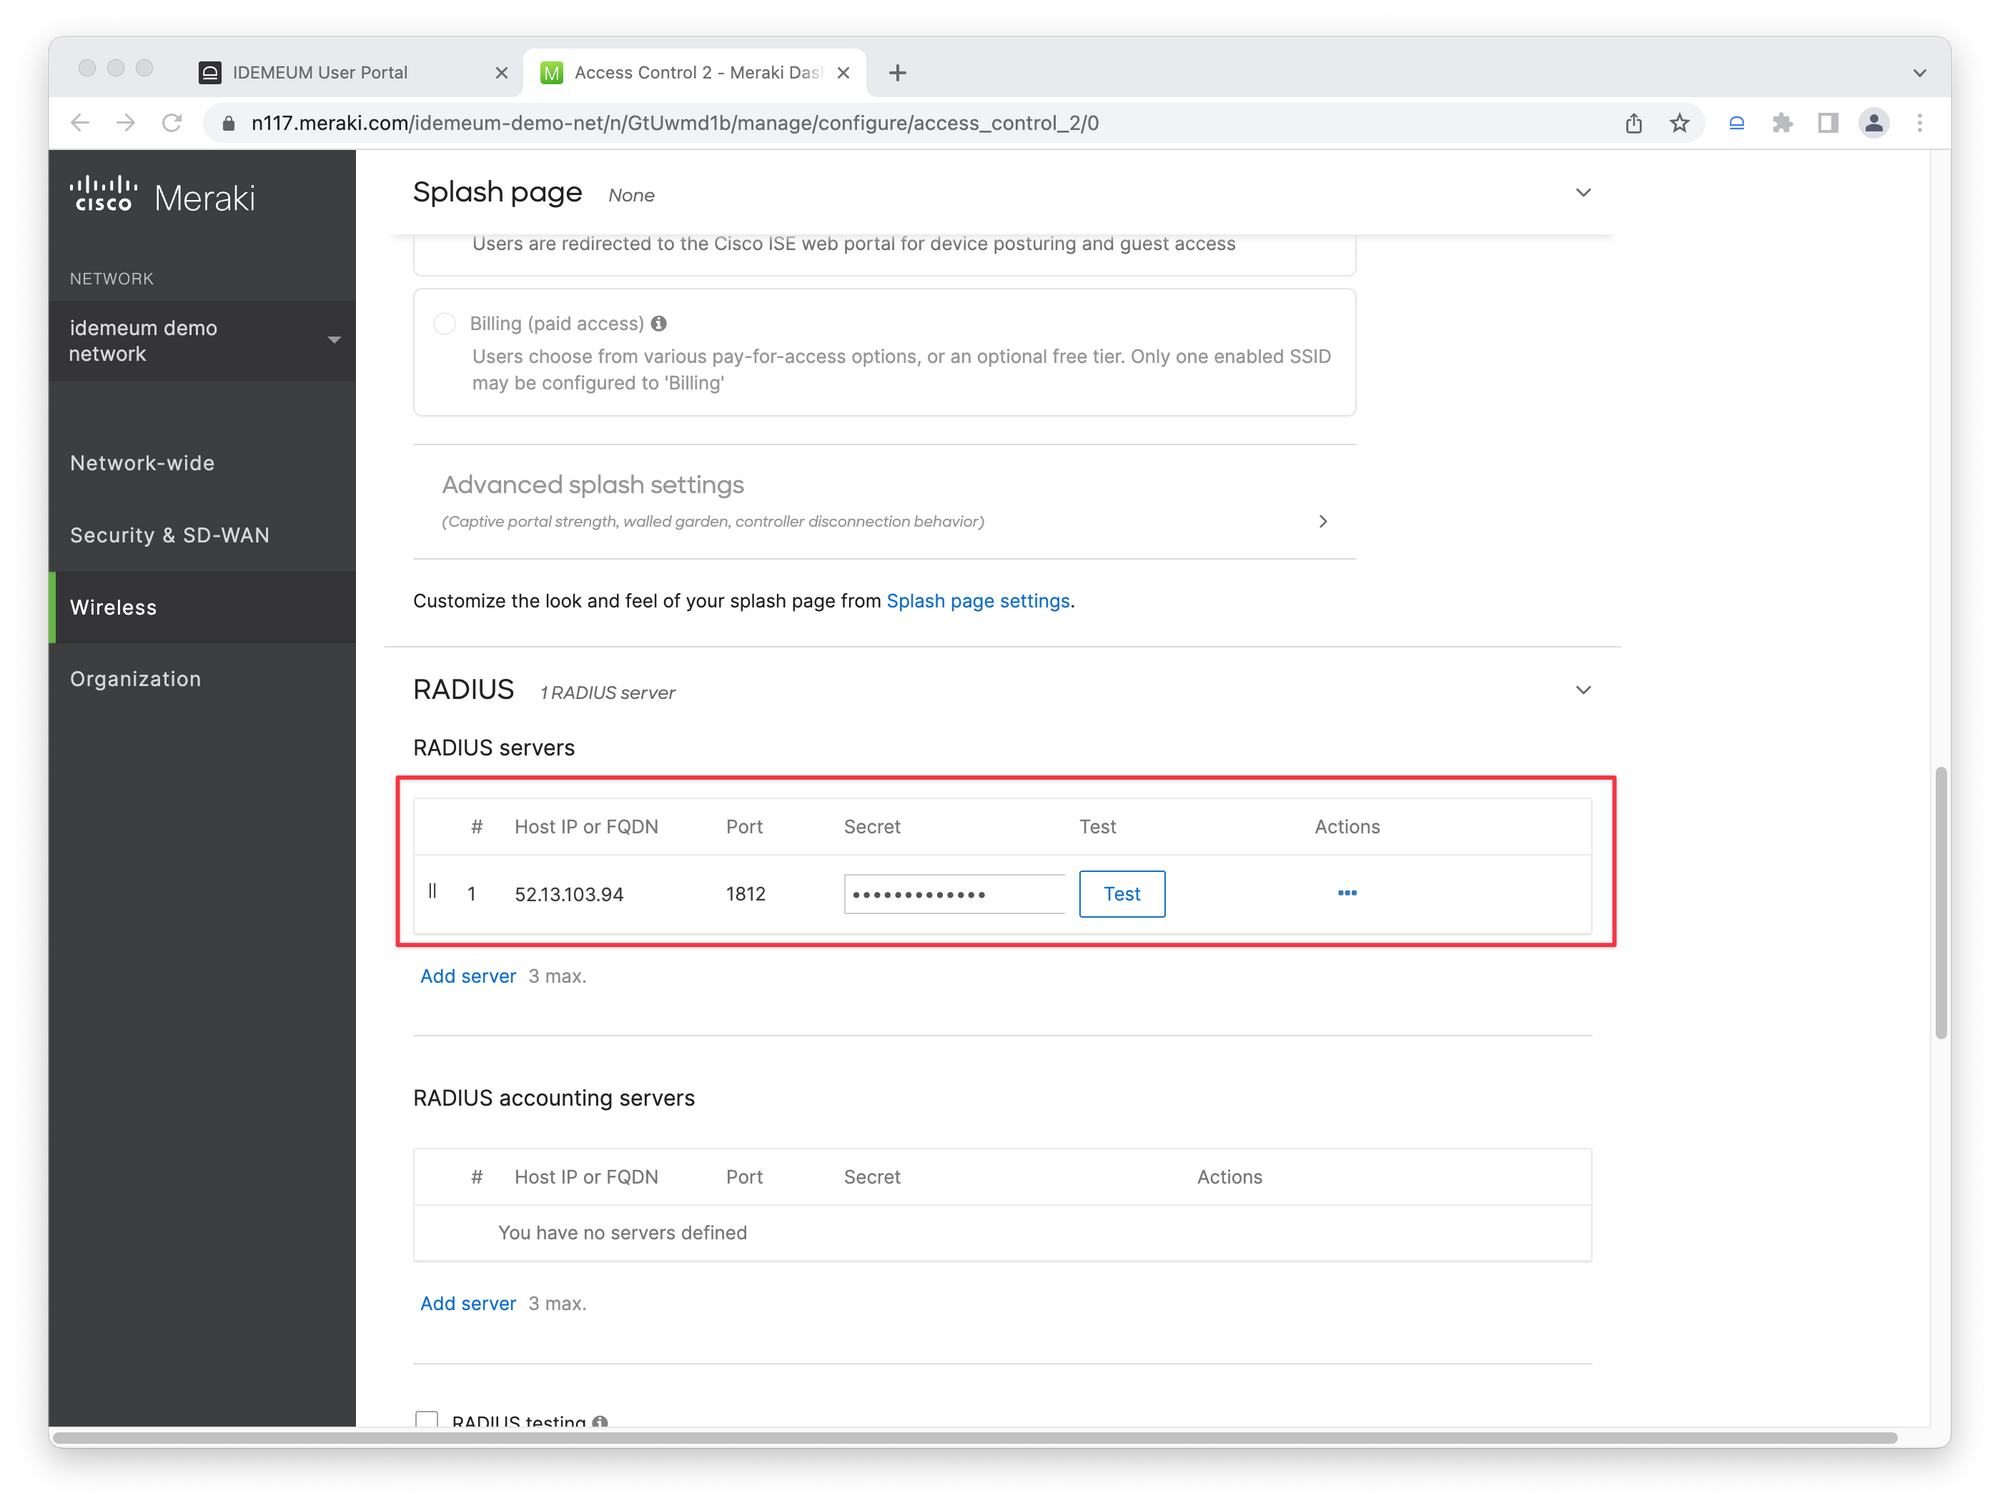
None - Scroll down to Radius servers and click
Add server
idemeum Cloud Radius IP addresses
- Enter the IP address of the idemeum Radius server into
Hostfield - Port is
1812 - Enter
Secretthat generated when configuring the Meraki application in idemeum. (Click Edit of Meraki WiFi Radius app in the My applications tab to copy the Shared secret)
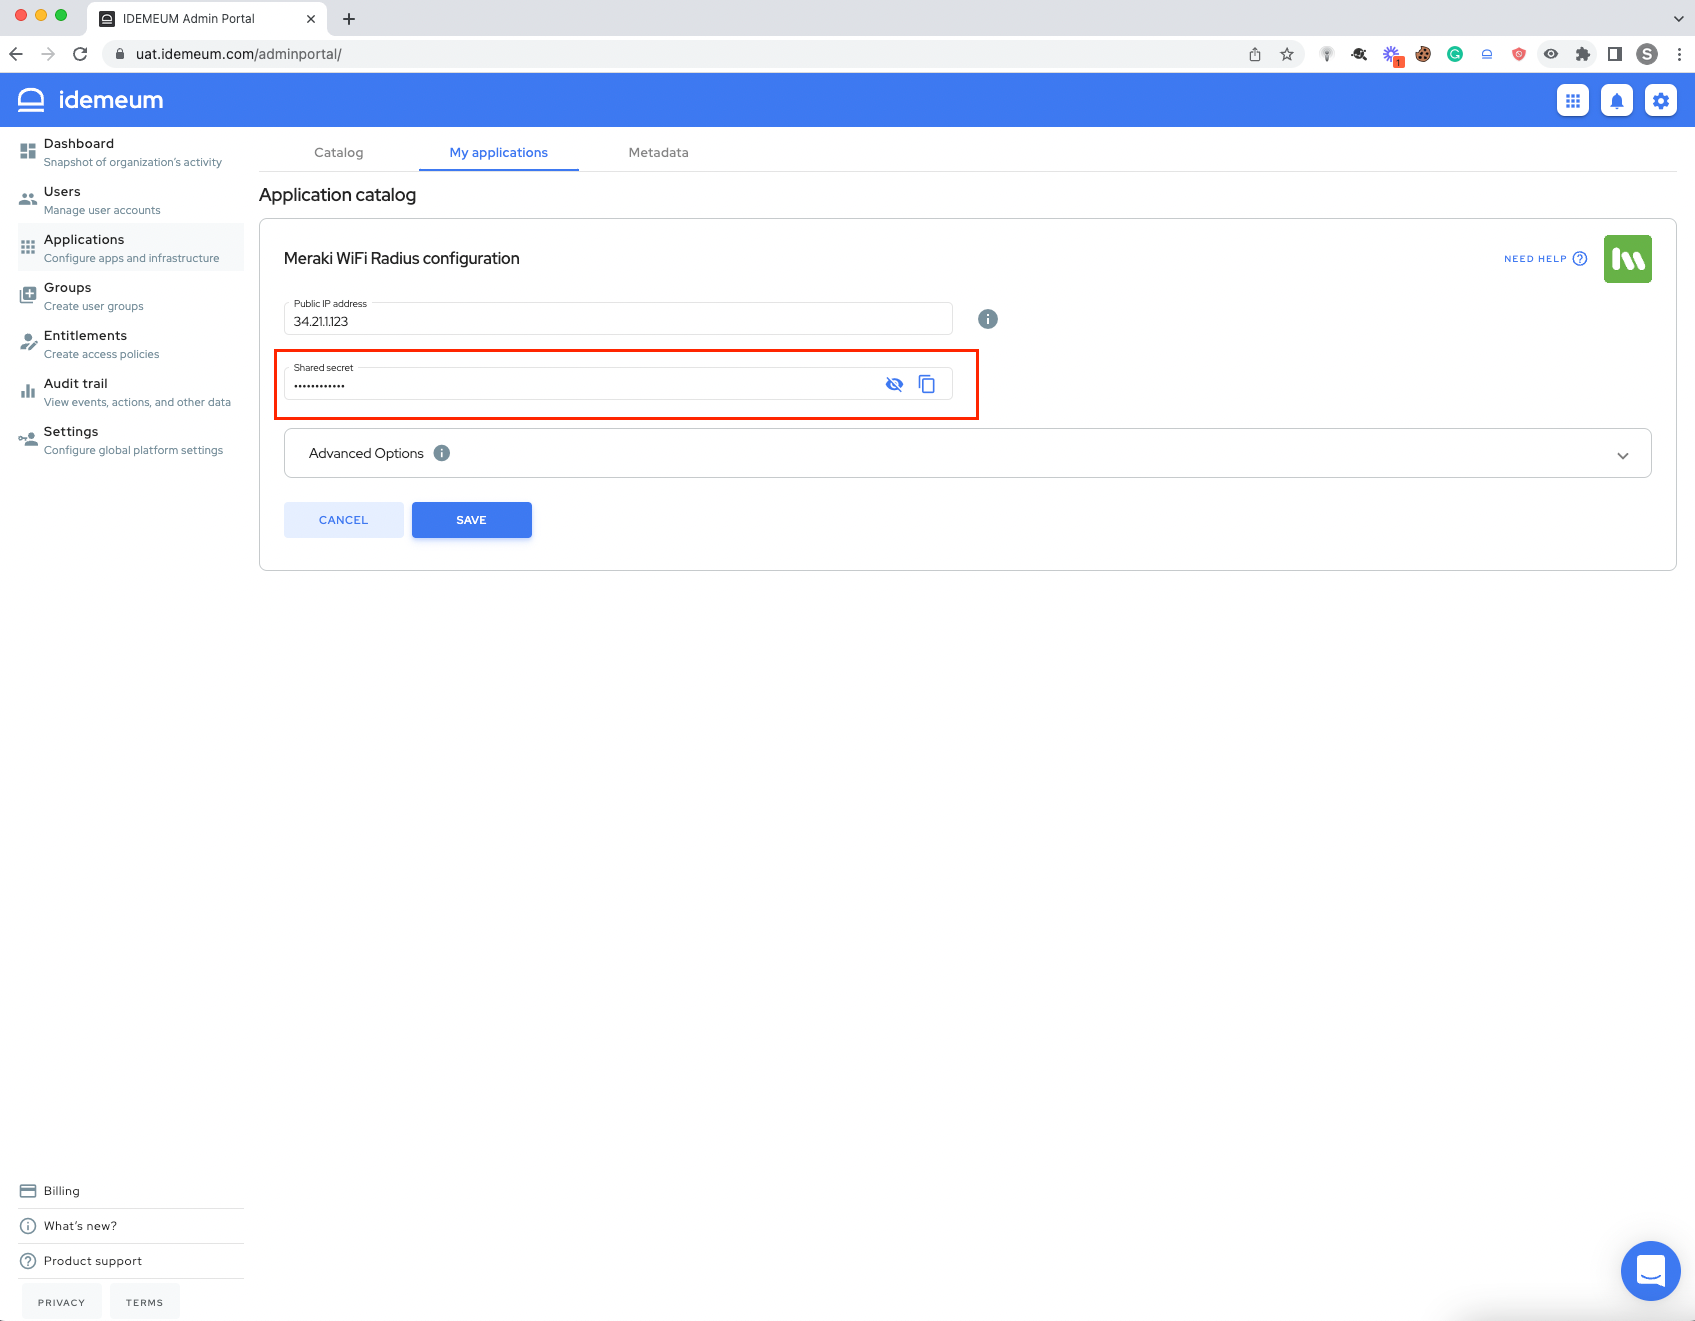
- Click
Saveto save configuration
Passcode login (EAP PEAP)
This option doesn't involve the creation/import of any profile nor requires importing a client certificate. As PEAP establishes an outer TLS tunnel via MSCHAPv2 (includes username and password), end-users need to key in the 3-letter passcode in the password field shared by the admin.
Users will able to connect in the following way:
- Connect to the company Wi-Fi network
- If idemeum Radius server certificate is not imported on a client device, there will be a pop-up to accept the certificate.
- The user will be prompted for a username and password. The user will type the email address and mfa passcode.
- The user will receive an idemeum push notification to a mobile device.
- Once approved with biometrics user will be connected to the network.